2
TABLE OF CONTENTSIMPORTANT SAFETY INSTRUCTIONS
Table of Contents 3
Important Safety Instructions 2-3
Part List 4
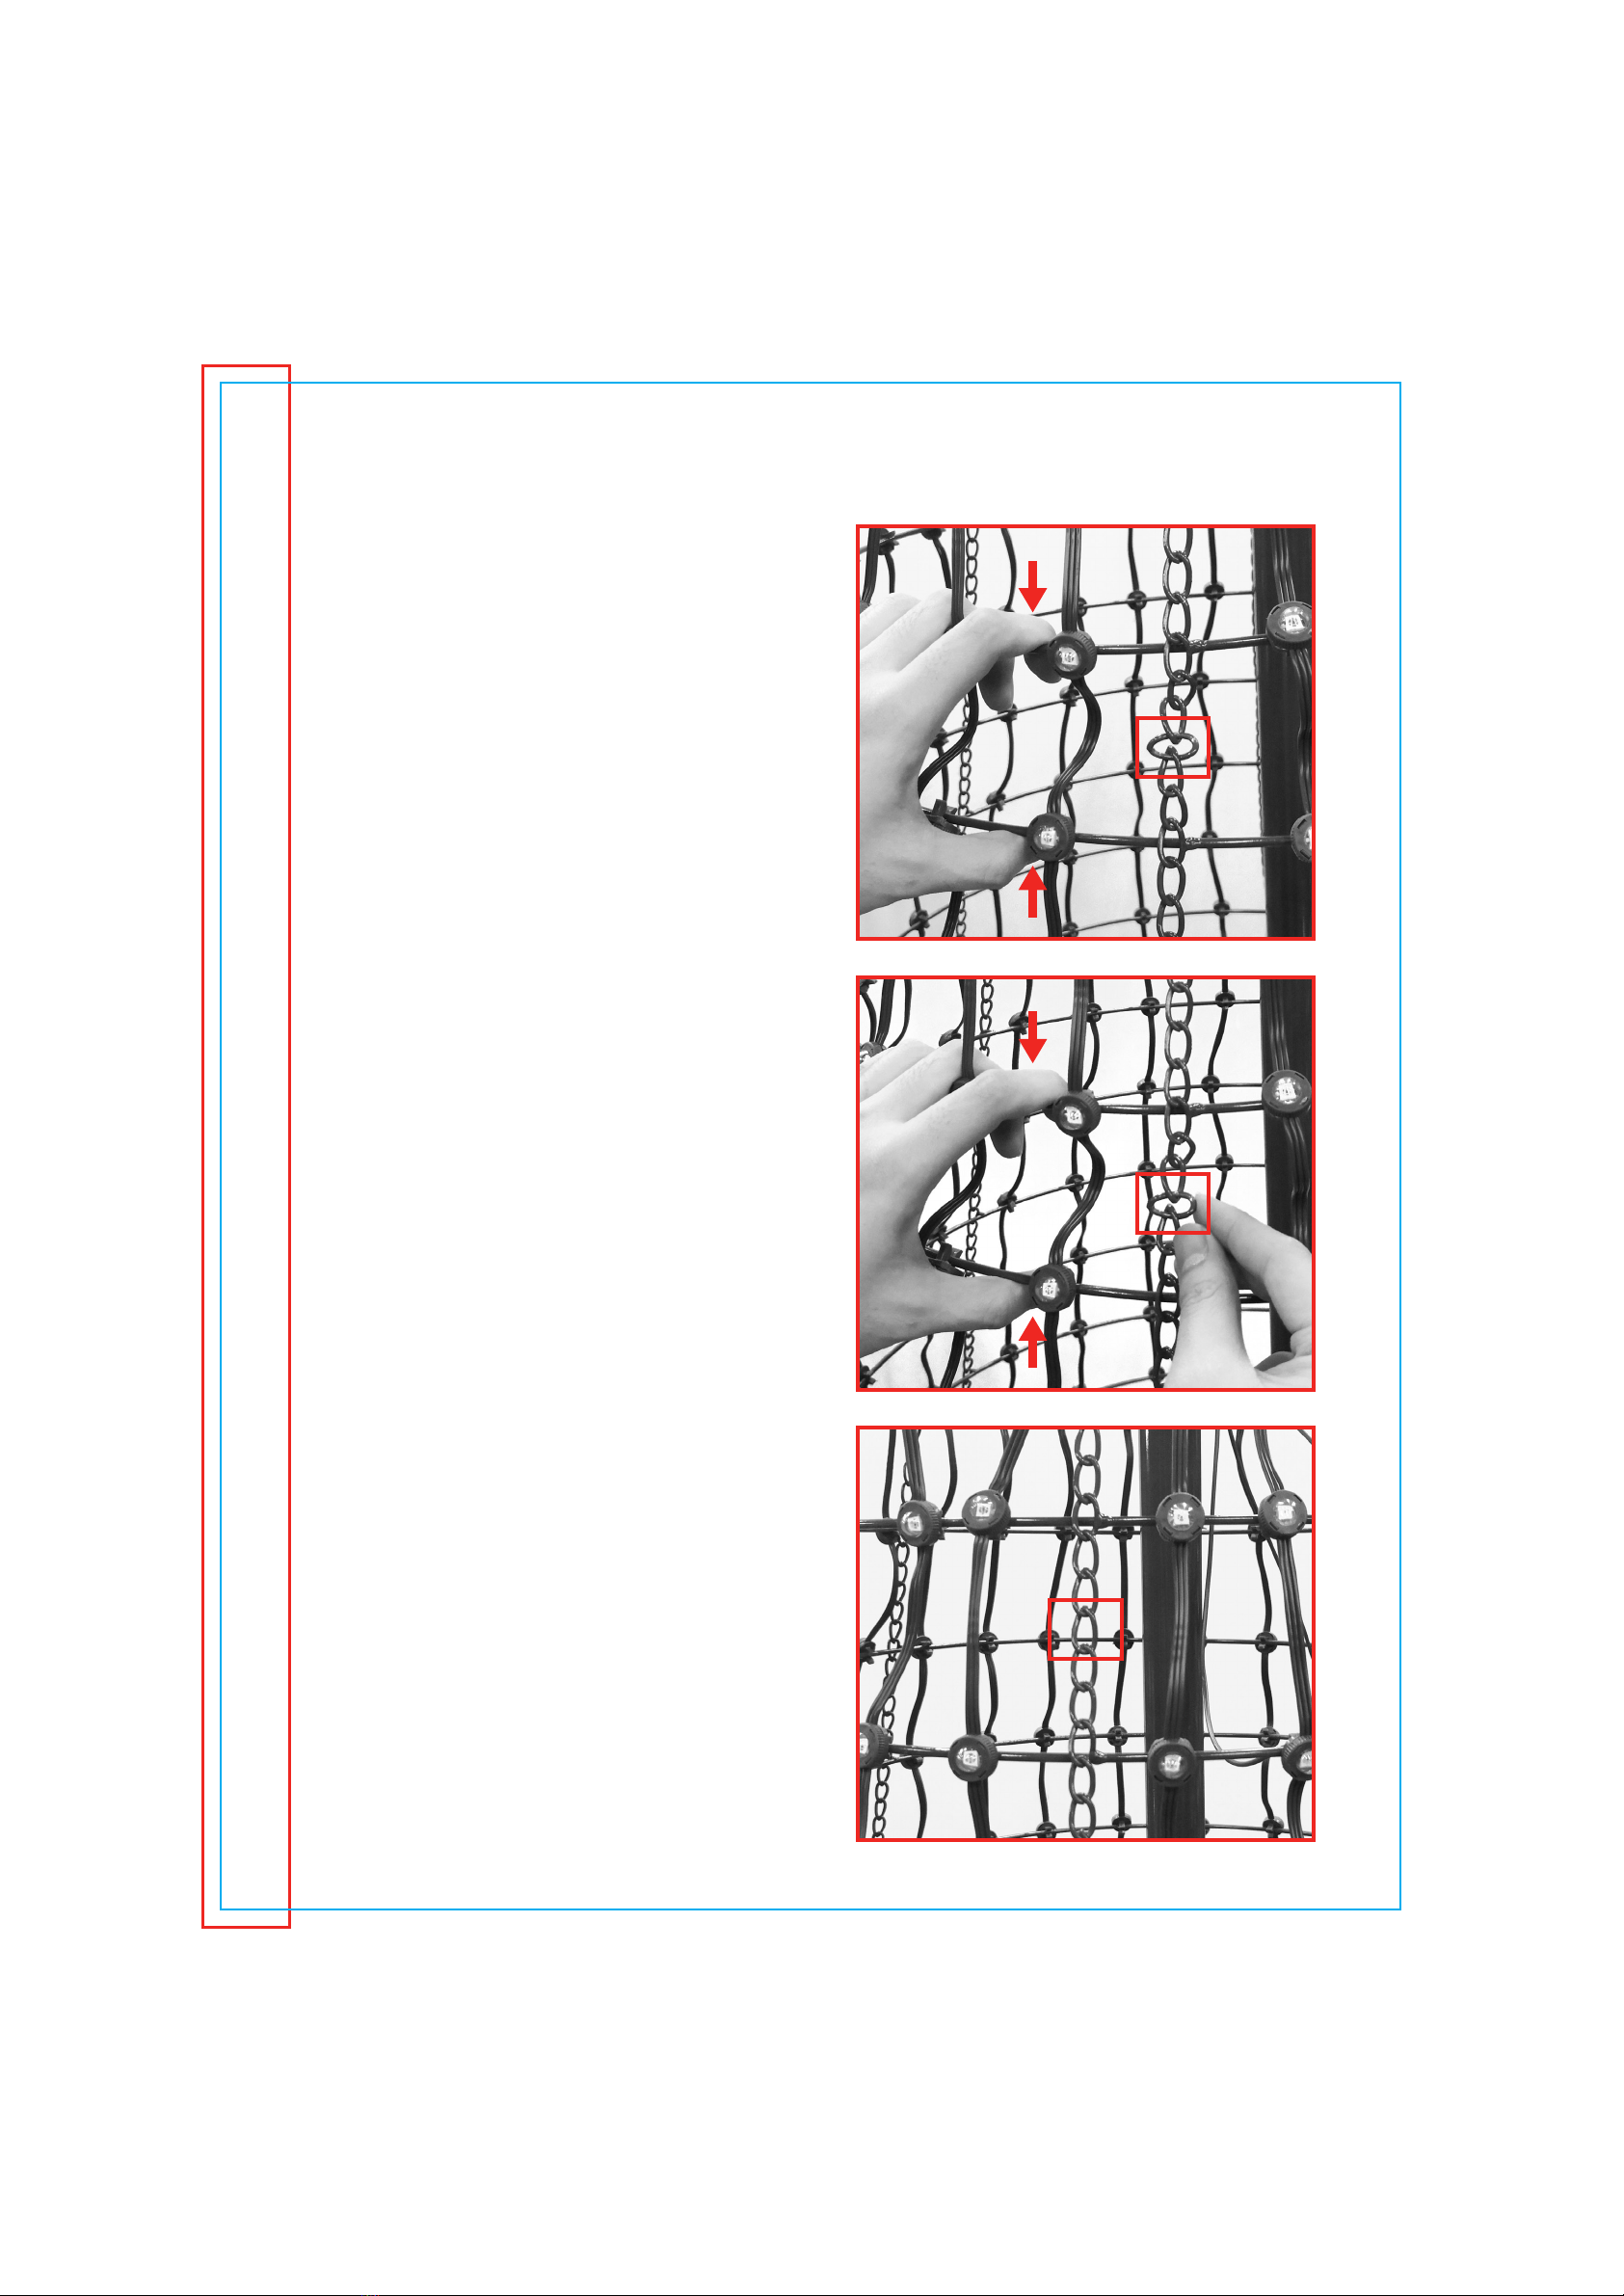
Assembly 5-11
Cleaning and Maintenance 11
Technical Data 11
Warranty 12
IMPORANT: Retain for future reference, and ready carefully.
Warning! To reduce the risk of serious injury, read the following safety
instructions before assembling and using the pixel tree.
Caution! Always keep children under close supervision while they are using or
around this product.
Never leave children unattended.
WHEN USING ELECTRICAL PRODUCTS, BASIC PRECAUTIONS SHOULD ALWAYS
BE FOLLOWED INCLUDING THE FOLLOWING:
READ AND FOLLOW ALL SAFETY INSTRUCTIONS.
• Do not use seasonal products outdoors unless marked suitable for indoor and outdoor use.
When products are used in outdoor applications, connect the product to a Ground Fault Circuit
Interrupting (GFCI) outlet. If one is not provided, contact a qualified electrician for proper installation.
• This seasonal use product is not intended for permanent installation or use.
• Do not mount or place near gas or electric heaters, fireplaces, candles or other similar sources of heat.
• Do not secure the wiring of the product with staples or nails, or place on sharp hooks or nails.
• Do not let LEDs rest on the supply cord or on any wire.
• Unplug the product when leaving the house, when retiring for the night, or if left unattended.
• This is an electrical product—not a toy! To avoid risk of fire, burns, personal injury and electric shock, it
should not be played with or placed where small children can reach it.
• Do not use this product for anything other than its intended use.
• Do not hang ornaments or other objects from cord, wire, or light string.
• Do not close doors or windows on the product or extension cords as this may damage the wire insulation.
• Do not cover the product with cloth, paper or any material not part of the product when in use.
• Do not place lighting string on carpeting, drapes, furniture, or allow it to contact vinyl siding while the
power is on.
• Do not perform any maintenance or troubleshoot for bad or broken LEDs while the power is on.
• Caution! To reduce the risk of fire and electric shock: a). Do not install on trees with needles, leaves or
branch coverings of metal or materials which look like metal, and b). Do not mount or support strings in a
manner that can cut or damage wire insulation.
• Read and follow all instructions that are on the product or provided with the product.