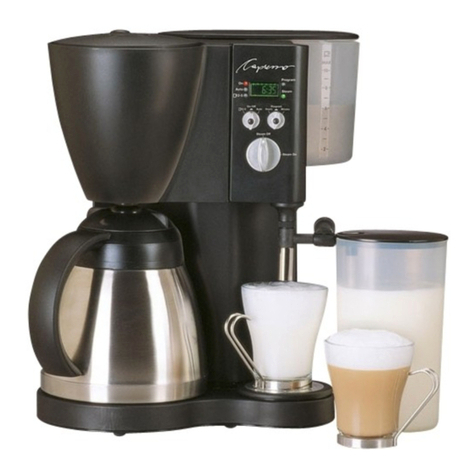
1. PREPARING THE CoffeeTEC
1.1 Before First Use
a. After unpacking your CoffeeTEC
clean all the loose parts with warm
water and make yourself familar
with the different functions.
b. After reading these instructions, let
some water run through the coffee
maker to clean all internal parts.
1.2 The Display/ Setting the Clock
and Timer
When you plug in the CoffeeTEC the
green display will flash “AM 12:00”
and all indicator lights are off.
To set the current time:
Turn and hold the program knob to
the left (hours) to set the hours (see
fig. 2; S). While you are doing this,
watch the AM change to PM. Then
turn and hold the program knob to
the right (minutes) and set the min-
utes (see fig. 2; S).
To set the programmed time:
a. Push the program button (see fig.
2; S). The Program light (see fig. 2;
Q) will go on and the display will
show “AM 12:00.”
b. Turn and hold the program knob to
the left (hours) to set the hours.
While you are doing this, watch the
AM change to PM. Then turn and
hold the program knob to the right
(minutes) and set the minutes.
Within four seconds, the display will
revert to the current time and the
program light will turn off.
c. To change the programmed time,
push the program button (see fig. 2;
S). It will show the programmed
time. Then set the time as
described above in step b.
d. To check the programmed time,
push the program button. The
display will show the time you have
programmed to brew coffee. The
display will switch back by itself to
the current time after a few seconds.
Attention: Flashing LCD Display
(see fig. 2; L)
If you unplug the coffee maker for
more than 15 seconds or if you have
a power failure, you will lose the cur-
rent time and program settings. The
display will flash “AM 12:00” indicat-
ing that you have to reset the current
and programmed time.
2. MAKING COFFEE
2.1 Filling the Water Container
• Open the water container lid and
remove the water container (see fig-
ure 1; C).
• Fill the water container to the
required marking with fresh, cold
water (see fig. 10). Caution: Never
fill water container above the “Max
Line”—this is the line between the
number “10” and the letters MAX. If
you fill more water into the water
container the stainless steel carafe
could overflow with hot coffee
which can cause severe injuries.
• Replace the water tank and close
the water tank lid. When filling the
water tank to brew coffee you will
automatically have water left over for
frothing milk (see section 5,
“Frothing Milk”).
2.2 Filling with Ground Coffee
a. Push the button to open the swing-
out filter (see fig. 4). On the inside
you will find a removable GoldTone
filter and a removable filter holder.
Caution: The handle of the filter
holder has to sit over the raised
plastic part of the filter (see fig. 5). If
the filter holder is not inserted prop-
erly, it is not possible to close the
swing-out filter back into machine.
b. Fill the GoldTone filter with ground
coffee. If you would rather use a
paper filter, use size 4. Please follow
the instructions on the filter paper
box for proper use of filter paper.
8
