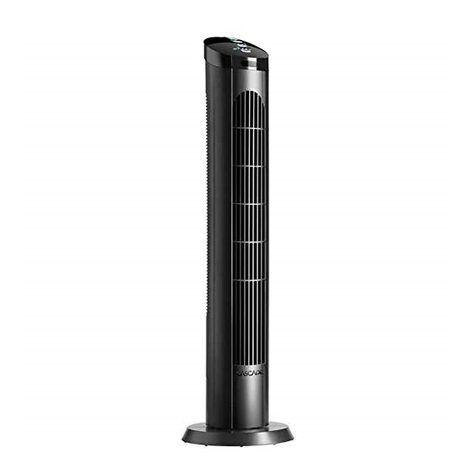
Cascade TF40-18 User manual

MODEL: TF40-18
(TF40-18-CA)
VOLTAGE: 120V AC
FREQUENCY: 60Hz
CURRENT: 0.55A
PLEASE READ, UNDERSTANDAND FOLLOW BEFORE USING
SAVE THESE INSTRUCTIONS
FOR HOUSEHOLD USE ONLY
HAVE A PROBLEM? DO NOT RETURN TO PLACE OF PURCHASE. PLEASE CONTACT CUSTOMER SERVICE.
Should you have any questions or comments please contact us at:
customerservice@blackstoneltd.com
1-888-525-7969
WARRANTY: This fan includes a one (1) year warranty, which covers manufacturer defects and workmanship under
normal use. Warranty is o˜ ered only to the original purchaser. Proof of purchase is required.Proof of purchase
constitutes a dated sales receipt. This warranty is void if the fan(s) have been subject to abuse such as: being dropped
which could result in damage to the fan cabinets, motors, fan controls, etc. immersion in or exposure to water, exposure
to excessive heat, outdoor usage, any use other than household use, disassembly, repair or alteration by anyone other
than an authorized service provider, use on improper voltage or current, or any use contrary to the user instructions.
Batteries and battery life are not covered in this warranty. No other warranties are expressed or implied.To receive
coverage under this warranty, contact customer service for consultation and/or replacement. DO NOT attempt to
repair any electrical or mechanical functions of this product; doing so will void this warranty and could lead to injury.
WARRANTY ACTIVATION: To activate the warranty for this product please visit:
http://www.blackstoneinternational.ltd/product-registration
Distributed by:
Blackstone International, Ltd.
2018 Lord Baltimore Dr.
Windsor Mill, MD 21244
customerservice@blackstoneltd.com
1-888-525-7969
www.blackstoneinternational.ltd
©2018 Blacksto ne International Ltd. and other trademarks are the pro p erty of the resp e ctive owners. All other b rand names an d
logos are regis tered trademarks of their resp e c t i ve owners. Specifications are subject to change wit h out noti c e.
8
CUSTOMER SERVICE
TROUBLESHOOTING
40-INCH TOWER FAN
INSTRUCTION MANUAL
Problem Possible Cause Solution
The fan is
not operating.
The plug is not fully
inserted into the wall
outlet.
Make sure that the plug is fully inserted into the base AC wall
outlet.
The remote
control does
not operate
the fan.
Inspect the battery to
ensure it is correctly
installed.
The battery is expired.
Replace the battery. For best performance we recommend
using a Duracell DL2032 battery.
If the problem persists, contact customer service at
for assistance.
The fan(s) are
missing parts.
Omitted parts are
extremely rare due to
stringent quality control
during assembly; however
there is a possibility that
parts can be omitted.
Contact customer service at
to request a replacement fan.
Unplug the fan. Inspect the main electrical breaker box. If you
find a tripped b eaker, reset it. If the problem persists, contact
a qualified, li ensed electrician.
The wall outlet
experienced an
overload.
Remove and inspect the fuse located in the plug. If the fuse is
tripped, replace with the appropriate 5 amp, 125V fuse. If the
problem persists, contact a qualified, li ensed electrician.
Fuse in plug fails.
Contact customer service at
customerservice@ blackstoneltd.com or call 1-888-525-7969
for assistance.
The fan is defective.
1
Make sure remote is pointed toward front infrared window of fan
CASCADE
This product contains a button battery. If swallowed, it could cause severe
injury or death in just 2 hours. Seek medical attention immediately.
Use Only With a Fuse Rated 5 Amperes, 125 Volts.

7
2
PLEASE READ AND
SAVE THESE INSTRUCTIONS
WHEN USING ELECTRICAL APPLIANCES, BASIC PRECAUTIONS SHOULD ALWAYS BE FOLLOWED
TO REDUCE THE RISK OF FIRE, ELECTRIC SHOCK AND INJURY TO PERSON OR PROPERTY,
INCLUDING THE FOLLOWING:
REMOTE CONTROL OPERATION
REMOTE CONTROL BATTERY REPLACEMENT
■ On the back of the remote, press the release button on the bottom right
hand side. This will allow the tray containing the battery to be released.
■ Release the tray by squeezing the small clip and pulling down the tab at
the bottom of the remote (Fig. 1).
■ Replace the battery with 1 “DL2032” coin cell battery and dispose of
properly and in accordance with local law and ordinances.
■ Slide the tab back into position until the tray locks into the remote.
■ DO NOT DISPOSE OF BATTERY IN FIRE, BATTERY MAY EXPLODE
OR LEAK.
■ This product contains a button battery. If swallowed, it could cause severe
injury or death in just 2 hours. Seek medical attention immediately.
■ For best performance we recommend
using a Duracell DL2032 battery.
POWER Turns Fan On/Off
SPEED SELECTION
Allows four different speed selections
OSCILLATION
Turns oscillation On/Off
MODE WIND SELECTION Allows for three
different wind modes
TIMER Allows for automatic shutoff
after preset time selections
■Read all instructions before using this
product.
■Use this fan only as described in this
manual. Any other use not recommend-
ed by the manufacturer may cause fi e,
electrical shock or injury to person or
property and may void the warranty.
■Always unplug unit before assembly,
disassembly or cleaning.
■Always unplug unit when not in use,
when moving from one location to
another and before cleaning.
■To disconnect, grasp the plug and pull it
from the wall outlet. DO NOT unplug by
pulling on cord.
■The use of attachments is not recom-
mended nor sold by the manufacturer
and may cause hazards.
■Avoid contact with moving parts.
■DO NOT operate any fan with a
damaged cord or plug, after a malfunc-
tion, or if dropped or damaged in any
manner.
■DO NOT operate the fan in the presence
of explosive and/or flammable fumes
■DO NOT place the fan or any parts near
an open flam , cooking or other heating
appliances.
■Extreme caution is necessary when fan is
used by or near children and whenever
the fan is left operating and unattended.
■This product is intended for household
use only and not for commercial or
industrial use.
■DO NOT use outdoors.
■Always use on a dry, level surface.
■DO NOT operate if the fan housing is
removed or damaged.
■A loose fit b tween the AC outlet and
plug may cause overheating of the plug;
consult a qualified ele trician.
■DO NOT run cord under carpeting. DO
NOT cover cord with throw rugs, runners,
or the like. Arrange cord away from
tra˝c ar ea and where it will not be
tripped over.
■This product employs overload protection
(fuse). A tripped fuse indicates an
overload or short-circuit situation. If the
fuse trips, unplug the product from the
outlet. Replace the fuse as per the user
servicing instructions. If the replacement
fuse trips, the product should be
discarded or returned to an authorized
service facility for examination or repair.
■DO NOT connect the fan to any power
sources other than a 120V alternating
current polarized outlet.
■This product contains a button battery.
If swallowed, it could cause severe injury
or death in just 2 hours. Seek medical
attention immediately.
OPERATION
FIG. 1
1 2 3
Prior to first-time operation, please remove the clear plastic tab at the base
of the remote and remove plastic covering from the front of the face.
This remote controller complies with Part 15 of the FCC Rules.
Operation is subject to the following two conditions: (1) This device
may not cause harmful interference, and (2) this device must accept
any interference received, including interference that may cause
undesired operation.
NOTE: This remote controller has been tested and found to comply
with the limits for a Class B digital device, pursuant to Part 15 of the
FCC Rules. These limits are designed to provide reasonable protection
against harmful interference in a residential installation. This
equipment generates, uses and can radiate radio frequency energy
and, if not installed and used in accordance with the instructions, may
cause harmful interference to radio communications. However, there
is no guarantee that interference will not occur in a particular
installation. If this equipment does cause harmful interference to
radio or television reception, which can be determined by turning the
equipment off and on, the user is encouraged to try to correct the
interference by one or more of the following measures:
■ Reorient or relocate the receiving antenna.
■ Increase the separation between the equipment and receiver.
■ Connect the equipment into an outlet on a circuit different from
that to which the receiver is connected.
■Consult the dealer or an experienced radio/TV technician for help.
1. Push
2. Open
Note: To reduce the risk of fire, electrical shock and injury to a person or property, do not plug this product into extension cords.
The extension cord could overheat. If the use of an extension cord is necessary, use a short extension cord that is UL or ETL listed to
decrease the chance of overheating. Do not plug the fan into any cord connected devices. This includes surge protectors, multiple
outlet adapters, and power strips.

5
4
Step 2
Pass the Power Cord through the center hole of the base.
Align the Base Front (B) and insert the four posts on the Fan
Body (A) into the four holes on the top of the base. It will only fit
one way. Place the four Body Screws (D) into the holes through
the bottom of the base and securely tighten.
Run the power cord through
the guide on the bottom of the
Base Back (C) by tucking the
cord under the tabs. Set fan
upright on the base and it is
ready for use.
Step 1
B) Base Front
C) Base Back
D) 4X Screws
PARTS LIST
A) Fan Body
E) Remote Control
ASSEMBLY ASSEMBLY

3
6
ECON
ECON
LOW
MED
HIGH
Standard Wind
The Standard Wind mode is simply the
ECON, LOW, MED, HIGH speed settings
Evening Wind
The air f ows as an evening breeze to a
light night breeze and are detailed as
follows:
ECON Evening Wind
The air f ow remains at ECON
LOW Evening Wind
The air f ow begins at LOW,
after half an hour it will drop
down to ECON
MED Evening Wind
The air f ow begins at MED,
after half an hour it will drop
down to LOW, after an
additional half an hour it will
drop down to ECON
HIGH Evening Wind
The air f ow begins at HIGH,
after half an hour it will drop
down to MED, after an
additional half an hour it will
drop down to LOW, after an
additional half an hour it will
drop down to ECON
Breeze Wind
Automatically selects wind speed
randomly as you would fi d outdoors.
The speeds are detailed as follows:
ECON
ECON
LOW
MED
HIGH
ECON Breeze Wind
The wind settings will f uctuate
between MED, LOW and ECON
in an 80 second wind cycle
that repeats with ECON being
the most common
LOW Breeze Wind
The wind settings will f uctuate
between MED, LOW and ECON
in an 80 second wind cycle
that repeats with LOW being
the most common
MED Breeze Wind
The wind settings will f uctuate
between HIGH, MED, LOW and
ECON in an 80 second wind
cycle that repeats with MED
being the most common
HIGH Breeze Wind
The wind settings will f uctuate
between HIGH, MED, LOW and
ECON in an 80 second wind
cycle that repeats with HIGH
being the most common
OPERATION
■WARNING: To reduce the risk of electric
shock, DO NOT use this fan with any
solid-state speed control and DO NOT
insert finger or ny object into grill.
■POLARIZED PLUG: This appliance has a
polarized plug (one blade is wider than the
other). To reduce the risk of electric shock,
this plug is intended to fit in a polar zed
outlet only one way. If the plug does not fi
fully into the outlet, reverse the plug and try
again. It if still does not fit, contact a
qualified el ctrician. DO NOT attempt to
change this safety feature.
■To clean your fan, f rst turn it OFF and UNPLUG the unit.
■Use a soft cloth to wipe the housing. DO NOT use water or any other chemical solution
or cleaner. DO NOT soak or immerse the fan in water or liquid.
■DO NOT ATTEMPT TO TAKE THE FAN APART.
■Store in a dry place away from excessive heat and direct sunlight.
■Regular cleaning will ensure optimum performance and appearance of the fan.
■DO NOT kink the power cord when storing or while in use.
A. To disconnect, grasp the plug and pull it from the wall outlet. DO NOT unplug by pulling the cord.
B. Open fuse cover. Slide open the fuse access cover located on the top of the plug towards to plug
blades.
C. Remove the fuse by turning the fuse over (end over end) carefully making sure not to break the
fuse. (See Fig. 2)
D. Risk of fire. Replace fuse only with 5A, 125V fuse.(Provided with product)
E. Close fuse cover. Slide close the fuse access cover toward the fan cord on the top of the plug.
1. When you replace the fuse, DO NOT force the slide suddenly or overexert to reduce the
risk of damage.
2.
3. Risk of f re. Do not replace attachment plug. Contains a safety device (fuse) that should
not be removed. Discard product if the attachment plug is damaged.
4. WARNING: To Reduce The Risk Of Fire Or Electric Shock, Do Not Use This Fan With Any
Solid-State Speed Control Device.
5. This product employs overload protection (fuse). A blown fuse indicates an overload or
short-circuit situation. If the fuse blows, unplug the product from the outlet. Replace the
fuse as per the user servicing instructions (follow product marking for proper fuse rating)
and check the product. If the replacement fuse blows, a short-circuit may be present and
the product should be discarded or returned to an authorized service facility for examina-
tion and/or repair.
6. Do not operate any fan with a damaged cord or plug. Discard fan or return to an
authorized service facility for examination and/or repair.
7. Do not run cord under carpeting. Do not cover cord with throw rugs, runners, or similar
area and where it will not be tripped over.
8. This appliance has a polarized plug (one blade is wider than the other). To reduce the risk
of electric shock, this plug is intended to fit in a polar zed outlet only one way. If the plug
does not fit fully in the out et, reverse the plug. If it still does not fit, contact a qualified
electrician. Do not attempt to defeat this safety feature.
Fig. 1 Fig. 2 Fig. 3 Fig. 4 Fig. 5
SPARE FU SE
5.0A MA X
Spare fuse on
back of plug.
SPARE FUSE
5.0 A M AX
FUSE
CONTROL PANEL
MODE EXPLANATION
CLEANING AND STORAGE
USER SERVICING INSTRUCTIONS
NOTICE:
MED HIGH
POWER
SPEED SELECTION
OSCILLATION
WIND SELECTION Allows for three
TIMER
Time increases by 1 hour with each
push of the button. The LED
indicators are cumulative to a
maximum of 15 hours.
MODE
ECON LOW

MODELO: TF40-18
(TF40-18-CA)
VOLTAJE: 120 VCA
FRECUENCIA: 60 Hz
CORRIENTE: 0.55A
LEA, COMPRENDA Y SIGA LAS INSTRUCCIONES ANTES DE UTILIZAR
GUARDE ESTAS INSTRUCCIONES
SOLO PARA USO EN EL HOGAR
¿TIENE UN PROBLEMA? NO LO DEVUELVA AL LUGAR DONDE
LO COMPRÓ. COMUNÍQUESE CON SERVICIO AL CLIENTE.
Si tiene alguna pregunta o comentario, comuníquese con
nosotros al:
customerservic[email protected]
1-888-525-7969
GARANTÍA: Este ventilador incluye garantía de un (1) año
que cubre defectos del fabricante y de mano de obra con
el uso normal. La garantía se ofrece solo al comprador
original. Se requiere prueba de compra. La prueba de
compra la constituye un recibo de venta con fecha.
Esta garantía se anula si el ventilador se ha sometido a
mal uso, como: dejarlo caer y dañar la caja del ventilador,
motores, controles del ventilador, etc.; inmersión o
exposición al agua; exposición a calor excesivo, uso en
exteriores, cualquier otro uso distinto al uso en el hogar;
desarmado, reparación o modificación por parte de
cualquier otra persona que no sea un proveedor de
servicio autorizado; uso de voltaje o corriente incorrecto
o cualquier otro uso contrario a las instrucciones del
usuario.
8
SERVICIO AL CLIENTE
SOLUCIÓN DE PROBLEMAS
VENTILADOR DE TORRE DE 40 PULGADAS
MANUAL DE INSTRUCCIONES
Problema Causa probable Solución
El ventilador no
está funciona-
ndo.
El conector no está
completamente insertado en
el tomacorriente de la pared.
Asegúrese de que el conector esté debidamente insertado en el
tomacorriente de CA de la pared.
El control
remoto no hace
funcionar el
ventilador.
Inspeccione la batería para
asegurarse de que esté
instalada correctamente.
La batería ya no sirve.
Reemplace la batería. Para obtener un mejor rendimiento,
recomendamos utilizar una batería Duracell DL2032.
Si el problema persiste, comuníquese con Servicio al cliente a
recibir asistencia.
Le faltan piezas
a los
ventiladores.
Esto es extremadamente
raro debido al riguroso
control de calidad durante el
ensamble; sin embargo,
existe la posibilidad de que
se omitan algunas piezas.
Comuníquese con servicio al cliente a
solicitar un ventilador de reemplazo.
Desconecte el ventilador. Inspeccione la caja principal de interrup-
tores eléctricos. Si hay un interruptor averiado, reinícielo. Si el
problema persiste, comuníquese con un electricista calificado y
certificado.
El tomacorriente de la
pared ha sufrido una
sobrecarga.
Retire e inspeccione el fusible ubicado en el conector. Si el fusible
está averiado, reemplace con el fusible de 5 amp, 125 V adecuado.
Si el problema persiste, comuníquese con un electricista calificado y
certificado.
El fusible del conector no
funciona.
Comuníquese con servicio al cliente a
recibir asistencia.
El ventilador está
defectuoso.
Este producto contiene una batería tipo botón. Si se traga, podría
ocasionar un daño grave e incluso la muerte en solo 2 horas. Busque
atención médica de inmediato.
Use solo con un fusible de 5 amperios, 125 voltios. 1
Asegúrese de que el control remoto esté orientado hacia la ventana infrarroja delantera del ventilador
La garantía no cubre las baterías ni la vida útil de la
batería. No se hace ninguna otra garantía expresa ni
implícita. Para recibir cobertura de conformidad con
esta garantía, comuníquese con servicio al cliente para
realizar una consulta o reemplazo. NO intente reparar
ninguna función eléctrica o mecánica de este producto;
hacerlo podría anular esta garantía y podría ocasionar
lesiones.
ACTIVACIÓN DE LA GARANTÍA: Para activar la garantía de
este producto visite:
http://www.blackstoneinternational.ltd/product-
registration
Distribuido por:
Blackstone International, Ltd.
2018 Lord Baltimore Dr.
Windsor Mill, MD 21244
customerservic[email protected]
1-888-525-7969
www.blackstoneinternational.ltd
©2018 Blackstone International Ltd. y otras marcas
comerciales son propiedad de los respectivos
propietarios. Todos los demás nombres y logotipos
comerciales son marcas comerciales registradas de sus
respectivos propietarios. Las especificaciones están
sujetas a cambio sin previo aviso.
CASCADE

7
2
LEA Y GUARDE ESTAS INSTRUCCIONES
CUANDO UTILICE APARATOS ELÉCTRICOS, SIEMPRE DEBE SEGUIR LAS
PRECAUCIONES BÁSICAS PARA REDUCIR EL RIESGO DE INCENDIO, DESCARGA
ELÉCTRICA Y LESIONES PERSONALES O A LA PROPIEDAD, INCLUYENDO LO
SIGUIENTE:
FUNCIONAMIENTO DEL CONTROL REMOTO
REEMPLAZO DE LA BATERÍA DEL CONTROL REMOTO
En la parte posterior del control remoto, presione el botón de liberación ubicado en el lado inferior
derecho. Esto liberará la bandeja que contiene la batería.
Libere la bandeja al apretar el sujetador pequeño y bajar la lengüeta en la parte inferior del control
remoto (Fig. 1).
Reemplace la batería con 1 batería tipo botón DL2032 y deséchela adecuadamente y según las leyes y
ordenanzas de la localidad.
Vuelva a deslizar la lengüeta a su posición hasta que la bandeja trabe en el control remoto.
NO DESECHE LA BATERÍA EN EL FUEGO; LA BATERÍA PODRÍA EXPLOTAR O PODRÍA TENER FUGAS.
Este producto contiene una batería tipo botón. Si se traga, podría ocasionar un daño grave e incluso la
muerte en solo 2 horas. Busque atención médica de inmediato.
Para obtener un mejor rendimiento, recomendamos utilizar una batería Duracell DL2032.
ENCENDIDO
Enciende/apaga el ventilador
SELECCIÓN DE VELOCIDAD
Permite cuatro selecciones de
velocidad distintas
OSCILANTE
Enciende/apaga la oscilación
MODO SELECCIÓN DE AIRE
Permite utilizar tres modos de aire
distintos
TEMPORIZADOR
permite el apagado automático
después de las selecciones de tiempo
predeterminadas
Lea todas las instrucciones antes de usar este
producto.
Utilice este ventilador solo como se describe en
este manual. Cualquier otro uso no recomen-
dado por el fabricante puede ocasionar un
incendio, descarga eléctrica o lesiones a
personas o a la propiedad y puede anular la
garantía.
Siempre desconecte la unidad antes de armar,
desarmar o limpiar.
Siempre desconecte la unidad cuando no esté
en uso, cuando se traslade de una ubicación a
otra y antes de limpiarla.
Para desconectar, sujete el conector y retírelo
del tomacorriente de la pared. NO jale el cable
para desconectarlo.
El fabricante no recomienda el uso ni vende
accesorios, ya que pueden representar un
peligro.
Evite el contacto con las piezas movibles.
NO ponga a funcionar ningún ventilador con un
cable o conector dañado, después de un mal
funcionamiento o si lo dejó caer o lo dañó de
alguna manera.
NO ponga a funcionar ningún ventilador en la
presencia de gases explosivos o inamables.
NO coloque el ventilador ni ninguna pieza cerca
de una llama abierta, aparato de cocina o de
calefacción.
Es necesario tomar medidas de precaución
extremas cuando el ventilador es utilizado por
o cerca de niños y siempre que el ventilador
esté funcionando sin supervisión.Este producto
está diseñado solo para uso en el hogar y no
para uso comercial ni industrial.
NO lo use en exteriores.
Siempre utilice sobre una supercie seca y
nivelada.
NO ponga a funcionar si desinstaló la caja del
ventilador o si está dañada.
Un adaptador ojo entre el tomacorriente de
CA y el conector puede ocasionar sobrecalenta-
miento del conector; consulte con un
electricista calicado.
NO pase el cable por debajo de la alfombra. NO
cubra el cable con alfombras, tapetes o cosas
similares. Coloque el cable lejos del área de
paso y donde las personas no puedan tropezar.
Este producto usa protección contra sobrecarga
(fusible). Un fusible averiado indica una
sobrecarga o un cortocircuito. Si el fusible está
averiado, desconecte el producto del tomacorri-
ente. Reemplace el fusible según las instruccio-
nes de servicio del usuario. Si el fusible de
reemplazo está averiado, debe descartar el
producto o devolverlo a un centro de servicio
autorizado para su revisión o reparación.
NO conecte el ventilador a una fuente de
energía que no sea un tomacorriente
polarizado de corriente alterna de 120 V.
Este producto contiene una batería tipo botón.
Si se traga, podría ocasionar un daño grave e
incluso la muerte en solo 2 horas. Busque
atención médica de inmediato.
OPERACIÓN
FIG. 1
1 2 3
Antes de poner a funcionar el ventilador por primera vez, retire la lengüeta
de plástico transparente que está en la base del control remoto y retire la
cubierta plástica de la parte delantera de la superficie.
Este control remoto cumple con la parte 15 de los Reglamentos FCC. El
funcionamiento está sujeto a las dos condiciones siguientes: (1) Este
dispositivo no puede causar interferencia nociva y (2) este dispositivo
debe aceptar cualquier interferencia que reciba, incluyendo interferencia
que pueda ocasionar funcionamiento no deseado.
NOTA: Este control remoto fue probado y se determinó que cumple con los
límites para un dispositivo digital Clase B, de conformidad con la Parte 15
de los Reglamentos FCC. Estos límites están diseñados para proporcionar
protección razonable contra la interferencia nociva en una instalación
residencial. Este equipo genera, utiliza y puede irradiar energía de
radiofrecuencia y, si no se instala y utiliza según las instrucciones, puede
ocasionar una interferencia nociva para las comunicaciones de radio. Sin
embargo, no hay ninguna garantía de que no ocurrirá interferencia en
una instalación específica. Si este equipo provoca una interferencia
nociva para la recepción de radio o televisión, lo que puede determinar al
apagar y encender el equipo, se recomienda que el usuario intente
corregir la interferencia con una o más de las medidas siguientes:
Cambie la orientación o ubicación de la antena de recepción.
Aumente la separación entre el equipo y el receptor.
Conecte el equipo a un tomacorriente de un circuito distinto a donde está
conectado el receptor.
Consulte con el distribuidor o con un técnico experto en TV/radio para recibir
ayuda.
Nota: Para reducir el riesgo de incendio, descarga eléctrica y lesiones a personas o a la propiedad, no conecte este producto con
cables de extensión. El cable de extensión podría sobrecalentarse. Si es necesario utilizar un cable de extensión, utilice uno corto
con certificación de UL o ETL para disminuir la probabilidad de sobrecalentamiento. No conecte el ventilador en ningún
dispositivo conectado a un cable. Esto incluye protectores contra sobrevoltaje, adaptadores de enchufe múltiples y regletas.

5
4
B) Parte delantera
de la base
C) Respaldo
de la base
D) 4 tornillos del cuerpo
LISTA DE PARTES
A) Cuerpo del ventilador
E) Control remoto
ENSAMBLE ENSAMBLE
Pase el cable eléctrico por el agujero central de la base.
Alinee la parte delantera de la base (B) e inserte los cuatro
pilares en el cuerpo del ventilador (A) en los cuatro agujeros en
la parte superior de la base. Solo se puede insertar de una
manera. Coloque los cuatro tornillos del cuerpo (D) en los
agujeros que están en la parte inferior de la base y apriételos de
manera segura.
Step 2
Pase el cable de energía a
través del agujero central de la
base. Coloque la base en
posición invertida. Trabe
firmemente la parte delantera
de la base (B) sobre el
respaldo de la base (C) al
alinear los cuatro agujeros con
los cuatro pilares.
Step 1

3
6
PANEL DE CONTROL
MODO
ECON BAJO MED ALTO
ENCENDIDO Enciende/apaga el
ventilador
SELECCIÓN DE VELOCIDAD
Permite cuatro selecciones de velocidad
distintas
OSCILANTE
Enciende/apaga la oscilación
SELECCIÓN DE AIRE Permite utilizar
tres modos de aire distintos
TEMPORIZADOR Permite el apagado
automático. El tiempo aumenta en 1 hora
con cada pulsación del botón. Los
indicadores LED son acumulativos hasta
un máximo de 15 horas.
EXPLICACIÓN DE MODOS
ECON
ECON
BAJO
MED
ALTO
Aire estándar
El modo Aire estándar es sencillamente
el ajuste de velocidad ECON, BAJO,
MED y ALTO
Aire de la tarde
El aire fluye como una brisa de la tarde a
una brisa ligera nocturna y se describe de
la manera siguiente:
Aire de la tarde ECON
El flujo de aire permanece
en ECON
Aire de la tarde BAJO
El flujo de aire comienza en
BAJO, después de media
hora disminuye a ECON
Aire de la tarde MED
El flujo de aire comienza en
MED, después de media
hora disminuye a BAJO,
después de media hora
adicional, disminuye a
ECON.
Aire de la tarde ALTO
El flujo de aire comienza en
ALTO, después de media
hora disminuye a MED,
después de media hora
adicional disminuye a BAJO,
y después de media hora
adicional disminuye a ECON.
Brisa de aire
Selecciona automáticamente la velocidad
del aire al azar como sería al aire libre.
Las velocidades se describen como sigue:
ECON
ECON
BAJO
MED
ALTO
Brisa de aire ECON
Los ajustes de aire fluctúan
entre MED, BAJO y ECON en un
ciclo de aire de 80 segundos
que se repite, siendo el modo
ECON el más común
Brisa de aire BAJO
Los ajustes de aire fluctúan
entre MED, BAJO y ECON en un
ciclo de aire de 80 segundos
que se repite, siendo el modo
BAJO el más común
Brisa de aire MED
Los ajustes de aire fluctúan
entre ALTO, MED, BAJO y
ECON en un ciclo de aire de 80
segundos que se repite, siendo
el modo MED el más común
Brisa de aire ALTO
Los ajustes de aire fluctúan
entre ALTO, MED, BAJO y
ECON en un ciclo de aire de 80
segundos que se repite, siendo
el modo ALTO el más común
OPERACIÓN
ADVERTENCIA: Para reducir el riesgo de
descarga eléctrica, NO utilice este ventilador con
ningún control de velocidad de estado sólido y
NO inserte los dedos ni ningún otro objeto en la
rejilla.CONECTOR POLARIZADO: Este aparato
tiene un conector polarizado (una hoja es más
ancha que la otra). Para reducir el riesgo de
descarga eléctrica, este conector está diseñado
para ajustarse a un tomacorriente polarizado de
una sola vía. Si el conector no se ajusta
completamente al tomacorriente, cambie la
posición del conector e intente de nuevo. Si aún
así no ajusta, comuníquese con un electricista
calificado. NO intente cambiar esta caracter-
ística de seguridad.
LIMPIEZA Y ALMACENAMIENTO
Para limpiar su ventilador, primero APÁGUELO y DESCONECTE la unidad.
Utilice un paño suave para limpiar la caja. NO utilice agua ni ninguna otra solución química o limpiador. NO remoje ni
sumerja el ventilador en agua o en otro líquido.
NO INTENTE SEPARAR EL VENTILADOR.
Guárdelo en un lugar seco, lejos del calor excesivo y de la luz solar directa.
La limpieza habitual garantiza la apariencia y el rendimiento óptimos del ventilador.
NO doble el cable eléctrico cuando lo guarde o cuando esté en uso.
INSTRUCCIONES DE SERVICIO PARA EL USUARIO
A. Para desconectar, sujete el conector y retírelo del tomacorriente de la pared. NO jale el cable para desconectarlo.
B. Abra la cubierta de fusibles. Deslice la cubierta de acceso a los fusibles para abrirla, la cual que se encuentra en la
parte superior del conector para conectar las hojas.
C. Retire el fusible dándole vuelta con cuidado (de extremo a extremo), asegurándose de no romperlo. (Vea la Fig. 2)
D. Riesgo de incendio. Reemplace el fusible solo con un fusible de 5A, 125 V.
E. Cierre la cubierta del fusible. Deslice la cubierta de acceso a los fusibles para cerrarla, hacia el cable del ventilador
en la parte superior del conector.
AVISO:
1. Cuando reemplace el fusible, NO fuerce el movimiento de deslizamiento repentinamente ni haga presión excesiva
para reducir el riesgo de daño.
2. Si tiene dificultad para reemplazar el fusible, llame a un electricista calificado para que lo ayude.
3. Riesgo de incendio. No reemplace el conector de accesorio. Contiene un dispositivo de seguridad (fusible) que
no se debe desinstalar. Deseche el producto si el conector de accesorio está dañado.
4. ADVERTENCIA: Para reducir el riesgo de incendio o de descarga eléctrica, no utilice este ventilador con ningún
dispositivo de control de velocidad de estado sólido.
5. Este producto usa protección contra sobrecarga (fusible). Un fusible quemado indica una sobrecarga o un
cortocircuito. Si el fusible se quema, desconecte el producto del tomacorriente. Reemplace el fusible según las
instrucciones de servicio del usuario (siga las indicaciones del producto para ver la clasificación adecuada del
fusible) y revise el producto. Si el fusible de reemplazo se funde, es probable que exista un cortocircuito y debe
descartar el producto o devolverlo a un centro de servicio autorizado para su revisión o reparación.
6. No ponga a funcionar ningún ventilador con un cable o conector dañado. Descarte el ventilador o devuélvalo a
un centro de servicio autorizado para su revisión o reparación.
7. No pase el cable por debajo de la alfombra. No cubra el cable con alfombras, tapetes o cubiertas similares.
No dirija el cable debajo de los muebles o aparatos. Coloque el cable lejos del área de paso y donde las
personas no puedan tropezar.
8. Este aparato tiene un conector polarizado (una hoja es más ancha que la otra). Para reducir el riesgo de
descarga eléctrica, este conector está diseñado para ajustarse a un tomacorriente polarizado de una sola vía.
Si el conector no se ajusta completamente al tomacorriente, cambie la posición del conector. Si aun así no
ajusta, comuníquese con un electricista calificado. No intente arruinar esta característica de seguridad.

GARANTIA
IMPORTADORA PRIMEX, S.A. DE C.V.
IPR-930907-S70
Boulevard Magnocentro No. 4
Col. San Fernando La Herradura
Huixquilucan, Estado de México C.P. 52765
Tel. 5246-5500
Garantiza este producto por el término de TRES MESES en todas sus partes y mano de
obra contra cualquier defecto de fabricación y funcionamiento, a partir de la fecha de
compra y tratándose de productos que requieran enseñanza o adiestramiento en su
manejo o de la instalación de aditamentos, accesorios, implementos o dispositivos, a
partir de la fecha en que se hubiere quedado operando normalmente después de su
instalación en el domicilio que señale el consumidor.
ESTA GARANTIA SUSTITUYE A CUALQUIER OTRA QUE SE ENCUENTRE EN EL
PRODUCTO.
CONDICIONES
1.- Para hacer efectiva esta garantía, no podrán exigirse mayores requisitos que la
presentación de esta póliza, junto con el producto, en el lugar donde fue adquirido o en
los centros de servicio que se indican a continuación:
Centros de servicio en el Distrito Federal, área Metropolitana, y estados donde hay
bodegas de Importadora Primex, S.A. de C.V. en el departamento de devoluciones.

2.- La Empresa se compromete a reparar el producto, así como las piezas y
componentes defectuosos del mismo sin ningún cargo para el consumidor. (Dentro de
la vigencia de la póliza).
3.- El tiempo de reparación en ningún caso será mayor de 30 días hábiles contados a
partir de la recepción del producto en cualquiera de los sitios donde pueda hacerse
válida esta garantía.
4.- Las partes, componentes, consumibles, accesorios y refacciones se pueden adquirir
en los centros de servicio antes mencionados.
5.- Todos los gastos que se generen con motivo del cumplimento de esta garantía,
incluyendo los gastos de transportación, correrán a cargo de IMPORTADORA PRIMEX,
S.A. DE C.V.
ESTA GARANTÍA NO ES VALIDA EN LOS SIGUIENTES CASOS:
§ Cuando el producto ha sido utilizado en condiciones distintas a las normales.
§ Cuando el producto no ha sido operado de acuerdo con el instructivo de uso en
idioma Español.
§ Cuando el producto ha sido alterado o, reparado por personas no autorizadas por
Importadora Primex, S.A. de C.V.
Producto: Marca:
Modelo: No. de Serie:
Nombre del distribuidor:
Calle y número: Colonia y/o poblado:
Delegación y/o municipio: Código Postal:
Ciudad y/o Estado: Teléfono:
Fecha de entrega:
El consumidor podrá solicitar que se haga efectiva la garantía ante la propia casa
comercial donde adquirió el producto, o en cualquier otra de las indicadas.
NOTA: En el caso de que la presente garantía se extraviara el consumidor puede
recurrir a su proveedor para que se le expida otra póliza de garantía, previa
presentación de la nota de compra o factura respectiva.

This manual suits for next models
1
Table of contents
Languages:
Other Cascade Fan manuals