Casera PR-803 User manual

Model number: PR-803
After sales support AU: 1300 886 649 NZ: 0800 836 761
N13275
Hair
Grooming Kit
Instruction Manual
style

1
Important safety instructions
Please keep this instruction manual in a safe place, along with the purchase receipt and carton for
future reference. The safety precautions enclosed herein reduce the risk of fire, electric shock and
injury when correctly adhered to.
• The appliance is not intended for use by persons (including children) with reduced physical,
sensory or mental capabilities, or lack of experience and knowledge, unless they have
been given supervision or instruction concerning the use of the appliance by a person who
responsible for their safety.
• Young children should be supervised to ensure that they do not play with the appliance.
• Use this appliance as intended and described in the instruction manual only.
• Always unplug the appliance immediately after use.
• This appliance should never be left unattended when plugged in.
• Do not wrap the cord around the appliance.
• If the appliance stops unexpectedly, switch off the power supply, and unplug from the wall
socket. Contact the manufacturer or an authorized service representative.
• Switch off the power supply and unplug from the wall when not in use, before cleaning and or
changing accessories.
• Keep the appliance and cable away from sources of heat, sharp objects or anything that may
cause damage.
• Do not operate this appliance if the cable or plug is damaged. Contact the manufacturer or an
authorized service representative.
• Electrical appliances must always be stored in a secure place and out of reach from children.
• Always ensure that your hands are dry before operating or adjusting any switches on the
product or touching the plug and main power connection.
• Do not use outdoors. This appliance has been designed for domestic indoor use only.
• To avoid the risk of electric shock, do not disassemble or attempt to repair the unit.
• Do not overload electrical outlet.
• Do not leave packaging components (plastic bags, cardboard, polystyrene, etc) within the reach
of children, as it could be dangerous.
• Do not use while bathing or in a shower.
• Do not place in or dip into water or other liquids.
• Do not reach for an appliance that has fallen into water. Unplug immediately.
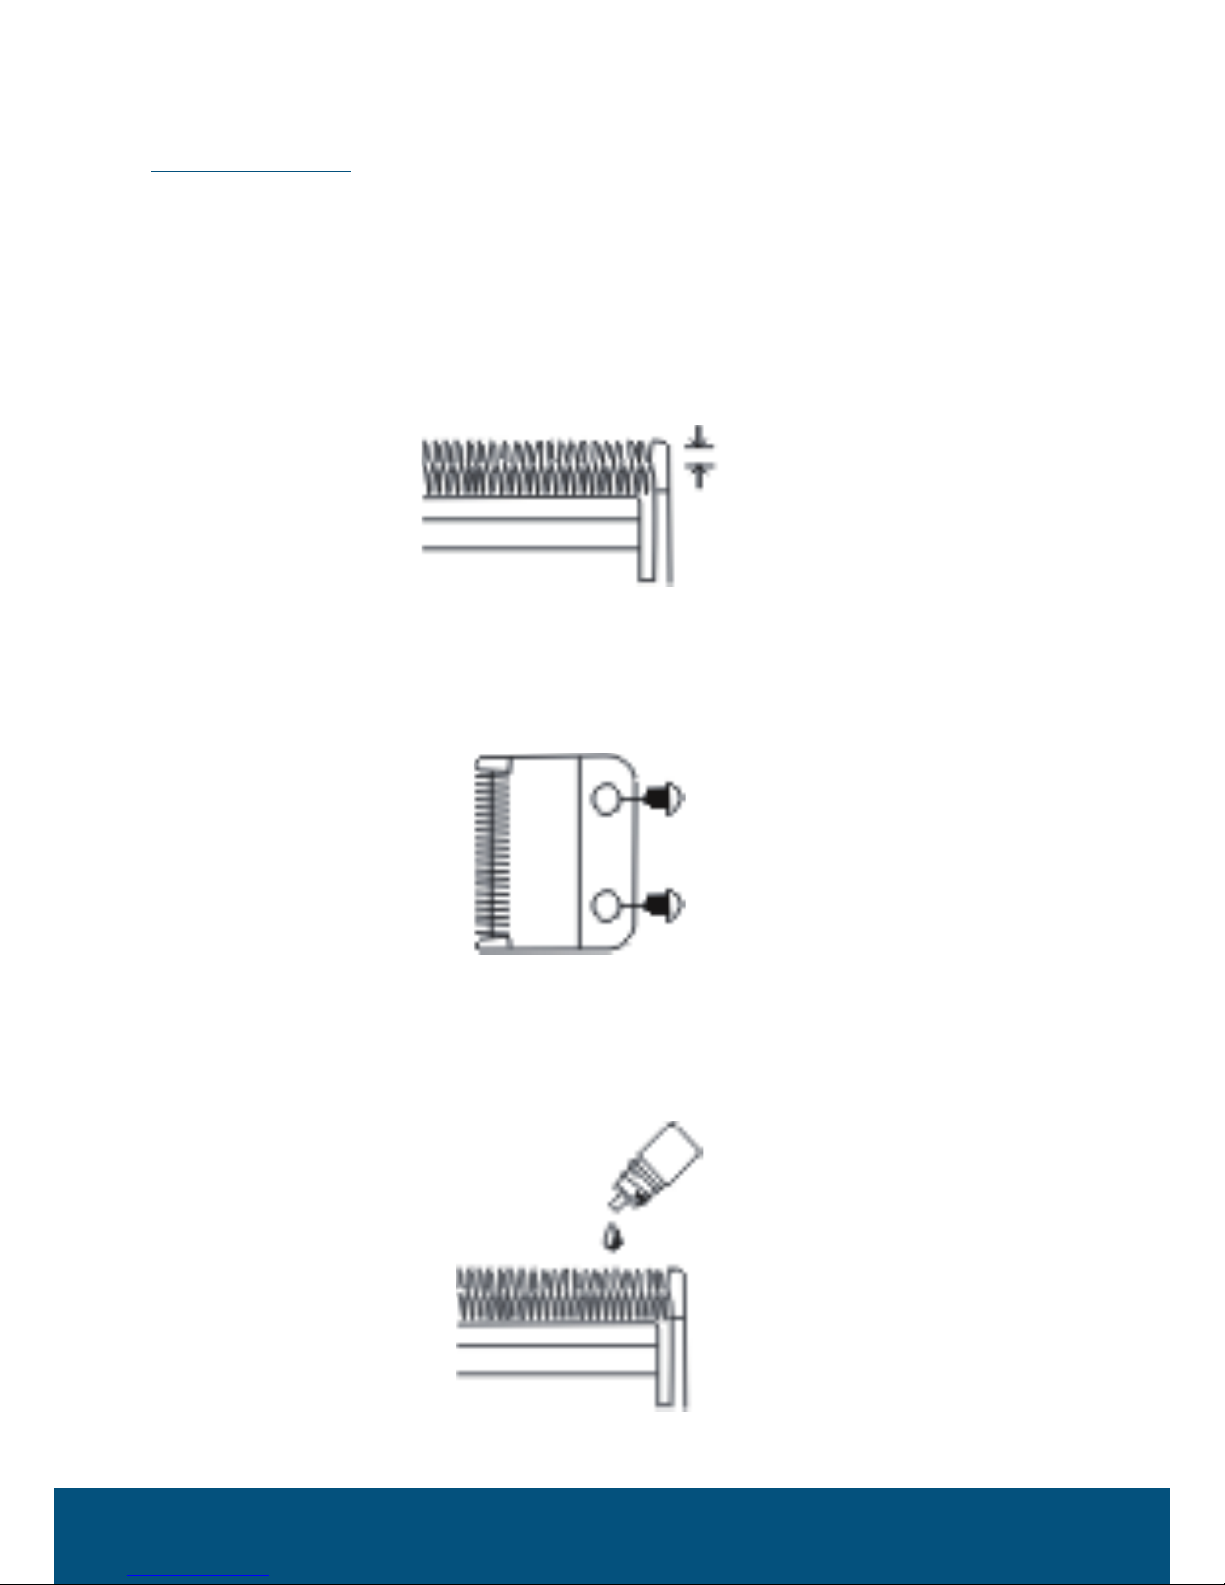
• Before use, make certain blades are aligned properly.
• Do not place appliance on any surface while it is operating.
• Do not use this appliance if the comb is damaged as injury may occur.

1
2
Know your hair grooming kit parts
Accessories
Blade lever
Bottom blade
Top blade
Power screw
On/off switch
3mm 5mm 7mm 9mm
Comb Scissors Oil Brush

3
Operating your electric hair grooming set
BEFORE STARTING YOUR HAIR CUT:
1. Ensure the clipper and attachments are free of all debris.
2. Untwist the cord from time to time to avoid tangling
3. Ensure the cutting blade teeth are free from oil. To distribute the remaining oil through the
appliance, turn the unit sideward’s.
4. Wipe off any excess oil.
5. Always first comb the hair so it is tangle free and as it is naturally worn.
6. Place a towel around the neck and shoulders of the person having the haircut.
7. Seat the person with their head at approximately at your eye level. This allows ease of visibility
while cutting and a relaxed control of the unit.
8. Begin styling.
POINTS TO REMEMBER WHEN CUTTING & STYLING
• Cut the hair in a relaxed and slow manner. Use short strokes only to work gradually over the
entire head.
• Always take off a little hair at a time, you can always trim off additional hair later.
• As you work, comb the hair frequently back into the style to which you are cutting.
• When styling with this grooming kit, it is better to leave the hair dry, not wet.
With the hair dry, it is much easier to control the amount of hair being cut.
Caution: Cutting hair requires practice so it is always better to leave the hair longer for the first few
haircuts until you become used to the length to which each comb attachment cuts the hair.

3
4
Attachments
COMBS
1. To attach the comb, hold the appliance with its teeth upward and slide it onto and along the
clipper blade until the front of the comb firmly sits against the clipper blade.
2. To remove the comb, simply pull the comb upward and away from the clipper blade.
Note: For even cutting, allow the comb attachment/cutter to cut its way through the hair. Do not
force it through quickly. Also remember to comb the hair frequently to remove trimmed hair and to
check for uneven strands.
STEP 1 - BACK OF THE NECK
1. Attach either the 3mm or 7mm comb attachment
2. Hold the clipper cutting edge pointed up and begin the haircut, starting at the centre of the
head at the base of the neck (see diagram 1 on the next page).
3. Hold the clipper comfortably in your hand and hold lightly against the head with the comb
teeth pointing upward. Gradually and slowly lift the clipper, working upwards and outwards,
through the hair, trimming just a little at a time.
4. As you cut, gradually lift the hair clipper head towards you. Continue to cut the back area
from the bottom of the neck upwards to the top of the ears.

5
STEP 2 - BACK OF THE HEAD
Change to the next longest comb attachment 7mm or 9mm and cut the back of the head (see
diagram 2).
STEP 3 - SIDE OF THE HEAD
It is recommended that you use one of the shorter combs, either the 3mm or 5mm, to trim sideburns
etc. i.e. the hair directly in front of the ears. Switch to one of the larger combs, either the 7mm or
9mm, and continue to cut to the top of the head (see diagram 3).
STEP 4 - TOP OF THE HEAD
1. Using either the 7mm or 9mm, cut top head from back to front against the direction in which
the hair normally grows (see diagram 4).
2. In some cases, this may require the reverse, or cutting from front to back.
Note: The shorter combs, either the 3mm or 5mm, to trim sideburns etc.
3. For longer hair on the top of your head, uses the comb provided and lift hair on the top of the
head. Cut over the comb, with the hair lifted or hold the hair between the fingers to lift it and
cut it to desired length (see diagrams 5 and 6 on the next page).

5
6
Note: Always work from the back of the head. You can cut the hair shorter gradually by reducing the
space between the comb/fingers, and the head. Comb out trimmed hair and check for
uneven strands.
STEP 5 - THE FINISHING TOUCH
1. Finally, use the taper lever without an attachment comb for close trimming around the base of
the neck, the sides of the neck and the ears.
2. To produce a clean straight line at the sideburns, reverse the hair clipper by turning the reverse
side uppermost (see diagram 7).
3. Press the clipper at right angles to the head, tips of the blades lightly touching the skin and
work downwards. This way you will obtain, a clean cut as would be given by a razor.
SHORT TAPERED STYLES - 'FLAT TOPS' AND SHORT CUTS
• Starting with the longest attachment comb (9mm) cut from the back of the neck to the crown.
Hold the attachment comb flat against the head and slowly move the clipper through the hair,
as shown (see diagram 8).
• Use the same procedure from the lower side to the upper side of the head, as illustrated. Then
cut the hair against the direction in which it grows from the front to the crown and then level
the cut with the sides.
• To give a 'flattop' look, the hair on top of the head must be cut over the top of a flat comb rather
than by using the attachment comb.
• Use closer cutting attachment combs to taper the hair down to the neckline as desired. Comb
hair and check for uneven areas and outlining sideboards and neckline as described previously.

7
• Your trimmers were carefully examined to ensure that the blades were oiled and aligned before
leaving our factory.
• Blades must be realigned before if they have been removed for cleaning or replacement.
• To realign the blades, simply match the upper and bottom blades teeth up, point to point.
(End of top blade teeth should be approximately 1.2mm back from bottom blade. Compare your
clipper blades with the sketch).
Blade alignment
• If blade alignment is incorrect, add a few drops of oil to the blades, turn trimmer on for a few
moments, turn off and unplug. Loosen screws slightly and adjust. Tighten screws after blade
is aligned.
OILING YOUR BLADES
• To maintain your trimmer in good condition, the blades should be oiled every few haircuts.
• Do not use hair oil, grease, oil mixed with kerosene or any solvent. As the solvent will evaporate
and leave the thick oil which may slow down the blades motion.
1.2mm

7
8
POWER SCREW
1. The power screw permits you to adjust the power. It has been adjusted before leaving the
factory. However, if the voltage in your home is low, you may need to re-adjust it.
2. To adjust, use a screwdriver or a thin coin to turn power screw in clockwise direction until the
arm strikes the coil, making a noise. Then slowly turn power screw out (Anti-clockwise) until
noise stops. This is maximum power setting.
BLADE LEVER
1. The lever is conveniently located near your thumb (if you're right-handed) so it can easily be
adjusted while the trimmer is in your hand.
2. The lever adds versatility to your trimmer by allowing you to gradually change the closeness of
your cut without an attachment comb.
3. When the lever is in the uppermost position, the blades will give you the closest cut and leaves
the hair very short. Pushing the lever downward gradually increases the cutting length.
4. The lever will also extend the use of your blades since different cutting edge is used in each setting.
5. In addition, if extremely heavy hair cutting has jammed the blades, it will help you remove hair
that has become wedged between the two blades without removing
the blades.
6. While the trimmer is running, rapidly move the lever from "close cut" to "longer cut" a couple of
times. Doing this each time after you have finished using your clipper help to keep the blades
clear of hair. If your clipper stops cutting and this does not help, your cutting blades are dulled.
Replace them with new blades.
Close cut
Longer cut

99
At the end of its working life, do not throw this appliance out with your household rubbish. Observe
any local regulations regarding the disposal of electrical consumer goods and dispose of it
appropriately for recycling. Contact your local authorities for advice on recycling facilities in
your area.
Disposal

99
Notes

11
Table of contents