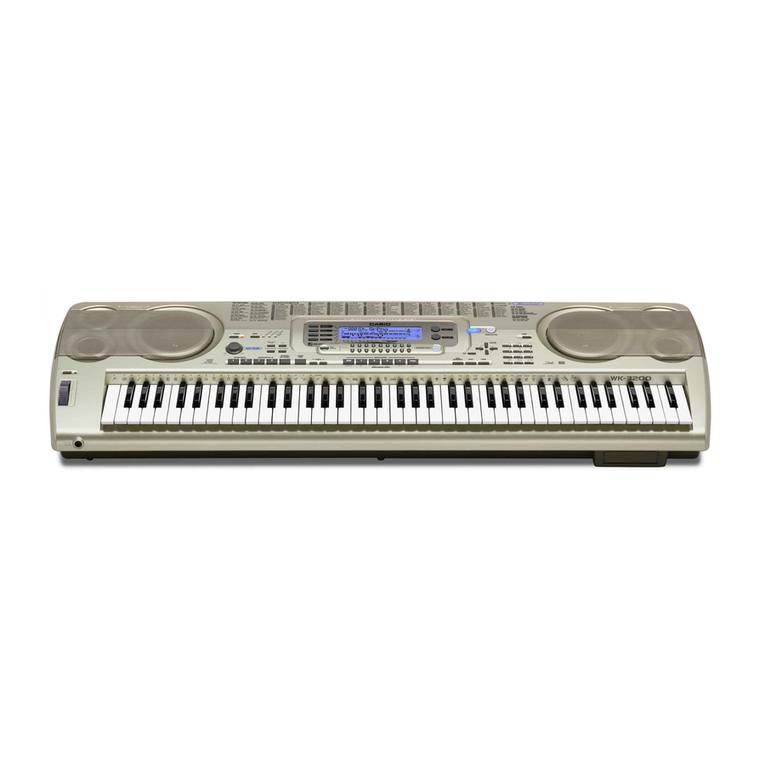
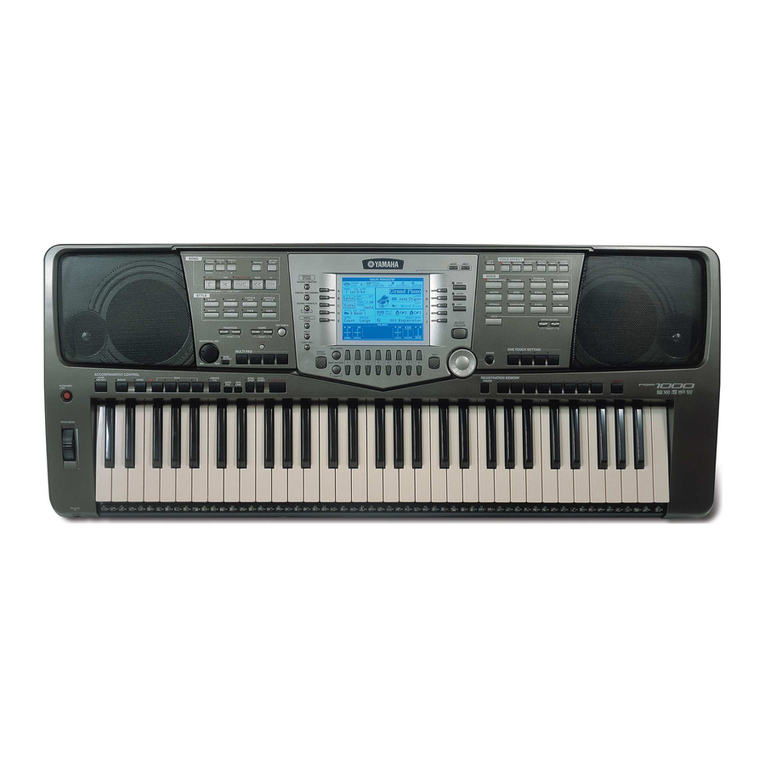
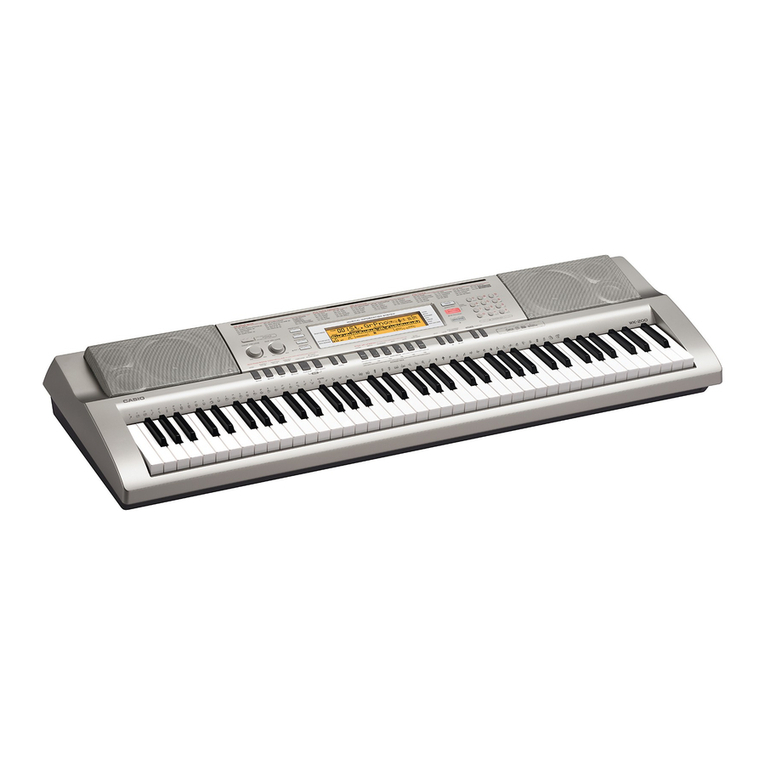
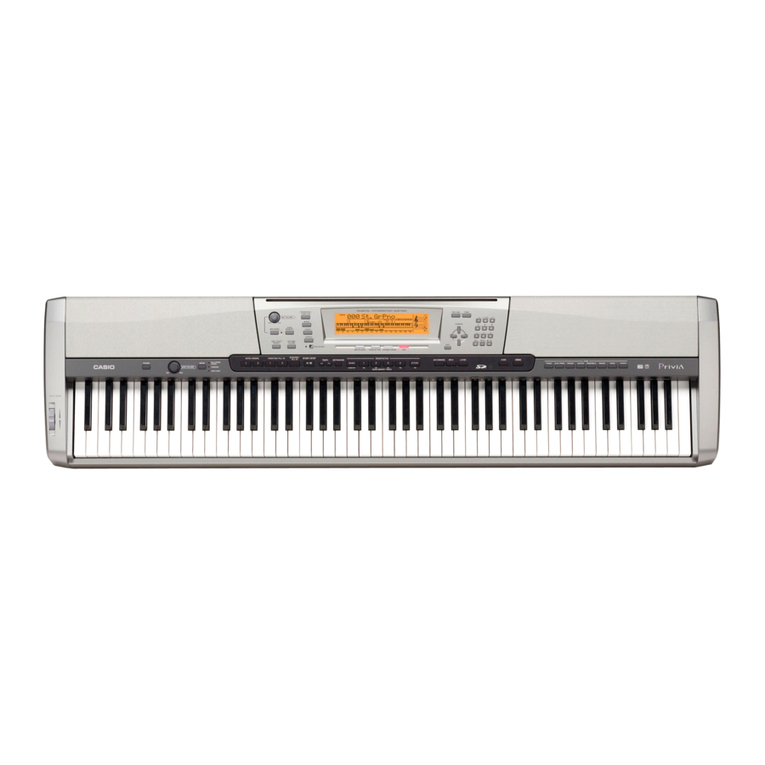
Casio WK-1500 User manual

OPERATION
MANUAL
MANUAL
DE
OPERACION
ara
@@
WK1500ES-1
CASIO.
WK-ISOO
GUIDELINES
LAID
DOWN
BY
FCC
RULES
FOR
USE
OF
THE
UNIT
IN
THE
U.S.A
(not
applicable
to
other
areas).
NOTICE
This
equipment
has
been
tested
and
found
to
comply
with
the
limits
for
a
Class
B
digital
device,
pursuant
to
Part
15-of
the
FCC
Rules.
These
limits
are
designed
to
provide
reasonable
protection
against
harmful
interference
in
a
residential
installation.
This
equipment
generates,
uses
and
can
radiate
radio
frequency
energy
and,
if
not
installed
and
used
in
accordance
with
the
instructions,
may
cause
harmful
interference
to
radio
communications.
However,
there
is
no
guarantee
that
interference
will
not
occur
in
a
particular
installation.
If
this
equipment
does
cause
harmful
interference
to
radio
or
television
reception,
which
can
be
determined
by
turning
the
equipment
off
and
on,
the
user
is
encouraged
to
try
to
correct
the
interference
by
one
or
more
of
the
following
measures:
*
Reorient
or
relocate
the
receiving
antenna.
*
Increase
the
separation
between
the
equipment
and
receiver.
*
Connect
the
equipment
into
an
outlet
on
a
circuit
different
from
that
to
which
the
receiver
is
connected.
*
Consult
the
dealer
or
an
experienced
radio/TV
technician
for
help.
FCC
WARNING
Changes
or
modifications
not
expressly
approved
by
the
party
responsible
for
compliance
could
void
the
user's
authority
to
operate
the
equipment.

Welcome...
To
the
happy
family
of
satisfied
CASIO
electronic
musical
instrument
owners!
To
get
the
most
out
of
the
many
features
and
functions
of
the
keyboard,
be
sure
to
carefully
read
this
manual
and
keep
it
on
hand
for
future
reference.
important!
When
using
batteries,
be
sure
to
replace
them
or
shift
to
one
of
the
alternate
power
sources
whenever
you
notice
any
of
the
following
symptoms.
Dim
power
supply
indicator
Abnormally
low
speaker/headphone
volume
Distortion
of
sound
output
A
totally
different
tone
may
sound
Abnormai
rhythm
pattern
and
demo
tune
play
Continued
sound
output
even
after
you
release
a
button
Occasional
interruption
of
sound
when
playing
at
high
volumes
Sudden
power
failure
when
playing
at
high
volumes
Main
Features
76-key
keyboard
76
keys
provide
plenty
of
artistic
versatility.
Perfect
for
use
as
a
master
keyboard
for
a
connected
external
sound
source.
General
MIDI
Level
1
compatibility
Built-in
tones
are
numbered
according
to
General
MID!
Level!
1
standards
for
full
enjoyment
of
DTM.
16-channel
mixer
and
MIDI
monitor
These
useful
features
make
parameter
settings
quick
and
easy.
Settings
for
each
channe!
can
be
checked
at
a
glance.
Pitch
bender
and
modulation
button
Plenty
of
tools
to
help
take
your
music
to
new
heights.
128
amazingly
realistic
tones
and
8
exciting
drum
sounds
Layer
and
Split
Keyboard
capabilities
for
play
of
two
tones
at
the
same
time
Layer
Function
Play
two
tones
at
the
same
time.
Split
Function
Split
the
keyboard
between
two
different
tones.
Magical
Preset
for
a
new
dimension
in
keyboard
play
Perform
such
“magical”
functions
as
play
of
a
different
chord
each
time
you
press
a
key,
play
of
tones
along
with
percussion
sounds,
and
more!
Musical
pads
Choose
from
among
30
set-ups.
Phrases
produced
by
pads
automatically
match
the
accompaniment
chord
being
played.
Enhanced
auto-accompaniment
function
for
greater
versatility
100
built
in
auto-accompaniment
patterns.
Combine
different
rhythms
to
create
your
own
patterns.
Full-Range
Chords
allow
both
chord
and
melody
play
across
the
entire
keyboard
range.
Song
Memory
Store
up
to
six
tracks
for
simultaneous
playback.
E-2

Q
Touch
Response
*
Automatic
adjustment
of
output
to
match
keyboard
pressure.
Q
Transpose
Function
*
An
easy
operation
instantly
changes
the
key
of
the
keyboard.
Q
10
versatile
digital
effects
*
Choose
from
various
reverb
effects
or
even
an
rotating
speaker
effect.
Q
MIDI
compatible
*
Hook
up
to
other
MIDI
devices
and
expand
your
creative
potential.
Q
Registration
Memory
*
Store
up
to
10
set-ups
for
instant
recall
when
you
need
them.
E-3
Safety
Precautions
Sym
bols
SSS
a
a
TNS
Various
symbols
are
used
in
this
operating
manual
and
on
the
product
itself
to
ensure
that
the
product
is
used
safely
and
correctly,
and
to
prevent
injury
to
the
user
and
other
persons
as
well
as
damage
to
property.
Those
symbols
along
with
their
meanings
are
shown
below.
AN
WARNING
This
indication
stipulates
matters
that
have
the
risk
of
causing
death
or
serious
injury
if
the
product
is
operated
incorrectly
while
ignoring
this
indication.
CAUTION
This
indication
stipulates
matters
that
have
the
risk
of
causing
injury
as
well
as
matters
for
which
there
is
the
likelihood
of
occurrence
of
physical
damage
only
if
the
product
is
operated
incorrectly
while
ignoring
this
indication.
Symbol
Examples
sume
EERE
This
triangle
symbol
(
/\
)
means
that
the
user
should
be
careful.
(The
example
at
left
indicates
electrical
shock
caution.)
This
circle
with
a
line
through
it
(©)
means
that
the
indicated
action
must
not
be
performed.
Indications
within
or
nearby
this
symbol
are
specifically
prohibited.
(The
example
at
left
indicates
that
disassembly
is
prohibited.)
The
black
dot
(
@
)
means
that
the
indicated
action
must
be
performed.
Indica-
tions
within
this
symbol
are
actions
that
are
specifically
instructed
to
be
per-
formed.
(The
example
at
left
indicates
that
the
power
plug
must
be
unplugged
from
the
electrical
socket.)
L\
WARNING
==0queeeeree
Please
use
caution
regarding
the
handling
of
the
AC
adaptor.
*
Do
not
use
a
voltage
other
than
the
indicated
power
supply
voltage.
Use
of
a
voltage
other
than
that
indicated
may
cause
fire
or
electrical
shock.
*
If
the
power
cord
should
become
damaged
(exposed
wires,
disconnection,
etc.),
purchase
a
new
AC
adaptor.
Use
of
a
damaged
power
cord
may
cause
fire
or
electrical
shock.
*
Do
not
cut
or
damage
the
power
cord.
Also
do
not
place
heavy
objects
on
top
f
of
it
or
subject
it
to
excessive
heat.
Damage
to
the
power
cord
may
cause
fire
or
electrical
shock.
*
Do
not
attempt
to
shape
the
power
cord
or
subject
it
to
excessive
bending,
twisting
or
pulling.
This
may
cause
fire
or
electrical
shock.
*
Use
only
the
AC
adaptor
that
comes
with
the
instrument.
Use
of
another
adaptor
may
cause
fire,
electrical
shock,
or
malfunction.
E-4

4.
Play
a
chord
on
the
accompaniment
keyboard
(page
E-32)
to
start
play
of
the
auto-accompaniment.
5.
Continue
pressing
keys
on
the
accompaniment
keyboard.
6.
To
stop
auto-accompaniment
play,
press
START/STOP
again.
o
START!
STOP
LC)
To
start
an
accompaniment
with
synchro
start
1.
Use
the
MODE
button
to
select
either
CASIO
CHORD
or
FINGERED.
FULL
RANGE
©
crore
MOOR
©
ANGERED
CJ
sess
5
Select
a
rhythm.
3.
Press
the
SYNCHRO/ENDING
button.
At
this
time,
the
TEMPO
indicator
Sypucenoy
lights.
C]
4.
Play
a
chord
on
the
accompaniment
keyboard.
5.
To
stop
the
accompaniment
pattern,
press
START/STOP
again.
@
Adjusting
the
accompaniment
volume
(Page
E-39)
Use
the
following
procedure
to
set
the
volume
that
the
accompaniment
is
played.
You
can
set
the
volume
to
any
value
in
the
range
of
000
to
127.
To
adjust
the
accompaniment
volume
1.
Press
the
ACCOMP
VOLUME
button.
2.
Use
the
10-key
pad
to
input
a
3-digit
number
and
specify
the
accompaniment
volume
level.
@
Using
the
musical
pads
(Page
E-44)
To
play
a
pad
Simply
press
one
of
the
six
pads
to
play
the
sound
assigned
to
it.
To
change
the
pad
functions
1.
Press
PAD
button.
2.
While
the
function
set
number
is
on
the
display,
use
the
10-key
pad
to
input
the
number
of
the
set
of
functions
you
want
to
change
to.
p
i
c
E-16
Using
the
Song
Memory
(Page
E-55)
To
record
to
Song
Memory
1.
Set
up
the
keyboard
to
play
the
tune
you
want
to
play.
2,
Press
the
SONG
MEMORY
button
until
the
message
r
a
appears
on
the
display.
cr
L
e
7
=
8%
9°
Use
the
10-key
pad
to
input
0
or
1
to
specify
the
song
number.
O09
oo
9
goog
OrO«O
@
4,
Press
TR1
button
to
select
track
1.
CH
O
SY
5.
Press
the
START/STOP
button
to
start
recording.
Shaw
STOP
6.
Play
the
song
that
you
want
to
record.
°
7.
After
the
song
is
finished,
press
the
START/STOP
button
to
stop
the
recording
START/
A
STOP
operation.
To
play
back
a
song
from
Song
Memory
1.
Press
the
SONG
MEMORY
button
until
the
message
PLy
appears
on
the
display.
CD
e
O 0
0
2.
Use
the
10-key
pad
to
input
0
or
1
to
specify
the
song
number.
009
gag
OvO«O0
3.
Press
TR1
button
to
select
track
1.
S@e
4,
Press
the
START/STOP
button
to
start
playback.
Agr
E-17

Q
Touch
Response
*
Automatic
adjustment
of
output
to
match
keyboard
pressure.
Q
Transpose
Function
*
An
easy
operation
instantly
changes
the
key
of
the
keyboard.
Q
10
versatile
digital
effects
*
Choose
from
various
reverb
effects
or
even
an
rotating
speaker
effect.
Q
MIDI
compatible
¢
Hook
up
to
other
MIDI
devices
and
expand
your
creative
potential.
Q
Registration
Memory
¢
Store
up
to
10
set-ups
for
instant
recall
when
you
need
them.
E-3
Safety
Precautions
Sym
|e)
a
Ne
Various
symbols
are
used
in
this
operating
manual
and
on
the
product
itself
to
ensure
that
the
product
is
used
safely
and
correctly,
and
to
prevent
injury
to
the
user
and
other
persons
as
well
as
damage
to
property.
Those
symbols
along
with
their
meanings
are
shown
below.
aed
WARNING
This
indication
stipulates
matters
that
have
the
risk
of
causing
death
or
serious
injury
if
the
product
is
operated
incorrectly
while
ignoring
this
indication.
CAUTION
This
indication
stipulates
matters
that
have
the
risk
of
causing
injury
as
well
as
matters
for
which
there
is
the
likelihood
of
occurrence
of
physical
damage
only
if
the
product
is
operated
incorrectly
while
ignoring
this
indication.
Symbol!
Exam
ples
sememmssessenrasnasmsnsnnsmnanamm
canes
serene
ere
@
O>
This
triangle
symbol
(
/\)
means
that
the
user
should
be
careful.
(The
example
at
left
indicates
electrical
shock
caution.)
This
circle
with
a
line
through
it
(@)
means
that
the
indicated
action
must
not
be
performed.
Indications
within
or
nearby
this
symbol
are
specifically
prohibited.
(The
example
at
left
indicates
that
disassembly
is
prohibited.)
The
black
dot
(
@)
means
that
the
indicated
action
must
be
performed.
Indica-
tions
within
this
symbol
are
actions
that
are
specifically
instructed
to
be
per-
formed.
(The
example
at
left
indicates
that
the
power
plug
must
be
unplugged
from
the
electrical
socket.)
LN
WARNING
=e
Please
use
caution
regarding
the
handling
of
the
AC
adaptor.
*
Do
not
use
a
voltage
other
than
the
indicated
power
supply
voltage.
Use
of
a
voltage
other
than
that
indicated
may
cause
fire
or
electrical
shock.
¢
If
the
power
cord
should
become
damaged
(exposed
wires,
disconnection,
etc.),
purchase
a
new
AC
adaptor.
Use
of
a
damaged
power
cord
may
cause
fire
or
electrical
shock.
¢
Do
not
cut
or
damage
the
power
cord.
Also
do
not
place
heavy
objects
on
top
of
it
or
subject
it
to
excessive
heat.
Damage
to
the
power
cord
may
cause
fire
or
nN
electrical
shock.
*
Do
not
attempt
to
shape
the
power
cord
or
subject
it
to
excessive
bending,
twisting
or
pulling.
This
may
cause
fire
or
electrical
shock.
*
Use
only
the
AC
adaptor
that
comes
with
the
instrument.
Use
of
another
adaptor
may
cause
fire,
electrical
shock,
or
malfunction.
E-4

Do
not
place
containers
containing
water
or
other
liquids
on
the
instrument.
*
Do
not
place
the
following
objects
on
the
instrument.
Placing
such
objects
on
the
instrument
may
cause
fire
or
electrical
shock
if
they
spill
and
get
inside
the
instrument.
;
*
Containers
filled
with
water
or
other
liquids
(including
vases,
potted
plants,
cups,
cosmetics
and
medicines)
¢
Small
metal
objects
(including
hairpins,
sewing
needles
and
coins)
¢
Flammable
objects
In
the
event
a
foreign
object
should
happen
to
get
inside
the
instrument,
please
take
the
following
actions:
1.
Turn
power
off.
2.
Unplug
the
AC
adaptor
from
the
wall
outlet.
3.
If
there
are
any
batteries
loaded
in
the
keyboard,
remove
them.
*
Do
not
touch
the
batteries
directly
with
your
hands
when
removing
them.
They
may
be
hot
or
battery
fluid
may
be
leaking
from
them.
4,
Consult
with
the
dealer
where
you
purchased
the
keyboard
or
with
an
authorized
CASIO
service
provider.
Do
not
disassemble
or
modify
the
instrument.
*
Never
attempt
of
take
apart
or
modify
the
instrument,
its
accessories,
or
separately
sold
options.
Doing
so
may
cause
fire,
electrical
shock
or
malfunc-
tion.
Consult
your
dealer
concerning
all
inspection,
adjustment
or
repair
of
internal
components.
Do
not
use
if
there
is
an
abnormality
or
malfunction.
*
Do
not
use
the
instrument
if
there
appear
to
be
abnormalities
such
as
the
presence
of
smoke
or
abnormal
odor.
Also
do
not
use
the
instrument
if
there
appear
to
be
malfunctions
such
as
the
power
not
coming
on
or
sound
not
being
produced.
Use
under
such
conditions
may
cause
fire
or
electrical
shock.
In
such
cases,
take
the
following
actions
immediately.
Never
attempt
to
repair
the
instrument
yourself.
1.
Turn
power
off.
2.
Unplug
the
AC
adaptor
from
the
wall
outlet.
3.
If
there
are
any
batteries
loaded
in
the
keyboard,
remove
them.
*
Do
not
touch
the
batteries
directly
with
your
hands
when
removing
them.
They
may
be
hot
or
battery
fluid
may
be
leaking
from
them.
4.
Consult
with
the
dealer
where
you
purchased
the
keyboard
or
with
an
authorized
CASIO
service
provider.
When
the
instrument
has
been
dropped:
*
In
the
case
the
instrument
has
been
dropped
or
damaged,
take
the
following
actions.
Continued
use
may
cause
fire
or
electrical
shock.
1.
Turn
power
off.
2.
Unplug
the
AC
adaptor
from
the
wall
outlet.
3.
If
there
are
any
batteries
loaded
in
the
keyboard,
remove
them.
*
Do
not
touch
the
batteries
directly
with
your
hands
when
removing
them.
They
may
be
hot
or
battery
fluid
may
be
leaking
from
them.
4,
Consult
with
the
dealer
where
you
purchased
the
keyboard
or
with
an
authorized
CASIO
service
provider.
Be
careful
of
the
bags
around
children.
*
Never
allow
anyone
to
place
the
plastic
bags
of
the
instrument,
its
accessories,
and
its
separately
sold
options
over
their
heads,
Doing
so
may
cause
suffoca-
tion.
Particular
caution
is
required
in
homes
with
small
children.
>
@
>
JN
CAUTION
AC
Adaptor
*
Do
not
locate
the
power
cord
in
close
proximity
to
heaters
or
other
heating
appliances.
This
may.cause
the
cord
to
melt
leading
to
possible
fire
or
electri-
cal
shock.
*
When
unplugging
the
AC
adaptor
from
an
electrical
outlet,
always
make
sure
to
pull
on
the
adaptor
itself
and
not
the
cord.
Pulling
excessively
on
the
cord
may
cause
it
to
be
damaged
or
break
leading
to
possible
fire
or
electrical
shock.
Do
not
touch
the
AC
adaptor
with
wet
hands
when
it
is
plugged
in.
This
may
cause
electrical
shock.
*
When
not
using
the
instrument
for
an
extended
period
such
as
when
traveling,
always
make
sure
to
unplug
the
AC
adaptor
from
the
electrical
outlet
for
safety
reasons.
After
use
turn
off
the
power
switch
of
the
instrument
and
unplug
the
AC
adaptor
from
the
electrical
outlet.
Batteries
«
Improper
battery
use
may
cause
batteries
to
rupture
and
leak.
This
may
cause
injury,
malfunction
of
the
instrument
or
discoloration
of
furniture
and
other
articles
that
come
into
contact
with
battery
fluid.
Take
care
to
observe
the
following.
*
Install
batteries
so
their
polarity
(+/—)
matches
that
indicated
on
the
instru-
ment.
¢
For
safety
and
to
prevent
possible
leakage
of
battery
fluid,
always
make
sure
to
remove
batteries
from
the
instrument
when
you
do
not
plan
to
use
it
for
a
long
time.
e
Always
make
sure
that
the
batteries
making
up
a
set
are
all
of
the
same
type.
*
Never
combine
new
batteries
with
old
ones.
°
Never
dispose
of
batteries
by
incinerating
them.
Never
short
or
disassemble
batteries,
and
do
not
expose
them
to
excessive
heat.
*
Replace
dead
batteries
as
soon
as
possible.
*
Never
attempt
to
recharge
batteries.
Transport
*
When
transporting
the
instrument,
always
make
sure
to
unplug
the
AC
adap-
tor
from
the
electrical
outlet
and
confirm
that
all
other
external
connections
have
been
disconnected.
Only
then
should
the
instrument
be
transported.
If
the
above
is
not
done,
the
cord
may
be
damaged
leading
to
possible
fire
or
electrical
shock.
Care
;
¢
Whenever.caring,
make
sure
to
first
unplug
the
AC
adaptor
from
the
electrical
outlet.
Also
remove
the
instrument's
batteries
if
battery
power
is
being
used.
Location
*
Never
locate
the
instrument
in
areas
subject
to
high
humidity
or
heavy
accu-
mulation
of
dust.
Doing
so
may
cause
fire
or
electrical
shock.
*
Never
locate
the
instrument
in
areas
subject
to
grease
splatters
or
steam,
such
as
in
a
kitchen
or
near
a
humidifier.
Doing
so
may
cause
fire
or
electrical
shock.
Do
not
place
keyboard
on
lacquered
furniture.
*
The
instrument’s
silicone
rubber
feet
may
eventually
blacken
or
scar
lac-
quered
surfaces.
Use
felt
cloth
pads
to
insulate
the
feet
or
preferably
use
a
CASIO
musical
instrument
stand
designed
for
your
keyboard.
E-6
@
>
@

Contents
Main
Features
..........
sevecneousvenasousavanasrenesacnscevsneceseccessssssssssnnetverserncesucsssntssecssarsesensasesens
EO
Safety
Precautions
wesssssesssccsssssssssesssssessesessassssescnesescscusessesazssecstosesersevesescesssesscestececene
En
Care
of
Your
Keyboard
............0.
seeevevesanerenenceeans
sdudceu
cobtonssncsecoadede
Control
Locations
.........
setieeesteate
tuaadexeiewloeceuens
suis
sovesnsutinnscaagesscd
eb
vabuntenseveescvecccuo
soveesee
E12
Quick
Reference
.........s.0
To
switch
power
On
and
Off
........ccccsssssssessssvescessssesesecsecsersecessserees
E14
To
Change
toneS..........sssseecsere
To
switch
Touch
Response
on
and
o
To
play
the
demo
tunes
soSachdasessnsansivacchcosediedsctocvassosid
sees
vavieventescssiseasebesveessososs
voesto
Using
effects
0...
cesses
To
select
an
effect
............00
To
switch
effecs
on
and
off
To
select
and
play
a
rhythm...
Using
auto-accompaniment
To
play
a
CASIO
CHORD
auto-accompaniment
To
play
a
FINGERED
auto-accompaniment....
To
start
an
accompaniment
with
synchro
start
Adjusting
the
accompaniment
volume
...
To
adjust
the
accompaniment
volume
..
Using
the
musical
pads
.............000
E-16
To
play
a
pad...,
E-16
To
change
the
pad
fu
E-16
Using
the
Song
Memory......
E-17
To
record
to
Song
Memory
ses
To
play
back
a
song
from
Song
Memory...
Using
Magical
Presets
...........ccessssssssscseseseene
E-18
To
tune
the
keyboard
....
To
transpose
the
keyboard
To
set
the
touch
sensitivity
......
ocevdadeapraeetansaneses
Part
1
Before
using
the
keyboard
.....s..ssssssesssssssessessscessssessescsessnsesasernecsseeesees
.
E-19
About
the
power
supply
Installing
the
batteries
Using
AC
power............
Auto
Power
Off
Function
.....
To
cance!
the
Auto
Power
Off
About
settings
and
memory
contents
.
General
overview
of
the
operation
..
How
the
display
shows
data.....
.
E-22
About
the
MOdeS
.....-csesesssesesscssssessnsssnsssssssesesscesccssestsceeesssnssssvussessssesssasssssssstsssaneansansaaviesesseessecsennsocen
E-23
Part
2
Basic
operations.
.........sssessseccosssscsseseore
sabevedeustesnaces
eusensecssosscersennsnsnecssaresssecre
M24
To
switch
power
on
and
off
...
E-24
To
change
tones.....
.
E24
Digital
Sampling
a
Polyphony
............
About
drum
sounds
...
Touch
Response
To
switch
Touch
Response
on
and
off
.
Using
the
PITCH
BEND
wheel...............
Tones
that
are
best
suited
for
use
with
the
PITC
E-8
PITCH
BEND
wheel
techniques
....
wo
E26
Bend
range
uu...
esceeeeees
.
E-26
Using
the
modulation
button
E-26
Playing
the
demo
tunes......
E-27
To
start
demo
tune
play
E-27
To
stop
demo
tune
piay
E-27
Using
effects...............
se
E-28
Types
of
effects
.
E-28
To
select
an
effect
....
E-29
To
switch
effects
on
and
off.
E-29
Playing
rhythms...
..
E-29
To
select
and
play
a
rhythm
....
E-29
Improvising
with
the
preset
patterns
.
.
E-30
To
play
intro
and
ending
pattems
...
E-31
Display
Data
........cceessscsesenees
E-31
Using
auto-accompaniment
.....
.
E-32
About
the
accompaniment
keyboard
..
E-32
Using
the
CASIO
CHORD
system.......
E-32
To
play
a
CASIO
CHORD
auto-accompanimen
E-33
Using
standard
fingerings
.......0....csecceccecssess
E-33
To
play
a
FINGERED
auto-accompaniment...
E-34
To
start
an
accompaniment
with
synchro
start
..
E-35
Improvising
with
the
preset
accompaniment
patterns
..
E-35
Switching
auto-accompaniment
parts
on
and
off...
E-36
Mixer
(Accomp
mixer)
.....
.
E-36
How
Mixer
works
...........
-
To
change
a
Mixer
parameter
..
Using
Full-Range
Chords
.............
To
play
a
FULL
RANGE
CHORD
auto-accompaniment
Adjusting
the
accompaniment
volume
......
To
adjust
the
accompaniment
volume
Part
3
Advanced
Operations
.
Mixer
(Tone
Expander)
....
How
Mixer
works
.....
To
change
a
Mixer
parameter
Using
the
Split
function
....
To
split
the
keyboard
......
To
change
the
location
of
the
split
point
To
unsplit
the
keyboard
......
Using
the
Layer
function
To
layer
tones
«0.0...
To
unlayer
the
keyboard......
Using
Split
and
Layer
together
To
split
and
layer
the
keyboard
..
Using
the
musical
pads
..............
‘Types
of
operations
available
for
the
pads
To
change
the
pad
functions
............
Changing
the
musical
pad
parameters
How
Mixer
WOrkS
......seeccesesceeeees
To
set
musical
pad
parameters
..
Assigning
rhythms
to
the
Intro,
Variation,
and
Eni
ing
Buttons
..
To
change
the
Intro,
Fill-in,
and
Ending
button
rhythm
assignments
Using
Magical
Presets
To
change
the
Magical
Preset
..
To
switch
Magical
Preset
off.
About
Magical
Presets
....
Break
Beat
(00
to
17)
Melodycomp
(18
to
25)
Shadow
Drum
(26
to
29)
..seecssesssessesssseessscenseanersnecsersnsssuesnsessnscensenanersnscsnersesecsasccsasccnancunncnssnesssssseesseeset
E-50
Free
Session
(30
to
49)
.....
Using
TONE
button
with
Magical
Presets
.
To
Change
the
tone
........scsereersceeererees
Using
the
Registration
function
.
To
store
a
set-up
....
To
recall
a
setup.
ie
Assignable
jack
........
.
E-53
To
change
the
assignable
jack
function
oo
ae
Part
4
Song
MEMOry....sccsssssrsescssssenersenerenssenesennceners
How
Song
Memory
works
Recording
to
Song
Memory
Song
Memory
capacity
To
record
a
base
track
(TRACK
a
to
ated
Memory
About
Song
Memory
data
..
How
Mixer
settings
are
stor
te
Multi-Track
Recording
...........
.
E-58
What
is
a
track?
.........
..
E-58
How
tracks
are
organized
..
es
Ways
to
use
multi-track
recording
To
perform
a
multi-track
recording
..
Recording
Mixer
settings
..........
General
Operation
..ccceerereereees
To
change
a
Track
Mixer
parameter
.
E-61
Playing
back
from
Song
Memory
.......
E-62
To
play
back
a
song
from
Song
Memory
...
..
E-62
Deleting
tracks
from
Song
Memory.......
.
E-63
To
delete
a
track
from
Song
Memory
Part
5
Other
Settings...
To
tune
the
keyboard
..
..
E-65
«E65
To
transpose
the
keyboa
To
set
the
touch
sensitivity
.
E-66
Part
6
Using
MIDI
........sssssssereeees
cs
aa
ol
desea
bunebubusapipoemmuvoxtensatedaas
er
O
lr
What
iS
MIDI?
....cccsssssscssscessssecsesscsessesecsssnesessescessersssnencnsnsernenensegnenssseassennnennanenasansaseesensessesees
E-67
£-67
MIDI
Terminals
MIDI
Channels
E-67
General
MIDI.....
..
E-68
Number
of
Voices
..
E-68
MIDI
Channels
....
E-68
Number
of
Tones...
E-68
Receivable
MIDI
Messages
..
£-68
Built-in
Digital
Effects
....
E-68
MIDI
Operations
............
..
E-69
Sending
Data
from
the
WK-1500.
E-69
Sending
Data
to
the
WK-1500........
E-69
WK-1500
Send/Receive
MID!
Messages
..
E-69
Receive
Only
MIDI
Messages
..............
E-71
Song
Memory
Contents
and
Demo
Tunes
E-72
Touch
RESPONSE
.....:seeeeeteoreees
E-72
Stereo
Position
and
Effect
Depth
E-72
Musical
Pads
.......-ssrerceee
E-72
MIDI
Implementation
Chart...
E-72
MID!
Channel
Operations
.....
.
E-72
Specifying
the
Basic
Channel...
E-72
Turning
a
Specific
MIDI
Channel
On
and
w
E74
E-10
MIDI
Monitor
Changing
MiD!
Settings
Selecting
Parameters
..
Changing
Parameter
Settings
..
MIDI
channel
parameter
setting
...
Part
7
Technical
Reference
....-...s.cssssssssssssnssesenssesceesene
isauavesecs
“icalivislostbceeuagheacsidences’
EOD
Troubleshooting
Specifications
...........+-
Part
8
Appendix
.....-.sesseorssscsensaeers
sapccececeacsnurenecenessecenensenersacanensaseasmenaeas
we
Ant
Melodycomp
Chord
Chatts
........--ssssssscsecsssreneerieerntsetsees
see
we
Ais
Free
Session
Chord
Progression
Chart:
Key
of
C
Note
Table
.......:sssceccecseree
Drum
Assignment
List
.
Fingered
Chord
Chart
E-11

aa
Control
Locations
Assembling
the
Music
Stand
Firmly
press
the
music
stand
provided
with
the
keyboard
all
the
way
into
the
groove
on
the
top
of
the
keyboard.
(First
align
the
left
edge
of
the
music
stand
with
the
left
end
of
the
groove,
press
it
into
the
groove,
and
then
press
the
right
edge
into
the
right
end
of
the
groove.)
E-12
@
SPEAKER
@
Modulation
button
@
KEYBOARD
@
PITCH
BEND
wheel
®
POWER
button
©
MODE
button
@
VOLUME
slider
START/STOP
button
©
INTRO
button
@
NORMAL/FILL-IN
button
@
VARIATION/FILL-IN
button
@
SYNCHRO/ENDING
button
®
DIGITAL
EFFECT
button
@
TEMPO
buttons
®
TOUCH
RESPONSE
button
TRANSPOSE/TUNING
button
@
MIDI
button
noannnnaag
0}
Offs
‘On|
ORS
|
Osfto!
|
|
ACCOMP
VOLUME
button
MAGICAL
PRESET
button
@
RHYTHM
button
@
TONE
button
@
PAD
button
@
MULTI
FUNCTION
DISPLAY
@
10-key
pad
@
[+]
and
{-]
buttons
@
MIXER
button
@
SONG
MEMORY
button
CHANNEL
selectors
®
SPLIT
button
@
LAYER
button
@
REGISTRATION
button
@
MUSICAL
PAD
buttons
@
DEMO
button
[Rear
Panel]
MIDI
OUT
terminal
J
MIDI
IN
terminal
ASSIGNABLE
JACK
For
connection
of
an
optional
pedal
(SP-2
or
SP-10).
Ey
PHONES/OUTPUT
jack
For
connection
of
commercially
available
headphones.
Output
from
speakers
is
automatically
cut
when
headphones
are
connected.
DC12V
jack
For
connection
of
an
optional
AC
adaptor
(AD-12).
E-13

=a
Quick
Reference
This
part
of
the
manual
provides
a
brief
overview
of
keyboard
operation.
This
is
meant
for
experi-
enced
users,
so
be
sure
to
read
the
rest
of
the
manual
for
details
before
trying
to
actually
use
the
keyboard.
Mi
To
switch
power
on
and
off
(Page
E-24)
Nga
Press
the
POWER
button
to
switch
power
on
and
off.
vy
POWER
ee
MH
To
change
tones
(Page
E-24)
4.
Press
the
TONE
button.
2
FONT
LN
mn
1
£& (%
2,
Use
the
10-key
pad
to
input
the
3-digit
number
that
identi-
—
0
se)
Q
fies
the
tone
you
want
to
select.
Hi
h
j
009
q0Qg
OrO-O0
—
To
switch
Touch
Response
on
and
off
(Page
E-25)
ead
:
Press
the
TOUCH
RESPONSE
button
to
switch
Touch
Response
on
and
off.
RESPONSE
@
To
play
the
demo
tunes
(Page
E-27)
Press
the
DEMO
button
to
start
and
stop
demo
tune
play.
d
Pa
CO
@
Using
effects
(Page
E-28)
To
select
an
effect
‘
wi
a
1.
Press
the
DIGITAL
EFFECT
button
to
switch
digital
effects
on.
EFFECT
(=)
2.
Use
the
10-key
pad
to
input
the
number
for
the
effect
you
want
to
use.
To
switch
effects
on
and
off
il
Press
the
DIGITAL
EFFECT
button
to
switch
the
currently
selected
effect
on
and
Breer
off.
Cc)
E-14
m@
To
select
and
play
a
rhythm
(page
E-29)
o
masse
4.
Use
the
MODE
button
to
enter
the
NORMAL
mode
(all
MODE
indicators
unlit).
MODE
©
FINGERED
C)
©
casio
cHOAD
va
2.
Press
the
RHYTHM
button.
O
‘s
0
3.
aga
ca
Lasialid
io
the
2-digit
rhythm
number
for
r
fi
A
ogg
:
goQ
OrO0-0
jet
4.
Press
the
START/STOP
button
to
start
play
of
the
rhythm.
fan
2
5.
To
stop
rhythm
play,
press
the
START/STOP
button
again.
m@
Using
auto-accompaniment
(page
E-32)
To
play
a
CASIO
CHORD
auto-accompaniment
o
BALMNE
1.
Use
the
MODE
button
to
select
CASIO
CHORD.
woe
©
FINGERED
(
}
@
CASIOCHORD
2.
Select
an
auto-rhythm.
3.
Start
play
of
the
rhythm.
_
Press
either
one
or
up
to
four
keys
on
the
accompaniment
keyboard
(page
E-32),
and
the
corresponding
accompaniment
starts
to
play
automatically.
5.
Continue
pressing
different
keys
on
the
accompaniment
keyboard.
2
6.
To
stop
auto-accompaniment
play,
press
START/STOP
again.
START
STOP
To
play
a
FINGERED
auto-accompaniment
aunwoe
4.
Use
the
MODE
button
to
select
FINGERED.
©
cHoro
MOOE
@
FINGERED
(Jo
mecw
5
Select
an
auto-rhythm.
3.
Start
play
of
the
rhythm.
E-15

SE
SL
a
ESS
4.
Play
a
chord
on
the
accompaniment
keyboard
(page
E-32)
to
start
play
of
the
auto-accompaniment.
5.
Continue
pressing
keys
on
the
accompaniment
keyboard.
6.
To
stop
auto-accompaniment
play,
press
START/STOP
again.
°
START
STOP
To
start
an
accompaniment
with
synchro
start
1.
Use
the
MODE
button
to
select
either
CASIO
CHORD
or
FINGERED.
©
Blount
MODE
©
FINGERED
C)
sama
>
Select
a
rhythm.
3.
Press
the
SYNCHRO/ENDING
button.
At
this
time,
the
TEMPO
indicator
Symcuacr
lights.
ff
4.
Play
a
chord
on
the
accompaniment
keyboard.
5.
To
stop
the
accompaniment
pattem,
press
START/STOP
again.
M
Adjusting
the
accompaniment
volume
(Page
E-39)
Use
the
following
procedure
to
set
the
volume
that
the
accompaniment
is
played.
You
can
set
the
volume
to
any
value
in
the
range
of
000
to
127.
To
adjust
the
accompaniment
volume
1.
Press
the
ACCOMP
VOLUME
button.
2.
Use
the
10-key
pad
to
input
a
3-digit
number
and
specify
the
accompaniment
volume
level.
@
Using
the
musical
pads
(Page
E-44)
To
play
a
pad
Simply
press
one
of
the
six
pads
to
play
the
sound
assigned
to
it.
To
change
the
pad
functions
1.
Press
PAD
button.
2.
While
the
function
set
number
is
on
the
display,
use
the
10-key
pad
to
input
the
number
of
the
set
of
functions
you
want
to
change
to.
E-16
@
Using
the
Song
Memory
(Page
E-55)
To
record
to
Song
Memory
1.
Set
up
the
keyboard
to
play
the
tune
you
want
to
play.
2.
Press
the
SONG
MEMORY
button
until
the
message
r
appears
on
the
display.
r
L
e
O
O
0
3.
Use
the
10-key
pad
to
input
0
or
1
to
specify
the
song
number.
20).
go09
OrO:0
e
4,
Press
TR1
button
to
select
track
1.
2
4
2
O
5.
Press
the
START/STOP
button
to
start
recording.
why
Bde
avis
Ch
6.
Play
the
song
that
you
want
to
record.
7.
After
the
song
is
finished,
press
the
START/STOP
button
to
stop
the
recording
Stor.
operation.
To
play
back
a
song
from
Song
Memory
1.
Press
the
SONG
MEMORY
button
until
the
message
}
appears
on
the
display.
p
L
Yy
e
O
2.
Use
the
10-key
pad
to
input
0
or
1
to
specify
the
song
number.
O04
QG
og
go0Q
Or0+0
3.
Press
TR1
button
to
select
track
1.
See
4.
Press
the
START/STOP
button
to
start
playback.
Sthet
STOP
E-17

AER
a
TI
ICIS
EIST
@
Using
Magical
Presets
(Page
E-49)
1.
Press
the
MAGICAL
PRESET
button,
and
the
number
that
identifies
the
current
Magical
Preset
appears
on
the
display.
Aly
7aN
MAGICAL,
PRESET
2.
Use
the
10-key
pad
to
input
the
number
of
the
Magical
Preset
you
want
to
change
to.
3.
The
keyboard
is
now
assigned
the
Magical
Preset
that
you
specified
in
the
above
procedure.
@
To
tune
the
keyboard
(Page
E-65)
TRANEPOSE/
1.
Press
the
TRANSPOSE/TUNE
button
until
appears
on
the
display.
OB
0
0
2.
Use
the
10-key
pad’s
[+]
and
[—]
buttons
to
tune
the
keyboard.
000
eielgie,
OrO40
@
To
transpose
the
keyboard
(Page
E-65)
TRANSPOSE!
1.
Press
the
TRANSPOSE/TUNE
button
until
appears
on
the
display.
TUNE
aE
2.
Use
the
10-key
pad’s
[+]
and
[-]
buttons
to
select
a
key.
OO-O-0-
O-0-0-0-
O-0-0-0-
@
To
set
the
touch
sensitivity
(Page
E-se)
e
1.
Press
the
TOUCH
RESPONSE
button.
‘comenans
Une
2.
Use
the
10-key
pad
to
input
the
number
that
identifies
the
touch
sensitivity
you
want
to
use.
E-18
About
settings
and
memory
contents
«
Whenever
power
is
switched
off
by
pressing
the
POWER
button
or
by
operation
of
the
Auto
Power
Off
function,
tone
and
rhythm
settings,
Song
Memory
contents
(page
E-55),
and
Registration
Memory
contents
(page
E-52)
are
retained.
All
of
these
settings
and
memory
data
items
are
available
when
you
switch
power
on
again.
*
The
settings
and
data
described
above
are
retained
while
power
is
switched
off
as
long
as
electrical
power
is
supplied
to
the
unit.
This
means
that
if
you
remove
batteries
or
if
batteries
go
dead,
and
you
disconnect
the
unit
from
an
externa!
power
supply
(AC
adaptor),
settings
and
data
stored
in
memory
will
all
be
lost.
¢
Note
that
the
following
settings
are
not
retained
when
power
is
switched
off,
and
they
are
initialized
whenever
you
switch
power
on.
;
_[Leeeat
conver
ower
Mixer
parameter
FEU
CEU,E
PS:
127
e
Auto
accompaniment
tones:
default
tones
E-21

SSS
SSS
IE
a
a
EES
@
General
overview
of
the
operation
This
section
provides
a
general
overview
of
main
operations.
it
mainly
focuses
on
how
the
display
shows
data
and
how
to
change
between
different
modes.
Be
sure
to
read
this
section
before
using
the
keyboard
for
the
first
time.
How
the
display
shows
data
The
3-digit
display
is
used
to
show
a
variety
of
numeric
data
and
other
indicators.
An
indicator
on
the
display
also
tells
you
what
kind
of
data
is
currently
displayed.
Sample
Display
Indicator
Meaning
(808)
(de.5)
|
Tone
number
display
|
[eon]
|
Rhythm
number
display
(standard)
Rhythm
number
display
(for
rhythm
assigned
to
INTRO,
NORMAL/FILL-
IN,
VAR/FILL-IN,
or
SYNCHRO/ENDING
buttons).
This
display
appears
only
when
you
press
INTRO,
NORMAL/FILL-IN,
VAR/FILL-IN
or
SYNCHRO/ENDING,
to
identify
the
number
of
the
rhythm
assigned
to
the
button.
After
a
few
seconds
the
display
returns
to
the
normal
rhythm
display.
Magical
Preset
number
display
Musical
Pad
function
number
display
E-22
About
the
modes
With
the
keyboard,
you
must
enter
various
modes
in
order
to
perform
certain
operations.
This
section
describes
the
main
modes
of
the
keyboard.
[Button
[Mode
SSSSS~«C
pts
The
keyboard
plays
like
a
standard
piano
or
organ.
NORMAL
This
mode
is
selected
when
ail
the
MODE
indicators
are
unlit.
You
can
use
the
auto-accompaniment
functions
de-
CASIO
CHORD
scribed
on
page
E-32.
You
can
finger
chords
as
you
normaily
do,
and
have
the
accompaniment
pattem
follow
along
with
you
(page
E-33).
FULL
RANGE
You
can use
the
entire
range
of
the
keyboard
for
CHORD
FINGERED
play
and
melody
play
(page
E-38).
MAGICAL
Use
this
mode
to
select
the
Magical
Preset
function
PRESET
MAGICAL
PRESET
you
want
to
use
(page
E-49).
|
pemo
=
{|
=
DEMO
Use
this
mode
to
play
the
demo
tunes
(page
E-27).
Use
this
mode
to
record
songs
to
and
play
songs
SONG
MEMORY
|
SONG
MEMORY
back
from
memory
(page
E-55).
This
mode
lets
you
set
up
the
keyboard
to
exchange
data
with
another
MID!
device
(page
E-67).
Use
this
mode
to
split
the
keyboard
between
two
SPLIT
SPLIT
different
tones
(page
E-41).
Use
this
mode
to
assign
two
different
tones
to
each
LAYER
LAYER
keyboard
key
(page
E-42).
Use
this
mode
to
select
the
digital
effect
you
want
to
DIGITAL
EFFECT)
DIGITAL
EFFECT
use
(page
E-28).
Use
this
mode
to
play
30
sets
of
phrases,
sound
MUSICAL
PAD
MUSICAL
PAD
effects,
and
percussion
sounds
(page
E-44).
FINGERED
E-23

|
Part
2°
Basic
operations
This
part
of
the
manual
provides
you
with
the
basic
information
you
need
to
use
your
keyboard.
@
To
switch
power
on
and
off
1.
Press
the
POWER
button
to
switch
power
on.
The
indicator
above
the
button
is
lit
while
power
is
on.
aly
-e-
“ys
POWER
C
2.
Adjust
the
volume.
VOLUME
*
Be
sure
to
adjust
the
volume
to
a
relatively
low
setting
before
playing
the
mie
keyboard.
r
MIN
3.
Press
the
keyboard
keys.
¢
Adjust
the
volume
to
the
level
you
want
while
playing
the
keyboard.
°
pilates
es
switch
power
on,
the
tone
that
was
selected
when
you
last
switched
power
off
is
still
selected.
4.
To
switch
power
off,
press
the
POWER
button
again.
°
POWER
Gy
@
To
change
tones
1,
Look
at
the
tone
list
printed
on
the
music
stand
and
find
the
one
you
want.
¢
A
total
of
128
tones
and
8
drum
sounds
are
available.
2.
Press
the
TONE
button.
1
¢
The
number
for
the
tone
that
is
currently
selected
is
shown
on
the
display.
3.
Use
the
10-key
pad
to
input
the
3-digit
number
that
identifies
the
tone
you
want
to
select.
0
¢
Use
the
numeric
buttons
to
input
a
3-digit
number.
<
*
Youcan
also
use
the
[+]
and
[-]
buttons.
Pressing
[+]
increases
the
displayed
OQ
tone
number
by
1,
while
[-]
decreases
it.
(ieee
Be
sure
to
always
specify
a
3-digit
number.
A
¢
Input
of
any
number
greater
than
135
is
ignored.
.
*
If
you
discover
a
mistake
before
you
input
the
third
digit,
press
the
TONE
button
to
return
to
the
previously
set
tone
number.
:
ET
I
SSE
SECT
NT
Digital
Sampling
Number
of
the
tones
that
are
available
with
this
keyboard
have
been
recorded
and
processed
using
a
technique
called
digital
sampling.
To
ensure
a
high
level
of
tonal
quality,
samples
are
taken
in
the
low,
mid,
and
high
ranges
and
then
combined
to
provide
you
with
sounds
that
are
amazingly
close
to
the
originals.
You
may
notice
very
slight
differences
in
volume
or
sound
quality
for
some
tones
when
you
play
them
at
different
positions
on
the
keyboard.
This
is
an
unavoidable
result
of
multiple
sampling,
and
it
is
not
a
sign
of
malfunction.
Polyphony
The
term
polyphony
refers
to
the
maximum
number
of
notes
you
can
play
at
the
same
time.
This
keyboard
has
32-note
polyphony,
which
includes
the
notes
you
play
as
well
as
the
rhythms
and
auto-
accompaniment
patterns
that
are
played
by
the
keyboard.
This
means
that
when
a
rhythm
or
auto-
accompaniment
pattern
is
being
played
by
the
keyboard,
the
number
of
notes
(polyphony)
available
for
keyboard
play
is
reduced.
Also
note
that
some
of
the
tones
offer
only
16-note
polyphony.
@
About
drum
sounds
Tone
numbers
128
through
135
are
drum
sounds,
that
you
can use
to
drum
notes
on
the
keyboard.
When
you
select
one
of
these
tones,
the
display
shows
a
value
from
through
de’
indicating
that
these
are
drum
sounds).
The
percussion
sounds
that
are
available
are
illustrated
on
the
keyboard’s
console.
Note
that
the
lower
7
keys
and
upper
16
keys
that
are
not
marked
do
not
produce
any
drum
sounds
when
pressed.
m@
Touch
Response
Touch
Response
makes
it
possible
for
the
keyboard
to
match
the
power
of
the
note
produced
with
the
amount
of
pressure
you
use
to
press
the
keyboard
keys.
Note
that
beginners
or
those
with
insufficient
strength
in
their
fingers
can
use
the
procedure
to
switch
Touch
Response
off.
To
switch
Touch
Response
on
and
off
Press
the
TOUCH
RESPONSE
button
to
switch
Touch
Response
on
and
off.
jet
*
When
Touch
Response
is
switched
off,
the
notes
produced
by
the
keyboard
are
Tobcx
not
affected
by
the
keyboard
pressure.
=
*
Touch
Response
is
on
when
the
TOUCH
RESPONSE
indicator
is
lit.
Cc
¢
Touch
Response
is
not
applied
to
the
accompaniment
keyboard
when
you
are
using
auto-accompaniment
(page
E-32).
It
is,
however,
applied
to
the
melody
keyboard.
¢
The
TOUCH
RESPONSE
button
is
automatically
deactivated
whenever
a
dem-
onstration
tune
is
playing.
*
You
can
also
adjust
the
Touch
Response
sensitivity
using
the
procedures
described
on
page
E-66.
E-25

LL
@
Using
the
PITCH
BEND
wheel
Rotating
the
PITCH
BEND
wheel
raises
and
lowers
the
pitch
of
the
tones
you
play
on
the
keyboard.
Use
it
to
add
interesting
effects
to
your
performances.
Tones
that
are
best
suited
for
use
with
the
PITCH
BEND
wheel
Use
tones
that
continue
to
sound
as
long
as
you
keep
a
keyboard
key
pressed,
such
as
the
STRINGS,
SYNTH-LEAD
and
SYNTH
BASS
tones.
PITCH
BEND
wheel
techniques
Releasing
the
finger
from
the
wheel
regains
the
original
pitch.
Pitch
lowers
*
You
can
add
vibrato
to
a
note
by
moving
the
PITCH
BEND
wheel
slightly
forward
and
back
as
the
note
is
sounding.
When
you
release
the
wheel,
the
note
returns
to
its
original
status.
Try
changing
the
pitch
of
a
note
after
it
is
sounding.
*
Another
interesting
effect
is
produced
by
tuming
the
PITCH
BEND
wheel
before
pressing
the
keyboard.
Then,
after
the
note
starts
to
sound,
either
release
the
PITCH
BEND
wheel
or
change
its
setting.
Bend
range
*
The
PITCH
BEND
wheel
is
initially
set
for
a
range
of
two
semitones
in
either
direction
(up
or
down).
You
can
increase
this
up
to
a
range
of
12
semitones
(page
E-78).
@
Using
the
modulation
button
Pressing
the
modulation
button
while
a
note
is
sounding
adds
vibrato
to
the
note.
Vibrato
is
turned
off
when
you
release
the
modulation
button.
Modulation
button
i
121
afhd
ie
Es
Dae)
AAA
*
Applicable
tones
Tones
that
continue
to
sound
as
long
as
a
keyboard
key
is
depressed.
The
modulation
button
is
best
used
with
wind
instruments
and
synthetic
reed
instruments.
¢
Example
While
depressing
a
keyboard
key,
press
the
modulation
button
to
add
vibrato.
E-26
an
ea
*
Vibrato
depth
adjustment
;
a
You
can
adjust
the
depth
of
the
vibrato
in
steps
of
50
cents
(100
cents
equals
one
semitone)
within
a
range
of
000
to
127.
The
initial
setting
is
64.
For
details
on
setting
the
vibrato
depth,
see
“Modulation
Depth”
on
page
E-78.
©
Note
.
Pressing
the
modulation
button
while
channel
10
(percussion-only
channel)
is
selected
does
not
apply
vibrato
to
the
percussion
sound.
However,
the
modulation
data
is
output
from
the
MID]
OUT
terminal.
@
Playing
the
demo
tunes
This
keyboard
comes
with
the
following
three
pre-recorded
demo
tunes
that
you
can
use
for
practice
or
simply
for
your
listening
enjoyment.
Tune
:
.
er
Play
Time
Oy
VILLAGE
WINGS
Kei
Akagi
bane
|
Talkin’
Half
The
Night
|
Edward
Alstrom
|
203
|
za
Clear
as
crystal
Hiroki
Koga
*
Note
that
you
cannot
start
playback
of
a
demo
tune
while
you
are
recording
to
Song
Memory
(page
E-55).
To
start
demo
tune
play
1.
Switch
power
on
and
adjust
the
volume
level.
2.
Press
the
DEMO
button.
¢
Demo
tune
play
continues
in
a
sequential
endless
loop
until
you
switch
it
off.
*
The
number
of
the
demo
tune
currently
playing
is
shown
on
the
display.
C)
*
You
can
play
along
on
the
keyboard
while
a
demo
tune
is
playing
back.
3.
You
can
change
the
demo
tune
being
played
by
pressing
[+]
(to
advance)
or
[—]
(to
move
back)
in
the
10-key
pad.
2
O
Oo
*
You
can
also
use
the
10-key
paa’s
[0],
[1]
and
[2]
buttons
to
specify
the
demo
Q
tune
number.
O-0-0-
O-0O-0-
0-0-0
To
stop
demo
tune
play
Press
the
DEMO
button
again
or
START/STOP
button
to
stop
Demo
tune
play.
me)
E-27

@
Using
effects
A
total
of
10
digital
effects
can
be
applied
to
the
keyboard's
tone
to
create
exactly
the
mood
that
you
want
for
your
music.
Note
that
only
one
effect
can
be
selected
at
a
time.
Types
of
effects
[
etecriumer
[Benepe
sd
oats
hh
bs os
TREMOLO
Causes
pulsating
sound.
Recommended
for
electric
piano
or
vibraphone.
Like
a
rotating
speaker
on
an
electronic
organ.
ORGAN
SP
Recommended
for
organ
tones.
ENHANCER
‘Strong
attack
effect
FLANGER
Adds
depth
and
sharpness.
Recommended
for
bass
sounds.
EQ
LOUDNESS
Enhances
low
range.
*
Digital
effects
are
applied
to
notes
played
on
the
keyboard,
pad
sounds,
rhythms,
and
auto-
accompaniments.
.
¢
Effects
F
-
J
through
£
-
8
are
quite
strong,
and
may
cause
problems
for
the
tone
you
are
trying
to
play.
When
this
happens,
change
the
accompaniment
mixer
setting
to
000,
which
switches
the
rhythm
and
auto-accompaniment
effects
off
(page
E-37).
*
Depending
on
the
tone
and
rhythm
you
are
using,
the
EQ
LOUDNESS
effect
may
cause
distortion
at
high
volume
settings.
When
this
happens,
try
lowering
the
volume.
E-28
To
select
an
effect
1.
Press
the
DIGITAL
EFFECT
button
to
switch
digital
effects
on.
7
*
When
you
do,
the
DIGITAL
EFFECT
indicator
lights.
—
rt
oan
ct
=
se
Lu
2.
Use
the
10-key
pad
to
input
the
1-digit
number
for
the
effect
you
want
to
use.
To
select
REVERB
1,
for
example,
input
0.
2 :
»
¢
You
can
also
use
the
[+]
and
[-]
buttons.
-fim
fe.
t.....
0
O
s)
Pressing
[+]
increases
the
displayed
effect
E
or
©
E
‘
f
2
g
000
number
by
1,
while
[-]
decreases
it.
«
:
Or-O«0
¢
Preset
effects
are
automatically
selected
whenever
you
play
a
demo
tune.
These
presets
cannot
be
changed
or
switched
off
during
demo
tune
play.
*
if
you
change
the
effect
while
a
note
is
still
sounding,
the
keyboard
may
make
an
irregular
sound
when
the
effect
change
is
made.
To
switch
effects
on
and
off
2
Press
the
DIGITAL
EFFECT
button
to
switch
the
currently
Errect
selected
effect
on
and
off.
0
rc
f
c=
@
Playing
rhythms
This
keyboard
features
a
collection
of
100
exciting
built-in
rhythm
patterns.
Each
pattern
provides
percussion
back
up
for
all
your
performances.
To
select
and
play
a
rhythm
1,
Make
sure
that
power
is
switched
on
and
that
volume
is
adjusted
to
a
comfortable
level.
2.
Use
the
MODE
button
to
enter
the
NORMAL
mode
(all
MODE
indicators
unlit).
o
Bue
~e
Each
time
you
press
the
MODE
button,
the
All off
MODE
=)
FINGERED
status
of
the
indicators
changes
as
illus-
Sins
oee
trated
here.
‘a
CJ
@
©ULL
RANGE
CHORD
a
0
@
CASIO
CHORD
3.
Look
at
the
rhythm
list
printed
on
the
music
stand
and
find
the
one
you
want.
E-29

4.
Press
the
RHYTHM
button.
a
iad
*
When
you
do,
the
rhythm
indicator
lights.
ny7i
vA
*
The
number
that
appears
on
the
display
indicates
the
cur-
ruy
rently
selected
rhythm.
Rhythm
indicator
5.
Use
the
10-key
pad
to
input
the
2-digit
rhythm
number
for
the
rhythm
you
want
to
use.
To
select
“12
8
BEAT
1”,
for
example,
input
1,
2.
Oo
O
Oo
e
You
can
also
use
the
[+]
and
[-]
buttons.
Pressing
[+]
17
a
Oo
sles
hg
displayed
rhythm
number
by
1,
while
[-]
r
{
c
lecreases
it.
e
a)
O
QO
*
Be
sure
to
always
specify
a
2-digit
number.
p
+
©
Ifyou
discover
a
mistake
before
you
input
the
second
digit,
press
the
RHYTHM
OvO:
button
to
return
to
the
previously
set
rhythm
number.
6.
Press
the
START/STOP
button
to
start
play
of
the
rhythm.
Soe
«
When
you
do,
the
selected
rhythm
starts
to
sound,
with
the
indicator
above
the
Sey
START/STOP
button
flashes
with
each
beat.
7.
Use
the
TEMPO
buttons
to
adjust
the
tempo
of
the
rhythm.
TEMPO
*
When
you
press
one
of
the
TEMPO
buttons,
the
tempo
setting
appears
on
the
VV
7%,
display.
The
value
indicates
the
number
of
beats
per
minute.
The
display
returns
to
normal
shortly
after
you
release
the
TEMPO
button.
Each
time
you
press
one
of
the
TEMPO
buttons
while
the
tempo
value
is
displayed,
the
tempo
setting
changes
one
Step,
within
the
range
of
40
to
255.
*
Holding
down
either
of
the
TEMPO
buttons
changes
the
tempo
setting
at
high
speed.
*
To
reset
the
tempo
to
the
standard
value
of
each
rhythm,
press
both
TEMPO
buttons
at
the
same
time.
*
Be
sure
to
always
specify
a
3-digit
number.
8.
To
stop
rhythm
play,
press
the
START/STOP
button
again.
°
START
STOP
lm
improvising
with
the
preset
patterns
Pressing
the
START/STOP
button
to
start
rhythm
play
causes
the
normal
version
of
the
pattern
to
be
played.
You
can
also
play
a
variation
of
the
rhythm
using
the
operation
described
below.
°
START/
STOP
=
E-30
Important!
In
addition
to
the
variations
described
below,
you
can
also
assign
specific
rhythm
types
to
each
of
INTRO,
NORMAL/FILL-IN,
VAR/FILL-IN,
and
SYNCHRO/ENDING
buttons.
See
page
E-48
for
de-
tails.
*
Press
this
button
while
the
normal
rhythm
pattern
is
playing
in
order
to
switch
to
the
variation
pattern.
*
if
you
press
this
button
while
the
variation
pattern
is
playing,
a
one-measure
fill-in
pattern
is
played
and
then
play
of
variation
pattern
continues.
Press
this
button
while
the
variation
rhythm
pattern
is.
playing
in
order
to
switch
to
the
normal
pattern.
*
If
you
press
this
button
while
the
normal
pattern
is
playing,
a
one-measure
fill-
in
pattern
is
played
and
then
play
of
normal
pattern
continues.
*
Note
that
fill-in
patterns
can
logically
be
inserted
at
specific
locations
inside
a
chord
progression,
Because
of
this,
the
fill-in
pattern
may
not
sound
immediately
when
you
press
a
fill-in
button.
Instead,
it
will
sound
at
the
next
location
that
a
fill-in
pattern
is
possible.
To
play
intro
and
ending
patterns
*
When
no
rhythm
is
playing,
press
the
INTRO
button
instead
of
the
START/
STOP
button.
When
you
do,
an
intro
paitern
is
played
to
start
the
normal
version
of
the
selected
rhythm
pattern.
*
To
start
play
of
the
variation
pattern,
press
INTRO
and
then
VAR/FILL-IN.
*
While
a
rhythm
is
playing,
pressing
SYNCHRO/ENDING
instead
of
START/
STOP
plays
an
ending
pattern,
after
which
play
of
the
pattern
stops.
Display
Data
Pressing
any
of
the
above
buttons
causes
the
following
indication.
INTRO
button
VAR/FILL-IN
button
NORMAL/FILL-IN
button
n
Hi
i}
SYNCHRO/ENDING
button
F
Hi
i}
+
Each
of
the
buttons
can
be
assigned
a
different
rhythm
(page
E-48).
The
number
that
appears
on
the
display
is
the
number
of
the
rhythm
assigned
to
the
button
you
press.
E-31

@
Using
auto-accompaniment
This
keyboard
features
100
accompaniment
patterns
that
let
you
add
full
accompaniments
to
your
performances
automatically.
With
auto-accompaniment,
part
of
the
keyboard
is
reserved
as
an
accompaniment
keyboard.
As
you
play
your
chords
on
the
accompaniment
keyboard,
the
accompa-
niment
patterns
adjusts
automatically
to
follow
the
progression
you
play.
You
get
a
choice
between
two
different
methods
for
chord
play.
FINGERED
lets
you
play
chords
as
you
normally
do,
while
CASIO
CHORD
makes
it
possible
to
play
fully
formed
chords
with
one
finger.
Note
that
this
keyboard
also
features
a
FULL
RANGE
CHORD
system
(page
E-38)
that
lets
you
use
the
entire
keyboard
for
chord
and
melody
play.
About
the
accompaniment
keyboard
The
lower
26
keys
are
reserved
for
use
as
an
accompaniment
keyboard
whenever
you
select
CASIO
CHORD
or
FINGERED
with
the
MODE
button.
The
panel
above
the
accompaniment
keyboard
keys
is
marked
with
the
names
of
the
notes
they
play.
The
remainder
of
the
keyboard
(the
part
that
is
not
included
in
the
accompaniment
keyboard)
is
called
the
melody
keyboard.
Please
be
sure
to
remem-
ber
these
terms,
because
they
will
be
used
throughout
the
rest
of
this
manual.
Accompaniment
Melody
Keyboard
Keyboard
Accomp/Melody
Keyboard
Using
the
CASIO
CHORD
system
The
CASIO
CHORD
system
lets
you
easily
play
the
four
main
types
of
chords.
Play
of
chords
is
simplified
as
shown
in
the
chart
below.
Chord
Type
Cc
CIDIE{FIG!A|BIC|DIEIF
Pressing
one
Major
chord
accompaniment
keys
(C
Major
Chord)
Seventh
chord
Minor
seventh
chord
Cm
Pressing
two
(C
Minor
Chord)
accompaniment
keys
C7
CIDIE|FIG|AIBICI
DIE]
F:
(C
Seventh
Chord)
Pressing
three
accompaniment
keys
Cm7
CIDIE|FIGIAJBIC|DIE|F
(C
Minor
Seventh
Chord)
Pressing
four
accompaniment
keys
E-32
SSR
I
ETE
A
EP
a
ED
EE
Note
The
bottom
(teftmost)
note
that
you
play
determines
the
name
of
the
chord.
If
the
bottom
note
is
aC
for
example,
the
keyboard
produces
a
C
chord.
To
play
a
CASIO
CHORD
auto-accompaniment
1.
Use
the
MODE
button
to
select
CASIO
CHORD.
©
Stow
“F
MODE
©
FINGERED
(J
refersocroro
2.
Select
an
auto-rhythm
as
described
under
“To
select
and
play
a
rhythm”
on
page
E-29.
3.
Start
play
of
the
rhythm.
6%
¢
If
you
want
start
play
of
the
normal
rhythm
pattern,
press
START/STOP.
aw
stARt
STOP
VARY
FILL-IN
LJ
4.
Press
either
one
or
up
to
four
keys
on
the
accompaniment
keyboard,
and
the
corresponding
accompaniment
starts
to
play
automatically.
*
To
start
play
of
the
variation
rhythm
pattern,
press
VAR/FILL-IN.
¢
You
can
also
use
synchro
start
(page
E-35)
to
start
rhythm
play.
5.
Continue
pressing
different
keys
on
the
accompaniment
keyboard
to
play
your
chord
progression.
6.
To
stop
auto-accompaniment
play,
press
START/STOP
again.
°
STARTS
STOP
Using
standard
fingerings
The
FINGERED
mode
lets
you
play
a
wider
variety
of
chords.
In
this
mode,
you
can
start
play
of
an
accompaniment
pattern
by
pressing
three
or
four
of
the
accompaniment
keyboard
keys.
This
keyboard
is
capable
of
recognizing
14
different
chords.
The
following
shows
the
fingerings
of
these
chords
with
a
root
of
C.
Note
that
you
can
omit
the
fifth
notes
(which
are
shown
inside
parentheses
in
the
illustrations
below)
to
produce
7,
m7,
maj7
and
mM7
chords.
E-33

Cadd9
C7
Cm7
|
bed
s
e
e
e
Cmaj7
Cm7*s
Cdim
Caug
(*1)
Cmadd9
Q
(=)
3
e
°
e
we
MUL)
Csus4
C74(*1)
CmM7
C7sus4
e
°
e e
e
*{
With
these
chords,
the
lowest
note
in
your
fingering
is
always
used
as
the
root.
Make
sure
that
your
fingering
correctly
identifies
the
root
you
want
to
use.
Important!
If
you
play
one
or
two
notes
only
in
the
left
hand,
or
three
notes
that
do
not
make
up
a
recognizable
chord
formation
(for
example,
C-D-D*),
no
sound
will
be
produced.
FINGERED
MODE
requires
a
conventional
three
or
four-note
chord
formation
to
produce
an
auto-accompani-
ment.
Also,
note
that
auto-chords
only
work
in
conjunction
with
rhythm
patterns,
and
not
inde-
pendently
of
them.
Notes
*
The
above
examples
show
only
one
of
the
possible
fingerings
for
each
chord.
Note
that
you
can
play
the
notes
that
form
a
chord
in
any
combination.
Each
of
the
following
fingerings
for
example,
produces
the
same
C
chord.
TT
A
Accompaniment
keyboard
*
See
the
“Fingered
Chord
chart”
on
page
A-7
for
information
on
the
fingerings
of
chords
for
all
roots.
To
play
a
FINGERED
auto-accompaniment
1.
Use
the
MODE
button
to
select
FINGERED.
FULL
RANGE
©
choo
aly
MODE
=
=
@
+FINGERED
Paes
Cc}
©
CASIO
CHORD
2.
Select
an
auto-rhythm
as
described
under
“To
select
and
play
a
rhythm”
on
page
E-29.
E-34
3.
Start
play
of
the
rhythm.
Jet
*
If
you
want'start
play
of
the
normal
rhythm
pattern,
press
START/STOP.
FLGN
*
To
start
play
of
the
variation
rhythm
pattern,
press
VAR/FILL-IN.
Ss
4.
Play
a
chord
on
the
accompaniment
keyboard
to
start
play
of
the
auto-accompaniment.
*
You
can
also
use
synchro
start
to
start
rhythm
play.
5.
Continue
pressing
keys
on
the
accompaniment
keyboard
to
play
your
chord
progression.
6.
To
stop
auto-accompaniment
play,
press
START/STOP
again.
°
START
STOP
To
start
an
accompaniment
with
synchro
start
4.
Use
the
MODE
button
to
select
either
CASIO
CHORD
or
FINGERED.
©
Goa
MOOE
©
FINGERED
(3)
@
CASIO
CHORD
2.
Select
a
rhythm
using
the
procedure
described
under
“To
select
and
play
a
rhythm”
on
page
E-29.
3.
Press
the
SYNCHRO/ENDING
button.
At
this
time
the
TEMPO
indicator
lights.
SYNCHRO!
ENDING
CL)
FLEW
*
If
you
want
to
start
out
with
the
variation
pattern
of
the
selected
rhythm,
press
fr]
VAR/FILL-IN
here.
4.
Play
a
chord
on
the
accompaniment
keyboard
and
the
accompaniment
pattern
starts
to
play.
improvising
with
the
preset
accompaniment
patterns
You
can
use
intro,
fill-in,
variation,
and
ending
operations
(see
“improvising
with
the
preset
patterns”
on
page
E-30)
with
auto-accompaniment.
Note
the
following
when
using
intro
and
ending
patterns.
*
When
an
intro
pattern
is
playing,
the
final
measure
of
the
pattern
is
indicated
by
the
tempo
indicator
speeding
up.
This
signals
you
to
get
ready
to
start
playing.
¢
Intro
patterns
are
available
in
major
chord
and
minor
chord
versions.
The
keyboard
automatically
selects
the
appropriate
version
in
accordance
with
the
chord
you
play
to
start
the
accompaniment
pattern.
E-35

*
Ending
patterns
are
also
available
in
major
chord
and
minor
chord
versions.
The
keyboard
automatically
selects
the
correct
version
in
accordance
with
the
last
chord
you
play
at
the
end
of
the
accompaniment.
lm
Switching
auto-accompaniment
parts
on
and
off
Use
the
five
part
buttons
to
switch
auto-accompaniment
parts
on
and
off.
SONG
MEMORY
TRACK
—————
00000
90
oni
CH2
CHS) «CHA CCHS
CHE
CH7
CHS
CHO
CHIO
FCHI1
CHI2 CHIS CHI4
CHI6 CHIE
UPPERS
UPPER2
LOWERILOWER2
PAD
§CHOAD1
CHORO2CHOADS
BASS
RHYTHMS
TRI
TR2
TR3
TR4
TRS
GUO)
@x67
0
OL
ee
Each
time
you
press
a
button,
its
part
switches
on
and
off.
If
the
auto-accompaniment
is
not
playing,
the
indicator
above
each
button
is
lit
if
the
part
is
switched
on
and
not
lit
if
the
part
is
switched
off.
While
the
auto-accompaniment
is
playing,
the
indicators
light
while
that
particular
part
is
sounding.
——
TONE
EXPANDER
——
Note
With
some
auto-accompaniment,
some
parts
contain
all
rests.
This
means
that
though
the
indicator
above
the
button
that
controls
such
a
part
is
lit
while
auto-accompaniment
is
not
playing,
nothing
sounds
for
that
part
when
you
start
auto-accompaniment
play.
One
example
of
such
a
part
is
CHORDS
of
19
LATIN
FUSION.
@
Mixer
(Accomp
mixer)
The
Mixer
function
lets
you
control
tone,
volume,
stereo
position
(panning),
tuning,
effect
intensity,
and
expression
for
each
of
the
five
parts
of
an
auto-accompaniment.
Use
the
MIXER
button
to
select
the
parameter
you
want
to
adjust.
CO
How
Mixer
works
Each
time
you
press
the
MIXER
button,
the
display
changes
in
the
sequence
shown
below.
Display
the
value
for
the
parameter
you
wish
to
change
and
then
use
the
10-key
pad
keys
to
change
it.
x
Goes
back
to
@
F
p
5
ne,
the
first
display
ExPreSsion
E-36
tan
Tone
selection
for
each
channel
000
to
127,
dr
0
to
dr7.
vol
Volume
setting
for
each
channel
000
(min)
to
127
(max)
Stereo
position
(position
between
speakers
000
(left
side)
to
127
(right
side)
where
sound
is
hear)
;
Effect
depth
000
(min)
to
127
(max)
FE
if
|
Fine
tuning
of
each
channel
f-sos0
[
t
if
Rough
tuning
of
each
channel
Expression
setting
of
each
channel
000
to
127
The
following
example
operation
shows
how
to
change
the
effect
parameter
only.
Operation
is
identical
for
all
of
the
other
parameters,
except
for
the
range
of
the
settings
as
shown
in
the
table
above.
La
To
change
a
Mixer
parameter
14.
Press
the
MIXER
button
until
the
display
for
the
parameter
you
want
to
change
appears.
we
°
Here
we
will
change
the
effect
volume
for
the
Chord
2
part
(=
from
100
to
118,
so
press
MIXER
four
times.
5
n
Qo.
2.
Press
the
part
button
for
the
part
whose
parameter
you
want
to
change.
Noe
¢
The
indicator
above
the
part
button
you
press
starts
to
rm
toms
flash.
{
u
CHORD2
3.
Use
the
10-key
pad
to
input
the
3-digit
number
for
the
effect
volume
value
you
want
to
use.
In
this
example,
we
will
input
a
value
of
118.
*
*
©
You
can
also
use
the
[+]
and
[-]
buttons.
Pressing
[+]
tt
0
increases
the
displayed
effect
volume
value
by
1,
while
[-]
(
{
Hy
0
decreases
it.
a}
*
Remember
that
you
have
five
seconds
after
pressing
the
MIXER
button
to
input
z
the
first
digit
or
press
a
part
button.
You
also
have
five
seconds
after
pressing
a
.
60
part
button
to
input
the
first
digit.
Otherwise,
the
value
will
disappear
from
the
display,
and
you
will
have
to
press
the
MIXER
button
again
to
start
again.
O-0-0-0-
000-0
4.
Repeat
steps
1~3
for
other
parts
if
you
want.
Using
Full-Range
Chords
This
function
lets
you
use
the
entire
range
of
the
keyboard
for
play
of
accompaniment
and
melody.
Unlike
the
FINGERED
mode,
the
melody
can
be
played
in
the
accompaniment
keyboard
range,
and
chords
can
be
played
in
the
range
of
the
melody
keyboard.
Other manuals for WK-1500
1
Table of contents
Other Casio Electronic Keyboard manuals

Casio
Casio PS-20 User manual

Casio
Casio LK-50 Service manual

Casio
Casio CTK-750 User manual

Casio
Casio OMNION User manual

Casio
Casio casiotone MT-52 User manual

Casio
Casio CDP-220R User manual

Casio
Casio LK-220 User manual

Casio
Casio WK-7500 Technical document

Casio
Casio CTK-480 User manual

Casio
Casio CTK-500 User manual

Casio
Casio CTK-601 User manual

Casio
Casio Privia PX-700 User manual

Casio
Casio CTK-450 User manual

Casio
Casio ToneBank CT-670 User manual

Casio
Casio SK-5 - SERVICE User manual

Casio
Casio CTK-220L User manual

Casio
Casio Celviano AP-45 User manual

Casio
Casio ToneBank CT-395 User manual

Casio
Casio MZ-2000 User manual

Casio
Casio SA-46 User manual