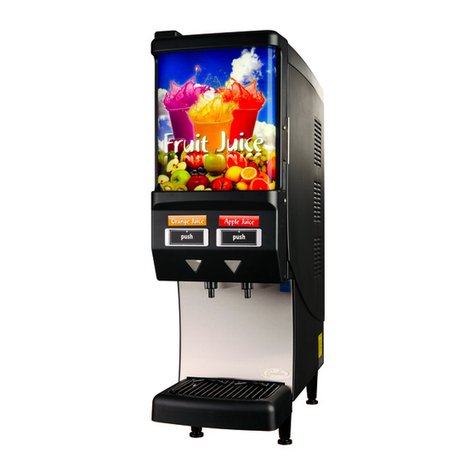
Cater-Cool 688151 User manual

688151-2 en ma 2012
OPERATION MANUAL
Please read these instructions carefully before installing and operating the dispenser.
Professional Supplies
JUICE DISPENSER
Modelnr.: *688.151 - *688.152

688151-2 en ma 2012 2
INDEX
WARNING .............................................................................................................................................................. 3
INSTALLATION ..................................................................................................................................................... 3
HOW TO USE ......................................................................................................................................................... 4
MAINTENANCE ..................................................................................................................................................... 5
INSTRUCTIONS FOR DISPOSAL ..................................................................................................................... 5
TECHNICAL SPECIFICATIONS .......................................................................................................................... 5
OPERATING FIGURES ........................................................................................................................................ 7
TROUBLE SHOOTINGS ...................................................................................................................................... 9
STRUCTURE DIAGRAM .................................................................................................................................... 10

688151-2 en ma 2012 3
WARNING:
1. This machine is a cold drink dispenser.
2. This instruction manual is an integral part of the machine and must be kept for any further consultation.
3. Warning: Never try to use this appliance for applications which are not described in the instructions
or in a way which is not described in the instruction or under conditions which are not similar those
described in the instructions, otherwise severe hazards may occur!
4. This machine should be used only for the purpose for which it was designed. Any other use is
inappropriate and therefore dangerous. The manufacturer will not be held responsible for any damage
caused by improper use.
5. Before installing and operating on the machine read carefully this operation mamual.
6. Keep the appliance out of reach for children! Do not allow children to play with the appliance.
7. Unplug the appliance from outlet when not in use, before putting on or taking off parts, and before
cleaning.
8. Be sure to unplug the appliance if not use the appliance in a long time.
9. If the supply cord is damaged, it must be replaced by the manufacturer, its service agent or similarly
qualified persons in order to avoid a hazard.
10. Do not use the appliance in a dusty environment or in an explosive atmosphere (inflammable gases,
vapours, vapours from organic solvents).
11. Disable a defective appliance in an obvious way, so that it does not represent a hazard to others and
dispose of the appliance according to the regulations from the local authorities. Please see Instructions
for Disposal in this manual.
12. Other than cleaning mentioned in this instruction manual, no additional maintenance or servicing of this
appliance is required.
13. The motor is permanently lubricated and will require no oil.
14. Repairs, when necessary, must be performed at an authorized service facility.
15. The appliance is suitable for indoor use only.
16. Basic safety rules:
A.Do not touch the machine when hands or feet are wet.
B. Do not use the machine when barefooted.
C. Do not allow the machine to be used by children or untrained persons.
D. Do not leave the machine outside.
E. Do not pull on the electrical cord when unplugging the machine.
The company reserves the right to modify the construction or appearance without notice
INSTALLATION:
USEFUL INSTRUCTION FOR TRANSPORT
1. 1. In order to prevent the oil contained in the hermetic compressor from flowing into the cooling circuit,
it is necessary to always carry, store and handle the machine in a vertical position, following the
instructions found on the packaging.
2. 2. If the machine was accidentally or purposely placed in a non-vertical position during transport,
before operating the machine, it should be kept in a straight position for approximately 30 minutes,
to allow the oil to flow back into the compressor.
UNPACKING: Remove cardboard and plastic covering. Make sure that the machine has not been damaged.
Remove the plastic film from all the stainless steel panels(if has).
IMPORTANT: THE VARIOUS PACKAGING SHOULD BE KEPT FROM CHILDREN SINCE THEY ARE POTENTIALLY
DANGEROUS. DISPOSE THE PACKAGING ACCORDING TO THE REGULATIONS FROM THE LOCAL
AUTHORITIES.
688151-2 en ma 2012 4
POSITIONING
1. Do not install the appliance in the area where water jet could be used.
2. Place machine on a horizontal and sturdy surface.
3. Please install the appliance in locations where can be overseen by trained personnel.
4. For good ventilation, keep a distance of 20cm(7 inches), between unit and walls or other objects.
Increase the distance if the obstacles are a heating source. When the dispenser is in place, adjust the
legs in order to keep it level. (FIG.1)
ASSEMBLING
1. Remove the cover from the tank.
2. Hang the waste liquid container to hanging holes on front panel.
3. Insert the taps (with gasket) to the tank and through the tap lever.
ELECTRICAL CONNECTION
Before inserting the plug into the electrical socket, carefully read the following precautions:
1. Make sure that the machine is properly connected to an efficient grounding system, in compliance with
current safety standards.
2. Make sure that the voltage is in accordance with what indicated on the “serial number“ label applied
on the chassis.
3. The current available is sufficient for the maximum required by the machine.
4. If necessary, use only approved multiple outlets, in compliance with current safety standards.
If in doubt, consult only specialized technicians.
BY LAW, THE MACHINE MUST ALWAYS BE GROUNDED.
HOW TO USE:
Before using, the tanks and taps of the appliance should be cleaned carefully as it comes into
contact with drinks.
FILLING
For a correct usage of the machine ensure that the liquid level of the tank does not go below 3-4 Lt
(please use the level lines on the tank for reference).
1. Mix product in a separate container (FIG. 2).
2. Make sure to unplug the appliance before filling up the container.
3. Do not fill the container with hot product.
4. Do not let liquid level exceed the “MA” level line (FIG. 3).
FUNCTIONING (FIG. 4)
1. Make sure that the main switch (A) is in the [ O ] position, plug in the machine.
2. Before starting the machine, ensure that the tanks are properly closed with their covers.
3. Turn the main switch to [ I ] position, the condensing unit will automatically start.
4. To start the mixing action, turn the appropriate stiring switch to [ I ] position.
The mixing system switches (B) locate beside the main switch. Each tank has a string control switch.
5. To pour drink out, press lightly the tap lever.
BEVERAGE TEMPERATURE ADJUSTMENT (FIG.7)
To adjust the temperature of liquid, lift up the plastic cover on left side of appliance then turn the
temperature control knob to set the temperature. Lower down the temperature by turning the knob clockwise
(higher figure), and increase temperature by turning it anticlockwise (lower figure). Note: The numbers
beside control knob do not indicate the actual temperature of the liquid but the trend for cooler or heater.
CAUTION: YOU ARE SUGGESTED NOT TO RESET THE TEMPERATURE CONTROLLER FREQUENTLY.

688151-2 en ma 2012 5
MAINTANCE:
OVSERVE THE AMBIENT TEMPERATURE
The appliance is suitable for an ambient temperature ranging between 16°C - 32°C.
CLEANING
For health standard and good quality of beverages, clean tanks, lids and the mixing paddles/pumps as
often as possible.
CAUTION: Do not clean the appliance by water jet.
1. Before carrying out cleaning and refilling, remove the power plug.
2. Do not use abrasive powders that might impair tanks and lid’s shine.
3. Use neutral soap and a little warm water to wash container, lid, mixing paddles/pump, refrigerator
tank and tap. Rinse carefully with water in order to remove any residual of soap.
4. To maintain a high standard of flavor, leave the dispenser turned on night and day in order to avoid
deposit.
5. Pour out the waste water in waste liquid reservoir and clean it as often as possible.
CAUTION:
• Do not use any organic solvents (petrol, alcohol, etc.) for cleaning the appliance. The case of the
appliance may be damaged and explosive vapours may develop. Do not use any sharp edged
objects for cleaning.
• The appliance may be cleaned with a damp towel, but may never get in direct contact with water.
After cleaning the appliance make sure that it will be dried completely.
DISASSEMBLING AND ASSEMBLING THE TANKS:
For disassemble and assemble the tanks or change the rubber gasket of the tank:
1. Disconnect the unit by removing the plug.
2. Remove the cover from the tank.
3. Remove the mixing paddle from its shaft. For the pump disassembling follow the instructions reported
on the (Fig.5&6).
4. Lift container with both hands by a light, swinging motion. If there is difficulty, please wet the cooling
column and gasket.
5. To remove tap, lift it from its setting.
6. Change the gaskets for tanks and taps only with the gaskets that supply by us.
To reassemble the unit, repeat the above operations in reverse.
INSTRUCTIONS FOR DISPOSAL
When replacing your old appliance with a new one, please comply with the following information:
Old appliances are not worthless rubbish. Valuable raw materials can be reclaimed by recycling
old appliances.
Render old appliance unusable:
1. Pull out the mains plug,
2. Cut off the mains cable and discard with the mains plug,
CAUTION: REFRIGERANTS IN REFRIGERATION APPLIANCES AND GASES IN THE THERMAL INSULATION
MUST BE DISPOSED OF PROFESSIONALLY. ENSURE THAT REFRIGERATION TUBING IS NOT DAMAGED
PRIOR TO DISPOSAL. PLEASE DISCARD THE APPLIANCE ACCORDING TO THE REGULATIONS FROM THE
LOCAL AUTHORITIES.
TECHNICAL SPECIFICATIONS:
Models Parameter Tanks Capacity Refrigerant Dimensions
LxWxH cm Weight
688151 230V,50Hz,210W 1 1 x 12L R134a 220x450x635 19.00 Kg
688152 230V,50Hz,310W 2 2 x 12L R134a 420x450x635 26.50 Kg
NOTE: THE A WEIGHTED SOUND PRESSURES OF THE APPLIANCES ARE BELOW 55DB.

688151-2 en ma 2012 6
ELECTRIC WIRING DIAGRAM
ITEMS
S1 Main Switch
M1 Mixer/Pump Motor
S2 Switch
M2 (see Note 1,2) Mixer/Pump Motor
S3 (see Note 1,2) Switch
M3 (see Note 2) Mixer/Pump Motor
S4 (see Note 2) Switch
F1 Fan
T1 Thermostat
K1 Compressor
Kr Relay
Km Electric Motor
Kt Thermal Prot
LEGEND
cCompressor
CCondenser
FFilter
Bc Boiler
E1 Evaporator
E2 Evaporator
E3 Evaporator
DDistributor
Ca Capillary coils
1 High Pressure Side
2LiquidLine
3 Low Pressure Side
TThermostat
NOTE 1 = ONLY FOR 688152

688151-2 en ma 2012 7
OPERATION FIGURES

688151-2 en ma 2012 8

688151-2 en ma 2012 9
TROUBLE SHOOTING:
SYMPTOM POSSIBLE REASONS SOLUTION REMARK
No power to
machine
• Plug is not in. • Insert plug into mains socket
• Main switch is not on the “I”
position.
• Switch main switch to “I”
position.
• Power cord is broken. • Replace power cord
Ask for
authorized
service
department
to check and
repair it.
• Main switch is broken. • Replace main switch
Machine is not
cooling
• Compressor does not start • See “compressor does not start”
section.
• Gas leak into the cooling circuit. • Find leak, filter it out and
re-charge the cooling circuit
• Condenser is clogged. • Clean the condenser
• Fan motor is burnt. • Replace fan motor
• Lack of air flow
• Increase distance between the
machine and other obstacles/
heating sources
Compressor
does not start
• Main switch is broken • Replace main switch
Ask for
authorized
service
department
to check and
repair it.
• Compressor protector is broken. • Replace compressor protector
• Compressor relay is broken • Replace compressor relay
• Compressor motor is broken • Replace motor
One tank is not
cooling
• Gas leak into the cooling circuit • Find leak, filter it out and re-
charge the cooling circuit
• Condenser is clogged • Clean the condenser
• Lack of air flow
• Increase distance between the
machine and other obstacles/
heating sources
• Tube of the cooling circuit is
clogged.
• Cut the tube, eliminate clog,
re-charge the cooling circuit
• Filter is clogged • Replace the filter
The mixing
paddles are not
working
• The mixing motor is broken • Replace the mixing motor
The pump not
working
• The pump motor is broken • Replace the pump motor
• The pump switch is broken. • Replace the pump switch
WARNING: IF THE APPLIANCE HAS ANY PROBLEM OR HAS BEEN DAMAGED, DO NOT TRY TO REPAIR OR
REPLACE IT BY YOURSELF. PLEASE ASK FOR THE AUTHORIZED SERVICE DEPARTMENT FOR HELP.

688151-2 en ma 2012 10
STRUCTURE DIAGRAM
1. COVER
2. MIXING PADDLE
3. TAP LEVER
4. TAP GASKET
5. TANK (PADDLE SYSTEM)
6. GASKET
7. MIXING POD
8. THERMOSTAT
9. MIXING MOTOR
10.CONDENSER FAN
11. WATER TRAY
12. ADJUSTABLE LEG
13. POWER SWITCH
14.SWITCH FOR
MIXING MOTOR
15. COMPRESSOR
16. PUMPING MOTOR
17. CORNER PLUG
18. TANK(PUMP SYSTEM)
19. GASKET FOR
PUMPING MOTOR
20.PUMP
21. PUMPING CONNECTOR
22.PUMPING PIPE
This manual suits for next models
1
Table of contents
Popular Beverage Dispenser manuals by other brands

Bunn
Bunn FMD-2 Illustrated parts catalog

Grindmaster
Grindmaster PIC-3 Three Flavor Specifications

Cornelius
Cornelius Liquid Base Beverage Dispenser Installation & operation manuals

Olympia
Olympia J183 Instructions for use

Cornelius
Cornelius ED-250 installation instructions

Crathco
Crathco Crathco 3341 Operator's manual