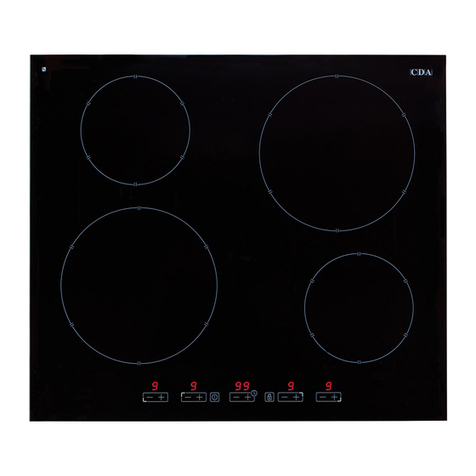
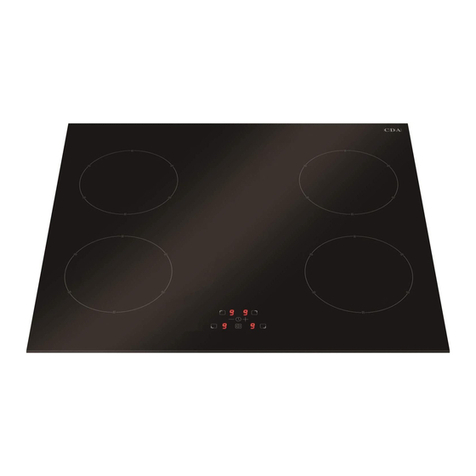
CDA HN6112FR User manual

www.cda.co.uk
1
HN6112FR
Induction hob
Installation, use and maintenance
www.cda.co.uk

2
Contents:
3 Important information
4 Important safety warnings/notes
4 Important notes for safety, use and care
6 Pacemaker and active implants information
7 Cooking on induction
8 Important safety warnings
8 Saving energy
9 Using your hob(s)
9 Hob layout
14 Selecting suitable cookware (pan compatibility)
18 Child lock
19 Residual heat indicators
20 Booster function
22 Maximum operating time
22 Timer
24 Minute minder
24 Stop’n go function
25 Maintain temperature
28 Fitting the hob (ventilation, furniture requirements etc.)
29 Installation
32 Mains electrical connection
34 Troubleshooting
38 Care and maintenance
39 Cleaning advice

3
Important
The CDA Group Ltd cannot be held responsible for injuries or losses
caused by incorrect use or installation of this product. Please note
that CDA reserve the right to invalidate the guarantee supplied with
this product following incorrect installation or misuse of the appliance
or use in a commercial environment.
This appliance is not designed to be used by people (including
children) with reduced physical, sensorial or mental capacity, or
who lack experience or knowledge about it, unless they have had
supervision or instructions on how to use the appliance by someone
who is responsible for their safety.
Under no circumstances should any external covers be removed for
servicing or maintenance except by suitably qualified personnel.
Appliance information:
Please enter the details on the appliance rating plate below for
reference, to assist CDA Customer Care in the event of a fault with
your appliance and to register your appliance for guarantee purposes.
Appliance Model
Serial Number
EU Declarations of Conformity
This appliance has been designed and manufactured to comply with
all applicable UK and EU legislation,
Low voltage Directive, 2014/35/EU

4
Electromagnetic compatibility Directive, 2014/30/EU
ErP Directive, 2009/125/EC
RoHS Directive, 2011/65/EU
and has been marked with the following symbols
IMPORTANT INFORMATION FOR CORRECT DISPOSAL OF THE
PRODUCT IN ACCORDANCE WITH EC DIRECTIVE 2012/19/EU.
At the end of its working life, the product must be taken to a special
local authority waste collection centre or to a dealer providing
appliance recycling services.
Disposing of a household appliance separately avoids possible
negative consequences for the environment and health. It also
enables the constituent materials to be recovered, saving both energy
and resources. As a reminder of the need to dispose of household
appliances separately, the product is marked with a crossed-out
wheeled dustbin.
Warning: The appliance and its accessible parts become hot during
use. Care should be taken to avoid touching heating elements.
Children less than 8 years of age shall be kept away unless
continuously supervised. This appliance can be used by children
aged from 8 years and above and persons with reduced physical,
sensory or mental capabilities or lack of experience and knowledge
if they have been given supervision or instruction concerning use of
the appliance in a safe way and understand the hazards involved.
Children shall not play with the appliance. Cleaning and user
maintenance shall not be made by children without supervision.

5
Warning: Unattended cooking on a hob with fat or oil can be
dangerous and may result in fire. NEVER try to extinguish a fire with
water, but switch off the appliance and then cover flame e.g. with a lid
or a fire blanket.
Warning: Danger of fire: do not store items on the cooking surfaces.
Warning: If the surface is cracked, switch off the appliance to avoid
the possibillity of electric shock. Metallic objects, such as knives, forks,
spoons and lids should not be placed on the hob surface since
they can get hot. After use, switch off the hob element by its control
and do not rely on the pan detector. The appliance is not intended to
be operated by means of an external timer or separate remote-control
system. You should not use steam cleaning devices to clean the
appliance.
Please note:
• Induction hobs become hot and remain hot during and
immediately after use. Do not touch the hob until it has been
allowed to cool.
• Keep children away from the appliance when in use.
• Never use the hob top for storage.
• Pan handles should never stand out beyond the edge of the
worktop. This will help to avoid children reaching them.
• Do not lean over the hob when it is in use.
• Follow the cleaning instructions carefully.
• Ensure the base of the saucepan is clean and dry before placing it
on the hob.

6
• Avoid hard shocks from cookware, dropping pepper mills
etc. – the vitroceramic glass surface is highly resistant but not
unbreakable.
• Do not place hot lids flat on the hob top. A “suction” effect could
cause damage to the hob.
• Do not drag cookware across the hob top: in the long term, this
could cause damage to the hob.
• Do not store cleaning or flammable products in the unit below the
hob.
• Always use appropriate cookware.
• Do not cook unopened tins of food directly on the hob.
• Never put cooking foil or plastic materials on the ceramic surface
when the hob is hot. These materials could melt and cause
damage to the hob.
• This hob (Class 3) has been designed for use only as a cooking
appliance in a domestic environment. Any other use should be
considered incorrect and therefore dangerous.
FOR THOSE WITH HEART PACEMAKERS OR ACTIVE IMPLANTS:
The function of this hob conforms to current electromagnetic
interference standards and thus is in total compliance with legal
requirements (2004/108/CE directives).
To avoid interference between your hob and a pacemaker, your
pacemaker must be designed and programmed in compliance with
the regulations that apply to it. As such, CDA guarantee only that our
product is compliant.

7
With regard to the compliance of the pacemaker or any potential
incompatibility, you should obtain information from the manufacturer
or your attending physician.
Cooking on Induction
The principle of induction cooking is based on magnetic effect.
When you put your cookware on an induction zone and switch it on,
the electronic boards in the hob produce induced currents in the base
of the cookware and instantly raise its temperature. This heat is then
transferred to the food inside the cookware.
The best cookware to use with induction cooking has thick flat bases,
as the heat will be better distributed meaning cooking is more even.
Most cookware is compatible with induction cooking.
There are three ways to check the suitability of your cookware:
1. Using a magnet to see if the base of the pan is magnetic: If the
magnet sticks, then the cookware is compatible.
2. Place the pan on one of the cooking zones and switch the zone
on. If the display continues to show the selected power level
then the cookware is compatible. If the display shows “ ”, the
cookware cannot be used on an induction hob.
3. Check the instructions or packaging of the pans for the symbols
indicating suitability for use with induction.

8
Important
• Do not use the hob if the glass surface is cracked or damaged to
prevent the risk of electric shock. Disconnect it from the power
supply.
• Ensure that the power cable of a connected electrical appliance
near the hob is not in contact with the cooking zones.
Saving energy
Using energy in a responsible way not only saves money but also
helps the environment. The following will help you to save energy:
• Use proper pans for cooking. A saucepan should never be smaller
than the zone. Always remember to cover any pans.
• Ensure pans and the hob are kept clean. Soils can prevent heat
transfer and repeatedly burnt-on spillages can often only be re-
moved by products which cause damage to the environment.
• Do not uncover the pan too often (a watched pot never boils!).
Be sure to recycle all of the packaging.
All packaging materials used are 100% recyclable.

9
23
14
Using your hob
Zones:
1. Front left
Power Booster induction
cooking zone
2. Back left
Booster induction cooking zone
3. Back right
Booster induction cooking zone
4. Front right
Booster induction cooking zone
Control Panel
4
1110 8
12 13 14 15
3
2567
1
9
1. Sensor on/o board with LED
2. Minus power setting sensor
3. Plus power setpoint sensor
4. Cooking zone indicator
5. Clock sensor
6. Clock sensor +
7. Clock sensor -
8. Clock indicator
9. Sensor key
10. Sensor pause
11. Sensor power amplifier
12. Temperature maintenance
program 40o
13. Temperature maintenance
program 70o
14. Temperature maintenance
program 90o

10
Operation
Before using the appliance for the first time
• Thoroughly clean your induction hob first. The induction hob
should be treated with the same care as a glass surface.
• Switch on the ventilation in the room or open a window, as the
appliance could emit an unpleasant smell during first use.
• Operate the appliance while observing all safety guidelines.
Induction cooking zone operation principle
An electric oscillator powers a coil placed inside the appliance. This
coil produces magnetic fields which induce eddy currents in the
cookware. The eddy currents induced by the magnetic field cause the
cookware to heat up.
This requires the use of pots and pans whose base is ferromagnetic,
in other words susceptible to magnetic fields.
Overall, induction technology is characterized by two advantages:
• Heat is only emitted by the cookware and energy use is optimised.
• There is no thermal inertia, since the cooking starts immediately
when the pot is placed on the hob and ends once it is removed.
This means the hob responds instantly to changes in power.
Certain sounds can be heard during normal use of the induction hob,
which do not affect its correct operation.
• Low-frequency humming. This noise arises when the cookware
is empty and stops when water is poured or food is placed in the
cookware.

11
• High-frequency whizz. This noise arises in cookware made of
multiple layers of different materials at maximum heat setting.
The noise intensifies when using two or more cooking zones at
maximum heat setting. The noise will stop or reduce when heat
setting is reduced.
• Creaking noise. This noise arises in cookware made of multiple
layers of different materials. The noise intensity depends on how
the food is cooked.
• Buzzing. Buzzing can be heard when electronics cooling fan
operates.
The noises that can be heard during the normal appliance operation
are the result of the cooling fan operation, cooking method, cookware
dimensions, cookware material and the heat setting. These noises are
normal and do not indicate a fault.
Power Management
This function allows you to activate the demonstration mode and to
limit the total maximum power of your induction hob to one of the
following values: 2.8kW; 3.7kW; 4.5kW; 5.6kW; 7.35kW (maximum
power).
You need to specify the total maximum power of your
induction hob within 5 minutes of connecting the induction
hob to the mains. To select a power setting, touch to
turn on the appliance and then touch and hold and
simultaneously for 3 seconds.

12
The twin display will show the previous setting or — if there was no
previous setting — the default setting of 7.4kW shown as “74”.
Use and to select the desired setting: Within 10 seconds of
selecting the desired setting, touch and hold for 3 seconds to
confirm.
You will hear a beep and the selected maximum power setting
will flash several times on the display and then the appliance
will turn off. Now your operating induction hob will not exceed
the total maximum power you selected.
If you do not confirm the selected maximum power setting,
your induction hob will turn off and operate with the previously
selected maximum power or with the default power of 7.35kW.
When you select heat setting on individual cooking zones, the Power
Management circuit will ensure that the selected total maximum power
is not exceeded. Any setting that would cause the total maximum
power to be exceeded will be unavailable to the user.
The Power Management circuit may disable a cooking zone if using
it would cause the total maximum power of the appliance to be
exceeded.
00 DEMO
28 2.8kW
37 3.7kW
45 4.5kW
56 5.6kW
74 7.4kW

13
Hob Protection
If the hob has been installed correctly and is used properly, any protec-
tive devices are rarely required.
Fan: Protects and cools controls and power components. It can operate
at two different speeds and is activated automatically. Fan runs until the
electronic system has sufficiently cooled down regardless of the appli-
ance or the cooking zones being turned on or off.
Temperature sensor: The temperature of electronic circuits is continu-
ously monitored by a temperature sensor. If temperature is raised be-
yond a safe level, this protection system will reduce cooking zone heat
setting or shut down the cooking zones adjacent to the overheated
electronic circuits.
Pan detection: allows the hob to detect pans placed on a cooking zone.
Small objects placed on the cooking zone (eg, spoon, knife, ring ...) will
not be recognised as pans and the hob will not operate.
Pan detector
A pan detector is installed in all induction hobs. The pan detector starts
heating automatically when a pan is detected on a cooking zone and
stops heating when it is removed. This helps save electricity.
• When an suitable pan is placed on a cooking zone, the display
shows the heat setting.
• Induction requires the use of suitable cookware with ferromagnetic
base (see Table).
If a pan is not placed on a cooking zone or the pan is unsuitable, the
symbol is displayed. The cooking zone will not operate. If a pan is not
detected within 10 minutes, the cooking zone will be switched off.

14
Switch off the cooking zone using the touch control sensor field rather-
than by removing the pan.
Pan detector does not operate as the on/off sensor.
The induction hob is equipped with electronic touch control sensor
fields, which are operated by touching the marked area with a finger.
Each time a sensor field is touched, an acoustic signal can be heard.
When switching the appliance on or off or changing the heat setting,
attention should be paid that only one sensor field at a time is touched.
When two or more sensor fields are touched at the same time (except
timer and child lock), the appliance ignores the control signals and may
trigger a fault indication if sensor fields are touched for a long time.
When you finish cooking switch off the cooking zone using touch con-
trol sensor fields and do not rely solely on the pan detector.
Selecting cookware for induction cooking
High-quality cookware is an essential condition for efficient induction
cooking.
Cookware characteristics
• Always use high quality cookware, with perfectly flat base. This pre-
vents the formation of local hot spots, where food might stick. Pots
and pans with thick steel walls provide superior heat distribution.
• Make sure that cookware base is dry: when filling a pot or when
using a pot taken out of the refrigerator make sure its base is com-
pletely dry before placing it on the cooking zone. This is to avoid

15
soiling the surface of the hob.
• Pan lids prevent heat from escaping and thus reduce heating time
and lowers energy consumption.
• To determine if cookware is suitable, make sure that its base attracts
a magnet.
• Cookware base has to be flat for optimal temperature control by the
induction module.
• The concave base or deep embossed logo of the manufacturer
interfere with the temperature induction control module and can
cause overheating of the pot or pan.
• Do not use damaged cookware such as cookware with deformed
base due to excessive heat.
• When you use large ferromagnetic base cookware, whose diameter
is less than the total diameter of the cookware, only the ferromag-
netic base heats up. This results in a situation where it is not possible
to uniformly distribute the heat in the cookware. If the ferromagnetic
area is reduced due to inclusion of aluminium parts then the effec-
tive heated area can be reduced. Problems with the detection of the
cookware could arise or cookware may not be detected at all. To
achieve optimum cooking results, the diameter
of the ferromagnetic base should match that of
the cooking zone. If cookware is not detected in
a given cooking zone, it is advisable to try it in a
smaller cooking zone.
For induction cooking us only ferromagnetic base materials such as:
• Enamelled steel.
• Cast iron.
• Special stainless steel cookware designed for induction cooking.

16
The smallest useful diameter of cookware for a cooking zone:
The minimum diameter of cookware made of materials other than
enamelled steel may vary.
Marking of kitchen
cookware
Check for marking indicating that the cookware is
suitable for induction cooking.
Use magnetic cookware (enamelled steel, ferrite
stainless steel, cast iron). The easiest way to deter-
mine if your cookware is suitable is to perform the
“magnet test”. Find a generic magnet and check if
it sticks to the base of the cookware.
Stainless steel
Cookware is not detected.
With the exception of the ferrmagnetic steel
cookware.
Aluminium Cookware is not detected.
Cast iron High efficiency.
Caution: cookware can scratch the hob surface.
Enamelled steel
High efficiency.
Cookware with a flat, thick and smooth base is
recommended.
Glass Cookware is not detected.
Porcelain Cookware is not detected.
Cookware with copper base Cookware is not detected.
Cooking zone
diameter
The minimum diameter of the bottom
of an enamelled steel cookware
[mm] [mm]
160 - 180 110
180 - 200
210 - 220
125220 x 190
260 - 280

17
Control panel
• Immediately after the appliance is connected to electrical mains,
all displays will light up briefly. Your appliance is then ready for use.
• The induction hob is equipped with electronic touch control
sensors, which are operated by touching with a finger for at least 1
second.
• Touching of a sensor is accompanied by a beep to acknowledge.
Do not place any objects on the sensors of the control
panel. Make sure that cookware is not placed beyond the
outline of the cooking zone. If you place cookware too close
to the control panel or you cover any sensors, the hob will
automatically turn off for safety.
Turn on the appliance
Touch and hold the on/off sensor for at least 3 seconds. The
Hob indicates correct operation (active) when “00” is shown on the
cooking zone displays.
If you do not set the desired heat setting of the cooking zone
within 15 seconds of activating the appliance, it will turn off
automatically.
Activate cooking zone and set the heat setting
• Turn on the hob with the sensor.
• Place the cookware on the desired cooking zone.
• The cookware will be automatically detected and the relevant
display will show flashing “00.” This means that the selected
cooking zone is active and you can set the power.

18
If there are two or more pans on the hob when it is turned
on, the hob will not activate the cooking zones automatically.
You need to touch the sensor corresponding to your desired
cooking zone.
• Use the heat setting touch sensors and to set the heat setting
and it will be indicated on the display.
• The cooking zone operates.
The cookware detection and automatic cooking zone activation
only works for the first pan placed on the hob.
The Booster function can be used for one field. It is not
possible to activate two or more Boosters at the same time.
Activation of the Booster function is not possible if the other
pole is set too high the vertical power is already enabled for
the Booster function.
Child lock
The Child Lock function disables all hob controls for cleaning or to
prevent children from using the appliance. The Child Lock function can
be set when the appliance is turned on or off. To enable or disable the
Child Lock function, hold the sensor for 3 seconds. When the lock is
on, an indicator light next to the sensor is on.
When the hob is turned on and locked, you can turn it off
immediately by touching the sensor.

19
Disconnecting the appliance from the mains electrical supply
deactivates the Child Lock.
Residual heat indicator “h”, “H”
When you have finished cooking, the induction hob glass within the
cooking zone is still hot, this is called residual heat.
If the glass temperature is higher than 60°C*, display of the
cooking zone shows “H”.
If the glass temperature is 45°C* – 60°C *), the cooking zone
display shows “h” (low residual heat).
* Temperatures are approximate
When the residual heat indicator is on, do not touch the cook-
ing zone as there is a risk of burns and do not place on it any
items sensitive to heat!
The “H” or “h” residual heat indicators are not displayed during
a power outage. However, cooking zones may still be hot!

20
Deactivate cooking zones
Deactivate a cooking zone by doing one of the following:
• Turn off the hob with the sensor.
• Touch and hold the sensor for 3 seconds.
• Activate the cooking zone - simultaneously touch and hold the heat
setting touch sensors and .
• Activate the cooking zone and use the heat setting touch sensor
to set the heat setting to “0”.
Turn o the appliance
The appliance operates when at least one cooking zone is on.
• Turn off the hob with the sensor.
If a cooking zone is still hot, the relevant display will show the
letter “H” or “h” to indicate residual heat. For description of the
symbol, refer to the previous page (19).
Booster function “P”
The Booster Function increases the nominal power of the Ø 210 mm
cooking zone from 2000W to 2800W, and the Ø 160 mm cooking zone
from 1400W to 2100W.
• Place the cookware on the desired cooking zone.
• The cookware will be automatically detected and the relevant
display will show flashing “00.”
• Touch the “P” sensor to activate the Booster function. The display
will show the letter “P.”
Table of contents
Other CDA Hob manuals

CDA
CDA HCC663 Reference manual

CDA
CDA HC6621FR Specification sheet

CDA
CDA HC9606FR Specification sheet

CDA
CDA hn9610 Reference manual

CDA
CDA MATRIX MHC101FR Reference manual
CDA
CDA HCC570 for Reference manual

CDA
CDA hn9840 Reference manual

CDA
CDA HG6151 Quick start guide

CDA
CDA hn6110 Reference manual

CDA
CDA HN9626FR Quick start guide

CDA
CDA HCG 731 Series Instructions for use

CDA
CDA HN6111 User manual

CDA
CDA HC7621FR Quick start guide

CDA
CDA hn9625 Reference manual

CDA
CDA HCE340 for Reference manual

CDA
CDA HG6250 Quick start guide

CDA
CDA hg6300 Reference manual

CDA
CDA HN6412FR Quick start guide

CDA
CDA HN9611FR Quick start guide

CDA
CDA hn3620 Reference manual