8
Operation and Maintenance
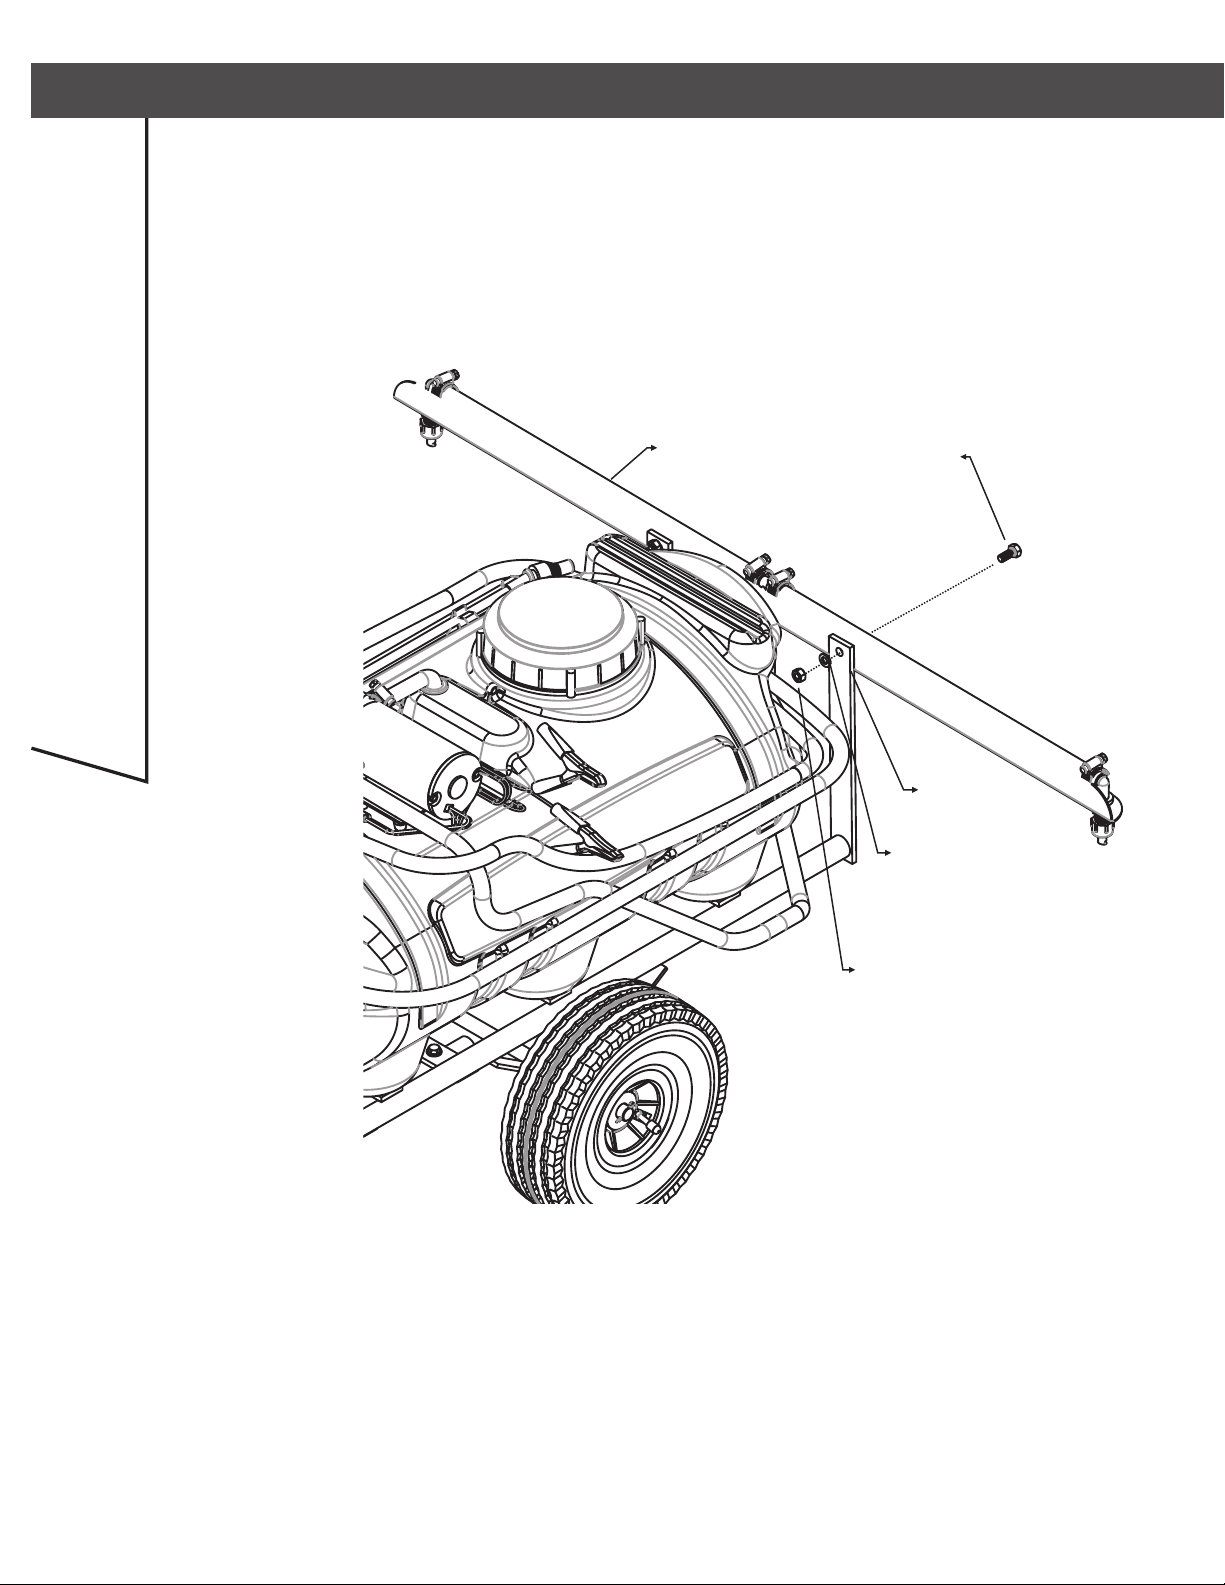
Model Number 060-0198-6 Trailer Sprayer
Operation
Operating power is obtained from a 12 volt
Battery. Be sure to connect the red to the
positive (+) source and attach the black to
the negative (-) source.
IMPORTANT: Before spraying chemicals, ll the
tank full of plain water to gain familiarization
with the sprayer and to prevent the waste of
expensive chemicals.
Maintenance Instructions
This sprayer has been carefully designed
and built and should provide many years
of reliable service if properly cared for.
• Keeping the sprayer clean and dry will
prolong the unit’s life.
• Grease Wheels at regular intervals, at least
once every six months, more frequently if
used regularly.
• Should rust develop, sand lightly then paint
area with enamel paint.
• Check tire pressure at regular intervals
Proper inflation will prolong the life of tires
(see side of tire for inflation amount).
Cleaning and Storage
Most spray materials are highly corrosive.
The most important aspect of long dependable
service from your sprayer is a thorough cleaning
immediately following each use. In addition,
the residue of one type of chemical could
cause an undesirable eect when a dierent
chemical is used for a dierent purpose.
The most eective cleaning method is to
pump several rinses of clean water through
the tank, pump, hoses, boom, spray gun, etc.
A neutralizing agent such as a solution of
Nutra-Sol, a detergent or household ammonia
as recommended by the chemical manufacturer
can assist in removal of a persistent chemical.
When the system is thoroughly cleaned, drain
the tank, suction line, pump, hoses, etc.
1. Wash and flush out sprayer after comple-
tion of each phase of your program. Flush out
sprayer when changing chemicals if there is a
possibility of the chemicals being incompatible.
Use of a detergent is advisable if the chemical
manufacture does not make specific cleaning
recommendations. Flush system completely,
including nozzles. Never use metal objects to
open clogged nozzles.
2. Clean sprayer thoroughly before storing at
the end of the spraying season. Permanent type
antifreeze added to the nal rinse will leave a
rust inhibiting film on parts of the sprayer.
STOP
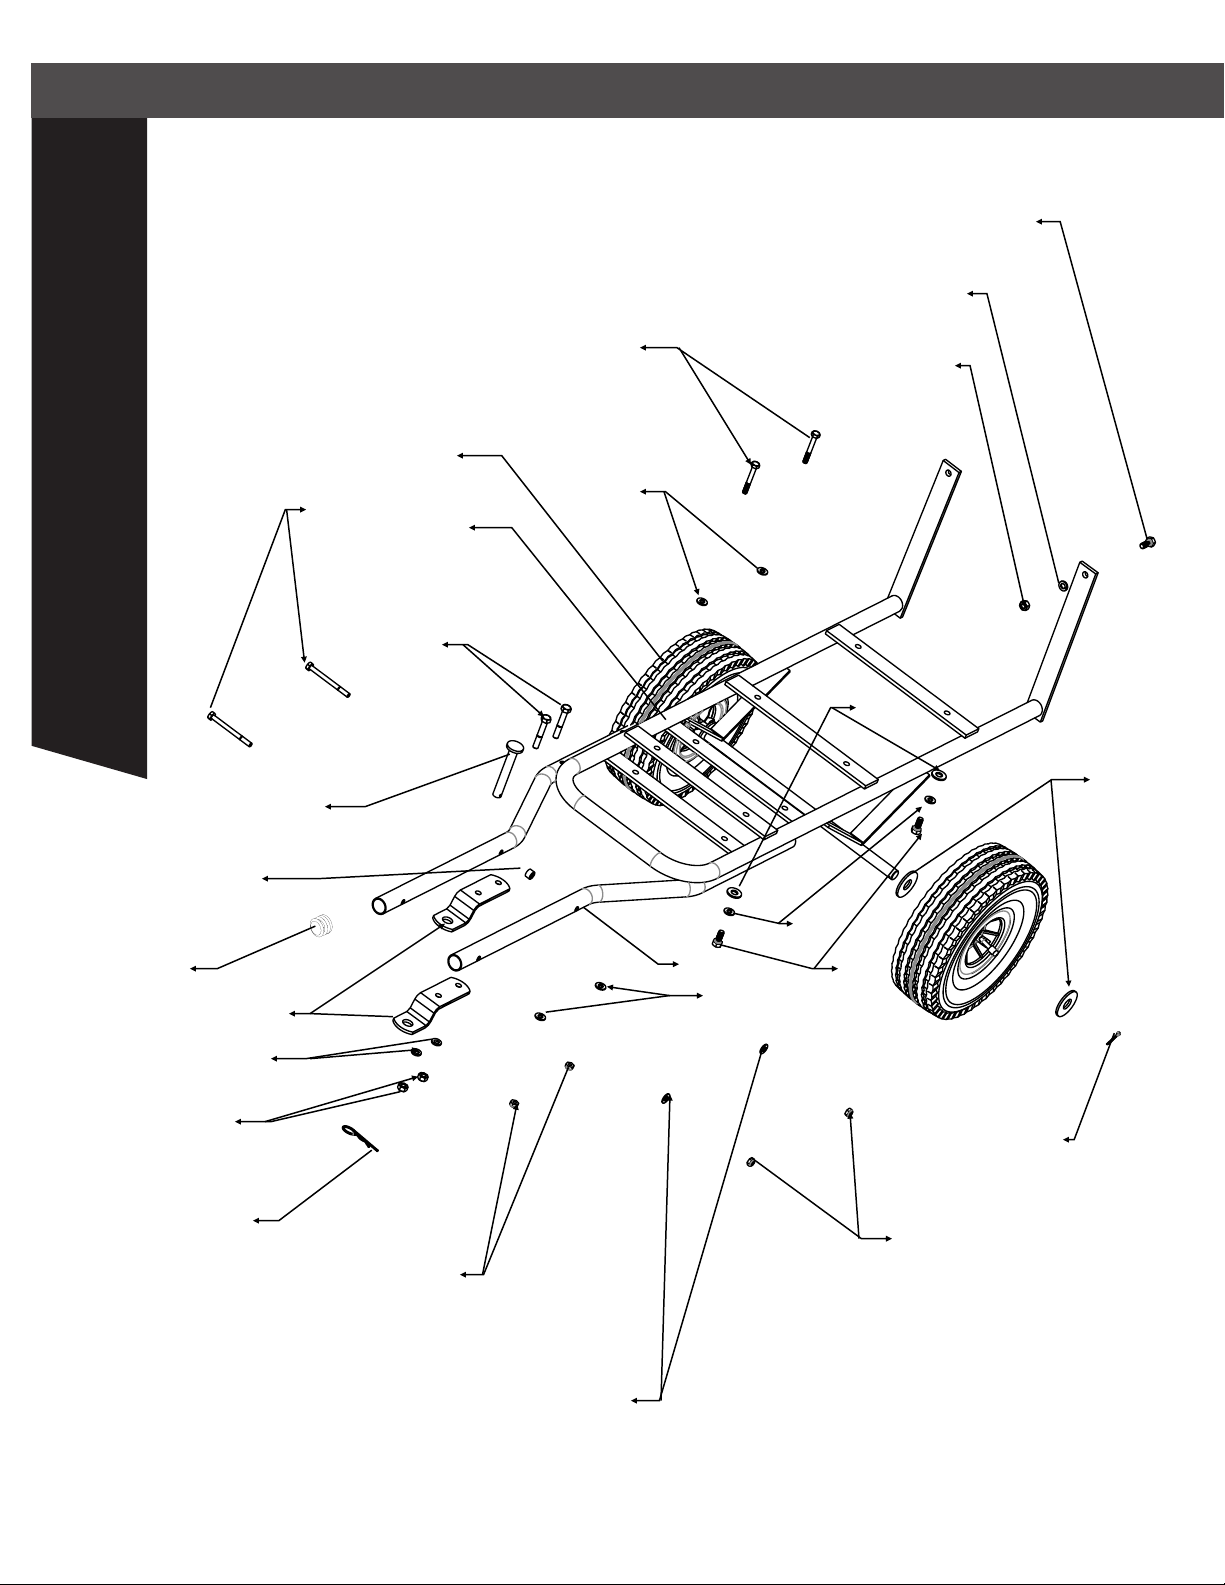
Parts and Support
Please do not return this product to the
store prior to contacting Certified
TM.
At Certified
TM our goal is to deliver quality, value
and outstanding service. If for any reason our
product does not meet your expectations, please
contact us and we will take care of any problem
you may have with this unit.
When ordering replacement parts please have
the model number, part description, part
number, inspector number and date on carton
available so that we can best serve you.
1 (844) 428-7277
MADE IN U.S.A
TRILEAF DISTRIBUTION
TRIFEUIL TORONTO,
CANADA M4S 2B8