5
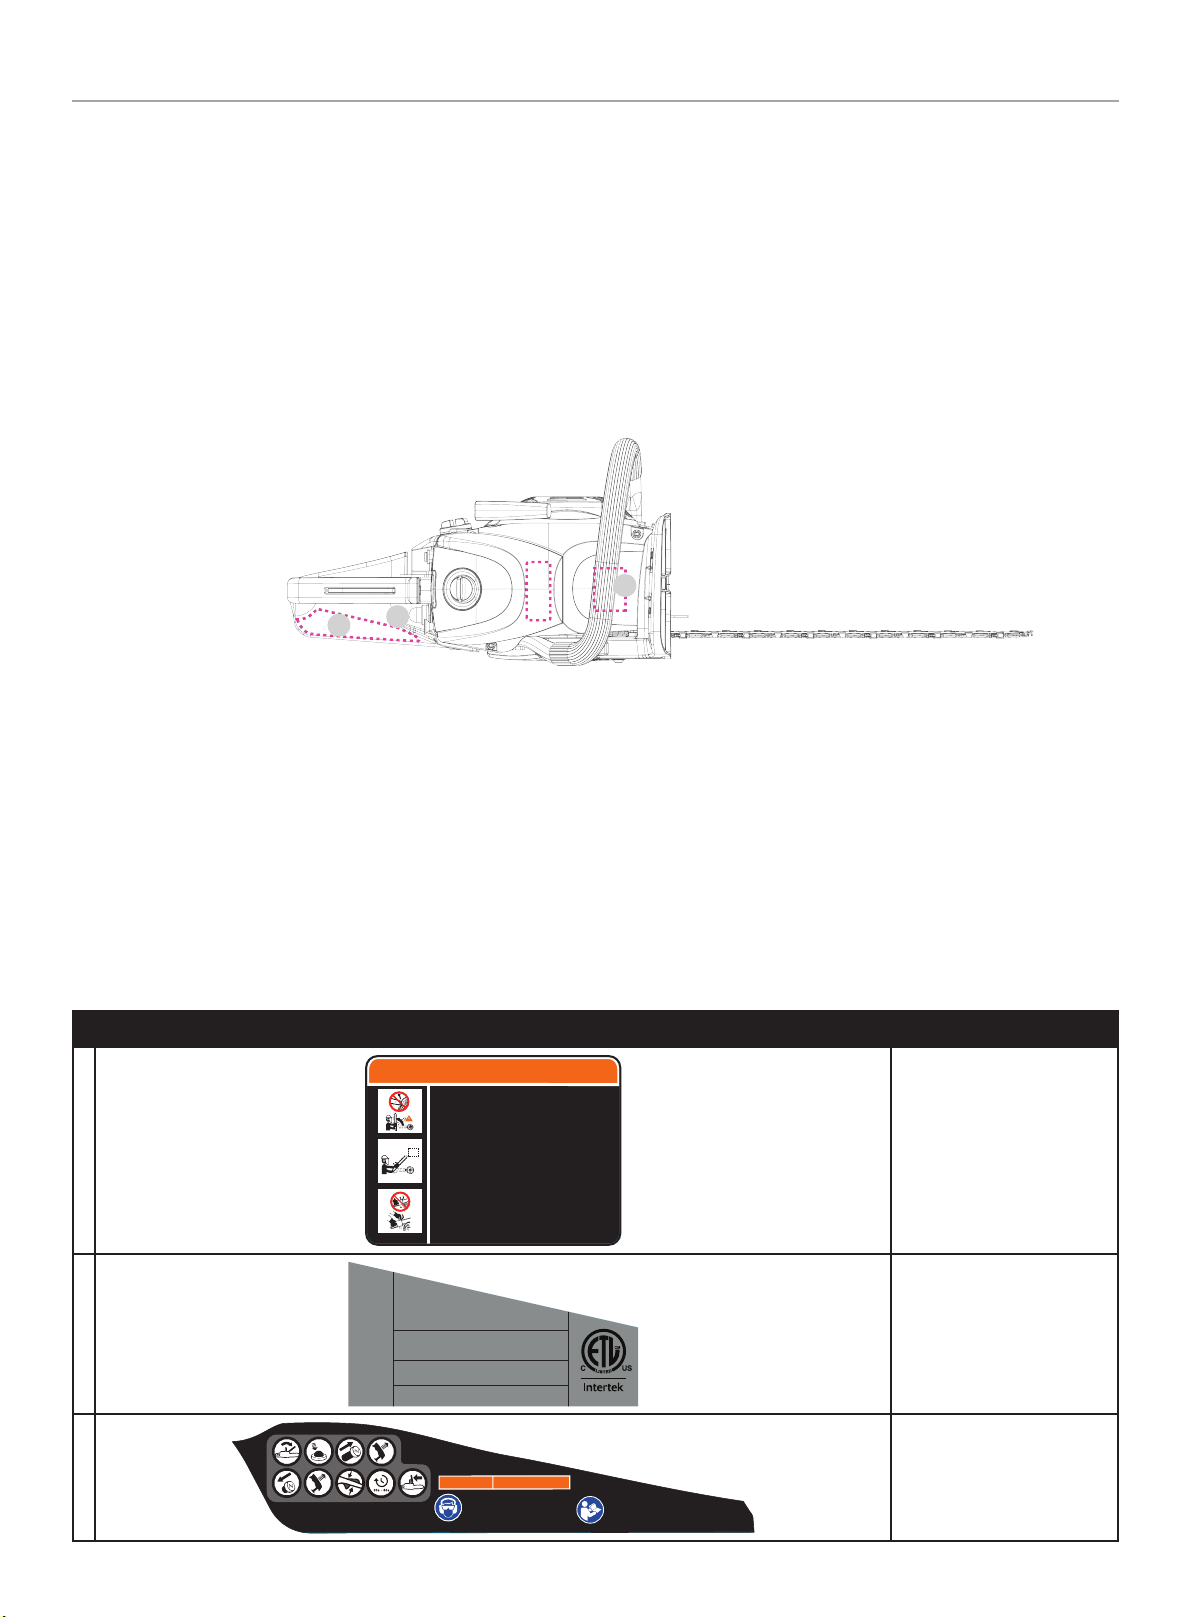
100647 - CHAINSAW IMPORTANT SAFETY INSTRUCTIONS
–Avoid accidental starting. Be in the starting position whenever
pulling the starter rope. The operator and chainsaw must be in
a stable position while starting. Refer to Starting and Stopping.
–Only use this chainsaw for its intended purpose: to cut wood.
Do not use the chainsaw for cutting plastic, masonry or
other non-wood building materials. Only use the chainsaw as
described in this manual.
–Keep all body parts away from the saw chain when the
chainsaw is running. Do not touch or try to stop moving parts.
–When carrying a chainsaw with the engine running always
engage the chain brake.
–Do not touch the engine or muffler. These parts get extremely
hot from operation, even after the chainsaw is turned off.
–Do not operate the chainsaw faster than the speed needed to
do the job. Do not run the chainsaw at high speed when not in
use.
–Do not force the chainsaw, especially near the end of a cut. It
will do a better, safer job when used at the intended rate.
–Always turn the engine off when operation is delayed, when
setting the chainsaw down or when carrying the chainsaw
from one location to another. Make sure all moving parts come
to a complete stop.
–Carry the chainsaw by the front handle with the muffler
positioned away from the body and the guide bar positioned to
the rear. Cover the guide bar and saw chain with the scabbard
when carrying the chainsaw.
–If you strike or become entangled with a foreign object, stop
the chainsaw immediately and check for damage. Do not
operate the chainsaw before repairing damage. Do not operate
the chainsaw with loose or damaged parts.
–Use only original equipment manufacturer (OEM) replacement
parts and accessories for this chainsaw. These are available
from Champion or other qualified service dealer. Use of any
other parts or accessories could lead to injury to the user,
or damage to the chainsaw, and void the warranty.
–Keep the chainsaw clean. Carefully remove vegetation and
other debris that could block moving parts.
–To reduce fire hazard, replace a faulty muffler and spark
arrestor. Keep the engine and muffler free from grass, leaves,
excessive grease or carbon build up.
–If the chainsaw starts to vibrate abnormally, stop the chainsaw
immediately. Inspect the chainsaw for the cause of the
vibration. Vibration is generally an indicator of trouble.
–Keep the work area clean. Cluttered areas invite injuries.
Do not start cutting until the work area is clear and free from
obstructions. Make sure there is secure footing and a planned
retreat path from falling trees or branches.
–Do not cut near electrical cables or power lines. Keep at least
50 feet (15 m) away from all power lines.
–For safer, more effective performance, make sure the guide
bar and chain are properly cleaned, lubricated, tightened and
sharpened. Check the guide bar and chain at frequent intervals
for proper adjustment.
–When cutting a limb that is under tension, use extreme
caution. When the tension is released, the limb could spring
back and strike the operator, causing severe injury or death.
–Use extreme caution when cutting small-sized brush and
saplings, as slender material may catch the saw chain and be
whipped toward the operator or pull the operator off balance.
–This saw is classified by UL as a Class 1C saw in accordance
with CSA Z62.1-03. It is intended for infrequent use by
homeowners, cottagers and campers, and for general
applications such as clearing, pruning, cutting firewood, etc.
It is not intended for prolonged use. If the intended use
involves prolonged periods of operation, this may cause
circulatory problems in the user’s hands due to vibration.
–Do not operate the chainsaw in a tree or on a ladder unless
specifically trained to do so.
–Never remove, modify or make inoperative any safety device
furnished with the chainsaw.
–Do not use the chainsaw in the presence of flammable liquids
or gases.
–Do not attempt operations beyond the operator’s capacity or
experience.
–Do not operate a chainsaw that is damaged, improperly
adjusted or not completely and securely assembled. Make sure
moving parts stop when the throttle control trigger is released
or the chainsaw is turned off. Do not use the chainsaw if
it does not turn on and off properly. Have defective parts
replaced by Champion or other qualified service dealer.
Kickback Safety
WARNING
Kickback may occur when the nose or tip of the guide bar
touches an object, or when the wood closes in and pinches
the saw chain in the cut. In some cases, tip contact may cause
a lightening-fast reverse action, kicking the guide bar rapidly
back to wards the operator. Pinching the saw chain along
the top of the guide bar may push the guide bar rapidly back
towards the operator. Either of these reactions may cause
a loss of control over the saw, which could result in serious
injury to the user. Contact with foreign objects within the wood
can also induce a loss of chain saw control.