Charger WS1-CD Instruction manual
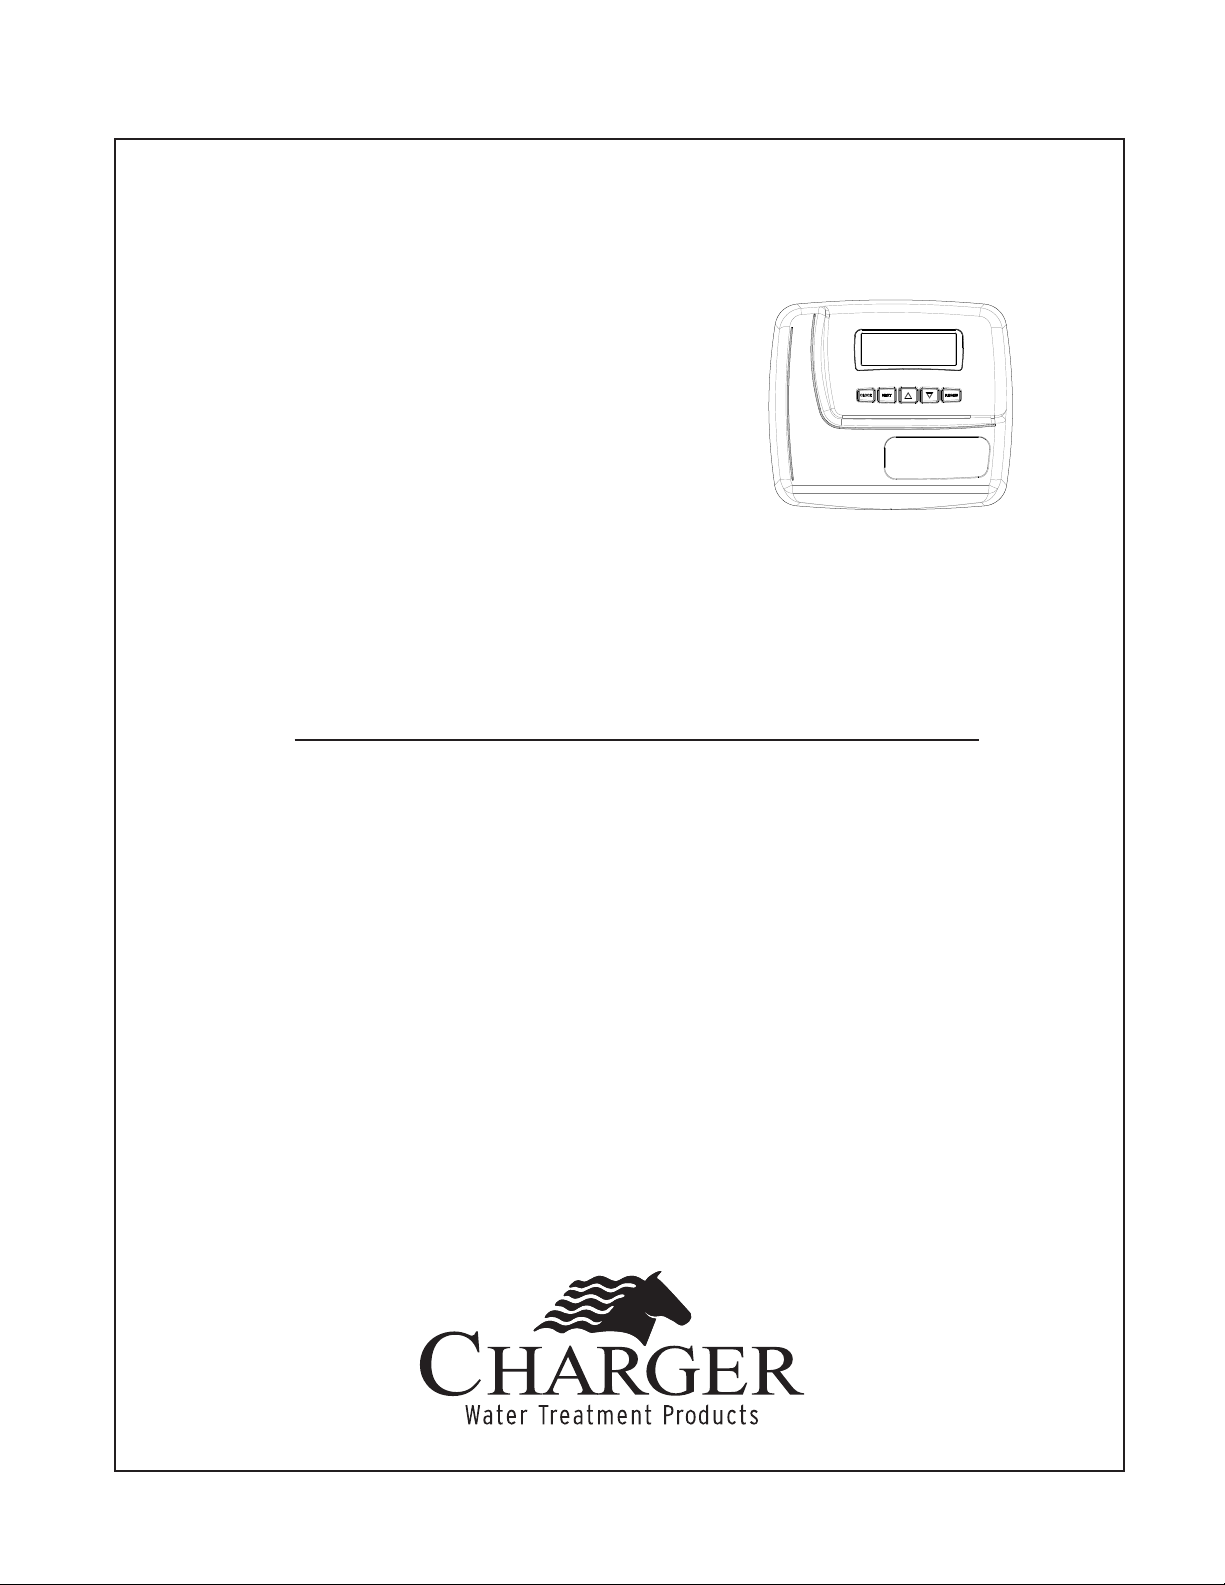
Quick Start Manual
for WS1 - CD Units
Eliminates Stains, Scale Deposits, Soap Scum, Clogged Plumbing,
Dissolved Minerals
Enjoy: Longer service life of water using appliances (up to 30%),
using less detergents, soaps, and harsh cleaners, better lathering of
soaps, cleaner dishes, towels, linens, clothes, Softer skin and hair
Features: High flow rates, highest efficiency, state of the art elec-
tronics, safe low voltage operation, Energy Saver display
Congratulations on the purchase of your new water
conditioner featuring the CD control system. You will
have peace of mind knowing your system will bring you
years of conditioned water use and enjoyment.
A Homeowner’s

(If light is set to “off”, press any button to light up display, then…)
Press and release NEXT to scroll through:
• Time of Day
• Current flow rate (GPM)
• Capacity Remaining (gallons)
• Days Remaining to Regeneration (if programmed)
Setting Time of Day - Initiating a Manual Regeneration
Setting the Time of Day - Start-up or Power Outage
(If light is set to “off”, press any button to light up display, then…)
• Press CLOCK to set time of day, hour (XX:00)
• Press CLOCK again to set time of day, minutes (00:XX)
• Press NEXT to return to Time of Day display (normal)
Time of Day will need to be reset only if power is lost for greater than 8 hours. (Your system has a battery back-up.)
If power is lost during a regeneration, the control will complete the regeneration at the point of interruption once
power is restored.
Manual Regeneration (Immediate)
If higher than average water usage is anticipated, a Manual Regeneration can be initiated:
• Press and hold (3-4 seconds) the REGEN button. A Manual Regeneration will start immediately.
Manual Regeneration (Delayed)
To delay a Manual Regeneration until the normal regeneration time (typically 2:00 am):
• Press and release the REGEN button. To cancel prior to regeneration time, press and release the REGEN button a
second time.
(Note: during any Manual or Normal Regeneration, untreated water may flow through the unit if required)
Bypassing the Water Conditioning System
A bypass should be installed on all water conditioning
systems. A bypass isolates the conditioner from the
home’s water system and allows unconditioned water to
be used in the home while the conditioner is undergoing
service, routine maintenance, if the conditioner is experi-
encing performance issues, or if any leak is detected. The
bypass valve is located directly behind the control
valve and connects to the main line plumbing.
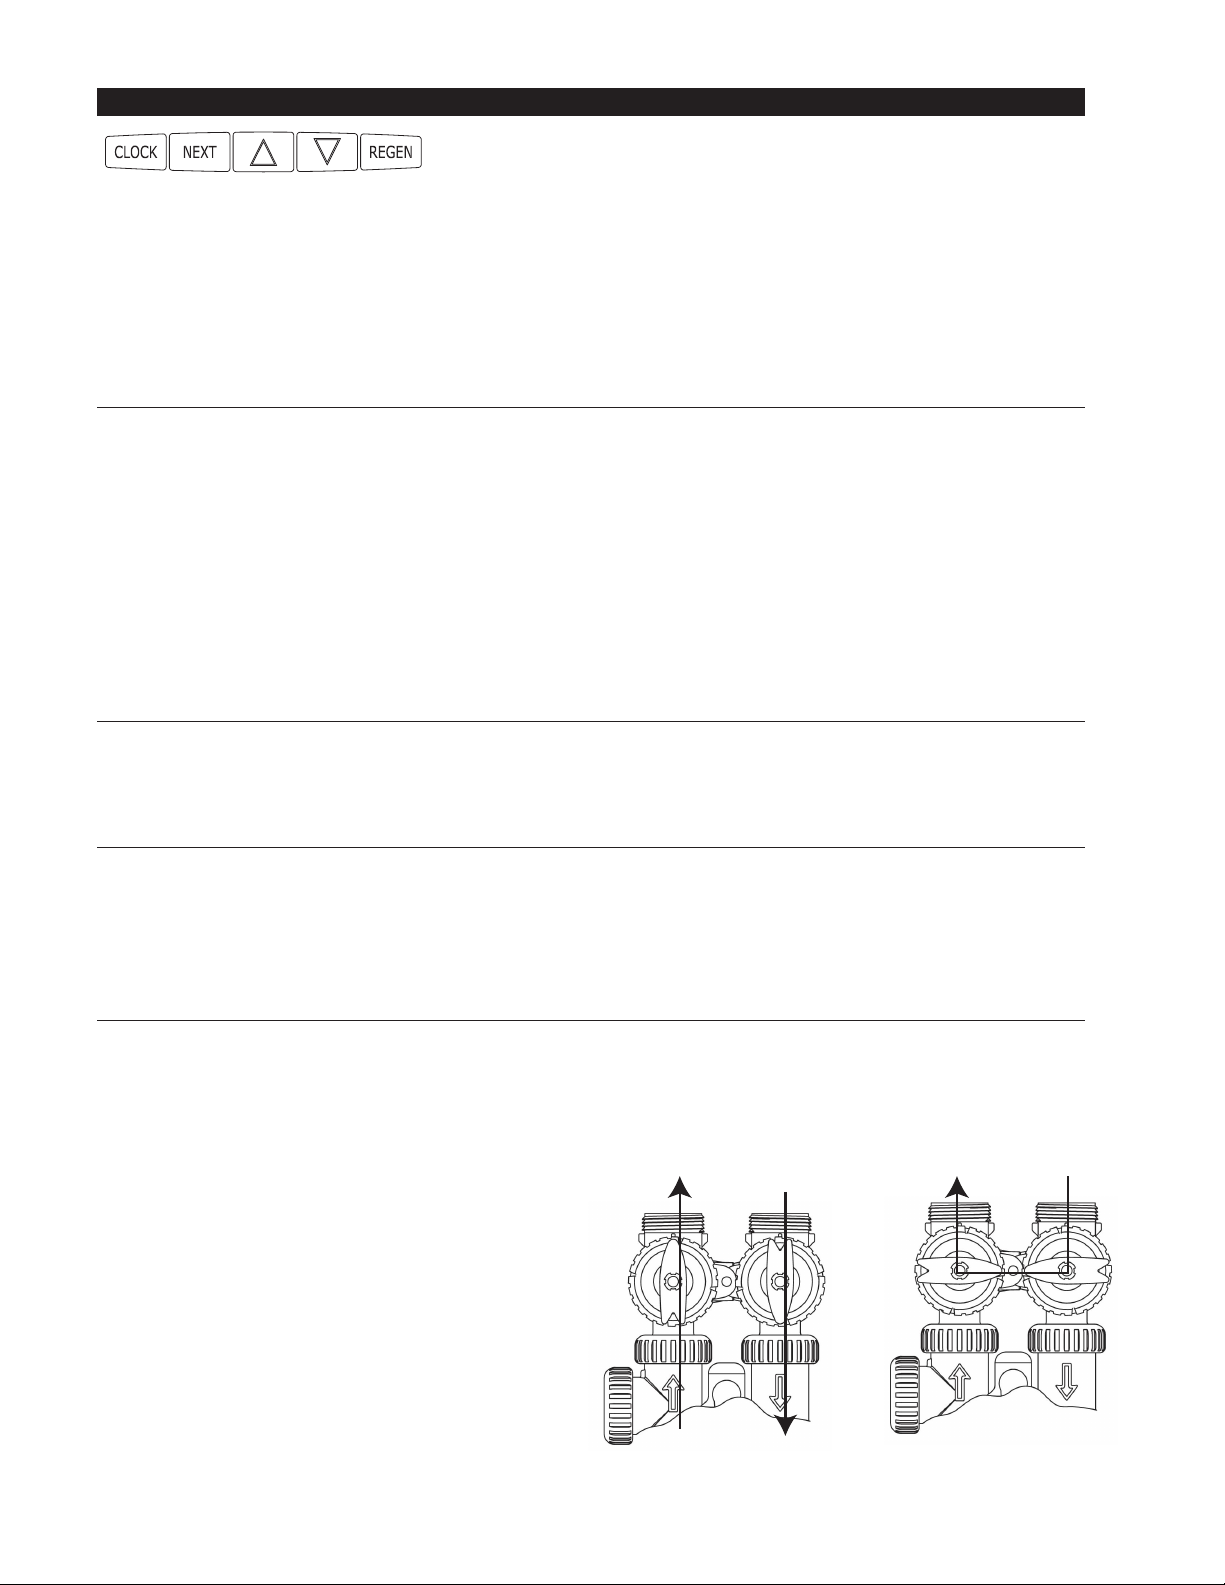
• NORMAL position for the bypass (flow through the
conditioner, to the house) is shown in Figure 1. The
small, red handles are parallel with the inflow and
outflow plumbing.
• To BYPASS the conditioner, turn both small red
handles until they are in the position in Figure 2.
• To return the bypass to the NORMAL position, turn
both small red handles to the position shown in
Figure 1.
• If your water conditioning system is placed in BYPASS,
immediately contact your Water Treatment Professional.
MANUAL OVERVIEW
How To Use This Manual
This Owner’s Manual is designed to provide the homeowner with basic information and instructions on the
residential water conditioner and control packaged with this manual.
This manual does NOT include instructions regarding installation, setup, services, or troubleshooting of the
control valve or other components of a residential water conditioning system. Please contact your local
Water Treatment Professional with questions or concerns about the operation or performance of your water
conditioning system. Keep this manual with other valuable manuals and documents for future reference.
General Warnings
• There are no user serviceable parts in the AC adaptor, motor or controller. DO NOT attempt to remove or
repair individual components.
• Use ONLY the power transformer supplied with this water conditioning system.
• The power outlet MUST be grounded and always on. If it is necessary to disconnect power, unplug the AC
adaptor from its power source first.
• Only fill the brine tank with salt designed for water softening. (Either sodium chloride or potassium chloride
may be used but should not be combined.)
• Ambient temperature surrounding the system should be between 35°F (1°C) and 120°F (49°C)*
• Water temperature flowing through the system should be between 35°F (1°C) and 100°F (38°C)*
• Installation must conform to all state and local plumbing code(s), including electrical.
*If installation is located outdoors, protection from freezing conditions should be considered.
ORIGINAL INSTALLATION INFORMATION
Dealer Name: __________________________________________________ Phone: ________________________
Installation Date: ______/______/______
Install location: _______________________________________________________________________________
Model No: __________________________
Serial No: ___________________________
Water Test: Hardness ___________ TDS ___________ pH ___________ Other ___________
Water Source: City Well Other
Unit Capacity: Max ___________ Min ___________ Per Regeneration
Mineral Tank Size: Diameter ___________ Height ___________
Brine Tank Size: Diameter ___________ Height ___________
Salt Setting Per Regen: ___________lbs
Time of Regeneration: ___________AM PM
DLFC: ___________ GPM
Fill Rate: ___________GPM (0.33 unless otherwise specified)
Injector #/Color: ___________
BASIC TROUBLESHOOTING
Adding Salt to the Brine Tank
When “CHECK SALT LEVEL” is displayed:
(If in Energy Saver mode, press any button to “wake” display, then…)
•Press CLOCK
•“SALT LEVEL SET xx LBS” is displayed
•Press Or to adjust Salt Level to amount of salt added to brine tank
•Press and release NEXT to exit programming; Time of Day is displayed
When adding salt prior to “CHECK SALT LEVEL” being displayed, or initial installation:
(If in Energy Saver mode, press any button to “wake” display, then…)
• Press NEXT four times until “SALT LEVEL” is displayed
• Press CLOCK; “XXX” (current salt level) will flash
• Press or to adjust salt to new* level:
*Current salt level, plus salt being added (pounds)
•Press NEXT to return to normal display (“TIME”)
(Note: either sodium chloride or potassium chloride can be used as a regenerant for ProH2O water softeners.)
Error Codes
Error codes are rare. The most common causes are power supply (brown out, etc.). If any error message appears,
contact your Water Treatment Professional immediately.
Leaks
If there is a leak on or by your water conditioner, put the unit in BYPASS (see “BYPASSING THE WATER CONDITIONING
SYSTEM” section on previous page) and contact your Water Treatment Professional immediately.
Hard Water
If you believe you do not have “soft” water:
• Verify unit is plugged in, the outlet has power, and that the display is on, either gray LCD (light “Off”) or blue LED
(light “On”).
• Make sure the Bypass is in the NORMAL position. If the bypass valve is in the BYPASS position, return it to the
NORMAL position. (See “BYPASSING THE WATER CONIDITIONING SYSTEM” section on previous page).
• Check the brine tank for adequate salt (sodium chloride or potassium chloride). The “dry” salt level should be
above the water level. If it is not, add enough salt to cover the water, wait approximately 20 minutes, then initiate
a Manual Regeneration, either immediate or delayed. (See “SETTING TIME OF DAY - INITIATING A MANUAL
REGENERATION”)
• Make sure the Time of Day is set correctly. If not, set the correct time of day (see “SETTING TIME OF DAY - INITIATING
A MANUAL REGENERATION”) section.
Additional Issues
• Unit used too much salt
• Loss of water pressure
• Staining with conditioned water
• Excessive water in brine tank
The above issues and other concerns not listed in this manual should be addressed with your Water Treatment Professional.
(If light is set to “off”, press any button to light up display, then…)
Press and release NEXT to scroll through:
• Time of Day
• Current flow rate (GPM)
• Capacity Remaining (gallons)
• Days Remaining to Regeneration (if programmed)
Setting Time of Day - Initiating a Manual Regeneration
Setting the Time of Day - Start-up or Power Outage
(If light is set to “off”, press any button to light up display, then…)
• Press CLOCK to set time of day, hour (XX:00)
• Press CLOCK again to set time of day, minutes (00:XX)
• Press NEXT to return to Time of Day display (normal)
Time of Day will need to be reset only if power is lost for greater than 8 hours. (Your system has a battery back-up.)
If power is lost during a regeneration, the control will complete the regeneration at the point of interruption once
power is restored.
Manual Regeneration (Immediate)
If higher than average water usage is anticipated, a Manual Regeneration can be initiated:
• Press and hold (3-4 seconds) the REGEN button. A Manual Regeneration will start immediately.
Manual Regeneration (Delayed)
To delay a Manual Regeneration until the normal regeneration time (typically 2:00 am):
• Press and release the REGEN button. To cancel prior to regeneration time, press and release the REGEN button a
second time.
(Note: during any Manual or Normal Regeneration, untreated water may flow through the unit if required)
Bypassing the Water Conditioning System
A bypass should be installed on all water conditioning
systems. A bypass isolates the conditioner from the
home’s water system and allows unconditioned water to
be used in the home while the conditioner is undergoing
service, routine maintenance, if the conditioner is experi-
encing performance issues, or if any leak is detected. The
bypass valve is located directly behind the control
valve and connects to the main line plumbing.
• NORMAL position for the bypass (flow through the
conditioner, to the house) is shown in Figure 1. The
small, red handles are parallel with the inflow and
outflow plumbing.
• To BYPASS the conditioner, turn both small red
handles until they are in the position in Figure 2.
• To return the bypass to the NORMAL position, turn
both small red handles to the position shown in
Figure 1.
• If your water conditioning system is placed in BYPASS,
immediately contact your Water Treatment Professional.
MANUAL OVERVIEW
How To Use This Manual
This Owner’s Manual is designed to provide the homeowner with basic information and instructions on the
residential water conditioner and control packaged with this manual.
This manual does NOT include instructions regarding installation, setup, services, or troubleshooting of the
control valve or other components of a residential water conditioning system. Please contact your local
Water Treatment Professional with questions or concerns about the operation or performance of your water
conditioning system. Keep this manual with other valuable manuals and documents for future reference.
General Warnings
• There are no user serviceable parts in the AC adaptor, motor or controller. DO NOT attempt to remove or
repair individual components.
• Use ONLY the power transformer supplied with this water conditioning system.
• The power outlet MUST be grounded and always on. If it is necessary to disconnect power, unplug the AC
adaptor from its power source first.
• Only fill the brine tank with salt designed for water softening. (Either sodium chloride or potassium chloride
may be used but should not be combined.)
• Ambient temperature surrounding the system should be between 35°F (1°C) and 120°F (49°C)*
• Water temperature flowing through the system should be between 35°F (1°C) and 100°F (38°C)*
• Installation must conform to all state and local plumbing code(s), including electrical.
*If installation is located outdoors, protection from freezing conditions should be considered.
ORIGINAL INSTALLATION INFORMATION
Dealer Name: __________________________________________________ Phone: ________________________
Installation Date: ______/______/______
Install location: _______________________________________________________________________________
Model No: __________________________
Serial No: ___________________________
Water Test: Hardness ___________ TDS ___________ pH ___________ Other ___________
Water Source: City Well Other
Unit Capacity: Max ___________ Min ___________ Per Regeneration
Mineral Tank Size: Diameter ___________ Height ___________
Brine Tank Size: Diameter ___________ Height ___________
Salt Setting Per Regen: ___________lbs
Time of Regeneration: ___________AM PM
DLFC: ___________ GPM
Fill Rate: ___________GPM (0.33 unless otherwise specified)
Injector #/Color: ___________
BASIC TROUBLESHOOTING
Adding Salt to the Brine Tank
When “CHECK SALT LEVEL” is displayed:
(If in Energy Saver mode, press any button to “wake” display, then…)
•Press CLOCK
•“SALT LEVEL SET xx LBS” is displayed
•Press Or to adjust Salt Level to amount of salt added to brine tank
•Press and release NEXT to exit programming; Time of Day is displayed
When adding salt prior to “CHECK SALT LEVEL” being displayed, or initial installation:
(If in Energy Saver mode, press any button to “wake” display, then…)
• Press NEXT four times until “SALT LEVEL” is displayed
• Press CLOCK; “XXX” (current salt level) will flash
• Press or to adjust salt to new* level:
*Current salt level, plus salt being added (pounds)
•Press NEXT to return to normal display (“TIME”)
(Note: either sodium chloride or potassium chloride can be used as a regenerant for ProH2O water softeners.)
Error Codes
Error codes are rare. The most common causes are power supply (brown out, etc.). If any error message appears,
contact your Water Treatment Professional immediately.
Leaks
If there is a leak on or by your water conditioner, put the unit in BYPASS (see “BYPASSING THE WATER CONDITIONING
SYSTEM” section on previous page) and contact your Water Treatment Professional immediately.
Hard Water
If you believe you do not have “soft” water:
• Verify unit is plugged in, the outlet has power, and that the display is on, either gray LCD (light “Off”) or blue LED
(light “On”).
• Make sure the Bypass is in the NORMAL position. If the bypass valve is in the BYPASS position, return it to the
NORMAL position. (See “BYPASSING THE WATER CONIDITIONING SYSTEM” section on previous page).
• Check the brine tank for adequate salt (sodium chloride or potassium chloride). The “dry” salt level should be
above the water level. If it is not, add enough salt to cover the water, wait approximately 20 minutes, then initiate
a Manual Regeneration, either immediate or delayed. (See “SETTING TIME OF DAY - INITIATING A MANUAL
REGENERATION”)
• Make sure the Time of Day is set correctly. If not, set the correct time of day (see “SETTING TIME OF DAY - INITIATING
A MANUAL REGENERATION”) section.
Additional Issues
• Unit used too much salt
• Loss of water pressure
• Staining with conditioned water
• Excessive water in brine tank
The above issues and other concerns not listed in this manual should be addressed with your Water Treatment Professional.
Treated
Water Exits
Figure 1 Figure 2
Supply
Water Enters
NORMAL OPERATION
Supply
Water Exits
Supply
Water Enters
BYPASS OPERATION
GENERAL SYSTEM INFORMATION

(If light is set to “off”, press any button to light up display, then…)
Press and release NEXT to scroll through:
• Time of Day
• Current flow rate (GPM)
• Capacity Remaining (gallons)
• Days Remaining to Regeneration (if programmed)
Setting Time of Day - Initiating a Manual Regeneration
Setting the Time of Day - Start-up or Power Outage
(If light is set to “off”, press any button to light up display, then…)
• Press CLOCK to set time of day, hour (XX:00)
• Press CLOCK again to set time of day, minutes (00:XX)
• Press NEXT to return to Time of Day display (normal)
Time of Day will need to be reset only if power is lost for greater than 8 hours. (Your system has a battery back-up.)
If power is lost during a regeneration, the control will complete the regeneration at the point of interruption once
power is restored.
Manual Regeneration (Immediate)
If higher than average water usage is anticipated, a Manual Regeneration can be initiated:
• Press and hold (3-4 seconds) the REGEN button. A Manual Regeneration will start immediately.
Manual Regeneration (Delayed)
To delay a Manual Regeneration until the normal regeneration time (typically 2:00 am):
• Press and release the REGEN button. To cancel prior to regeneration time, press and release the REGEN button a
second time.
(Note: during any Manual or Normal Regeneration, untreated water may flow through the unit if required)
Bypassing the Water Conditioning System
A bypass should be installed on all water conditioning
systems. A bypass isolates the conditioner from the
home’s water system and allows unconditioned water to
be used in the home while the conditioner is undergoing
service, routine maintenance, if the conditioner is experi-
encing performance issues, or if any leak is detected. The
bypass valve is located directly behind the control
valve and connects to the main line plumbing.
• NORMAL position for the bypass (flow through the
conditioner, to the house) is shown in Figure 1. The
small, red handles are parallel with the inflow and
outflow plumbing.
• To BYPASS the conditioner, turn both small red
handles until they are in the position in Figure 2.
• To return the bypass to the NORMAL position, turn
both small red handles to the position shown in
Figure 1.
• If your water conditioning system is placed in BYPASS,
immediately contact your Water Treatment Professional.
MANUAL OVERVIEW
How To Use This Manual
This Owner’s Manual is designed to provide the homeowner with basic information and instructions on the
residential water conditioner and control packaged with this manual.
This manual does NOT include instructions regarding installation, setup, services, or troubleshooting of the
control valve or other components of a residential water conditioning system. Please contact your local
Water Treatment Professional with questions or concerns about the operation or performance of your water
conditioning system. Keep this manual with other valuable manuals and documents for future reference.
General Warnings
• There are no user serviceable parts in the AC adaptor, motor or controller. DO NOT attempt to remove or
repair individual components.
• Use ONLY the power transformer supplied with this water conditioning system.
• The power outlet MUST be grounded and always on. If it is necessary to disconnect power, unplug the AC
adaptor from its power source first.
• Only fill the brine tank with salt designed for water softening. (Either sodium chloride or potassium chloride
may be used but should not be combined.)
• Ambient temperature surrounding the system should be between 35°F (1°C) and 120°F (49°C)*
• Water temperature flowing through the system should be between 35°F (1°C) and 100°F (38°C)*
• Installation must conform to all state and local plumbing code(s), including electrical.
*If installation is located outdoors, protection from freezing conditions should be considered.
ORIGINAL INSTALLATION INFORMATION
Dealer Name: __________________________________________________ Phone: ________________________
Installation Date: ______/______/______
Install location: _______________________________________________________________________________
Model No: __________________________
Serial No: ___________________________
Water Test: Hardness ___________ TDS ___________ pH ___________ Other ___________
Water Source: City Well Other
Unit Capacity: Max ___________ Min ___________ Per Regeneration
Mineral Tank Size: Diameter ___________ Height ___________
Brine Tank Size: Diameter ___________ Height ___________
Salt Setting Per Regen: ___________lbs
Time of Regeneration: ___________AM PM
DLFC: ___________ GPM
Fill Rate: ___________GPM (0.33 unless otherwise specified)
Injector #/Color: ___________
BASIC TROUBLESHOOTING
Adding Salt to the Brine Tank
When “CHECK SALT LEVEL” is displayed:
(If in Energy Saver mode, press any button to “wake” display, then…)
•Press CLOCK
•“SALT LEVEL SET xx LBS” is displayed
•Press Or to adjust Salt Level to amount of salt added to brine tank
•Press and release NEXT to exit programming; Time of Day is displayed
When adding salt prior to “CHECK SALT LEVEL” being displayed, or initial installation:
(If in Energy Saver mode, press any button to “wake” display, then…)
• Press NEXT four times until “SALT LEVEL” is displayed
• Press CLOCK; “XXX” (current salt level) will flash
• Press or to adjust salt to new* level:
*Current salt level, plus salt being added (pounds)
•Press NEXT to return to normal display (“TIME”)
(Note: either sodium chloride or potassium chloride can be used as a regenerant for ProH2O water softeners.)
Error Codes
Error codes are rare. The most common causes are power supply (brown out, etc.). If any error message appears,
contact your Water Treatment Professional immediately.
Leaks
If there is a leak on or by your water conditioner, put the unit in BYPASS (see “BYPASSING THE WATER CONDITIONING
SYSTEM” section on previous page) and contact your Water Treatment Professional immediately.
Hard Water
If you believe you do not have “soft” water:
• Verify unit is plugged in, the outlet has power, and that the display is on, either gray LCD (light “Off”) or blue LED
(light “On”).
• Make sure the Bypass is in the NORMAL position. If the bypass valve is in the BYPASS position, return it to the
NORMAL position. (See “BYPASSING THE WATER CONIDITIONING SYSTEM” section on previous page).
• Check the brine tank for adequate salt (sodium chloride or potassium chloride). The “dry” salt level should be
above the water level. If it is not, add enough salt to cover the water, wait approximately 20 minutes, then initiate
a Manual Regeneration, either immediate or delayed. (See “SETTING TIME OF DAY - INITIATING A MANUAL
REGENERATION”)
• Make sure the Time of Day is set correctly. If not, set the correct time of day (see “SETTING TIME OF DAY - INITIATING
A MANUAL REGENERATION”) section.
Additional Issues
• Unit used too much salt
• Loss of water pressure
• Staining with conditioned water
• Excessive water in brine tank
The above issues and other concerns not listed in this manual should be addressed with your Water Treatment Professional.
Charger Water Treatment Products
8150 N. Lehigh Ave, Morton Grove, IL 60053
www.chargerwater.com/FAQ
CWWS1CDHOMEOWNERSMANUAL • 08/2022
Table of contents
Other Charger Water System manuals

Popular Water System manuals by other brands


RainWater
RainWater Mains Backup in a Box installation guide

Sunbank
Sunbank SB-40G installation manual

Ecofrog
Ecofrog EcoFrog user manual

IWS
IWS Dripper System Assembly instructions

Everpure
Everpure Kleensteam II Twin System EV9797-22 Specification sheet

Spectra Watermakers
Spectra Watermakers Ventura 150T MPC Installation and operating manual