ChargeWorx KH-410 User manual

USER MANUAL
KH-410

2
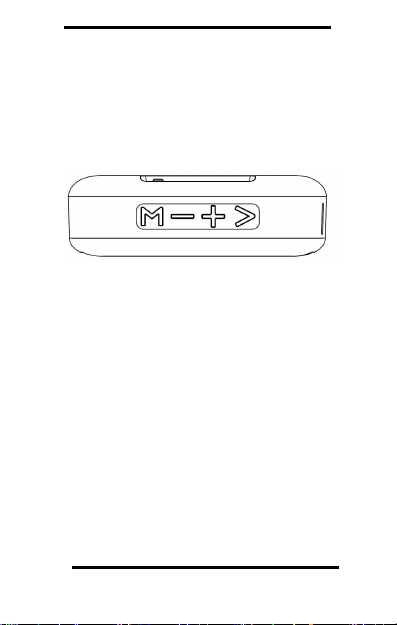
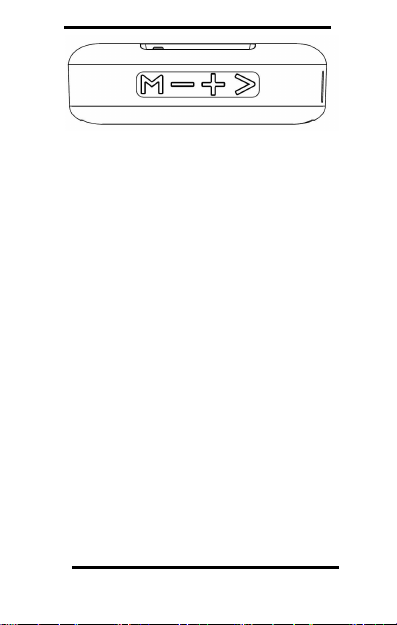
Product Overview
1. USB Input
2. TF Card
3. Micro USB Charging Port
4. On/Off
5. Mode
6. Previous/Decrease Volume
7. Next/Increase Volume
8. Play/Pause
___________4
5_________
6______________
_ ______________3
_______________7
1____________
2_____________
__
_______________8
_
__

3
How to Use
Charging Your Speaker
Connect
one end of the provided Micro
USB charging cable to the Speaker and the
other end to a power source. While the
Speaker is charging the LED indicator will
turn red. When it’s fully charged the light
will turn off.
Powering On & Off
On: Toggle the “On/Off” switch on the back
of the speaker to the left to turn the speaker
on. By default, a blue LED light will be
displayed. The user will hear a voice
prompt say “The Bluetooth® device is
ready to pair.” Indicating that the device
has successfully turned on and entered
Bluetooth® pairing mode.
Off: Toggle the “On/Off” switch on the back
of the speaker to the right to turn off the
speaker. The blue LED indicator light will
turn off. Indicating that the device has been
powered down.
Connecting via Bluetooth®
Make sure to check your phones
Bluetooth® settings to ensure that the
Bluetooth® is turned on. Look for

4
“KH-410” on the list of nearby devices and
tap the name to pair. The user will hear a
voice prompt say
“The Bluetooth® device is connected
successfully.” Indicating that the device has
successfully paired with your phone. The
speaker will automatically connect with your
smart-phone the next time they’re both on,
in range, and in pairing mode.
Note: If you are asked for a password,
please enter "0000".
Phone Commands
•Answer call: When you receive an
incoming call, the speaker will
indicate this by providing a sound
prompt of a phone ringing. To answer
press the “Play/Pause” Button.
•Reject Call: To reject the call, double
tap the “Play/Pause” button.
•End Call: To hang up, simply press
the “Play/Pause” button again.
Music Controls
•Next song: Press the "Next" button to
play the next song.
•Previous song: Press the "Previous"
button to play the previous song.
5
TF & Radio Mode
•IncreaseIncrease volume:volume: PressPress hold andhold and
releaserelease thethe "Next” b"Next” buttonutton untiluntil thethe
desireddesired volume is reacvolume is reached.hed.
•DecreaseDecrease volume:volume: PressPress holdhold andand
releaserelease thethe “Previous”“Previous” button untilbutton until thethe
desireddesired volume is reacvolume is reached.hed.
•Switching Songs/Stations: Press the
Next/Increase Volume and the
Previous/Decrease Volume buttons to
switch songs and increase or decrease
radio stations respectively.
•Increase/Decrease Volume: Press
hold and release the Next/Increase
Volume and the Previous/Decrease
Volume buttons until the desired
volume is reached.
TF Mode:
•To enter TF mode, insert a TF card
into the TF card slot on the back of

6
the device. The user will hear a voice
prompt say "SD Card Mode" and
Music will immediately begin to play.
Radio Mode:
•Press the "Mode" button to switch to
the radio. The user will hear a voice
prompt say "The Radio Mode".
•Press the "Play/Pause" button to auto
search for radio channels
(necessary before using the radio).
Note: Leaving the provided Micro
USB charging cable plugged into the
USB Output will enhance signals, as
the USB cable will act an an antenna.
Problems & Solutions
1. After playing for a long time, the device
will automatically turn off. Especially if
the battery is low. If this happens
please charge the device to capacity
and then turn on.
2. The device does not work when the
paired device is beyond the effective
distance of the Bluetooth®
connection.

7
3. There may be too many Bluetooth®
devices around you. Try turning them
off to remove interference.
Package Contents
•KH-410 Speaker
•Dual Micro USB AUX Cable
•Manual
Specifications
Bluetooth®
Version 4.2
Bluetooth®
Range 33ft
Playtime 10 Hours
Charge Time 1.5 Hours
Battery Lithium Ion
Power Input 5V
Music Input Bluetooth®, TF Card,
Radio
Item
Dimensions 4.3"x 1.3"x2.7"
Weight 215g

8
Important Notes
•Don't drop, knock, disassemble or attempt to repair the
device by yourself.
•Keep out of reach of children.
•Don't immerse the device in water or make it wet.
•Don't use in the presence of flammable gas.
•Don't expose the device to a heat source like fire or a
heater.

9
Limited Warranty Card
The ChargeWorx® Limited l Year Warranty guarantees the
original purchaser that the product is free from any defect in
material and workmanship in conjunction with the original
purchaser using the product according to any accompanying
labels and instructions. THIS GUARANTEE IS VALID FOR
ONE YEAR FROM THE ORIGINAL DATE OF PURCHASE.
ChargeWorx® agrees that it will, at its option, either repair the
defect or replace the defective product or part thereof at no
charge to the purchaser for parts or labor for the time period
stated.
This limited warranty does not cover any damage caused by
accident, misuse, modification, or normal wear and tear, and is
limited to the value of the product. There are no other express
or implied warranties for battery-powered products. The limited
warranty described herein is in addition to applicable law. ALL
IMPLIED WARRANTIES INCLUDING THE WARRANTIES OF
MERCHANTABILITY AND FITNESS FOR USE ARE LIMITED
TO THE PERIOD FROM THE DATE OF ORIGINAL
PURCHASE SET FORTH. Some states do not allow limitations
on how long an implied warranty lasts, so the above limitation
may not apply to you. Neither the sales personnel of the seller
nor any other person is authorized to make any warranties other
than those described herein or to extend the duration of any
warranties beyond the time period described herein on the
behalf of ChargeWorx®.
The warranties described herein shall be the sole and exclusive
warranties granted by ChargeWorx® and shall be the sole and

10
exclusive remedy available to the purchaser. Corrections of
defects, in the manner and for the period of time described
herein, shall constitute complete fulfillment of all liabilities and
responsibilities of ChargeWorx® to the purchaser with respect
to the product and shall constitute full satisfaction of all claims,
whether based on contract negligence, strict liability or
otherwise. In no event shall be liable or in any way responsible,
for an incidental of consequential economic or property
damage. Some states do not allow the exclusion of incidental or
consequential damages, so the above exclusion may not apply
to you. THIS LIMITED WARRANTY, GIVES YOU SPECIFIC
LEGAL RIGHTS. YOU MAY ALSO HAVE OTHER RIGHTS,
WHICH VARY FROM STATE TO STATE.
Where to ship product
ChargeWorx® Returns Department
1 Rewe Street
2nd Floor
New York, NY 11211
Enclose proof of purchase and $5.95 for Shipping and Handling
If you have any questions, please contact ChargeWorx® at
support@chargeworxusa.com or visit
www.chargeworxusa.com
CHARGEWORX® COPYRIGHT© 2018 ALL RIGHTS RESERVED.
MANUAL DE USUARIO
KH-410

2
Descripción Del Producto
1. Entrada USB
2. Tarjeta TF
3. Puerto De Carga Micro USB
4. Encendido/Apagado
5. Modo
6. Anterior/Disminuir Volumen
7. Siguiente/Aumentar Volumen
8. Jugar/Pausa
___________4
5_________
6______________
_ ______________3
_______________7
1____________
2_____________
__
_______________8
_
__

3
Cómo Utilizar
Cargando Su Altavoz
Conecte un extremo del cable de carga
Micro USB suministrado al altavoz y el otro
extremo a una fuente de alimentación.
Mientras el altavoz se está cargando, el
indicador LED se encenderá en rojo.
Cuando esté completamente cargada, la
luz se apagará.
Encendido Y Apagado
Encendido: mueva el interruptor de
"Encendido / Apagado" en la parte
posterior del altavoz hacia la izquierda para
encenderlo. Por defecto, se mostrará una
luz LED azul. El usuario escuchará un
mensaje de voz que dice "El dispositivo
Bluetooth® está listo para emparejarse".
Indica que el dispositivo se ha encendido
con éxito y ha ingresado en el modo de
emparejamiento Bluetooth®.
Apagado: mueva el interruptor de
"Encendido / Apagado" en la parte
posterior del altavoz a la derecha para
apagarlo. El indicador LED azul se
apagará. Indica que el dispositivo ha sido
apagado.

4
Connecting via Bluetooth®
Asegúrese de verificar la configuración de
Bluetooth® de sus teléfonos para
asegurarse de que Bluetooth® esté
activado. Busque “KH-410” en la lista de
dispositivos cercanos y toque el nombre
para emparejar. El usuario escuchará un
mensaje de voz que dice "El dispositivo
Bluetooth® está conectado
correctamente". Indica que el dispositivo
se ha emparejado correctamente con su
teléfono. El altavoz se conectará
automáticamente con su teléfono
inteligente la próxima vez que se
encuentren tanto en el rango como en el
modo de sincronización.
Nota: Si se le solicita una contraseña,
ingrese "0000".
Comandos De Teléfono
•Responder a la llamada: cuando
recibe una llamada entrante, el orador
lo indicará con un aviso sonoro de un
teléfono que suena.Para responder
presione el botón "Play / Pause".
•Rechazar llamada: para rechazar la
llamada, toque dos veces el botón
"Reproducir / Pausa".

5
Controles De Musica
•Reproducir/Pausa: Cuando el
Bluetooth® está conectado a un
teléfono móvil, presione el botón
"Reproducir / Pausa" para reproducir
música desde el teléfono hasta el
altavoz. Presiona el botón
"Reproducir / Pausa" nuevamente
para pausar la música que se está
reproduciendo.
•Siguiente Canción: presione el botón
"Siguiente" para reproducir la
siguiente canción.
•Canción Anterior: presione el botón
"Anterior" para reproducir la canción
anterior.
•Aumentar El Volumen: mantenga
presionado y suelte el botón "Siguiente"
hasta alcanzar el volumen deseado.
•Disminuir El Volumen: mantenga
presionado y suelte el botón "Anterior"
hasta alcanzar el volumen deseado.
•Finalizar llamada: para colgar,
simplemente presione nuevamente el
botón "Reproducir / Pausa".
6
Modo TF Y Radio
•Cambio de Canciones/Estaciones:
Presione los botones Siguiente/
Aumentar volumen Y Anterior/
Disminuir volumen para cambiar
canciones y aumentar o disminuir las
estaciones de radio respectivamente.
•Aumentar/Disminuir El Volumen:
mantenga presionado y suelte los
botones Siguiente / Aumentar volumen
y Anterior / Reducir volumen hasta
alcanzar el volumen deseado.
Modo TF:
•Para ingresar al modo TF, inserte una
tarjeta TF en la ranura para tarjetas TF
en la parte posterior del dispositivo. El
usuario escuchará un mensaje de voz
que dice "Modo de tarjeta SD" y la
Música comenzará a reproducirse
inmediatamente.

7
Modo De Radio:
•Presione el botón "Modo" para
cambiar a la radio. El usuario
escuchará un mensaje de voz que
dice "El modo de radio".
•Presione el botón "Reproducir /
Pausa" para buscar automáticamente
los canales de radio (necesarios antes
de usar la radio). Nota: Dejar el cable
de carga Micro USB provisto
enchufado en la salida USB mejorará
las señales, ya que el cable USB
actuará como una antena.
Problemas Y Soluciones
1. Después de jugar durante mucho
tiempo, el dispositivo se apagará
automáticamente. Especialmente si la
batería está baja. Si esto sucede,
cargue el dispositivo a su capacidad y
luego enciéndalo.
2. El dispositivo no funciona cuando el
dispositivo vinculado está más allá de
la distancia efectiva de la conexión
Bluetooth®.
3. Puede haber demasiados dispositivos
Bluetooth® a tu alrededor. Intenta

8
Contenidos Del Paquete
•Altavoz KH-410
•Cable AUX Micro USB Doble
•Manual
apagarlos para eliminar la
interferencia.
Presupuesto
Versión
Bluetooth® 4.2
Rango De
Bluetooth® 33 Pies
Tiempo De
Juego 10 Horas
Tiempo De
Carga 1.5 Horas
Batería Ion De Litio
Entrada De
Alimentación 5V
Entrada De
Musica
Bluetooth®, Tarjeta
TF, Radio
Dimensiones
Del Artículo 4.3"x 1.3"x2.7"
Peso 215g

9
Notas Importantes
•No deje caer, golpee, desmonte ni intente reparar el
dispositivo por sí mismo.
•Mantener fuera del alcance de los niños.
•No sumerja el dispositivo en agua ni lo humedezca.
•No usar en presencia de gas inflamable.
•No exponga el dispositivo a una fuente de calor como
el fuego o un calentador.

10
Tarjeta De Garantía Limitada
La garantía limitada de l año de ChargeWorx® garantiza al
comprador original que el producto está libre de cualquier
defecto de material y mano de obra junto con el comprador
original que usa el producto de acuerdo con las etiquetas e
instrucciones que lo acompañan. ESTA GARANTÍA ES
VÁLIDA POR UN AÑO A PARTIR DE LA FECHA ORIGINAL
DE COMPRA. ChargeWorx® acuerda que, a su opción,
reparará el defecto o reemplazará el producto defectuoso o
una parte del mismo sin cargo para el comprador por las
piezas o la mano de obra durante el período de tiempo
establecido.
Esta garantía limitada no cubre ningún daño causado por
accidente, mal uso, modificación o desgaste normal, y se limita
al valor del producto. No hay otras garantías explícitas o
implícitas para productos alimentados por batería. La garantía
limitada aquí descrita es adicional a la ley aplicable. TODAS
LAS GARANTÍAS IMPLÍCITAS, INCLUIDAS LAS GARANTÍAS
DE COMERCIABILIDAD Y ADECUACIÓN PARA EL USO,
ESTÁN LIMITADAS AL PERÍODO A PARTIR DE LA FECHA
DE LA CONFIGURACIÓN DEL ORIGINAL. Algunos estados
no permiten limitaciones sobre la duración de una garantía
implícita, por lo que es posible que la limitación anterior no se
aplique en su caso. Ni el personal de ventas del vendedor ni
ninguna otra persona está autorizada para otorgar garantías
que no sean las descritas en este documento o para extender
la duración de cualquier garantía más allá del período de
tiempo descrito en este documento en nombre de
ChargeWorx®.
Las garantías descritas aquí serán las únicas y exclusivas
otorgadas por ChargeWorx® y serán las únicas y
Table of contents
Languages:


