1
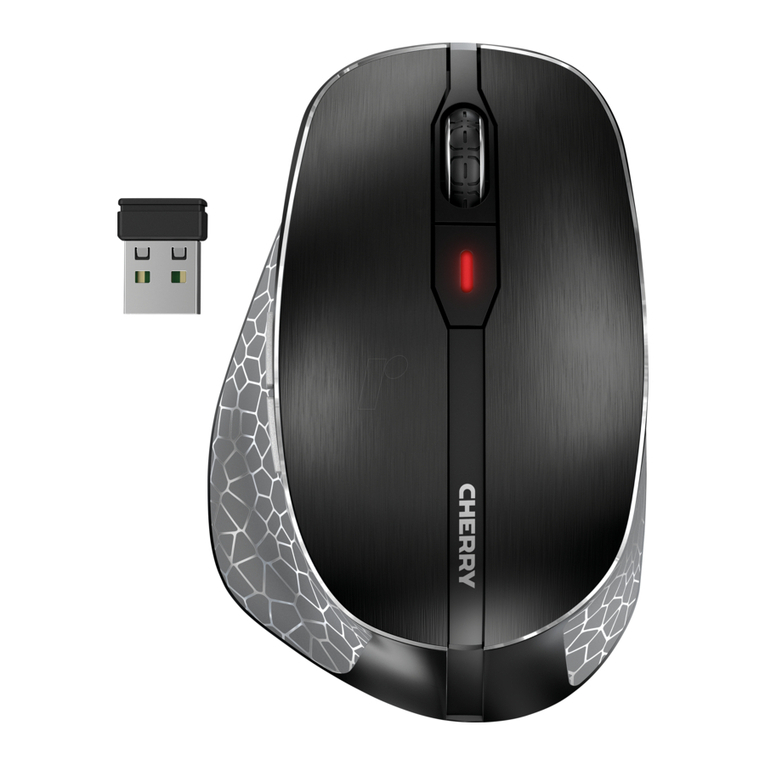
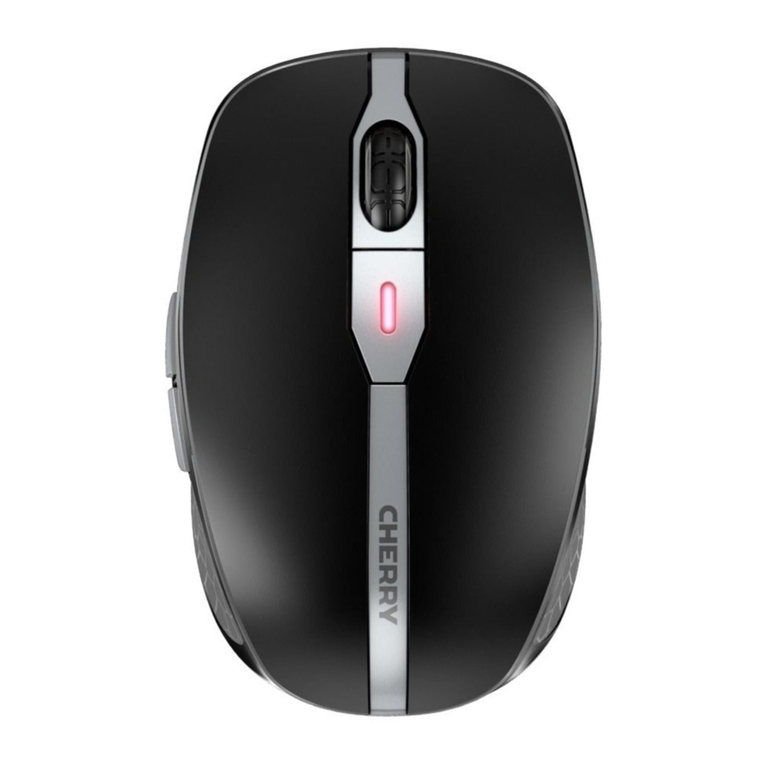
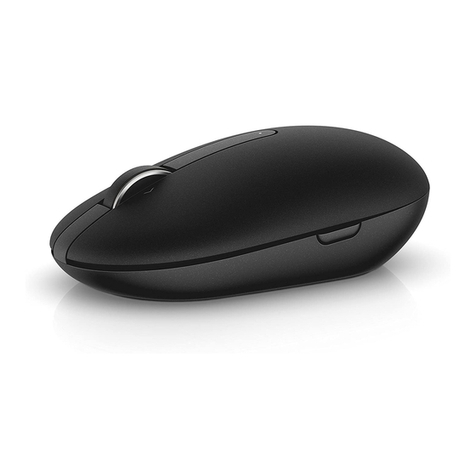
①Buchse für Ladekabel
②DPI-Umschaltung
③Status-LED für Ladezustand der Batterie,
Auflösung, Bluetooth- oder Funkverbindung
④Browser vor
⑤Browser zurück
⑥Schalter Aus (off)/Funk (RF)/Bluetooth (BT)
⑦Taste für Bluetooth-Verbindung
⑧Empfänger für Funkverbindung
Bevor Sie beginnen ...
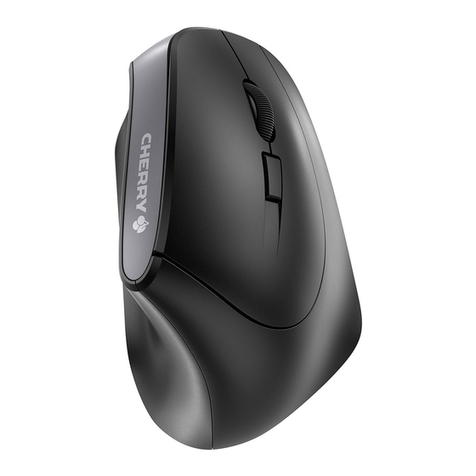
Die CHERRY MW 8 ERGO ist eine kabellose Maus zur
Bedienung von PCs/Laptops.
Für Informationen zu weiteren Produkten, Downloads
und vielem mehr, besuchen Sie bitte www.cherry.de.
1 Zu Ihrer Sicherheit
Erstickungsgefahr durch Verschlucken von
Kleinteilen
• Bewahren Sie das Gerät außerhalb der Reichweite
von Kindern unter 3 Jahren auf.
"Repetitive Strain Injury" = "Verletzung durch
wiederholte Beanspruchung"
RSI entsteht durch kleine, sich ständig
wiederholende Bewegungen.
• Richten Sie Ihren Arbeitsplatz ergonomisch ein.
• Positionieren Sie Tastatur und Maus so, dass sich
Ihre Oberarme und Handgelenke seitlich vom
Körper befinden und ausgestreckt sind.
• Machen Sie mehrere kleine Pausen, ggf. mit
Dehnübungen.
• Ändern Sie oft Ihre Körperhaltung.
2 Beschädigungen vermeiden
Löschen von Speichermedien und Beschädigung von
mechanischen Uhren durch Magnet in der Maus
• Bringen Sie keine Speichermedien, wie
Magnetkarten oder externe Festplatten, und keine
mechanischen Uhren näher als 10 cm zur Maus.
3 Maus mit dem PC/Laptop verbinden
Sie können die Maus über Bluetooth mit dem PC/
Laptop verbinden oder mit dem Empfänger über eine
2,4 GHz-Funkverbindung.
Die Verbindung über Bluetooth ist bequem, wenn Sie
die Maus an mehreren Geräten verwenden möchten:
Sie müssen die Verbindung nur einmal herstellen
und benötigen den Empfänger nicht.
3.1 Maus über Bluetooth verbinden
1 Öffnen Sie an Ihrem PC/Laptop die Suche nach
Bluetooth-Geräten (zum Beispiel über Start >
Einstellungen > Geräte > Bluetooth).
2 Folgen Sie den Anweisungen der Software.
3 Stellen Sie auf der Unterseite der Maus den
Schalter auf "BT".
4 Aktivieren Sie die Bluetooth-Verbindung der Maus,
indem Sie den Knopf an der Unterseite der Maus
drücken.
Die blaue LED der Maus blinkt schnell.
Falls die blaue LED nicht blinkt:
• Es besteht bereits eine Verbindung der Maus
mit einem anderen PC/Laptop. Schalten Sie
diesen PC/Laptop aus oder deaktivieren Sie die
Verbindung an diesem PC/Laptop.
5 Folgen Sie den Anweisungen der Software.
Die LED erlischt und die Maus ist mit Ihrem PC/
Laptop verbunden.
Falls die rote LED der Maus schnell blinkt, ist die
Verbindung fehlgeschlagen.
• Versuchen Sie es erneut.
3.2 Maus über Empfänger verbinden
Der Empfänger befindet sich in einem Fach an der
Unterseite der Maus und wird durch einen Magneten
gehalten.
1 Ziehen Sie den Empfänger aus dem Gehäuse.
2 Schließen Sie den Empfänger am USB-Anschluss
des PCs/Laptops an.
3 Stellen Sie auf der Unterseite der Maus den
Schalter auf "RF".
Die Maus ist mit Ihrem PC/Laptop verbunden.
DE BEDIENUNGS-
ANLEITUNG
Jedes Gerät ist anders!
In der Bedienungsanleitung erhalten Sie
Hinweise zur effektiven und zuverlässigen
Verwendung.
• Lesen Sie die Bedienungsanleitung
aufmerksam durch.
• Bewahren Sie die Bedienungsanleitung auf und
geben Sie sie an andere Benutzer weiter.
Parallele Anmeldung an mehreren PCs/
Laptops
Bluetooth erkennt automatisch, wenn
bereits ein PC/Laptop eingeschaltet ist, der schon
einmal mit dem Gerät verbunden wurde. In diesem
Fall lässt Bluetooth keine neue Verbindung mit
einem weiteren PC/Laptop zu, damit es nicht zu
Fehleingaben kommt.
• Schalten Sie den ersten PC/Laptop aus oder
deaktivieren Sie die Verbindungen.
3.3 Empfänger in der Maus verstauen
Der Empfänger ist so klein, dass er auch beim
Transport eines Laptops in der USB-Buchse bleiben
kann. Zum Schutz vor Verschmutzung und Verlust
ziehen Sie den Empfänger ab und deponieren ihn in
der Maus.
4 DPI-Zahl der Maus einstellen
Mit der Höhe der DPI-Zahl steigt die Geschwindigkeit
des Mauszeigers.
• Drücken Sie die DPI-Taste auf der Mausoberseite.
Die LED blinkt je nach Einstellung:
1x = 600 dpi, 2x = 1000 dpi,
3x = 1600 dpi, 4x = 3200 dpi
Die Einstellung wird in der Maus gespeichert und
bleibt auch beim Ausschalten erhalten.
5Mausladen
Wenn die rote LED langsam blinkt, sollten Sie die
Maus in Kürze laden. Je schneller die rote LED blinkt,
umso geringer ist der Ladestand der Batterie.
• Verbinden Sie das Ladekabel mit der Maus und
einer USB-Buchse am PC/Laptop.
Solange die Maus geladen wird, leuchtet die LED.
Wenn die Maus voll geladen ist, erlischt die LED.
Solange der PC/Laptop eingeschaltet ist, wird die
Batterie der Maus geladen. Sie können während des
Ladevorgangs weiterarbeiten.
6 Maus ein-/ausschalten
Die CHERRY MW 8 ERGO schaltet bei Nichtbenutzung
in einen Schlaf-Modus, in dem sie fast keine Energie
benötigt. Beim ersten Tastendruck schaltet sie sich
automatisch wieder ein.
Weil sie im Energiesparmodus trotzdem Energie
verbraucht, sollten Sie sie bei längerer
Nichtbenutzung und zum Transport manuell
ausschalten.
• Schieben Sie den Schalter auf der Mausunterseite
in die entsprechende Position:
Aus = off, Ein (Funk) = RF, Ein (Bluetooth) = BT
7 Maus reinigen
1 Schalten Sie die Maus aus.
HINWEIS: Beschädigung durch aggressive
Reinigungsmittel oder Flüssigkeit in der Maus
• Verwenden Sie zur Reinigung keine Lösungsmittel
wie Benzin oder Alkohol und keine Scheuermittel
oder Scheuerschwämme.
• Verhindern Sie, dass Flüssigkeit in die Maus
gelangt.
2 Reinigen Sie die Maus mit einem leicht feuchten
Tuch und etwas mildem Reinigungsmittel
(z. B. Geschirrspülmittel).
3 Trocknen Sie die Maus mit einem fusselfreien,
weichen Tuch.
8 Falls die Maus nicht funktioniert
• Schalten Sie die Maus aus und wieder ein.
• Laden Sie die Maus über das Ladekabel (siehe 5
"Maus laden").
• Bei Verbindung über den Empfänger: Schließen
Sie den Empfänger an einem anderen USB-
Anschluss am PC/Laptop an.
• Falls es bei der Nutzung von USB 3.0-Geräten in
der direkten Umgebung des Empfängers zu
Störungen kommt: Verwenden Sie für den
Empfänger oder das USB 3.0-Gerät einen
entfernteren Anschluss, ein zusätzliches Kabel
oder einen USB-Hub.
• Schließen Sie den Empfänger an einer USB 2.0-
Buchse des PCs/Notebooks an (diese hat meist
eine weiße oder schwarze Führung). An USB 3.0-
Buchsen (blaue Führung) kommt es manchmal zu
Fehlfunktionen.
• Bei Verbindung über Bluetooth: Entfernen Sie die
Maus in der Bluetooth-Software und fügen Sie sie
als neues Gerät wieder hinzu.
• Wenn sich Ihr PC/Laptop im Standby-Modus
befindet, ist ein Aufwecken über Bluetooth-Geräte
nicht möglich. Schalten Sie den PC/Laptop
manuell ein.
9 Entsorgung
Das Gerät enthält eine Lithium-Ionen-
Batterie. Diese lässt sich nicht wechseln.
Elektrische Geräte und Batterien enthalten
Stoffe, die der Gesundheit und der Umwelt
schaden können.
• Entsorgen Sie das Gerät mit der Batterie
entsprechend den gesetzlichen Vorschriften.
10 Technische Daten
Bezeichnung Wert
Versorgungs-
spannung
Empfänger:
5,0 V/DC ±5 %
Ladespannung Typ. 5,0 V/DC
Stromaufnahme Maus: typ. 10 mA
(Standby: max. 0,3 mA)
Empfänger: typ. 10 mA
Batterie Aufladbare Lithium-Ionen-
Batterie, 550 mAh
Sendefrequenz 2400,0 ... 2483,5 MHz
Sendeleistung Max. 10 mW (EIRP)
Bluetooth 4.0
Lagertemperatur -15 °C ... +60 °C
Betriebstemperatur 0 °C ... +40 °C
11 Kontakt
Cherry GmbH
Cherrystraße
91275 Auerbach/OPf.
Internet: www.cherry.de
Telefon: +49 (0) 9643 2061-100*
*zum Ortstarif aus dem deutschen Festnetz, abweichende
Preise für Anrufe aus Mobilfunknetzen möglich
12 EU-Konformitätserklärung
Hiermit erklärt die Cherry GmbH, Auerbach/
OPf., Deutschland, dass dieser Funkanlagen-
typ der Richtlinie 2014/53/EU entspricht. Den
vollständigen Text der EU-Konformitätserklärung fin-
den Sie unter folgender Internet-Adresse:
www.cherry.de/compliance.
①Socket for charging cable
②DPI switch
③Status LED for battery charge status, resolution,
Bluetooth or wireless connection
④Browser forward
⑤Browser back
⑥Off switch/wireless (RF)/Bluetooth (BT)
⑦Button for Bluetooth connection
⑧Receiver for wireless connection
Before you begin ...
The CHERRY MW 8 ERGO is a wireless mouse for
operating PCs and laptops.
For information on other products, downloads and
much more, visit us at www.cherry.de.
1Foryoursafety
Risk of choking from swallowing small parts
• Keep the device out of the reach of children under
3years.
RSI stands for "Repetitive Strain Injury".
RSI arises due to small movements continuously
repeated over a long period of time.
• Set up your workspace ergonomically.
• Position the keyboard and mouse in such a manner
that your upper arms and wrists are outstretched
and to the sides of your body.
• Take several short breaks, with stretching
exercises if necessary.
• Change your posture often.
2 Avoiding damage
The magnet in the mouse can wipe storage media and
damage mechanical watches.
• Do not place any storage media such as magnetic
cards or external hard drives, or mechanical
watches within 10 cm of the mouse.
3 Connecting the mouse with a PC/
laptop
You can connect the mouse to the PC/laptop via
Bluetooth or with the receiver using a 2.4 GHz wireless
connection.
The Bluetooth connection is convenient if you wish to
use the mouse with several devices: You only need to
make the connection once and do not require the
receiver.
3.1 Connecting the mouse via Bluetooth
1 Start the search for Bluetooth devices on your PC/
laptop (for example by calling up Start > Settings >
Devices > Bluetooth).
2 Follow the instructions in the software.
3 Set the switch on the bottom of the mouse to "BT".
4 Activate the Bluetooth connection of the mouse by
pressing the button on the bottom of the mouse.
The blue LED on the mouse flashes quickly.
If the blue LED does not flash:
• There is already a connection between the
mouse and another PC/laptop. Switch off this
PC/laptop or deactivate the connection on this
PC/laptop.
5 Follow the instructions in the software.
The LED stops glowing and the mouse is connected
with your PC/laptop.
If the red LED of the mouse flashes quickly, the
connection has failed.
• Try to establish the connection again.
3.2 Connecting the mouse via the receiver
The receiver is in a compartment on the bottom of the
mouse and is held in place by magnets.
1 Pull the receiver out of the housing.
2 Connect the receiver to the USB socket on the PC/
laptop.
3 Set the switch on the bottom of the mouse to "RF".
The mouse is connected with your PC/laptop.
3.3 Storing the receiver in the mouse
The receiver is so small that it can stay in the USB
socket of a laptop while being transported. To avoid
any damage, you can also pull out the receiver and
deposit it in the mouse to protect it from dirt and loss.
4 Setting the DPI rate of the mouse
The speed of the mouse pointer increases with the
level of the DPI rate.
• Press the DPI button on the top of the mouse.
The LED flashes according to the setting:
1x = 600 dpi, 2x = 1000 dpi,
3x = 1600 dpi, 4x = 3200 dpi
The setting is saved in the mouse and is retained even
when the mouse is switched off.
EN OPERATING
MANUAL
Every device is different!
The operating instructions contain
information on effective and reliable use.
• Read the operating instructions carefully.
• Keep the operating instructions and pass them
on to other users.
Parallel login to multiple PCs/laptops
Bluetooth automatically detects if a PC or
laptop that has already been connected to
the device is switched on. In this case, Bluetooth
does not allow a new connection with any other PC
or laptop, thus preventing inadvertent entries.
• Turn off the first PC/laptop or disable the
connections.
5Chargingthemouse
When the red LED flashes slowly, you should charge
the mouse soon. The faster the red LED flashes, the
lower the charging status of the battery.
• Connect the charging cable to the mouse and a
USB socket on the PC/laptop.
The LED glows as long as the mouse is being
charged. When the mouse is fully charged, the LED
stops glowing.
The battery will be charged as long as the PC/laptop
is switched on. You can continue working while the
mouse is charging.
6 Switching the mouse on/off
The CHERRY MW 8 ERGO switches to a sleep mode,
which requires nearly no energy, when it is not in use.
It switches on again automatically the first time a
button is pressed.
However, it still consumes power in the energy-
saving mode, therefore you should switch it off
manually for longer periods of disuse or for
transporting.
• Push the switch on the bottom of the mouse to the
corresponding position:
Off, Wireless on = RF, Bluetooth on = BT
7Cleaningthemouse
1 Switch the mouse off.
NOTICE: Damage due to aggressive cleaning agents
or liquid in the mouse
• Do not use solvents such as benzene, alcohol,
scouring agents or abrasive scourers for cleaning
the mouse.
• Prevent any liquid from getting inside the mouse.
2 Clean the mouse with a slightly damp cloth and
some mild detergent (such as washing-up liquid).
3 Dry the mouse with a soft, lint-free cloth.
8 If the mouse does not work
• Switch the mouse on and off again.
• Charge the mouse via the charging cable (see 5
"Charging the mouse").
• When using the receiver: Connect the receiver to
another USB port on the PC/laptop.
• Should any interference be encountered when
using USB 3.0 devices right near the receiver: Use
a port that is further away, an additional cable, or
a USB hub for the receiver or USB 3.0 device.
• Connect the receiver to a USB 2.0 port on your
PC/laptop (this usually has a white or black guide).
Malfunctions occasionally occur on USB 3.0 ports
(blue guide).
• When using the Bluetooth connection: Remove the
connection to the mouse in the Bluetooth software
and add it again as a new device.
• If your PC/laptop is in standby mode, it cannot be
woken up using Bluetooth devices. Switch on the
PC/laptop manually.
9Disposal
This device contains a lithium ion battery.
This cannot be replaced.
Electrical devices and batteries contain
substances that can be harmful to health
and the environment.
• Dispose of the devices and the batteries in
accordance with the legal regulations.
10 Technical data
11 Certifications
11.1 EU Declaration of conformity
The company Cherry GmbH, Auerbach/OPf.,
Germany hereby declares that this radio
system model conforms to the European
guideline 2014/53/EU. The full text of the EU
declaration of conformity can be found under the
following Internet address:
www.cherry.de/compliance.
11.2 Federal Communications Commission
(FCC) Radio Frequency Interference
Statement
This device complies with part 15 of the FCC Rules.
Operation is subject to the following two conditions:
(1) This device may not cause harmful interference,
and (2) this device must accept any interference
received, including interference that may cause
undesired operation.
Note: This equipment has been tested and found to
comply with the limits for a Class B digital device,
pursuant to part 15 of the FCC Rules. These limits
are designed to provide reasonable protection against
harmful interference in a residential installation. This
equipment generates, uses and can radiate radio
frequency energy and, if not installed and used in
accordance with the instructions, may cause harmful
interference to radio communications. However,
there is no guarantee that interference will not occur
in a particular installation. If this equipment does
cause harmful interference to radio or television
reception, which can be determined by turning the
equipment off and on, the user is encouraged to try to
correct the interference by one or more of the
following measures:
• Reorient or relocate the receiving antenna.
• Increase the separation between the equipment
and receiver.
• Connect the equipment into an outlet on a circuit
different from that to which the receiver is
connected.
• Consult the dealer or an experienced radio/TV
technician for help.
Caution: Any changes or modifications not expressly
approved by the party responsible for compliance
could void the user's authority to operate the
equipment.
Designation Value
Supply voltage Receiver:
5.0 V/DC ±5%
Charging voltage Typ. 5.0 V/DC
Current consumption Mouse: typ. 10 mA
(Standby: max. 0.3 mA)
Receiver: typ. 10 mA
Battery Rechargeable lithium ion
battery, 550 mAh
Operating frequency 2400.0 ... 2483.5 MHz
Effective radiated power Max. 10 mW (EIRP)
Bluetooth 4.0
Storage temperature -15 °C ... +60 °C
Operating temperature 0 °C ... +40 °C
11.3 RF exposure statement
This device complies with the RF exposure
requirements for mobile and fixed devices. However,
the device shall be used in such a manner that the
potential for human contact during normal operation
is minimized.
11.4 For UL
For use with Listed Personal Computers only!
①Разъем для подзарядки
②Переключение DPI
③Светодиод состояния зарядки аккумулятора,
разрешения, соединения по Bluetooth или
беспроводного соединения
④Браузер вперед
⑤Браузер назад
⑥Переключатель: выкл. (off) / беспроводное
соединение (RF) / Bluetooth (BT)
⑦Кнопка для соединения по Bluetooth
⑧Приемник для беспроводного соединения
Прежде чем Вы начнете...
CHERRY MW 8 ERGO — это беспроводная мышь для
работы с ПК/ноутбуками.
Информацию о других продуктах, загрузках и пр.
можно найти на сайте www.cherry.de.
1Вцеляхвашейбезопасности
Опасность удушья при проглатывании мелких
деталей
• Храните устройство в месте, недоступном для
детей младше 3 лет.
"Repetitive Strain Injury" = "травма повторяющихся
нагрузок"
ТПН возникает вследствие небольших, постоянно
повторяющихся движений.
• Удобно оборудуйте свое рабочее место.
• Расположите клавиатуру и мышь таким образом,
чтобы ваши плечи и запястья располагались
параллельно туловищу и были вытянуты.
• Делайте небольшие перерывы, если
необходимо, с упражнениями на растяжку.
• Часто меняйте положение тела.
2 Избегайте повреждений
Стирание информации с запоминающих устройств
и повреждение механических часов магнитом
мыши
• Не подносите запоминающие устройства, такие
как магнитные карты, внешние жесткие диски
или механические часы ближе чем на 10 см к
мыши.
3 Подключение мыши к ПК/ноутбуку
Вы можете подключить мышь к ПК/ноутбуку двумя
способами:
• по Bluetooth;
• через беспроводное соединение 2,4 ГГц.
Подключение по Bluetooth удобно, если вы хотите
использовать мышь на нескольких устройствах:
Вам нужно установить соединение только один раз,
и для этого не требуется приемник.
3.1 Подключение мыши по Bluetooth
1 Откройте поиск Bluetooth-устройств на вашем
ПК/ноутбуке (например, через Пуск >
Настройка > Устройства > Bluetooth).
2 Следуйте инструкциям программного
обеспечения.
3 Установите переключатель на нижней стороне
мыши в положение «BT».
4 Активируйте Bluetooth-соединение мыши,
нажав кнопку на нижней стороне мыши.
Синий светодиод мыши начнет быстро мигать.
Если синий светодиод не мигает:
• Мышь уже подключена к другому ПК/
ноутбуку. Выключите этот ПК/ноутбук или
отключите соединение на этом ПК/ноутбуке.
5 Следуйте инструкциям программного
обеспечения.
Светодиод погаснет и мышь подключится к
вашему ПК/ноутбуку.
Если красный светодиод мыши быстро мигает,
соединение не установлено.
• Попробуйте установить его еще раз.
3.2 Подключение мыши с помощью
приемника
Приемник расположен в специальном отсеке на
нижней стороне мыши и удерживается на месте
магнитом.
RU ИНСТРУКЦИЯ ПО
ЭКСПЛУАТАЦИИ
Все устройства разные!
Инструкция по эксплуатации содержит
информацию об эффективном и
безопасном использовании.
• Внимательно прочитайте инструкцию по
эксплуатации.
• Сохраните инструкцию по эксплуатации и
передайте другим пользователям.
Параллельное подключение к несколь-
ким ПК/ноутбукам
Bluetooth распознает автоматически,
включен ли ПК/ноутбук, соединение с которым
было установлено. В этом случае Bluetooth
отклоняет новое соединение с другим ПК/ноутбу-
ком, чтобы не допустить ошибочный ввод дан-
ных.
• Выключите первый ПК/ноутбук или отключите
соединения.
1 Вытащите приемник из корпуса.
2 Подключите приемник к USB-разъему ПК/
ноутбука.
3 Установите переключатель на нижней стороне
мыши в положение "RF".
Мышь подключится к вашему ПК/ноутбуку.
3.3 Размещение приемника в мыши
Приемник настолько мал, что может оставаться в
USB-разъеме даже во время транспортировки
ноутбука. Чтобы защитить приемник от загрязнения
и потери, вытаскивайте его и храните внутри мыши.
4НастройкаDPIдлямыши
Чем больше значение DPI, тем быстрее
передвигается указатель мыши.
• Нажмите кнопку DPI на верхней части мыши.
Светодиод мигает в зависимости от настройки:
1 раз = 600 dpi, 2 раза = 1000 dpi,
3 раза = 1600 dpi, 4 раза = 3200 dpi
Настройка сохраняется в мыши и не сбивается при
выключении устройства.
5Зарядкамыши
Зарядите мышь, если мигает красный светодиод.
Чем быстрее мигает красный светодиод, тем ниже
заряд аккумуляторной батареи.
• Подключите зарядный кабель к мыши и USB-
разъему ПК/ноутбука.
Светодиод горит, пока мышь заряжается. Когда
мышь полностью заряжена, светодиод гаснет.
Аккумулятор мыши заряжается, пока ПК/ноутбук
включен. Вы можете продолжать работать во время
процесса подзарядки.
6 Включение/ выключение мыши
Когда мышь не используется, она переходит в
спящий режим, в котором она практически не
расходует электроэнергию. При первом нажатии на
кнопку мышь автоматически включается снова.
Поскольку мышь все же использует энергию в
режиме энергосбережения, отключите ее вручную,
если она не используется в течение длительного
времени и при транспортировке.
• Сдвиньте переключатель на нижней стороне
мыши в соответствующее положение:
Выкл. = off, вкл. (беспроводное соединение) = RF,
вкл. (Bluetooth) = BT
7Очисткамыши
1 Выключите мышь.
ПРИМЕЧАНИЕ! Агрессивные чистящие средства и
жидкости могут повредить мышь
• Не используйте для очистки растворители,
такие как бензин или спирт, а также абразивные
материалы или моющие губки.
• Не допускайте попадания жидкости в мышь.
2 Очищайте мышь слегка влажной тканью с
небольшим количеством мягкого моющего
средства (например, жидкости для мытья
посуды).
3 Вытирайте мышь мягкой безворсовой тканью.
8Еслимышьнеработает
• Выключите и снова включите мышь.
• Зарядите устройства с помощью зарядного
кабеля (см. 5 "Зарядка мыши").
• При подключении через приемник: Подключите
приемник к другому USB-разъему ПК/ноутбука.
• В случае возникновения проблем во время
использования устройств с поддержкой USB 3.0
в непосредственной близости от приемника:
Используйте для приемника или устройства с
поддержкой USB 3.0 более удаленный разъем,
дополнительный кабель или USB-разветвитель.
• Подключите приемник к разъему USB 2.0 ПК/
ноутбука (обычно белый или черный вход).
Разъемы USB 3.0 (синий вход) иногда выходят
из строя.
• При подключении по Bluetooth: Удалите мышь в
программном обеспечении Bluetooth и снова
добавьте ее как новое устройство.
• Если ваш ПК/ноутбук находится в режиме
ожидания, пробуждение через Bluetooth-
устройства невозможно. Включите ПК/ноутбук
вручную.
9Утилизация
Устройство содержит литий-ионный
аккумулятор. Его невозможно заменить.
Электрические устройства и аккумуляторы
содержат вещества, которые могут нанести
вред здоровью и окружающей среде.
• Утилизируйте устройство с аккумулятором в
соответствии с законодательством.
10 Технические характеристики
Обозначение Величина
Напряжение пита-
ния
Приемник:
5,0 В/пост. тока ±5 %
Напряжение
заряда
Тип. 5,0 В/пост. тока
Потребляемый ток Мышь: тип. 10 мА
(В режиме ожидания:
макс. 0,3 мА)
Приемник: тип. 10 мА
Аккумулятор Перезаряжаемая литий-ион-
ная батарея, 550 мАч
Частота передат-
чика
2400,0 ... 2483,5 МГц
Мощность передат-
чика
Макс. 10 мВт (э.и.и.м.)
Bluetooth 4.0
Температура хра-
нения
-15 °C ... +60 °C
Температура экс-
плуатации
0 °C ... +40 °C
①充电线的插口
②DPI 切换装置
③电池充电状态、分辨率、蓝牙或无线连接的
状态 LED
④浏览器前进
⑤浏览器后退
⑥开关关闭 (off)/ 无线 (RF)/ 蓝牙 (BT)
⑦蓝牙连接的按键
⑧无线连接的接收器
在开始操作之前 ...
CHERRY MW 8 ERGO 是一款用于操作电脑 / 笔
记本电脑的无线鼠标。
关于其他产品的信息、下载和更多服务请访问
www.cherry-world.com。
1为了您的安全
吞咽小零件可能会引起窒息危险
•请将设备保存在 3 岁以下儿童无法够及之
处。
“Repetitive Strain Injury”=“ 重复性劳损 ”
RSI 是由于频繁重复的小幅度运动造成的。
•按照人体工程学调整您的工作位置。
•将键盘和鼠标置于正确位置,确保您的上臂
和手腕在体侧自然伸展。
•多加休息,必要时进行伸展运动。
•经常变换您的身体姿势。
2避免损坏
鼠标中的磁铁可能会删除存储介质,损坏机械
表
•请勿将磁卡、外部硬盘之类的存储媒介或机
械表置于距离鼠标 10 cm 的范围以内。
3连接鼠标与电脑 / 笔记本电脑
您可以通过两种方式连接鼠标与电脑 / 笔记本电
脑:
•通过蓝牙
•通过 2.4 GHz 无线连接
如果在多台设备上使用鼠标,通过蓝牙连接会
十分方便:您只需要建立一次连接,并且不需
要接收器。
3.1 通过蓝牙连接鼠标
1在您的电脑 / 笔记本电脑上打开搜索蓝牙设备
(例如:开始 > 设置 > 设备 > 蓝牙)。
2遵从软件的指示。
3将鼠标底部的开关切换到 “BT”。
4按下鼠标底部的按钮,激活鼠标的蓝牙连接。
鼠标的蓝色 LED 快速闪烁。
如果蓝色 LED 不闪烁:
•则表示鼠标已经连接到另一台电脑/笔记本
电脑。关闭该电脑 / 笔记本电脑或禁用与
该电脑 / 笔记本电脑的连接。
5遵从软件的指示。
LED 熄灭并且鼠标已与您的电脑 / 笔记本电
脑连接。
如果鼠标的红色 LED 快速闪烁,则连接失
败。
•请重新尝试。
3.2 通过接收器连接鼠标
接收器位于鼠标底部的格层中,并通过磁铁固
定。
1从壳体中拔出接收器。
2将接收器连接到电脑 / 笔记本电脑的 USB 接
口上。
3将鼠标底部的开关切换到 “RF”。
鼠标已与您的电脑 / 笔记本电脑连接。
3.3 接收器存放在鼠标中
接收器非常小,即使是在移动笔记本电脑时也
可以保留在 USB 插口中。为了防止污染和丢
失,在不使用时请拔下接收器并将其存放在鼠
标中。
简体字 操作手册
设备各不相同!
在使用说明书中您可以获取有关可靠
高效操作的说明。
•请仔细阅读使用说明书。
•请保管好使用说明书,必要时将其转交给
其他用户。
在多台电脑/笔记本电脑上并行注册
蓝牙自动检测附近运行的、已经和设
备连接过的电脑/笔记本电脑。在这
种情况下,蓝牙不允许与另一台电脑/笔记
本电脑的新连接,从而避免错误输入。
•关闭第一台电脑/笔记本电脑或禁用该连
接。
4设置鼠标的 DPI 数值
DPI 数值越高,鼠标的速度越快。
•按下鼠标顶部的 DPI 键。
LED 根据设置闪烁:
1x = 600 dpi,2x = 1000 dpi,
3x = 1600 dpi,4x = 3200 dpi
设置保存在鼠标中,即使关闭设备也会保留该
设置。
5鼠标充电
当红色 LED 闪烁时,给鼠标充电。红色 LED
闪烁越快,表明电池的电量越低。
•将充电线连接到鼠标和电脑 / 笔记本电脑上
的 USB 插口。
鼠标充电期间, LED 常亮。鼠标充满电后,
LED 熄灭。
电脑 / 笔记本电脑开启时,鼠标的电池就会充
电。您可以在充电过程中继续工作。
6开启 / 关闭鼠标
鼠标在不使用时进入睡眠模式,几乎不需要消
耗电量。首次按下按键时,鼠标自动重新启
动。
鼠标在节能模式下仍会消耗电量,因此如果长
时间不使用或运输时,应手动将其关闭。
•将鼠标底部的开关切换到相应位置:
关 = off,开 (无线)= RF,
开 (蓝牙)= BT
7清洁鼠标
1关闭鼠标。
注意!腐蚀性清洁剂和液体会损坏鼠标
•清洁时切勿使用汽油或酒精之类的溶剂,也
不得使用去污剂或百洁布。
•避免液体进入鼠标。
2请使用微湿的清洁布和柔和的清洁剂 (如
餐具洗涤剂)清洁鼠标。
3然后用柔软不掉毛的清洁布将鼠标擦干。
8如果鼠标不能正常工作
•关闭并重启鼠标。
•通过充电线为设备充电
(参见 5 " 鼠标充电 ")。
•通过接收器连接时:将接收器连接到电脑 /
笔记本电脑上的另一个 USB 接口。
•如果在接收器附近使用 USB 3.0 设备时出
现故障:为接收器或 USB 3.0 设备使用更
远的连接、额外的电缆或 USB 集线器。
•将接收器连接到电脑 / 笔记本电脑的 USB
2.0 插口中 (通常有白色或黑色的导线)。
USB 3.0 插口 (蓝色导线)有时会发生故
障。
•通过蓝牙连接时:移除蓝牙软件中的鼠标,
并将其添加为新设备。
•如果您电脑 / 笔记本电脑处于待机模式,则
无法通过蓝牙设备唤醒。手动启动电脑 / 笔
记本电脑。
9废弃处理
设备包含锂离子电池。该电池不能更
换。
电气设备和电池包含危害健康和环境
的物质。
•按照法律规定对设备和电池进行废弃处理。
10 技术参数
11 联系方式
珠海确励电子有限公司
珠海市高新区唐家湾镇金园一路8号
519060 珠海,广东
电话:+86 756 368 9088-887
传真:+86 756 368 9080
www.cherry-world.com
确励电子有限公司(香港)
香港岛西区上环德辅道中 248 号
东盟商业大厦 17 楼1702,香港
电话:+86 756 368 9088-887
sales_hk@cherry.de
www.cherry-world.com
名称 数值
电源电压 接收器: 5.0 V/DC ±5 %
充电电压 典型值 5.0 V/DC
电流消耗 鼠标:典型值 10 mA
( 待机:最大 0.3 mA)
接收器:典型值 10 mA
电池 可充电的锂离子电池,
550 mAh
发射频率 2400.0 ...2483.5 MHz
发射功率 最大 10 mW (EIRP)
蓝牙 4.0
存放温度 -15 °C ~ +60 °C
运行温度 0 °C ~ +40 °C
64410098-00, DE, EN, RU, ZH (simpl.), ZH (trad.), JA, KO, AR, © Mai 2020 (JW-8501 = Mod. JF-85, JR-90)
User Guide about Hazardous Materials
(People's Republic of China Electronic Industry Standard SJ/T11364-2014)
[关于有害物质的用户说明 (中华人民共和国电子工业标准SJ/T11364-2014)]
0: Indicates that the concentration of the hazardous substance in all homogeneous materials in the parts is below
the relevant threshold of the GB/T 26572-2011 standard.
[表示该有害物质在该部件所有均质材料中的含量均在 GB/T 26572-2011 标准规定的限量以下。 ]
X: Indicates that the concentration of the hazardous substance of at least one of all homogeneous materials in the
parts is above the relevant threshold of the GB/T 26572-2011 standard.
[表示该有害物质至少在该部件的某一均质材料中的含量超过 GB/T 26572-2011 标准规定的限量。 ]
Toxic and hazardous materials or elements
[有毒有害物质或元素 ]
Part name
[部件名称 ]
Pb
[铅]
Hg
[汞]Cd
[镉]Cr+6
[六价铬 ]PBB
[多溴联苯 ]PBDE
[多溴二苯醚 ]
PCB's/flex circuits [PCB/ 挠性电路 ]0000 0 0
Electronic components [ 电子元器件 ]X00 0 0 0
Solder paste [ 锡膏 ]000 0 0 0
Cable [ 缆线 ]000000
Plastic parts [ 塑料部件 ]000000
Metal parts [ 金属部件 ]000000
Rubber parts [ 橡胶部件 ]000000
CHERRY MW 8 ERGO
Wireless Mouse with Bluetooth®
and RF Transmission

