Chestnut Hill Sound GEORGE User manual
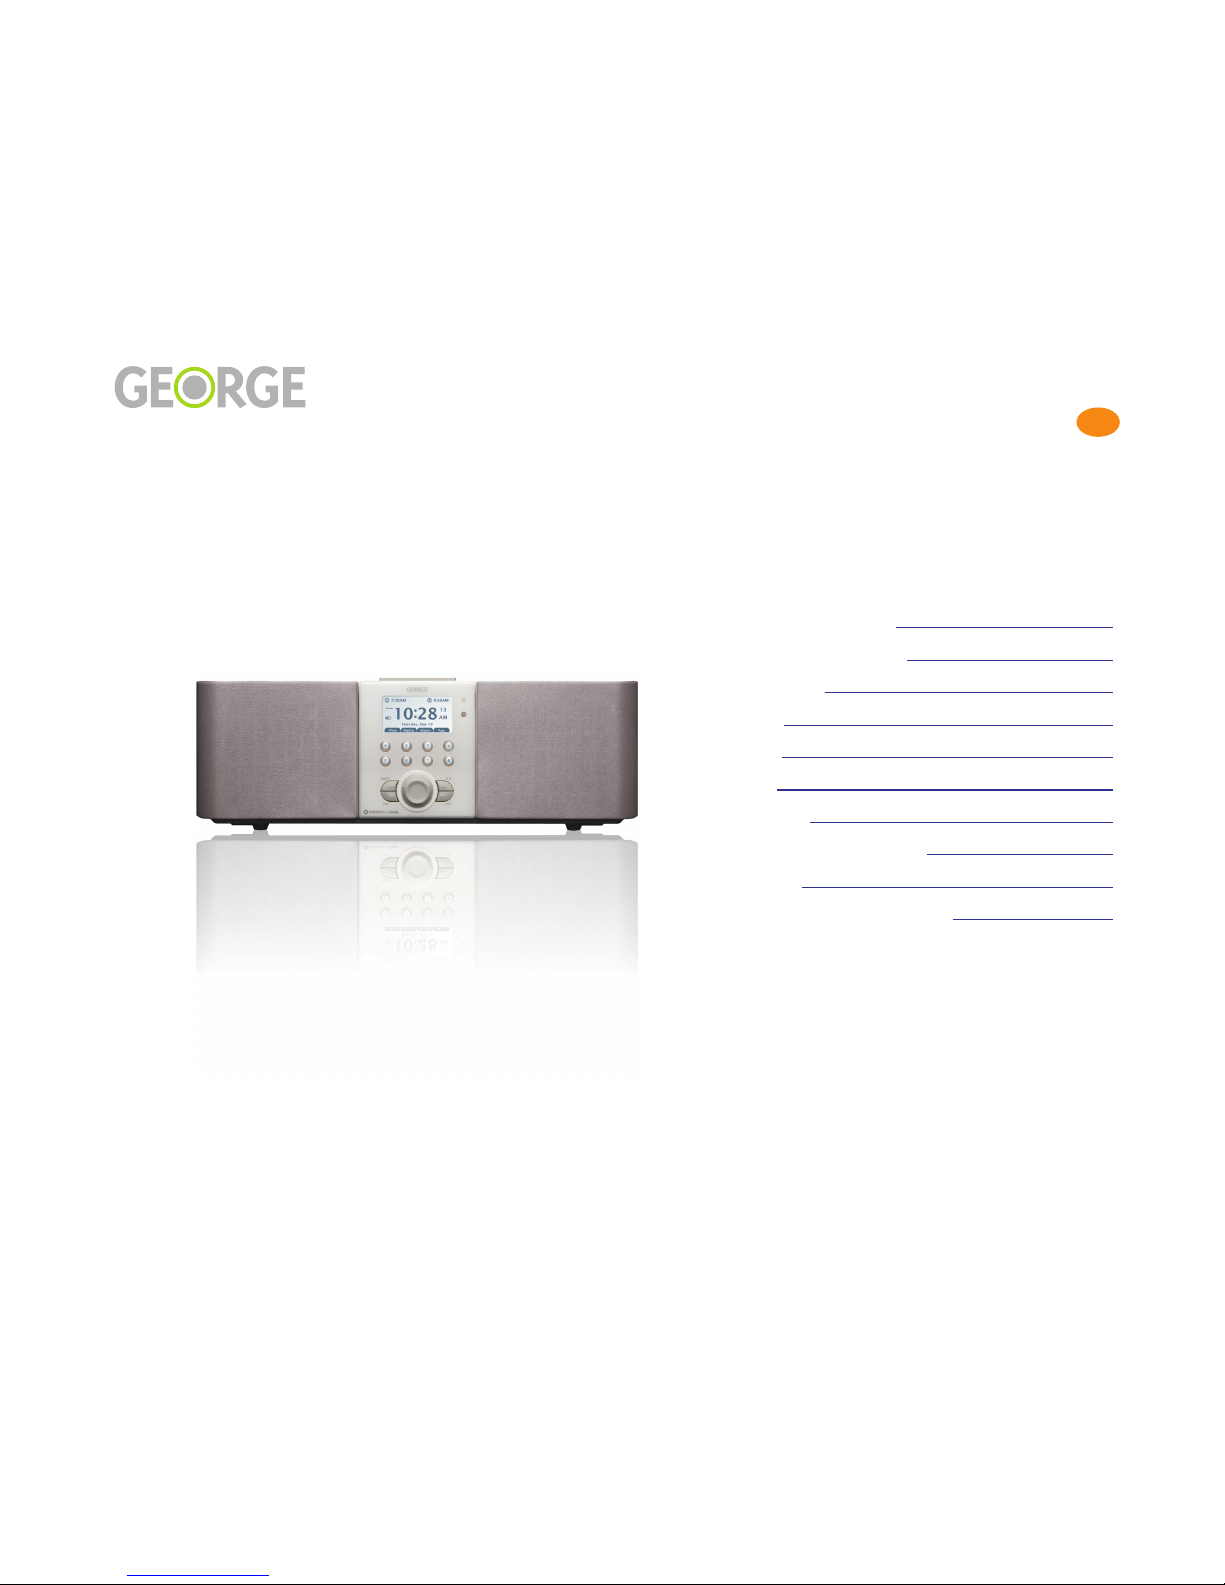
Table of Contents 1
Table of Contents
Table of Contents
•Meet George.......... 3
•Setting Up............ 4
• Using the Remote.......... 12
• Listening to Yo r iPod.......... 17
• Listening to the Radio.......... 21
• So nding the Alarm(s).......... 24
• Advanced Feat res.......... 28
• Options.......... 34
• In Case of Problems.......... 36
• Index.......... 39
“Chestnut Hill Sound”, “George” and their respective logo designs, “Bandless”, “Products with a Future” and “Control Your Music” are trademar s of Chest-
nut Hill Sound Inc. in the U.S. and other countries. US and International Patents Pending. All other trademar ed names mentioned are properties of their
respective owners. iPod is a trademar of Apple Computer, Inc., registered in the U.S. and other countries. ZigBee is a trademar of the ZigBee Alliance.
Rev. B © 2007, All Rights Reserved.

Table of Contents 2
Table of Contents
Important Safety and Installation Instructions
Important Safety and Installation Instr ctions
INSTRUCTIONS PERTAINING TO THE RISK OF FIRE, ELECTRIC SHOCK, OR INJURY TO PERSONS
WARNING
- When using electric
products, basic precautions should
always be followed, including the fol-
lowing:
1 Read these instructions.
2 Keep these instructions.
3 Heed all warnings.
4 Follow all instructions.
5 Do not use this apparatus near
water.
6 Clean only with a dry cloth.
7 Do not block any ventilation open-
ings. Install in accordance with the
manufacturer’s instructions.
8 Do not install near any heat
sources such as radiators, heat reg-
isters, stoves, or other apparatus
(including amplifiers that produce
heat.
9 Do not defeat the safety purpose of
the polarized or grounding-type plug.
A polarized plug has two blades with
one wider than the other. A ground-
ing type plug has two blades and a
third grounding prong. The wide
blade or the third prong are provided
for your safety. If the provided plug
does not fit into your outlet, consult
an electrician for replacement of the
obsolete outlet.
10 Protect the power cord from being
walked on or pinched, particularly at
plugs, convenience receptacles, and
the point where they exit from the
apparatus.
11 Only use attachments/accesso-
ries specified by the manufacturer.
12 Use only with a cart, stand, tripod,
bracket, or table specified by the
manufacturer, or sold with apparatus.
When a cart is used, use caution
when moving the cart/apparatus
combination to avoid injury from tip-
over.
13 Unplug this apparatus during
lightning storms or when unused for
long periods of time.
14 Refer all servicing to qualified ser-
vice personnel. Servicing is required
when the apparatus has been dam-
aged in any way, such as power-sup-
ply cord or plug is damaged, liquid
has been spilled or objects have
fallen into the apparatus, the appara-
tus has been exposed to rain or
moisture, does not operate normally,
or has been dropped.
15 The plug of the power adaptor
should be readily operable.
FCC Compliance and Advisory
Statement
Note1: Changes or modifications not
expressly approved by CHS could
void your authority to operate the
equipment.
This device complies with part 15 of
the FCC Rules. Operation is subject
to the following two conditions: (1
This device may not cause harmful
interference, and (2 this device must
accept any interference received,
including interference that may cause
undesired operation.
Note 2: This equipment has been
tested and found to comply with the
limits for a Class B digital device, pur-
suant to part 15 of the FCC Rules.
These limits are designed to provide
reasonable protection against harm-
ful interference in a residential instal-
lation. This equipment generates,
uses and can radiate radio frequency
energy and, if not installed and used
in accordance with the instructions,
may cause harmful interference to
radio communications. However,
there is no guarantee that interfer-
ence will not occur in a particular
installation. If this equipment does
cause harmful interference to radio or
television reception, which can be
determined by turning the equipment
off and on, the user is encouraged to
try to correct the interference by one
or more of the following measures:
-Reorient or relocate the receiving
antenna.
-Increase the separation between the
equipment and receiver.
-Connect the equipment into an out-
let on a circuit different from that to
which the receiver is connected.
-Consult the dealer or an experi-
enced radio/TV technician for help.

Meet George 3
Meet George
Meet George
iPod Dock Access Door
M te / Snooze B tton
Screen
J mp B ttons
Knob
MENU B tton
Reverse B tton
Play / Pa se B tton
Forward B tton
Knob B tton

Setting Up 4
Setting Up
Setting Up
• Unpack and Get Going.......... 5
• Antennas and Radio Reception.......... 6
• Installing the Remote Control Battery.......... 7
• T rning On, T rning Off, and Adj sting the Backlight.......... 8
• George’s Home Screen.......... 9
• What’s on the Home Screen.......... 10
Setting Up 5
Setting Up
Unpack and Get Going
Unpack and Get Going
What’s in the Box
Unpac and unwrap George,™
carefully and save all the pac ing
materials just in case you ever
have to ship him somewhere.
In addition to George, you’ll find
the following in the box:
• power adapter
• battery
• quic start card
• USB cable
• Phillips screwdriver
• AM antenna
• FM antenna
• Universal Doc Inserts
• Warranty Card
Where to p t George
George will sound good no mat-
ter where in your room you put
him, although you will hear a bit
more bass if you place him near a
room or cabinet wall. Just ma e
sure you leave at least a couple of
inches of space behind George for
ventilation.
Don’t place George on a soft,
deeply piled surface (such as a
shag rug), since this will reduce
ventilation and obstruct the sub-
woofer that points down from
the bottom of George.
Before you can use George’s
remote, you’ll have to install and
charge the battery as described in
Installing the Remote Control
Battery, on page 7. Once the bat-
tery is fully charged, the remote
will last for up to 4 to 6 hours
away from the base unit under
normal use. The battery will stay
charged longer – up to 8 or 10
hours – when the remote goes to
sleep.
The remote will wor up to 25
feet away from the base unit, and
it’s best if there are no obstruc-
tions between the remote and the
base.
Unli e other remote controls you
may have used, you do not need
to point George’s remote at the
base when you use it. For more
on using the remote, see Using
the Remote, on page 12.
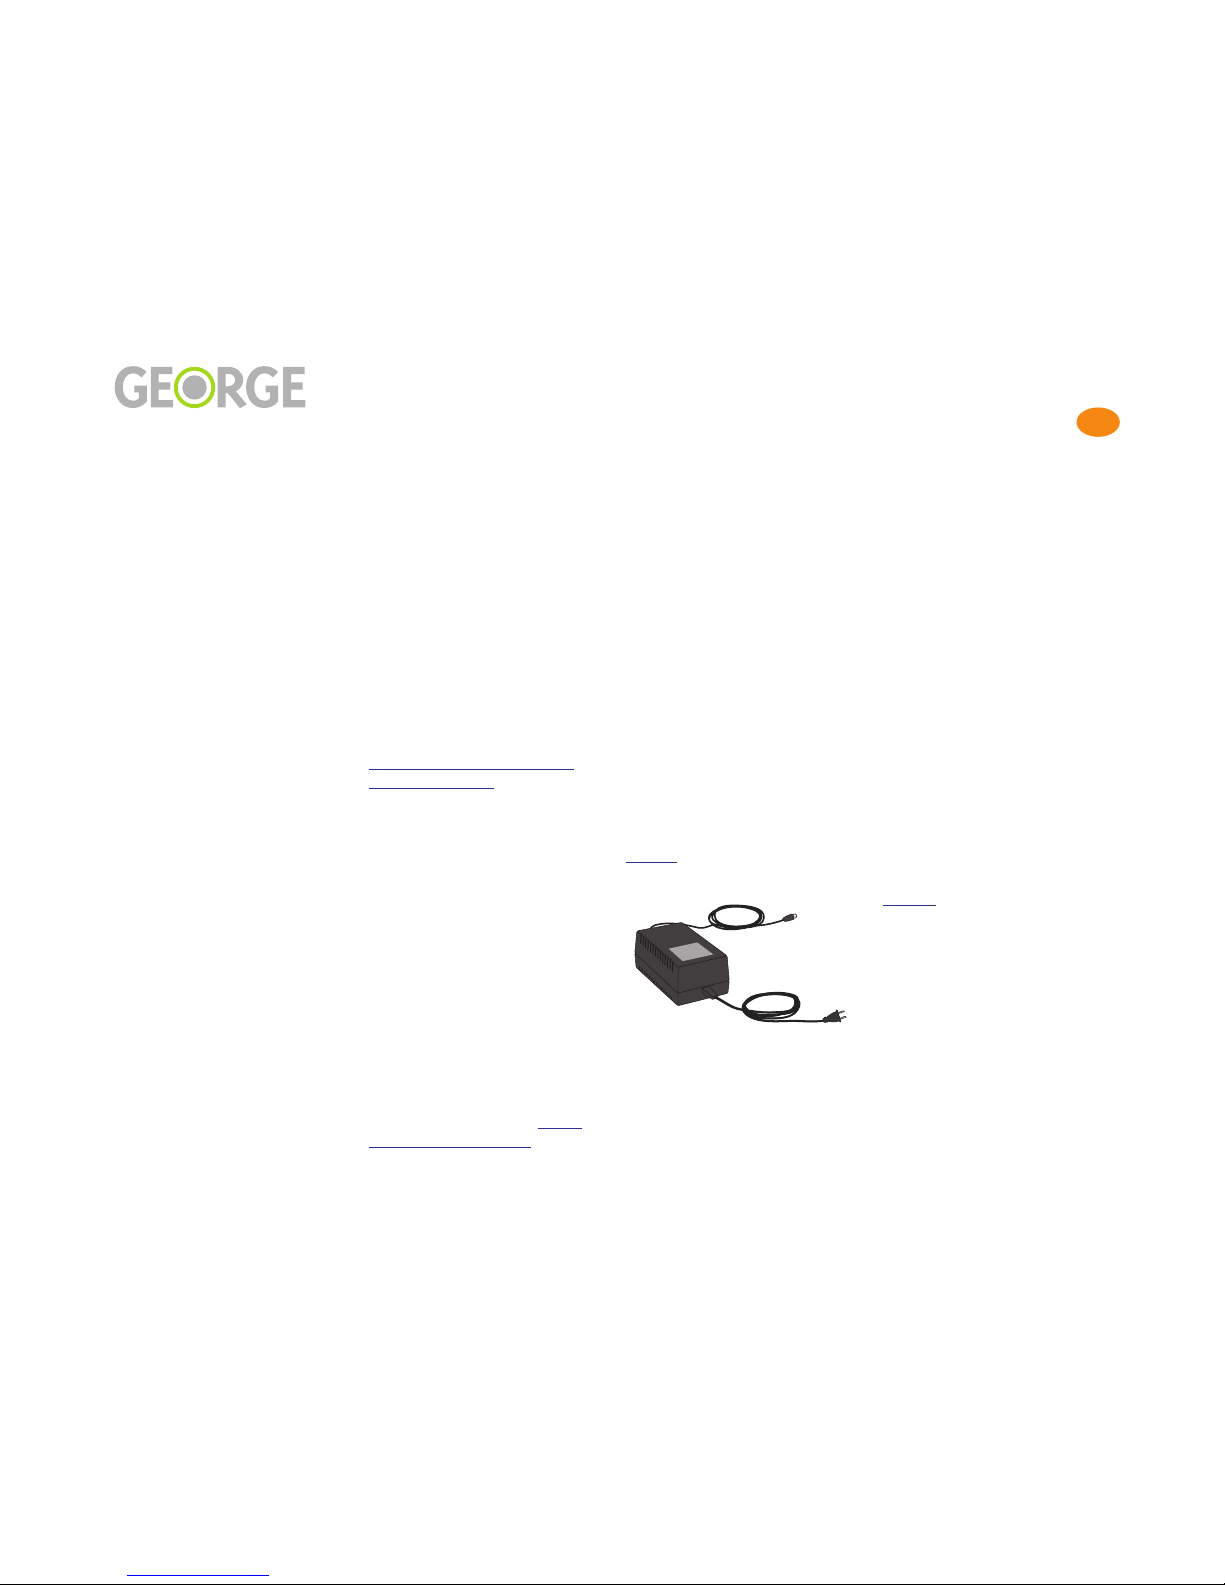
Power On
Insert the power cable into its
connector on the bac panel of
George. Ta e a good loo at the
connector, since there’s only one
way you can plug it in. After
you’ve connected the power
cable to George, plug the unit
into your power source.
George will come to life as soon
as you plug him in. When you’re
ready to get going, one of the
first things you will want to do is
set the time. This is a painless
process, and is described on
page 11.
Check for Software Updates
One of George’s many strengths
is his ability to change with the
changing times. Just attach the
provided USB cable between
George and your computer, and
you can download software
updates and new features as they
become available.
In fact, before you use George for
the first time, you may want to
chec for updated software at:
http://www.chillsound.com
Downloading software updates
is simple and straightforward.
You’ll find instructions on
page 33.
Register Yo r George
While you’re at the Chestnut Hill
Sound website, ta e a moment to
register your George. This will
help us to eep you informed of
all the news from the world of
George.

Setting Up 6
Setting Up
Antennas and Radio Reception
Antennas and Radio Reception
Two antennas are provided with
George. You’ll need to ta e a
moment to attach these before
you can get proper AM or FM
reception.
You’ll also want to experiment
with the placement of each
antenna until you find the posi-
tion that provides optimal signal
strength.
FM antenna
The
FM antenna
simply snaps
onto the corresponding connector
on the bac panel of George.
AM antenna
To connect the
AM antenna
, first
pull down the two plastic hinges
at the bottom of the AM connec-
tors on the bac panel of George.
Insert one of the wire leads of the
AM antenna into each of these
connectors, then snap the plastic
hinges shut to loc the antenna
leads into place.
Ga ging Yo r Reception
George displays these signal
strength bars when you’re listen-
ing to the radio:
The following section tells you
what the signal strength bars are
trying to tell you.
Reading the Signal
Strength Bars
•
No bars:
No reception.
George is tuned to a very wea or
nonexistent station. Mostly noise,
although words and music may
be audible but may not be intelli-
gible and not easy to listen to.
Environmental noises and arti-
facts from strong adjacent radio
stations may be heard.
•
1 bar:
Poor reception.
Words may be intelligible, but
still noisy; not easy to enjoy.
•
2 bars:
Fair reception.
Programs are listenable, but may
be accompanied by some noise,
possibly distracting.
•
3 bars:
Good reception.
Perfectly listenable, noise may be
present but not distracting.
•
4 bars:
Best reception.
Strong radio station, minimal
noise, easy to listen to without
fatigue.
Attach FM antenna here.
Attach AM antenna here.
Setting Up 7
Setting Up
Installing the Remote Control Battery
Installing the Remote Control Battery
Installing and charging the bat-
tery in George’s remote control is
one of the first things you need to
do to get going with George. Use
the provided Phillips screwdriver
for installing and removing the
remote control battery compart-
ment cover.
There are some neat illustrations
of the battery installation process
on page 37.
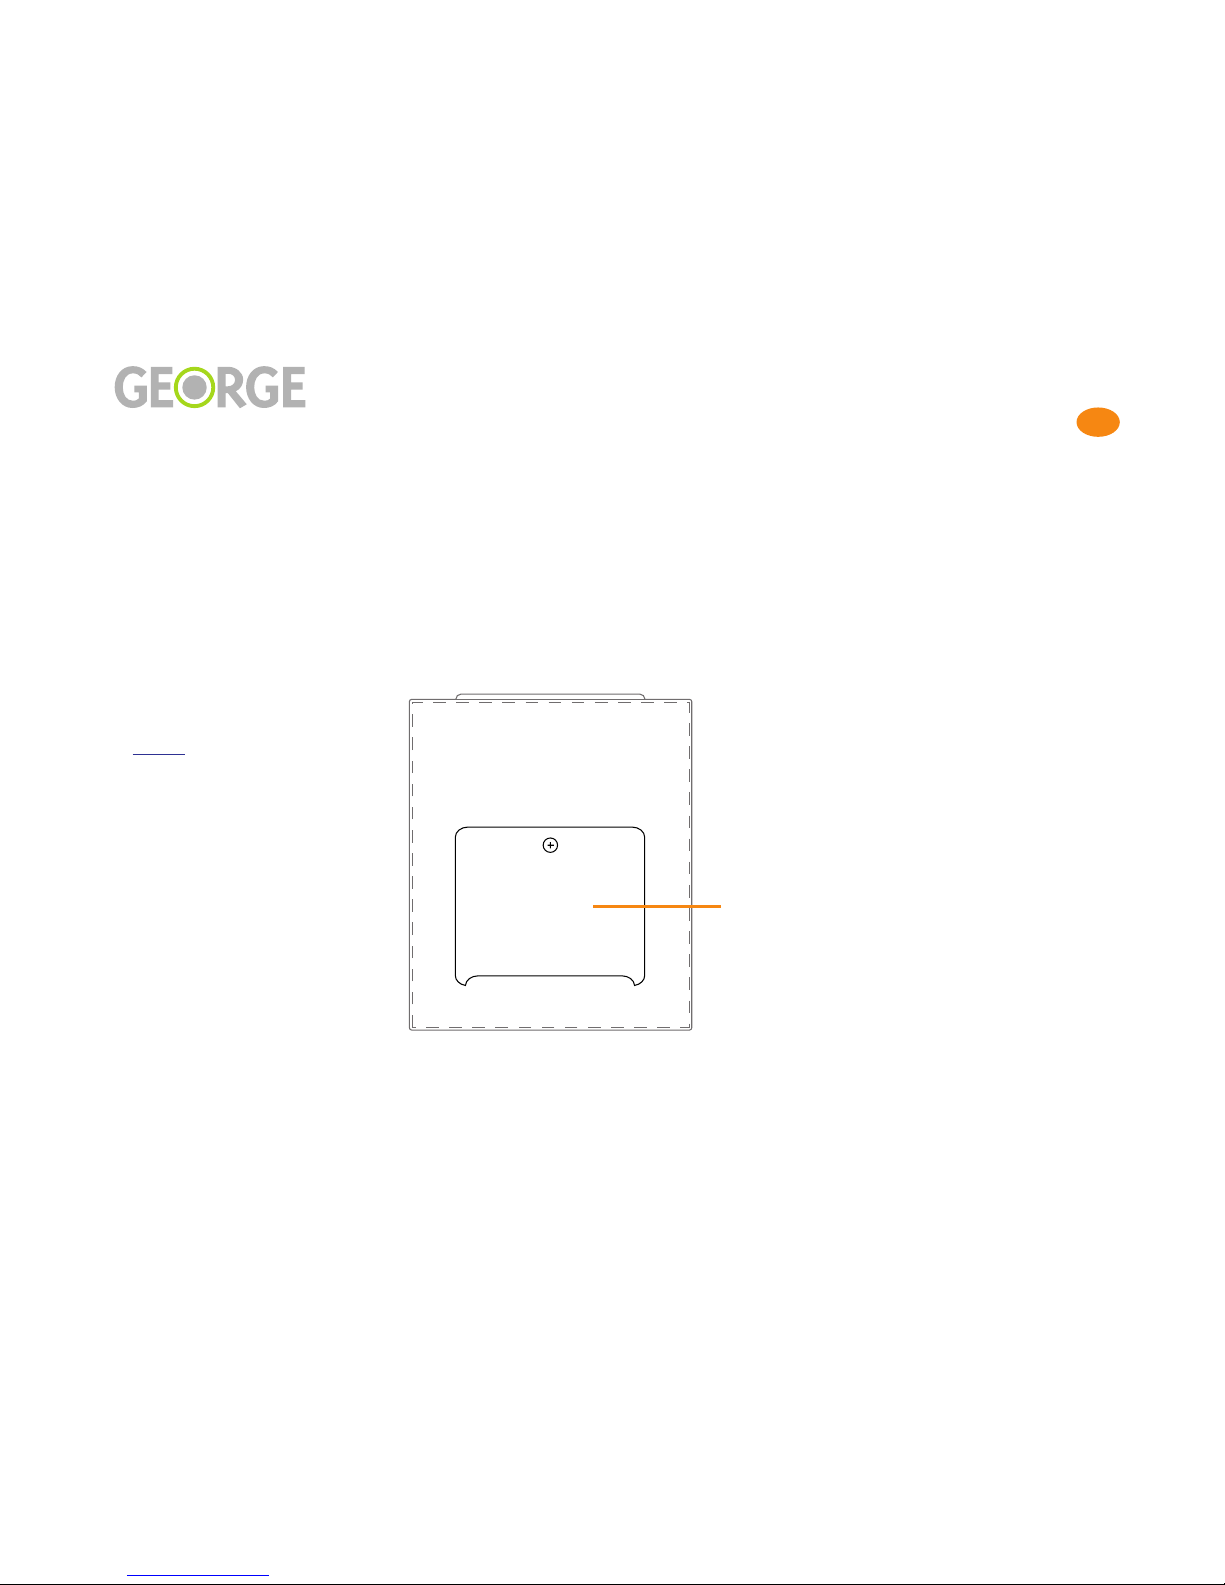
To install the battery:
1. Pull the remote control away
from the base unit.
2. Using the Phillips screw-
driver, remove the battery
compartment cover from the
bac of the remote control.
3. Remove the battery from its
cardboard shipping box, then
insert into the battery com-
partment on the bac of the
remote so that the copper ter-
minals on the battery come in
contact with the copper ter-
minals in the battery com-
partment. Press the battery
into place.
4. Re-attach the battery cover,
then reinsert the remote con-
trol into George.
Getting Charged Up
After you install a new battery,
you should let it charge by eep-
ing the remote inserted in George
or doc ed in a charging stand for
at least two hours.
Battery Safety Warnings
Remove the battery if George is
not to be used for an extended
period of time.
Do not incinerate, disassemble,
short terminals, or expose to high
temperature (212ºF/ 100ºC). Ris
of fire or explosion.
Replace only with the same or
equivalent type battery.
Keep the remote control battery
away from children.
Rechargeable batteries that are
brand new, or have not been used
in a long time, require condition-
ing (5-6 full charge/discharge
cycles) before lengthy playbac
time is realized.
Dispose of spent batteries accord-
ing to your state/country’s regu-
lations.
Battery
Compartment
Cover
George remote control
(back

Setting Up 8
Setting Up
Turning On, Turning Off, and Adjusting the Backlight
T rning On, T rning Off, and Adj sting the Backlight
T rning George On
Li e the iPod, George doesn’t
have an On or Off switch. Any
time George is plugged in, he’s
ready to go.
When you first apply power to
George, a display such as this
will appear on George’s screen:
This is called the
Home Screen
. It
may loo slightly different on
your George, but you should be
able to understand all of its ele-
ments after you review this page
and the diagram on the following
page.
T rning George Off
Technically spea ing, you never
need to turn George off. And it
ma es sense that you’ll want
George plugged in at all times,
since you’ll want cloc functions
throughout the day.
Silencing George
As on the iPod, you press and
hold the Play/Pause (>/||) but-
ton for a couple of seconds to
turn off George’s sound output.
This will turn off any sound com-
ing from George and return you
to the time display on the Home
Screen. Turning off the sound
does not disable any of George’s
alarm functions.
Adj sting the Backlight
From George’s Home Screen
(holding the MENU button
always ta es you to the Home
Screen), clic the nob button
(press and release the center part
of the nob) to bring up the Bac -
light Level Screen . After you
have turned the nob to adjust
the bac light to the level you
desire, press the
➀
jump button
(just below the
Done
tab) to
return to the previous page.
A to Backlight Level
George’s remote has an ambient
light detector that will automati-
cally reduce the screen’s bright-
ness in dar environments.
George doesn’t want to be eep-
ing you awa e at night!
To set the bac light to automati-
cally lower itself in dar environ-
ments, choose Auto from the
Bac light Level Screen.
Start at the Home Screen, then
clic (press and release) the nob
to bring up the Bac light Level
Screen. Turn the nob counter-
cloc wise until “Auto” is
selected. When you’re done, clic
the nob or press the
➀
jump but-
ton to return to the previous
page.
Setting Up 9
Setting Up
George’s Home Screen
George’s Home Screen
Jump
Buttons
Press the jump button beneath a tab to access that tab’s functions.
For example, press ➁ to turn on the radio.
Tabs
Alarm 2Alarm 1
Source Status
Battery Charge
S – Sleep Timer
N – Nap Timer
O – One-Time Alarm

Setting Up 10
Setting Up
What’s on the Home Screen
What’s on the Home Screen
Tabs
The four labels at the bottom of
the Home Screen are called tabs:
Other George screens also have
tabs, although their labels will be
different.
Whatever the tab says, press the
jump button underneath it to
choose that item. The illustration
on page 9 shows how this wor s.
Sometimes there will be two rows
of tabs:
The two rows of jump buttons
will correspond to these. For the
tabs shown above, for example,
jump button
➅
selects 102.5.
The jump buttons are described
in further detail on page 13.
Other Inhabitants of the
Home Screen
In addition to the time and date,
tabs for iPod, Radio, Alarm, and
Aux are found on the Home
Screen.
When an iPod selection is being
played or paused, song name art-
ist name, and album name will be
displayed.
When the radio is playing, station
frequency and band are shown.
The Home Screen also displays
the following indicators:
• Alarms
• Source Status
• Battery Charge
Battery Charge
An indicator on the Home Screen
will show the level of charge in
the remote’s battery:
So rce Stat s
A Source Status Indicator will
appear on the left side of
George’s screen whenever he
plays your iPod. This indicator
will show if iPod music is
paused, and also if you are cur-
rently in one of George’s shuffle
modes.
Additionally, the Mute indicator
will be displayed if you press a
mute button (either the Mute /
Snooze button on the top of the
remote or the Play/Pause (>||)
button) while you are listening to
the radio or aux.
Here are the Source Status indica-
tors:
Alarms
The items at the top of the Home
Screen show whether or not
George’s various alarms are set.
For Alarms 1 and 2, the times that
have been set will also be dis-
played.
You’ll see one of these icons on
George’s Home Screen when
you’ve set an alarm:
See page 24 for more information
on George’s alarms.
Alarm 1
Alarm 2
Sleep, Nap
One-Time Alarm

Setting Up 11
Setting Up
Setting the Time and Date
Setting the Time and Date
When you first use George, you’ll
need to bring him up-to-date.
Follow the instructions on this
page to set the current time and
date.
If you ever lose power or unplug
George for an extended period of
time, his cloc will continue to
run for about 12 hours. If you
lose power for longer than that,
you’ll have to set the time and
date again.
To set the time and date:
• While the Home Screen is
displayed, press the
MENU
button on the front of the
remote. The
System Settings
menu appears:
• Turn the nob until
Time
is
highlighted on the menu.
• Clic the nob button.
• The
Set Time
menu appears
and the hour is flashing:
• Turn the nob either direc-
tion until the correct hour is
shown. George’s cloc auto-
matically toggles between
AM and PM at 12:00, so ma e
sure AM or PM is displayed
correctly.
• Clic the nob button or
press the Forward button
(>>|). The minutes will now
be flashing:
• Turn the nob to set these,
then press >>| again to set
the month.
• Set the day and year in the
same way. The day of the
wee (Monday, Tuesday, etc.)
will be set for you automati-
cally. If you need to ma e
more changes to the time,
you can use the nob or the
>>| and |<< buttons to con-
tinue moving through the
fields.
• When the date is correct,
press the
➀
jump button (on
the front panel beneath the
done
tab) to return to the
System Settings Menu. The
back
tab will also save your
changes and return you to
the System Settings Menu.
• To return to the Home Screen
without changing the time,
hold down either the MENU
button or the Play/Pause
button (>||) . Or, the
cance
tab ta es you bac to the Sys-
tem Settings Menu without
changing the time.

Using the Remote 12
Using the Remote
Using the Remote
• What’s on the Remote.......... 13
•M lti-Tasking with the Knob.......... 14
• More Abo t the Remote.......... 15
• Detaching the Remote.......... 16

Using the Remote 13
Using the Remote
What’s on the Remote
What’s on the Remote
J mp B ttons
The two rows of buttons beneath
George’s display are called
jump
buttons
:
What happens when you press a
jump button will depend on what
you are doing with George at the
time. Usually you will simply
press the button beneath a
tab
on
the display to perform the func-
tion indicated by the tab.
For example, the four tabs on
George’s Home Screen read:
Each of these tabs corresponds to
the jump button directly beneath
it. So to choose iPod, press jump
button
➀
; for Radio, press
➁
, etc.
When two rows of tabs are dis-
played – such as the presets that
are shown when you are on the
Radio screen – you can select the
top row of tabs using the
➀
,
➁
,
➂
,
and
➃
buttons, and the bottom
row of tabs using the
➄
,
➅
,
➆
,
and
➇
buttons.
There are also times when a jump
button will perform a function
that is not labeled by a tab. For
example, on the Home Screen
they also have special functions
with George’s alarm cloc , as dis-
cussed on page 26.
Jump buttons are generally not
lighted if they have no current
function.
Knob
The big round nob in the center
of the remote lets you:
• set the volume level
• tune the radio
• scroll through lists
• change values
Knob B tton
When you clic the nob button
(quic ly press and release the
center part of the nob), you can:
• select an item
• switch between radio tuning
and volume
• save a value and move to the
next item
• move between settings
• adjust the Bac light Level
from the Home Screen.
Page 14 has more about the nob.
The Versatile MENU B tton
As on the iPod, when you press
the
MENU
button you will move
up a level from the screen you are
currently viewing. If you are
viewing the list of artists, for
example, pressing MENU moves
you bac to the iPod Music
Screen.
Here’s something that differs a
bit from the iPod: when you hold
down the
MENU
button from
any place in George’s menu
structure, you’ll return to the
Home Screen. This is useful to
remember if you ever need to get
to the volume control quic ly,
since the nob always wor s as a
volume control from the Home
Screen.
Press the
MENU
button while the
Home Screen is displayed to
bring up the System Settings
Menu. The System Settings Menu
is discussed on page 29.

Using the Remote 14
Using the Remote
Multi-Tasking with the Knob
M lti-Tasking with the Knob
Changing the Vol me
Usually while you’re listening to
music you can use George’s nob
to control volume. The screen dis-
play will change to the volume
screen as soon as you start to turn
the nob.
After you’ve changed the vol-
ume, the screen will return to its
previous display. You can change
the amount of time George waits
before returning to the previous
screen, with the Vol Idle Timeout
feature described on page 32.
If you find that you are at a place
where turning the nob does not
change the volume, hold down
the
MENU
button to return to the
Home Screen for access to vol-
ume.
Navigation and Vol me
You’ll use George’s nob for both
navigation (e.g., scrolling
through lists of artists) and vol-
ume control. Sometimes you will
want to adjust volume while you
are in the middle of navigation,
so it's helpful to now your
options.
Let's say the phone rings while
you are in the middle of brows-
ing for a song, and you want to
turn the volume down. You can
either hit the large Mute button
on the top of the remote to com-
pletely silence George, or press
and hold the MENU button to
return immediately to the Home
Screen, where turning the Knob
always controls volume.
But wait – there’s more! Read on
to learn how you can set George
to automatically return to the
Home Screen or Now Playing
Screen.
Setting Timeo t Options
To automate things a bit, the Idle
Timeout and Timeout To parame-
ters in System Settings (from the
Home Screen, press the MENU
Button) let you program George
to behave li e either an iPod or a
cloc radio.
From the factory, Idle Timeout is
set to Off. This means that the
screen you are on will not change
unless you tell it to. When you set
a value for Idle Timeout, George
will automatically return to either
the Play Screen (when Timeout
To is set to Source) or the Home
Screen (when Timeout To is set to
Time) after remaining idle for the
selected number of seconds. The
Timeout To: Source and Timeout
To: Time settings emulate the
iPod logic and cloc radio logic
respectively.
If you choose the iPod logic (Tim-
eout To: Source) George behaves
li e an iPod, in that after the
selected amount of time, he
reverts to the Play screen (iPod,
Radio, or Aux).
If you choose the cloc radio
logic (Timeout To: Time), George
reverts to the Home screen after
the selected amount of time. Of
course when a song is playing,
song information will still be dis-
played under the time and alarm
settings on the Home Screen. In
the case of Radio, the station
number will be displayed.
We encourage you to experiment
with the Timeout settings to see
what’s most convenient for you.

Using the Remote 15
Using the Remote
More About the Remote
More Abo t the Remote
Forward / Reverse B ttons
When you’re listening to music
from your iPod, use the Forward
(>>|) and Reverse (|<<) buttons
to bac up or s ip forward
through the songs being played.
When you are playing the radio,
pressing these buttons lets you
s ip forward or bac wards
through your radio presets.
Play / Pa se B tton
The Play /Pause button, with its
familiar >|| icon is versatile as
well. Press this button to begin
playing a selection from your
iPod’s music library. Press the
button again to pause; when you
repress the button, play will
resume from the point you were
at when you paused.
With the Radio or Aux, the Play /
Pause button serves as a mute. It
will stop sound coming from
George’s spea ers or head-
phones; when you press it again,
sound will resume.
The Play / Pause button also
functions as George’s audio off
switch. Hold the button down for
a few seconds to silence George.
Red, Green, or Amber LED
To the right of the the screen on
George’s remote, just below the
alarm cloc icon, is an LED that
may emit a red, green, or amber
glow. Here’s what it’s trying to
tell you:
•
Red
means that the battery
power is low. No other LED
will light – whether the
remote is awa e or asleep.
•
Green
shows that an alarm is
set (whether or not the
remote is awa e). The LED is
green unless the battery is
low (in which case the LED
will be red).
•
Amber
indicates that the
remote has gone to sleep, no
alarm is set, and the battery is
not in low power mode.
• No LED means (1) the remote
is awa e, (2) no alarm is
active, and (3) battery power
is not low.
Pa sing / M ting
In addition to the Play/Pause
button (described on page 15),
there are two other ways to pause
or mute the sound coming from
George:
• Mute/Snooze button - the
long grey button on top of
the remote is most famous
for its snooze-the-alarm-for-
five-minutes function, but it
will also pause (iPod) or
mute (Radio or Aux) the
sound coming from George
at any time. This can be con-
venient if the phone rings
while you’re blasting a favor-
ite tune.
• Quiet button - the green light
that George reveals when
you remove the remote also
serves as a pause (iPod) or
mute (Radio or Aux) switch.
Pressing the Quiet button
will also dismiss a currently
firing alarm – very impor-
tant if you misplace your
remote, or if the remote bat-
tery should go south in the
middle of the night.
Using the Remote 16
Using the Remote
Detaching the Remote
Detaching the Remote
To remove the remote from
George, simply reach behind the
top of the remote and pull it
away from the front panel of
George. You’ll be reaching
behind the long grey Mute/
Snooze button, but don’t push
the button when you pull out the
remote (unless, of course, you
also want to silence George).
Q iet B tton
When the remote is removed,
you will see an illuminated green
Quiet button:
This button allows you to quic ly
mute George’s sound when the
remote is nowhere to be found.
Covering the Remote Dock
If you want to cover the remote
doc , optional covers are avail-
able from Chestnut Hill Sound
that match George’s spea er grill
cloth. The remote will still wor
fine when you’ve covered the
remote doc , but you won’t be
able to access the Quiet button.
See page 35 for more information.
When the Remote Sleeps
When George’s remote is away
from the base unit, it will gradu-
ally go to sleep after 5 minutes of
inactivity. The screen will go
blan , and usually the green LED
will appear. (The red, green, and
amber LEDs are described on
page 15.)
Turn the nob or press any but-
ton to wa e George.
If the remote goes to sleep and an
alarm has been set, the remote
will wa e up a few minutes
before the alarm goes off.
Charging the Remote
With a fully charged battery
George’s remote will last for a
few hours away from the base
unit with constant use. The bat-
tery will stay charged quite a bit
longer when the remote is asleep.
The best way to eep your
George remote handy and fully
charged is by doc ing it in the
optional Charging Stand (avail-
able from your George dealer).
See page page 35 for more infor-
mation.
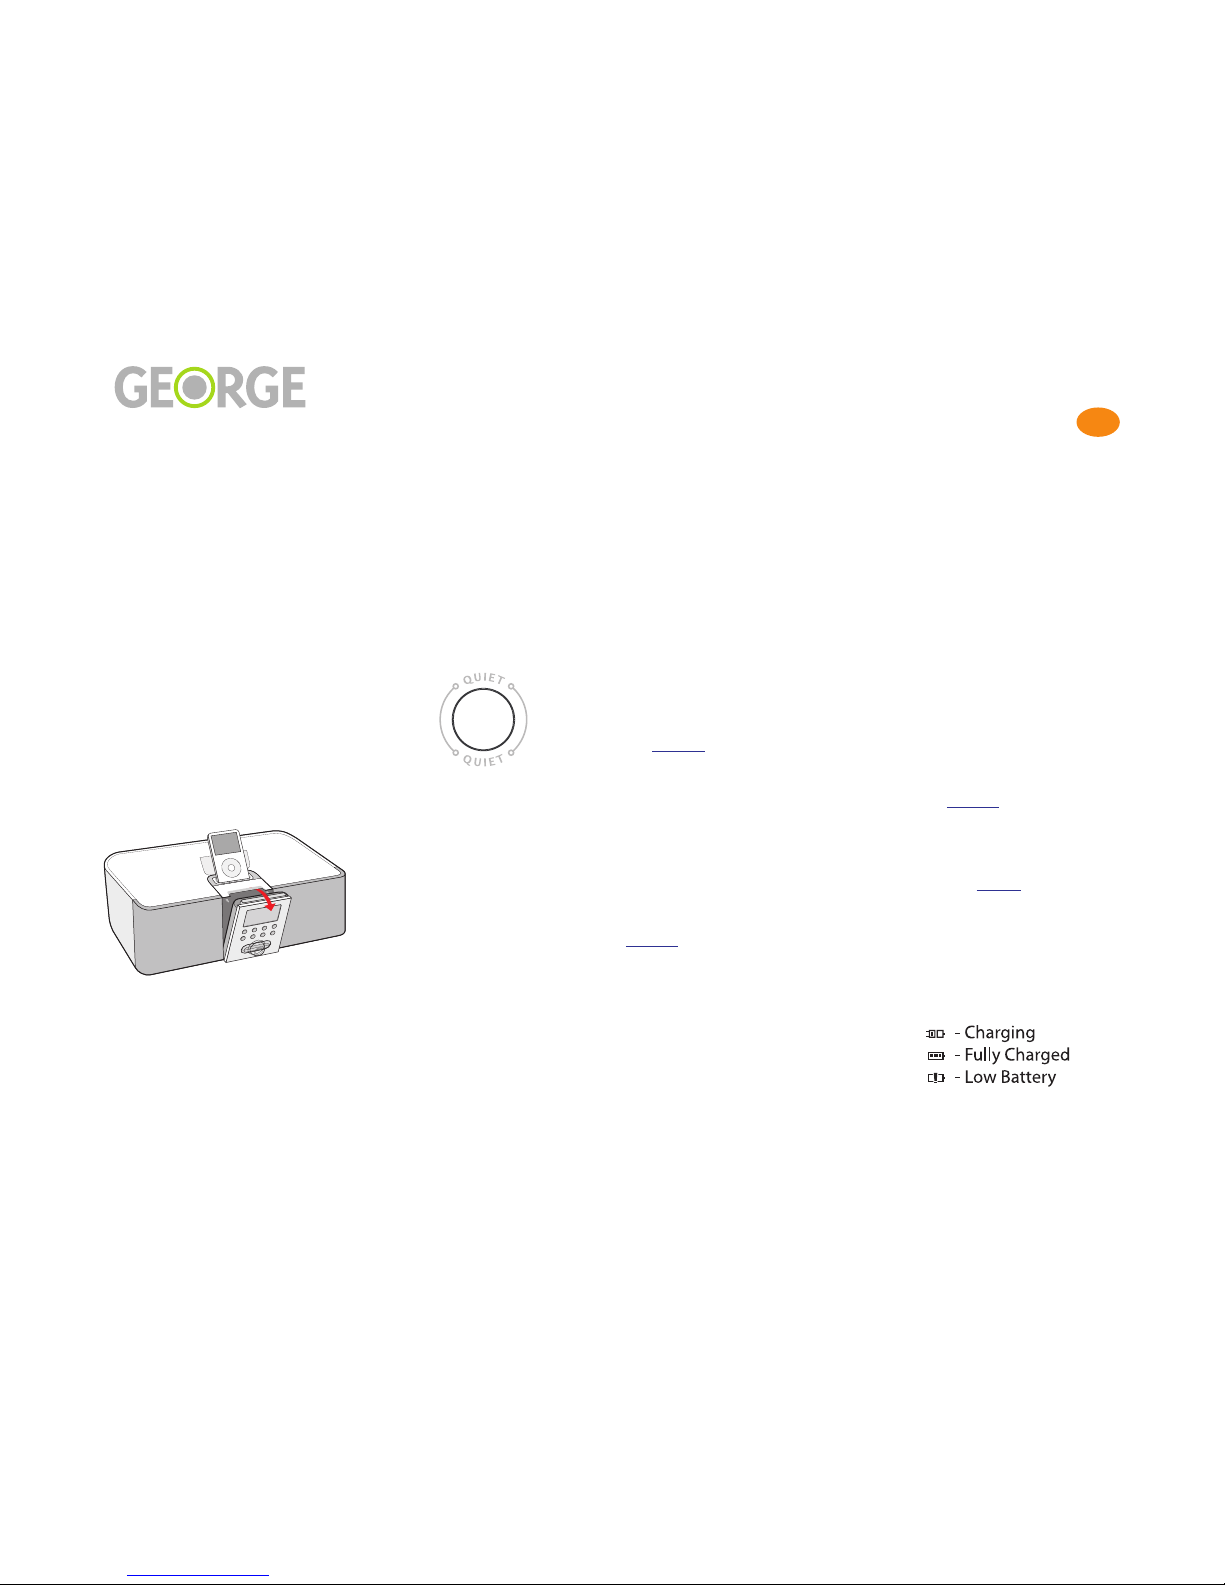
Battery Charge Indicator
As shown on page 9, the battery
charge indicator appears on the
left side of George’s screen. When
this indicator is displayed, one of
the following icons will show the
current state of the remote bat-
tery:

Listening to Your iPod 17
Listening to Your iPod
Listening to Yo r iPod
• Making the George / iPod Connection.......... 18
• How George is Different from the iPod.......... 19
• Sh ffle, Repeat, and Now Playing.......... 20
Listening to Your iPod 18
Listening to Your iPod
Making the George / iPod Connection
Making the George / iPod Connection
iPod Compatibility
George wor s with fourth gener-
ation (4G) and newer iPods.
These are the iPods with clic
wheels, including the Nano.
Shuffle iPods are supported
through the AUX connector on
George’s bac panel (see
page 31). Using the AUX connec-
tor lets you use George’s remote
to control volume, but you will
not be able to view song informa-
tion on the remote.
George Charges Yo r iPod
George wants to eep your iPod
happy and healthy. So as long as
you eep George plugged in, and
your iPod plugged into George,
he’ll ma e sure that your iPod’s
battery stays charged.
What George Can Play
While George is happy to play all
of your music, he does not recog-
nize non-audio items in your
iPod library such as videos or
photos. Version 2 (and later) of
George’s software let you play
podcasts. Chec www.chill-
sound.com for availability.
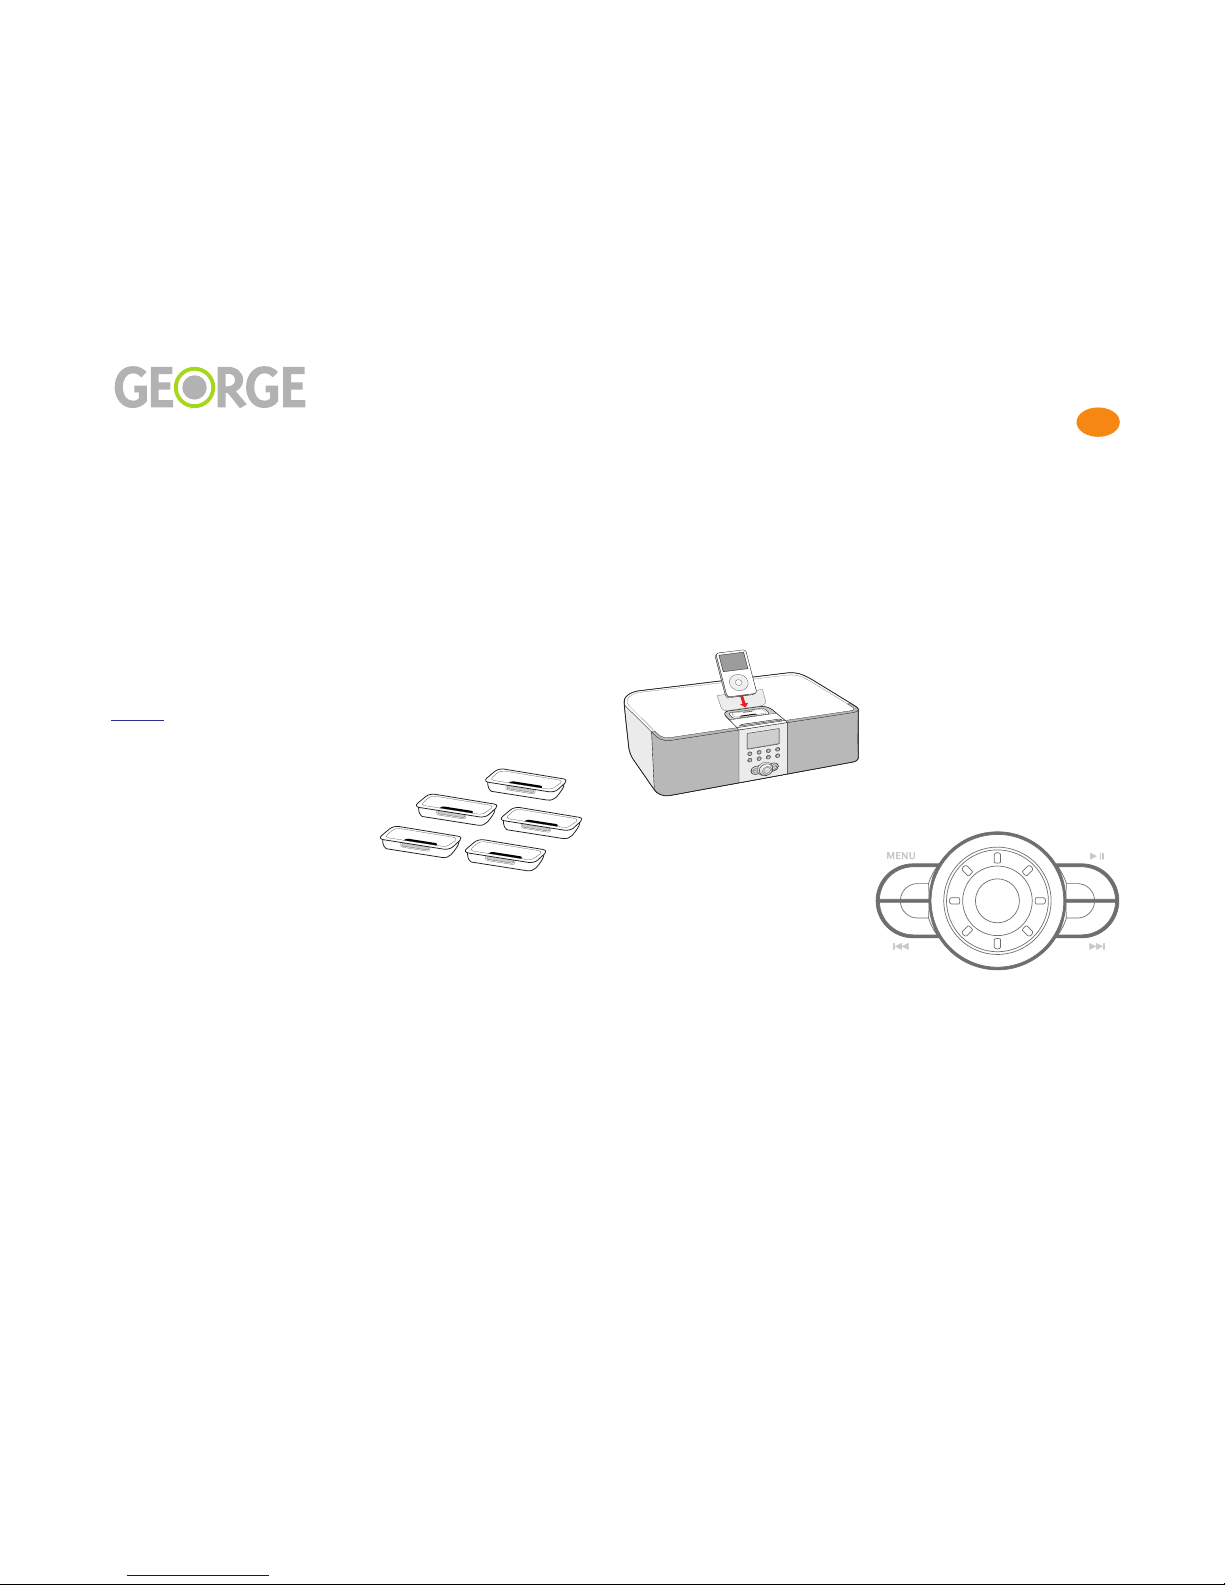
Universal Dock Inserts
Universal Doc Inserts allow the
different models of iPod’s to sit
comfortably on top of George.
Five Universal Doc Inserts are
included in the accessory box
that comes with George,
although if your iPod is a First
Generation Nano or newer you
should use the insert that came
with your iPod.
Choose the Universal Doc Insert
that fits your iPod by referring to
the chart on the accessory box.
Flip up the doc ing cover, then
insert your Universal Doc Insert
as shown:
Inserting Yo r iPod
Insert your iPod into the connec-
tor on top of George as shown:
After you insert your iPod, a
chec mar will appear on the
iPod’s screen and George will
gather all the song information
for the songs on your iPod (in
techno-spea this is nown as
metadata - information about the
songs, but not the songs them-
selves); George will also load all
the playlist, genre, album, and
artist information from your
iPod. The amount of time this
ta es will depend on the number
of songs in your iPod.
Any time the chec mar is on
the iPod screen, it is safe to
remove your iPod (although you
will no longer be able to listen to
its songs through George).
Knob and Navigation
For the most part, you use
George’s nob and navigation
buttons the same way that you
use your iPod. The nob behaves
the same as your iPod clic
wheel. The buttons to the left and
right of the nob correspond with
your iPod navigation.
To choose an item, clic the but-
ton in the center of the nob. To
go bac to the previous menu,
press the MENU button. When
you find the item that you want,
press Play (>/||) to listen, or just
clic the nob button to play a
selected song.

Listening to Your iPod 19
Listening to Your iPod
How George is Different from the iPod
How George is Different from the iPod
Using George is very similar to
using your iPod. There are a few
differences, however, as we’ll
explain here. The main differ-
ence is that George has features
to extend and enhance navigation
within your music collection. We
thin you’ll appreciate the added
power and flexibility that George
provides.
Scrolling with George
Scrolling through lists of items
(songs, artists, etc.) is a bit differ-
ent on George than on the iPod.
While the iPod ma es you stop at
the top or bottom of a list, George
lets you eep scrolling through
any list and wrap through to the
beginning (or end). When you get
to Z, for example, you don’t need
to bac trac through the alphabet
to return to A; just eep scrolling.
Similarly, George’s radio lets you
go right from AM to FM and bac
again without switching bands.
We call this “Bandless Tuning,”
and it’s discussed on page 22.
Search with J mp B ttons
Although some iPods have
search functions, George’s eight
jump buttons provide a much
faster way of searching for an art-
ist, album, song, or genre.
When George is displaying an
artist, album, song or genre list,
the jump buttons (labeled ➀ – ➇)
let you move quic ly through
alphabetical lists.
For example, press the jump but-
ton beneath the tab labeled “def”
to move to the beginning of the
“d” items in the displayed list. If
you press this button 3 times,
you’ll move to the beginning of
the “f” items.
Menu items that begin with non-
alphabetic characters (li e num-
bers, punctuation, and symbols)
cannot be reached using the jump
buttons. Since these items are
generally found at the beginning
of the menu, however, you can
find them easily by pressing the
“abc” jump button once and then
scrolling bac wards.
If no selection is found that starts
with the letter you’ve chosen,
George will beep. Press the jump
button again to see if there is a
selection starting with the next
letter. in the alphabet.
Men Memory
As you’re navigating with
George, he will remember the last
place you were in an iPod menu,
whether going forwards or bac -
wards. Bear in mind, though, that
if you change the iPod doc ed in
George, this menu memory won’t
be retained.
Timeo t Options
George gives you a great deal of
flexibility over timeout options.
These are things such as:
• What screen should George
display after periods of inac-
tivity.
• How long should George
wait after displaying the Vol-
ume Screen before returning
to the previous screen. This is
particularly important since –
as on the iPod – the nob
controls both volume and
navigation.
See page 32 for all there is to
now about George’s timeout
options.
Playlists
In addition to all the playlists
from your iPod, you will also see
a playlist with the same name as
your iPod. This is a list of all the
songs on your iPod.

Listening to Your iPod 20
Listening to Your iPod
Shuffle, Repeat, and Now Playing
Sh ffle, Repeat, and Now Playing
iPod M sic Men
Press the ➀ jump button (beneath
the iPod tab on the Home Screen)
to bring up the iPod Music Menu.
From here you can play music
from your iPod by selecting from:
• Playlists
• Artists
• Albums
• Songs
• Genres
You can also bring up the iPod
Settings Menu (described below)
for setting if and how you want
Shuffle and Repeat to wor .
You can quic ly turn George into
a ju e box by choosing Shuffle
Songs from the iPod Music
Menu. You can also bring up the
Now Playing Screen from the
iPod Music Menu or Resync your
iPod. The Now Playing Screen is
described below, and the Resync
option is discussed on page 38.
iPod Settings Men
Choose Settings from the iPod
Music Menu to bring up the
iPod Settings Menu. From here
you can set the way Shuffle and/
or Repeat will wor . Turn the
nob to highlight the option you
want, then clic (press and
release) the nob to move
through an item’s settings. Press
the MENU button to leave the
iPod Settings Menu.
Shuffle plays songs from your
iPod in a random order. Set Shuf-
fle to Songs to have songs shuf-
fled within the set you’ve chosen
(Playlists, Artists, Albums,
Genres, or your whole iPod). The
Albums option will play all the
songs from an album (in order)
before moving on to the next ran-
domly chosen album. Unless
you’ve set Repeat to All Songs,
songs stop playing after shuffle
has randomly played all the
songs within the chosen set.
As with the iPod, you can use the
Forward and Reverse buttons
(>>| and |<<) to move through
songs while you’re listening in
shuffle mode.
Repeat lets you play all the songs
in a set (Playlists, Artists,
Albums, Genres, or your whole
iPod), then starts over again at
the beginning. You can also
repeat only a single song, over
and over.
When you repeat multiple songs,
George will play all the songs on
the list you chose and then start
over again, playing them in the
same order in which they were
played before.
The Now Playing Screen
If eeping trac of the music
George plays is more important
than having a large time display,
you should go to the iPod Music
Menu and select Now P aying
You’ll still be able to see what the
time is, but song, artist, and
album information will now be
more prominently displayed:
For long names, the words will
scroll across the screen.
In addition to the song, artist, and
album, a number of other pieces
of information are displayed on
the Now Playing Screen. These
include several things that are
also on the Home Screen. The
Now Playing screen shows you:
• battery charge information
(see page 10)
• number of items in group
(e.g., current album) and
number of current item.
• current time.
• elapsed time of song being
played.
• source status (see page 10)
• tabs for Playlists, Artists,
Albums, and Songs.
Other manuals for GEORGE
1
Table of contents


