2) ln order to make the camera and microSD card reach good
compatibility, we suggestyou to format microsD card byTV
setting when you use it fir5t time because it won't reach good
compatibility if format microsD card by PC. After format
microsD card by TV setting, it can avoid some situations, such
as purple indicator flashes quickly warning or camera
automatically stops. etc.
3) Please copy the files taken in the camera to your computer
desktop. and then replay it to avoid ragged playback.
Charging & indicating
'l) Please use the qualified adapto(5V 1A or above) and USB
cable for unit charging.
2) Charging time is about 4h, red LED indicator keeps on during
charging, red LED indicator will go out after fully charged.
3) For this unit comes with built-in rechargeable libattery,
please charge unit for 8h in first three times, and recharge it
after battery is used up for long-time lifespan.
4) Waysofcharging
a. Charging by adaptor connect UsB cable with adaptor, and
then connect UsB cable with unit for unit charging.
b. Charging by PC, directly connect to Pc by USB cable for unit
charging no matter unit turning on&off, but it needs longer
time for charging.
Notes:
It is a normal phenomenon that the temperature o{ unit and
adaptorwillincreasealitfleduringcharging:,,'
lnstructions before using and matters needing attention
The unit supports time&date stamp, when use it first time or no
operation for a long time, please set up correct time and date
before using, please refer to system settings.
Vl Function specification
1. Turning on
> lnsert microsD card, long press " QD " . blue LED indicator is
lit up with warning tone and LcD screen opens and shows
" Welcome".That means the unit enters into standby mode.
> lnitialization time depends on capacity and load data quantity
of microsD card, please check LCD screen warning.
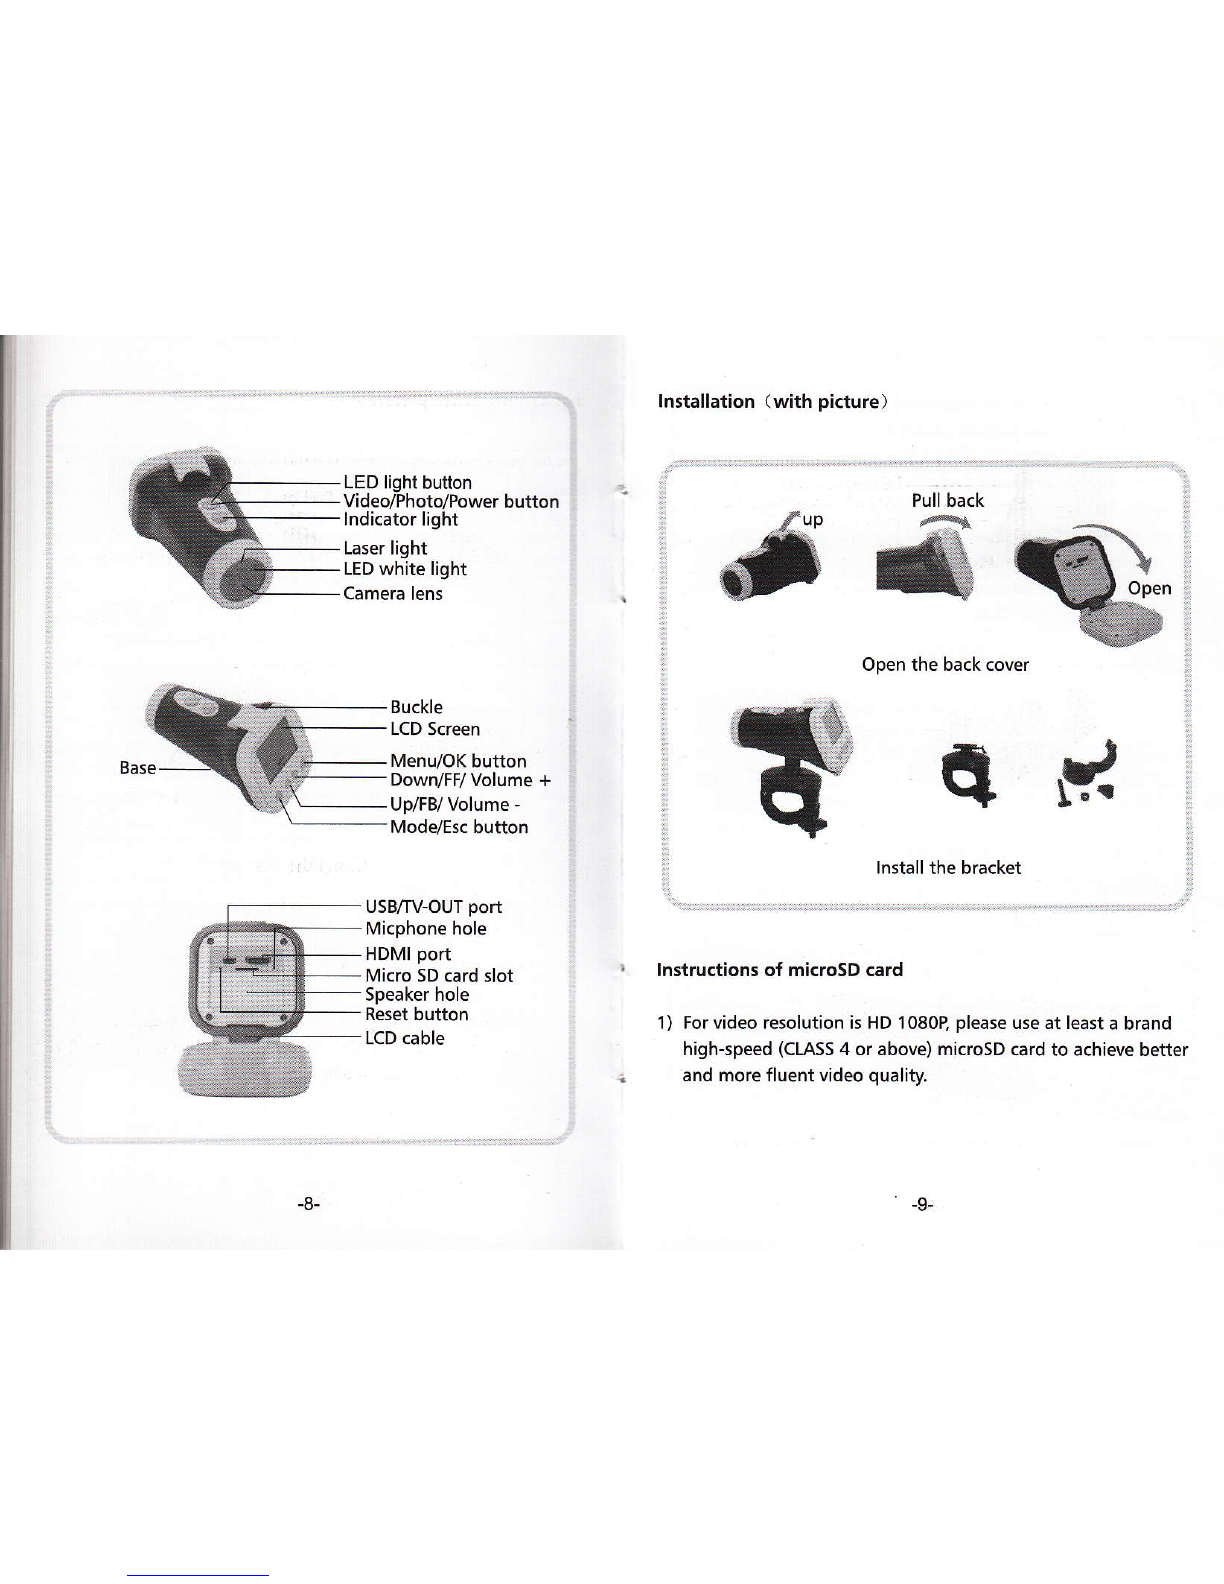
> For video resolution is HD 1 080P. please use at least a brand
high-speed (CLASS 4 or above) microsD card to achieve better
and more fluent video quality.
Notes:
1'),:Theib[i!:iridicbtoJlaslidi]diriakl]r,endinormbiiddtry?it!!!Ei i .'
I ri:ar]o€ar3,ia Lcp:aafuEh wheri,tlrindd:on.urilholtrl}krc-6.Dtaid,r
2),After..tting,diitinq,iecordff .m0Ct.(mcoiafarltlrts;.!rri!. :1 .
. ,:wila!'toiittiiiriiir 6ii.6nd,ariiii,iiitdntd€cr.ri*dii*i,ttiid!,
mode.
2. Turning off
> ln any mode, Iong press "@"then the blue indicatorflashes
several times quickly and with warning tone the LCD screen
shows" Goodbye".