Chuango SPS-260 User manual
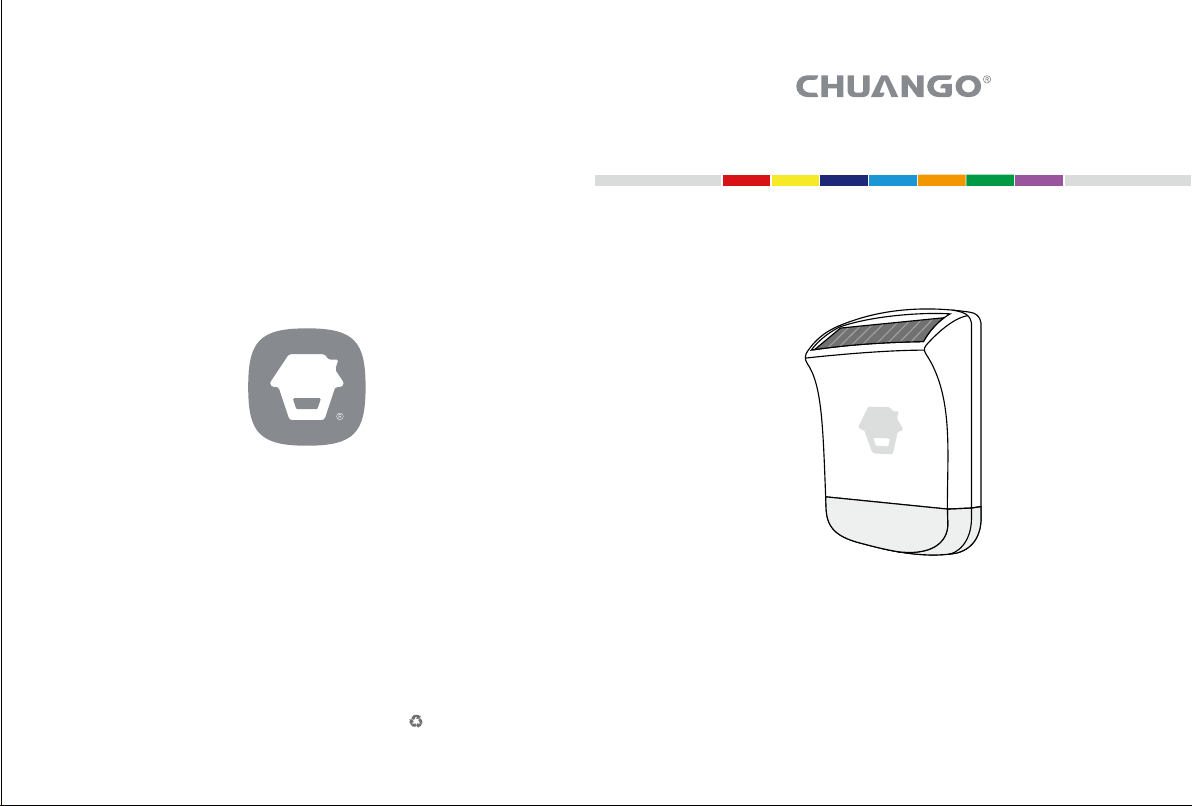
SPS-260
Solar-Powered Siren
Ver: SPS-260-UM-ML-V1.0
Printed in China
MULTILINGUAL
USER MANUAL
EN DE ESFR PTNL IT
© Chuango. All Rights Reserved.
ENEN
Product Overview
The solar-powered siren is a totally wireless siren, which can be
installed in driveways, gardens and all types of other external
locations. The strobe siren is battery powered and kept re-
charging by the built-in solar panel. The signal transmission
is all by wireless radio frequency which achieves signicantly
wirefree transmission and enhances the exibility to install.
The strobe outdoor siren can be used as a wireless siren by
connecting to the control panel as well as a standalone alarm
system to work with wireless accessories in same frequency by
learning.
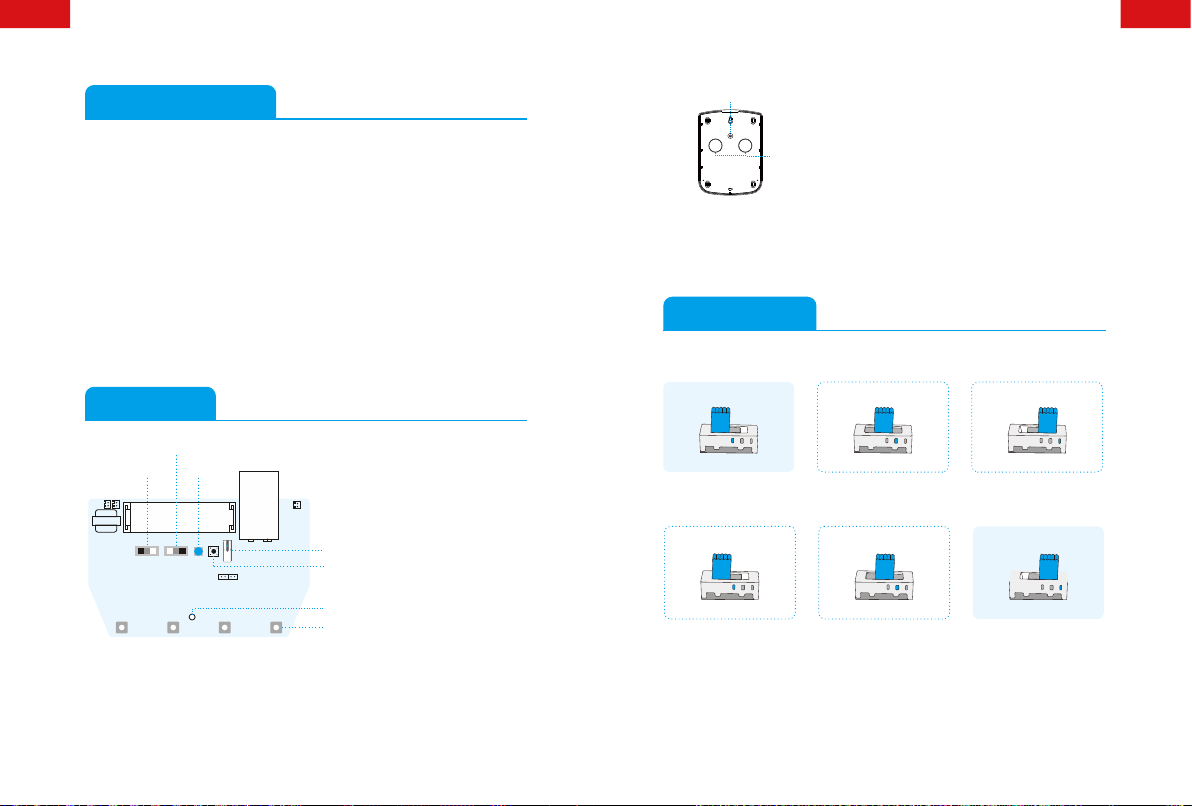
PCB Layout
1
8
6
5
0
9V 6F22
Internal Tamper Switch
Siren Duration Setting
VoIume Setting Power On/Off
Learning Button
Arm/Disarm Tone Setting
Entry&Exit Delay Time Setting
Status LED Indicator
Alarm LED Indicators
Note: The 9V battery is used to charge 18650 battery in case it is out of
power/with low power after a long-time storage. Use the 9V battery to
charge 18650 battery for 12 hours and then remove 9V battery before
installation.
External Tamper Switch
Sirens
Note: The siren will sound immediately if the tamper switch is triggered.
* The status LED light ashes every 5 seconds in Arm and Home
Arm mode but doesn't ash at all in Disarm mode.
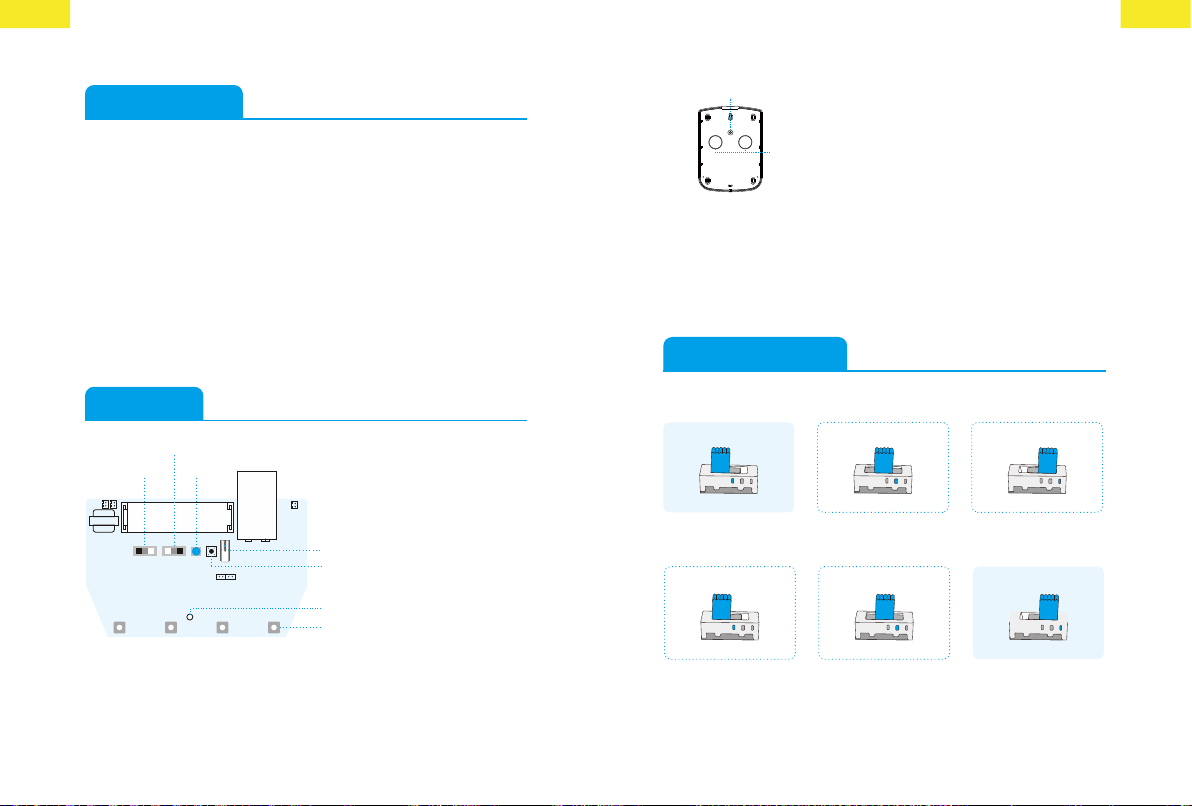
Jumper Setup
Volume Setting
HIGH MUTE LOWHIGH MUTE LOW HIGH MUTE LOW
High (default) Mute Low
Siren Duration Setting
5MIN 2MIN 30S 5MIN 2MIN 30S 5MIN 2MIN 30S
5 minutes 2minutes 30 seconds (default)
Note: To prevent possible hearing damage, it is suggested to avoid listening
at high volume level for long period.
ENEN
Usage
Getting Started
1. Load the 9V battery.
2. Set the volume and duration of the siren.
3. Start to use by pressing the power button on.
Note: The battery is used to charge the 18650 battery in case it is out of
power/with low power after a long time storage. Use the 9V battery to
charge 18650 for 12 hours and then remove 9V battery before installation
When installed as part of a
chuango Alarm System, the
Siren must be paired to the
Control Panel only.
Pairing to a Control Panel
1. Press the Learn Button on the
Solar Siren (0.5 seconds), the
siren goes into Learn Mode after
one beep is heard.
2. Press the Arm or SOS Button on
the Control Panel(or press Arm
on App if the panel does not
have a button).
3. The Siren is paired with Control
Panel successfully after a second
beep.
4. If two beeps are heard, it is
already linked.
To give up pairing the Control
Panel, press the Learn Button
(before step 2 is done) again to exit
Learn Mode after one beep.
The Siren will sound and the
strobe lights will ash upon
alarm activation. Disarming
the System will stop the siren
sounding. If not disarmed the
Siren Status Indicator will ash
once every 2 seconds for one
hour (visual notication of an
alarm event).
When installed as Siren
only Alarm System (without
control panel). All of the
Alarm Accessories must be
paired to the Siren.
Pairing with Wireless Accessories
1. Press the Learn Button
(0.5 seconds), the system goes
into Learn Mode after one beep
is heard.
2. Press the Test Button on the
additional Accessory or trigger
the Accessory once.
3. The Wireless Accessory is
learned successfully after a
second beep.
4. If two beeps are heard, the
accessory is already linked.
To give up pairing the Accessories,
press the Learn Button (before step
2 is done) again to exit Learn Mode
after one beep.
The Siren will sound and the
strobe light will ash upon
activation of a connected
Accessory.
Disarming the System will
stop the siren sounding. If
not disarmed the Siren Status
Indicator will ash once every
2 seconds for one hour (visual
notication of an alarm event).
Note: Press and hold the pair button of the wireless siren; the connection
between the wireless siren and control panels (or accessories) is deleted
when you hear a beep from the wireless siren.
ENEN
Installation
Service Mode
Test Mode prevents the Siren's tamper switch from triggering
an alarm during installation, maintenance or when changing
the battery.
When the remote control is connected with the siren, press
[Disarm ] 3 times successively (please make sure two beeps
are heard at each time before continuing the next press), the
siren goes into service mode when a long beep is heard.
During this period, the siren will not alarm but beep if the
tamper switch or the connected sensors are triggered. This
brings you convenience on installation.
Press [Arm ] on remote control to exit service mode after a
short beep.
Note: Also you can press the tamper switch 7 times to enter installation
mode.
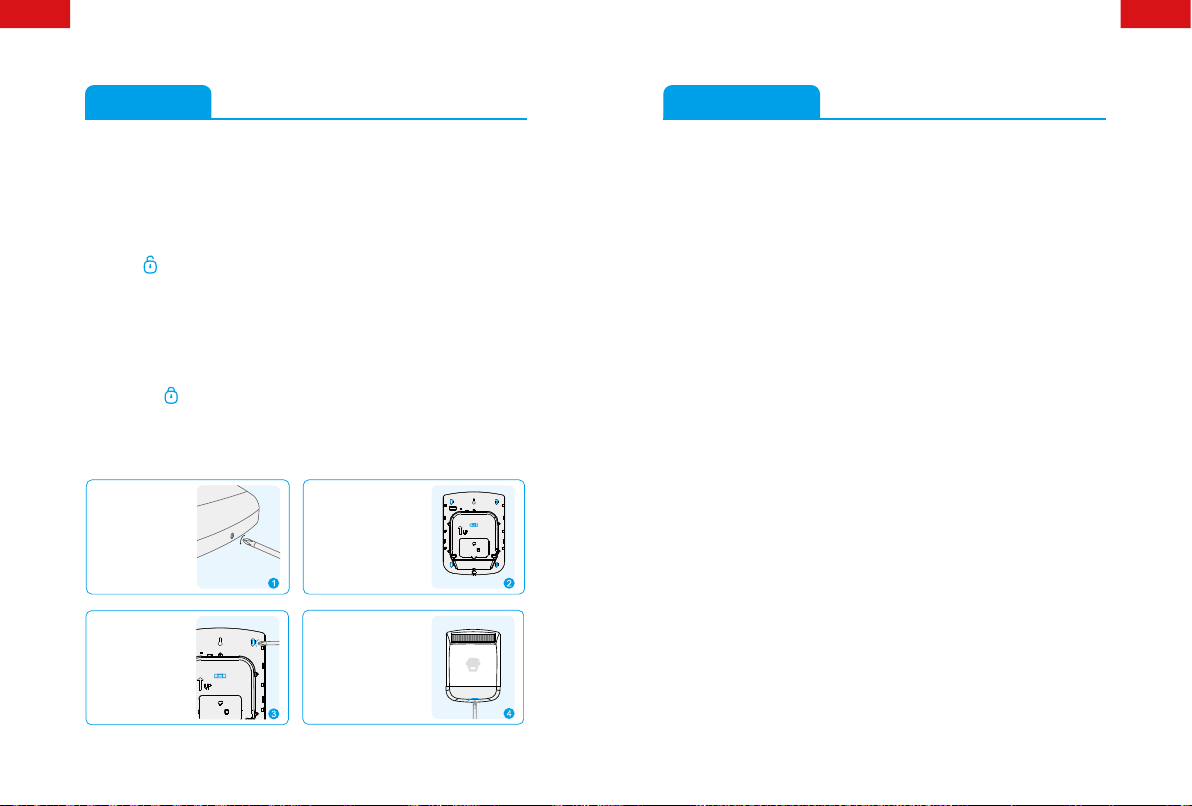
Remove the xing
screw from the
bottom edge of the
siren housing and
carefully remove front
cover.
Hold the mounting plate
in position and mark
the positions of the four
mounting holes. A spirit
level placed on the water-
proof casing will ensure a
perfect level.
Drill four holes and
t the wall plugs,
and then t supplied
xing screws in the
holes.
Hinge the front cover
locating tabs over the top
edge of the back plate and
carefully push the base of
the siren cover into place.
Secure the siren cover
in place by retting the
xing screw in the bottom
edge of the cover.
Specications
Backup Power 18650 3.7 V 1800 mAh rechargeable
lithium battery x 1
9 V 6F22 battery x 1
Solar Panel Output Current 2000 LUX illumination ≥ 4 mA
(in sunlight)
Maximum Alarm Current < 500 mA
Wireless Receiving Distance < 80m (in open area)
Operation Condition: Temperature -20°C~+55°C
Relative Humidity <80%
(non-condensing)
Maximum Siren Volume 110 dB
Static Current < 1 mA
Standby Time < 45 days (fully charged)
Wireless Receiving Frequency 433.92 MHz
Housing Material PC + ABS + ANTI-UV
Size (L x W x H) 309 x 230 x 79.7 mm
DEDE
Produktübersicht
Die solarbetriebene Sirene ist eine völlig drahtlose Sirene,
die in Einfahrten, Gärten und allen sonstigen Außenanlagen
installiert werden kann. Die Leuchtsirene ist batteriebetrieben
und wird durch das integrierte Solarmodul immer wieder
aufgeladen. Die Signalübertragung erfolgt drahtlos per
Funkfrequenz mit erheblicher Leistungsstärke und optimaler
Flexibilität bei der Installation.
Die Leuchtsirene für den Außenbereich kann als drahtlose
Sirene zum Anschluss an das Bedienfeld und als
eigenständiges Alarmsystem für den Betrieb mit drahtlosem
Zubehör im selben Frequenzbereich verwendet werden.
PCB-Layout
1
8
6
5
0
9V 6F22
Interner Sabotagekontakt
Einstellung Sirenendauer
Einstellung
Lautstärke Ein-/
Ausschalten
Lerntaste
Einstellung Scharf-/Unscharf-Ton
Einstellung Ein-und Ausgangsverzögerungszeit
Status der LED-Anzeige
Alarm-LED-Anzeigen
Hinweis: Mit der 9-V-Batterie wird die Batterie des 18650 aufgeladen,
falls diese nach langer Lagerung keine oder nur noch wenig Kapazität hat.
Laden Sie die Batterie des 18650 vor der Installation 12 Stunden lang mit
der 9-V-Batterie auf und entfernen Sie diese dann.
Externer Sabotagekontakt
Sirenen
Hinweis: Die Sirene löst sofort Alarm aus, wenn der Sabotagekontakt
ausgelöst wird.
* Die Status-LED blinkt alle 5 Sekunden im Modus Scharfschalten
und Zuhause Scharfschalten, blinkt aber nicht im Modus
Unscharfschalten.
Jumper-Einrichtung
Einstellung Lautstärke
Hoch (Standard) Stumm Niedrig
Einstellung Sirenendauer
5 Minuten 2 Minuten 30 Sekunden (Standard)
Hinweis: Um mögliche Hörschäden zu vermeiden, wird empfohlen, die
hohe Lautstärke über einen längeren Zeitraum zu vermeiden.
HOCH STUMM NIEDRIG HOCH STUMM NIEDRIG HOCH STUMM NIEDRIG
5 Min 2 Min 30 S 5 Min 2 Min 30 S 5 Min 2 Min 30 S
Other manuals for SPS-260
1
Table of contents
Languages:
Other Chuango Home Safety Product manuals


