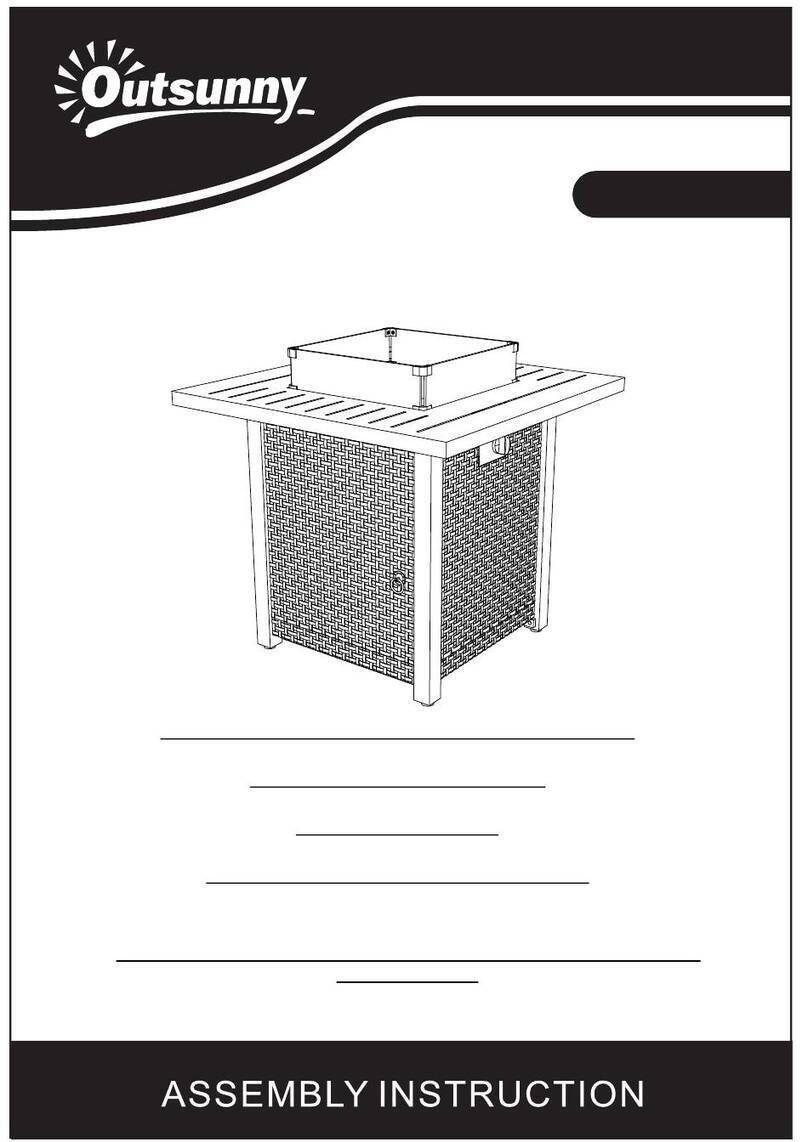
Ciays ETFPT2 User manual

Thank you for choosing this product! We strive to provide you with the
best quality products and services in the industry. Should you have
any issues, please don't hesitate to contact at
877-546-8648 Mon-Fri 8am - 8pm(CST)
Fire Pit Table Instruction Manual V1.0 (A)
Model: ETFPT2

- 1 -
Table of Contents
SAFETY INFORMATION ………………............................................ 2-5
PREPARATION …………………………...............…….......................... 6
SUPPLIED PARTS AND HARDWARE …………………................... 6-7
ASSEMBLING THE TABLE ………………………............................ 8-13
INSTALLING THE GAS CYLINDER IN THE HOLDER ASSEMBLY
....... 14-15
LOCATING FIRE PIT FOR USE ……………………............................ 16
OPERATION …………………….................................................... 17-19
MAINTENANCE AND STORAGE …………………..................... 20-21
FAQ …………………………................................................................. 22
Caution: Do not attempt to operate until you have read & understood all
General Safety Information in this manual and all assembly is complete &
leak checks have been performed.
Note: Before beginning assembly of the product, make sure all parts are
present. Compare parts with package content list and hardware contents. If
any part is missing or damaged do not attempt to assemble the unit. Con-
tact customer service for replacement parts.

Read the installation, operation and maintenance instructions before
installing, using or servicing this appliance. The appliance must be
installed in accordance with the instructions and local regulations.
Failure to comply with the precautions and improper installation, adjust-
ment, alteration, service or maintenance can cause injury or property
damage from hazards of fire, explosion, burn, asphyxiation, and/or carbon
monoxide poisoning.
Only persons who can understand and follow the instructions should use
or service this heater.
WARNING ForYour Safety
- 2 -
DANGER indicates an imminently hazardous situation which, if
not avoided, may result in death or serious injury.
DANGER
SAFETY INFORMATION
Do not store or use gasoline or other flammable vapor and liquids in the vicinity
of this or any other appliance.
DANGER
Do the leak test after each changing of the cylinder.
Never check for leaks with a match or open flame.
DANGER
CAUTION indicates an imminently hazardous situation which, if
not avoided, may result in minor or moderate personal injury or
property damage.
CAUTION
This appliance can produce carbon monoxide which has no odor.
Using it in an enclosed space can kill, cause injury or death.
For Outdoor Use Only (outside any enclosure). Never use this appli-
ance in an enclosed space such as a camper, tent, car or home.
DANGER Carbon Monoxide Hazard
WARNING indicates an imminently situation which, if not
avoided, may be hazardous result in death or serious injury.
WARNING

- 3 -
Solid fuels shall not be burned in this appliance.
DANGER
The maximum inlet gas supply pressure: Max . 250 PSI . Min 5 PSI
DANGER
Do not use this appliance if any part has been under water.
Immediately call a qualified service technician to inspect the appliance and to
replace any part of the control system and any gas control that has been under
water.
DANGER
For outdoor use only. Never use inside house or other unventilated or enclosed
areas. This heater consumes air (oxygen). Do not use in unventilated or enclosed
areas to avoid endangering your life.
DANGER
CARBON MONOXIDE HAZARD
Never store propane near high heat, open flames, pilot lights, direct sunlight,
other ignition sources or where temperatures exceed 120 degrees F (49°C). Pro-
pane vapors are heavier than air and can accumulate in low places. If you smell
gas, leave the area immediately.
Never install or remove propane cylinders while the heater is lighted, near flame,
pilot lights, other ignition sources or while the heater is hot to touch.
This heater is red hot during use and can ignite flammables too close to the
burner. Keep flammables at least 36" (91.44CM) from sides & 48" (121.92CM)
from top. Keep gasoline and other flammable liquids and vapors away from the
heater. The propane cylinder must always be stored outdoors in a well ventilated
space. Never store propane cylinder in an enclosed area (house, garage, etc.). If
the heater is to be stored indoors, disconnect the propane cylinder for outdoor
storage.
DANGER
EXPLOSION - FIRE HAZARD
Close the valve of the gas cylinder or regulator.
Extinguish all naked flames, do not operate any electrical appliances.
Check for leaks as detailed in these instructions.
DANGER IfYou Smell Gas

- 4 -
Surfaces of fire pit can remain extremely hot for a period after use. Allow 45
minutes to cool down before touching or moving the fire pit.
WARNING
WARNING: FUELS USED IN LIQUEFIED PROPANE GAS APPLIANCES, AND THE
PRODUCTS OF COMBUSTION OF SUCH FUELS CAN EXPOSE YOU TO CHEMI-
CALS INCLUDING BENZENE, WHICH IS KNOWN TO THE STATE OF CALIFORNIA
TO CAUSE CANCER AND CAUSE BIRTH DEFECTS OR OTHER REPRODUCTIVE
HARM.
FORmoreinformationgoto:www.P65Warning.ca.gov
ADVERTENCIA: LOS COMBUSTIBLES USADOS EN EQUIPOS PARA LICUAR GAS
PROPANO, ASÍ COMO LOS PRODUCTOS DE COMBUSTIÓN, PUEDEN EXPONER-
LE A SUSTANCIAS QUÍMICAS, ENTRE ELLAS EL BENCENO, QUE EL ESTADO DE
CALIFORNIA RECONOCE COMO CAUSANTES DE CÁNCER, MALFORMACIONES
CONGÉNITAS U OTROS DAÑOS AL SISTEMA REPRODUCTOR.
Paramásinformación, visita:www.P65Warning.ca.gov
WARNING
An LP cylinder not connected for use should not be stored in the vicinity of this
or any other appliance.
WARNING
Caution: Do not attempt to operate until you have read & understood all
General Safety Information in this manual and all assembly is complete &
leak checks have been performed.

- 5 -
Never fill the cylinder beyond 80 percent full.
For appliances designed to use a CGA No.791 connection:
Place the dust cap on the cylinder valve outlet whenever
the cylinder is not in use.
Only install the type of dust cap on the cylinder valve that
is provided with the cylinder valve.
Other types of caps or plugs may result in leakage of
propane.
Note: Gas supply pressure: 25 to 250
You must provide propane gas and a propane cylinder. Use a standard 20 lb.
propane cylinder only.
Use this heater only with a propane vapor withdrawal supply system. See
Chapter 5 of the Standard for Storage and Handling of Liquified Petroleum
Gas, ANSI/NFPA 58. Your local library or fire department should have this
book.
The minimum permissible gas supply pressure of 10 W.C. is the required for
purpose of input adjustment.
The minimum hourly of 50,000 Btu is the required input rating for a heater
for automatic operation at ratings less than the full input rating.
The pressure regulator and hose assembly supplied with the appliance must
be used.
The installation must conform to local codes, or in the absence of local
codes, to the National Fuel Gas Code, ANSI Z223.1.
A dented, rusted or damaged propane cylinder may be hazardous and should
be checked by your cylinder supplier. Never use a propane cylinder with a
damaged valve connection.
The cylinder used must include a collar to protect the cylinder valve.
Do not store a spare LP gas cylinder under or near this appliance.
Standard 20 lb. tank
Warnings-About Propane Cylinder

- 6 -
Supplied Parts and Hardware
PREPARATION
--Select an area where you will assemble this product. To protect compo-
nents, choose a smooth non abrasive surface that's free of cracks or open-
ings.
--Spread out all the parts.
--Tighten all hardware connections by hand first. Before completing each
step, go back and fully tighten all hardware. Be careful not to over-tighten,
that could damage the surface or strip threads.
--For the best results, complete each in the order presented.
To complete the assembly you will need:
(1) Leak detection solution instructions on how to make the solution are
included in the “operating instructions” section of this manual.
(2) precision-filled LP gas grill tank with an Acme Type 1 external threaded
valve connection standard grill size.
Phillips Screwdriver
Tools Required (Not Included)
Supplied Hardware
Bolt
M6X25mm
4PCS
Bolt
M6X12mm
36PCS
AA
BB

- 7 -
Supplied Parts
NO.
A
B
C
D
E
F
G
DESCRIPTION
Cover Lid
Lava Rock
Table Top
Door Handle
Leg 2
Side Panel B
Leg 1
QUANTITY
1
1
1
1
2
2
1
NO.
H
I
J
K
L
M
N
DESCRIPTION
Door Connector
Door
Leg With Door Magnet
Side Panel A
Cylinder Holder Pole
Cylinder Holder
Cylinder Locking Knob
QUANTITY
1
1
1
1
2
1
1
K
F
IL
JE
L
H
E
C
B
A
F
M
N
D
G

- 8 -
Assembling the table
STEP 1
STEP 2
Attach 1pc Leg 2 [E] and 1pc Leg 1 [G] to the table top [C] with 6pcs
M6X12mm bolts [BB].
Attach the leg 2 [E] and leg with door magnet [J] to the side panel A [K] with
6pcs M6X12mm bolts [BB].
x1
x1x1
C E G
x6
BB
x1x1x1
E J K
x6
BB
E
C
G
BB
K
J
E
BBBB

- 9 -
STEP 3
STEP 4
Attach the panel with Legs (in Step 2) to the control knob side of the table
top [C] with 6pcs M6X12mm bolts [BB].
Attach the other side panel B [F] to leg 2 [E] with 6pcs M6x12mm bolts [BB].
x1
F
x6
BB
x6
BB
BB
BB
BB
K
J
E
G
C
E
G
J
F
EC

- 10 -
STEP 5
STEP 6
Attach side panel B [F] to leg 2 [E] and leg 1 [G] with 6pcs M6x12mm bolts
[BB].
Attach cylinder holder poles [L] to cylinder holder [M] with 4pcs M6x12mm
bolts [BB] and then screw cylinder locking knob [N] to cylinder holder [M].
x1
x1x2
LM N
x1
F
x6
BB
x4
BB
C
BB
E
E
J
F
G
BB
L
N
L
M
BB

- 11 -
STEP 7
STEP 8
Attach the cylinder holder assembly to 4 legs with 4pcs M6x25mm bolts [AA].
Note: Make sure the cylinder locking bolt [N] plastic head is facing outwards.
Screw door handle [D] to door [I].
x1
x1
DI
x4
AA
N
AA
ID

- 12 -
STEP 9
STEP 10
Attach the door [I] to the leg 1 [G] with door connector [H] using 2pcs
M6x12mm bolts [BB].
Pour the lava rocks [B] (max 8.8 lb) into the burning area of the table top [C].
Then place the cover lid [A] onto the table top [C] when the gas fire pit is not
in the use.
Note: To avoid ignition failure, do not cover the flame orifice with lava rocks.
x1
x1
AB
x2
BB
H
BB
B
C
A

- 13 -
STEP 11
Press the edge of the lid, then take it off.
Press the handle
Take the lid off
A

- 14 -
Installing the Gas Cylinder in the Holder Assembly
Installation
Two or more people are helpful for an easier installation.
Location
Your fire pit must be installed on flat, stable surface, away from any combus-
tible materials or construction.
SET-UP
1. Place fire pit on any level, outdoor, non-combustible surface.
NOTE: Do not place the appliance on grass or dirt. This may prevent proper
safety venting.
2. Open the door [I] and place gas cylinder in the
holder assembly.
3. Turn the cylinder locking knob clockwise to
secure the gas cylinder.
4. Attach regulator to gas cylinder and turn
clockwise by hand.
5. Check your fire pit for leaks before use.
Tighten
regulator & cylinder connection

- 15 -
Your gas fire pit has been checked at all connections at the factory for leak-
age.
In transportation and handling some connections may have loosened. Follow
these steps to check the hose/ regulator/cylinder connections:
1) Make leakage solution by mixing 1 part liquld dish soap and 3 parts water
2) Spoon or brush several drops (or use squirt bottle) of the solution onto
hose/regulator/gas cylinder connection.
3) Turn on the gas cylinder. Inspect the connections and look for bubbles.
4) If no bubbles appear, the connection is safe.
5) If bubbles appear, there is leakage. Loosen and re-tighten this connection.
If there is still a leak, please call customer service at 877-546-8648.
Note:
1) The cylinder supply system must be arranged for vapor withdrawal.
2) The cylinder used must include a collar to protect the cylinder valve.
The hose assembly must be replaced prior to the appliance being put into
operation if there is evidence of excessive abrasion or wear, or if the hose is
damaged.
At least once a year, a complete inspection of the entire gas path compo-
nents shoud be performed.
If there is a need to replace parts, proceed to leak test after reassembly
(These procedures should be performed by a professional technician).
Leak Check

- 16 -
LOCATING FIRE PIT FOR USE
CAUTION: WHEN CERTAIN MATERIALS OR ITEMS ARE LEFT ABOVE, BESIDE
OR UNDER THIS APPLICANCE WHILE IN USE, THEY WILL BE SUBJECT TO
RADIANT HEAT AND COULD BE SERIOUSLY DAMAGED.
This gas fire pit is primarily used for the heating of outdoor patios, decks,
spas, pools and open working areas.
Always make sure that adequate fresh air ventilation is provided. Follow the
spacing tolerances shown in the below figure.
This fire pit table must be placed on level, firm ground.
Never operate in an explosive atmosphere.
Keep away from areas where gasoline or other flammable liquids or vapors
are stored or used.
36”
48”
36”

- 17 -
OPERATION
WARNING: DO NOT ATTEMPT TO OPERATE THE APPLIANCE UNTIL YOU
HAVE READ AND UNDERSTAND ALL PRECAUTIONS. FAILURE TO DO SO MAY
RESULT IN PROPERTY DAMAGE, SERIOUS INJURY, OR DEATH.
WARNING!!!
• Do not use an open flame to check for leakage.
• Do not smoke during testing.
• Do not test indoors.
• A leak check must be performed whenever the gas cylinder is replaced.
NOTE:
Use only the pressure regulator supplied with this fire pit. Replace them with
those specified by the manufacturer only.
Before turning the gas supply ON
Your fire pit was designed and approved for OUTDOOR USE ONLY. DO NOT
use it inside a building or any other enclosed area.
Make sure surrounding areas are free of combustible materials, gasoline, and
other flammable vapors or liquids.
Ensure that there is no obstruction to air ventilation.
Be sure all the gas connections are tight and there are no leaks.
Be sure the access panel is clear of debris.
Be sure any component removed during assembly or servicing is replaced and
fastened prior to starting.
FOR YOUR SAFETY:
If at any time you are unable to light
burner and smell gas, wait 5
minutes to allow gas to dissipate
before attempting to a light gas
appliance. If after 1 minute, you are
unable to light the burner, wait 5
minutes and allow flammable vapors
to dissipate before attempting to
light the gas appliance.
WARNING FOR YOUR SAFETY:
DO NOT touch or move gas appli-
ance for at least 45 minutes after
use.
WARNING
Lighting operations should comply
with Lighting instruction section
improper lighting operations will
cause serious injury and exolosion.
WARNING

- 18 -
OPERATION
WARNING: DO NOT ATTEMPT TO OPERATE THE APPLIANCE UNTIL YOU
HAVE READ AND UNDERSTAND ALL PRECAUTIONS. FAILURE TO DO SO CAN
RESULT IN PROPERTY DAMAGE, SERIOUS INJURY, OR DEATH.
The gas fire pit should be thoroughly inspected before each use, and by a
qualified service person at least annually.
lf relighting a hot gas fire pit. always wait at least 5 minutes.
Before Lighting
1. Make sure the control knob is in the “OFF”
position.
2. Turn the LP cylinder gas valve to fully open
position.
3. Press down control knob and turn it counter
clockwise to “MAX” position, this will light
the burner. (You will hear 1 clicking noise.)
4. If the burner is not lit immediately (within 5
seconds) press down the control knob and
turn clockwise to “OFF” position repeat
from step 3 after 5 minutes.
5. When burner is lit, turn the control knob to
desired heat output position between
“MAX” and “MIN”.
Lighting Instructions
Normally the burner flame is yellow.
If the burner flame is blue and very small. please
check the gas cylinder, as it may be in low gas
pressure or be empty. If there is enough gas in
the cylinder, please contact customer service to
change the burner of the gas fire pit.
If flames lift away from the burner or a backfire happens, or thick black
smoke is generated, the fire pit should be turned off immediately. The fire pit
should not be operated again until the unit is serviced and/or repaired by a
qualified service technician.
Flame Characteristic
P
u
s
h
t
o
t
u
r
n
OFF
OFF
MIN
ON/MAX
Yellow Tip
Primarily Blue
Flame

- 19 -
CAUTION: AVOID INHALING FUMES EMITTED FROM THE GAS APPLIANCE'S
FIRST USE SMOKE AND ODOR FROM THE BURNING OF OILS USED IN MANU-
FACTURING WILL APPEAR BOTH SMOKE AND ODOR WILL DISSPARE AFTER
APPROXIMATELY 30 MINUTES. THE GAS APPLIANCE SHOULD NOT PRODUCE
THICK BLACK SMOKE.
NOTE:
The burner may be noisy when initially turn on. To eliminate excessive noise
from the burner, turn the control knob to the “MIN” position. Then, turn the
knob to the level of heat desired.
WARNING: Gas appliance will be hot after use.
Handle with extreme care.
If the flame is very small, this is because the
supply pressure is not enough. Please refill
gas cylinder.
Check the Operation Pressure
1) Turn the control knob to the “OFF” position.
2) Wait 5 minutes before attempting to relight
the appliance.
3) Repeat steps beginning with step 3 of the
lighting instruction on page 18.
Re-light:
1) Push in and turn control knob clockwise to
“OFF” position.
2) Turn LP cylinder gas valve clockwise to
“OFF” position when appliance is not in use.
Shut down Instructions
1) Turn the control knob to “OFF” position.
2) Turn the LP cylinder valve to “OFF” position.
3) Wait 5 minutes to allow gas to disappear.
4) If odor continues, immediately call gas sup-
plier.
The Event of Gas Leakage
P
u
s
h
t
o
t
u
r
n
OFF
IGNITION
MIN
ON/MAX
P
u
s
h
t
o
t
u
r
n
OFF
OFF
MIN
ON/MAX
Table of contents
Popular Outdoor Fireplace manuals by other brands

Teamson Home
Teamson Home HR17501AC manual

Landmann
Landmann Ball of Fire Assembly and operating instructions

for Living
for Living Amelia 085-0030-6 Assembly instructions

Firegear
Firegear LOF-4214HMT-N Installation and operating instructions

Lifestyle
Lifestyle CALIDA LFS708 instruction manual

Empire
Empire ONR-24-2 Installation instructions and owner's manual

ELEMENTI
ELEMENTI VICTORIA OFG413NG owner's manual

Safavieh Furniture
Safavieh Furniture PIT1005A Assembly instruction

La Hacienda
La Hacienda Albion 58165 User instructions

Mustang
Mustang 313252 manual

pleasant hearth
pleasant hearth OFW155H manual

Firegear
Firegear FPB-G16RBSMT-N Installation and operating instructions