Cinetron HD-900 User manual


Limited Warranty
Thanks and congratulations on your purchasing Cinetron' s HD-900, the state-of-the-art 1080P LCOS home cinema projector. We believe that with proper
installation and setup, you may enjoy the best video performance from our product.
1.Except for the lamp, Cinetron provides a two-year limited warranty for the product, starting from the date on your purchasing.
In order to get better service when needed, you are encouraged to fill in your product registration at the web site www.cinetron.com.tw
Please note that this warranty covers only the failure due to defects in materials and workmanship during normal use and does not cover the normal
maintenance. The projector case or its appearance items are not included with this warranty. As for the remote control unit, damage occurred by leaking, broken
or improper batteries are also not included with this warranty.
2. Athree-month warranty for the lamp is provided starting from the date this product is purchased .
3. In case that you need service under this warranty, please contact the original place where you’ve purchased this product for a near-by Cinetron authorized service
center. They will help to judge firstly whether the failure is a result by normal use or not and help you to find the proper way to solve the problem. If the unit is
defined as a unit needs to be repaired, they will give you a return authorization number for your tracking the unit when contacting Cinetron.
Notes, Cautions and Warning
Notes: A note indicates further explanation or clarification. Reading this is highly recommended.
Warning! A warning provides additional information which, if ignored, may result in a risk of personal injury.

Safety, regulatory information
FCC Statement (for US users)
This device complies with Part 15 of the FCC Rules. Operation is subject to the following two conditions: (1) This device may not cause harmful interference, and (2)
this device must accept any interference received, including interference that may cause undesired operation.
This equipment has been tested and found to comply with the limits for a Class B digital device, pursuant to Part 15 of the FCC Rules. These limits are designed to
provide reasonable protection against harmful interference in a residential installation. This equipment generates, uses, and can radiate radio frequency energy and,
if not installed and used in accordance with the instructions, may cause harmful interference to radio communications. However, there is no guarantee that
interference will not occur in a particular installation. If this equipment does cause harmful interference to radio or television reception, which can be determined by
turning the equipment off and on, the user is encouraged to try to correct the interference by one or more of the following measures:
- Reorient or relocate the receiving antenna.
- Increase the separation between the equipment and receiver.
- Connect the equipment into an outlet on a circuit different from that to which the receiver is connected.
- Consult the dealer or an experienced radio/ TV technician for help.
You are cautioned that any changes or modifications not expressly approved in this manual could void your authority to operate this equipment.

EEC Statement (for European users)
This machine was tested again the 89/336/EEC (European Economic Community) for EMC (Electro Magnetic Compatibility) and fulfills these requirements.
Disposal of Waste Equipment by Users in Private Union
This symbol on the product or on its packaging indicates that this product must not be disposed of with your other household waste. Instead, it is your responsibility to dispose of
your waste equipment by handing it over to a designated collection point for the recycling of waste electrical and electronic equipment. The separate collection and recycling of your
waste equipment at the time of disposal will help to conserve natural resources and ensure that it is recycled in a manner that protects human health and the environment. For more
information about where you can drop off your waste equipment for recycling, please contact your local city office, your household waste disposal service or the shop where you
purchased the product.

Package Contents
Open the carton and check if the following items are included in the package. If any item is missing, please call your nearest dealer.
-AC power cord
-Lens cap
-CD
Warning! For safety and best performance concerns, please consult with a professional if you decide not to use the power code included with this product.
Remote Control and its batteries
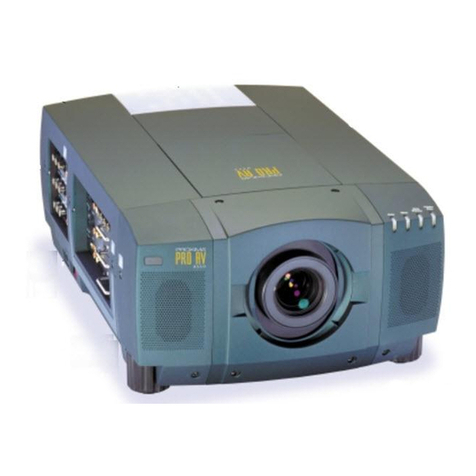
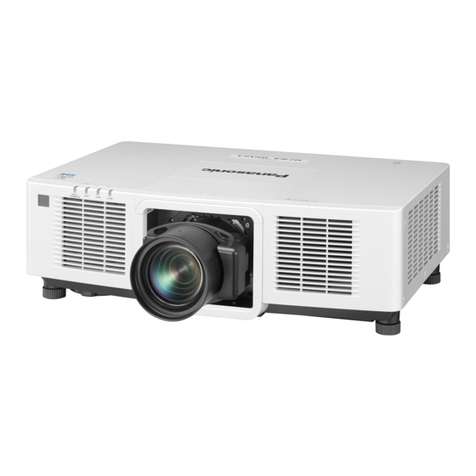
Projector

Precautions
On safety
- Do not expose this apparatus to water, outdoors or otherwise expose to the elements.
- To avoid hazardous electric shock or fire, do not remove any covers or screws other than those specified in this manual.
- Check that the operating voltage of your unit is identical with the voltage of your local power supply.
- Should any liquid or solid object fall into the cabinet, unplug the unit and have it checked by well-trained personnel before operating it further.
- Unplug the unit from the power outlet if it is not to be used for several days.
- To disconnect the cord, pull it out by the plug. Never pull the cord itself.
- The unit is not disconnected from the AC power source (mains) as long as it is connected to the wall outlet, even if the unit itself has been turned off.
- Do not look into the lens while the lamp is on.
- Do not place your hand or objects near the ventilation holes. The air coming out is hot.
On preventing internal heat build-up
After you turn off the power with the (on) switch, do not disconnect the unit from the power outlet while the cooling fan is still running.
Caution
The projector is equipped with two ventilation holes (intake and exhaust). Do not block or place anything near these holes, or internal heat build-up may occur,
causing picture degradation or damage to the projector.
In case of sudden power shut-down while the projector is in use, press the Power Switch to the “Off” position and wait for at least three minutes to turn on the
projector when power is back to normal.

On installation
- Do not install the equipment near heating or air conditioning units.
- Do not install the equipment in a humid or dusty place.
- Place the equipment securely on an even, flat surface. Tilted or uneven surfaces may cause mechanical problems.
On repacking
Save the original shipping carton and packing material; they will come in handy if you ever have to ship your unit. For maximum protection, repack your unit as it was
originally packed at the factory.

1. Overview
1.1 Projector Exterior View
Buttons on
the Control Panel
Lens
Adjustable Feet
Control Panel
Front View
Side View TopView
Bottom View
Ventilation Holes

1.2 Buttons on the Control Panel
Press to turn on/off the projector.
STATUS
TEMP FAN
POWER
Used to indicate the projector status.
1. Power LED lights in red: Indicates the projector is in stand-by mode.
2. Power LED lights in green: Indicates the projector is ready for use.
3. Temp or Fan LED flashes in orange: Indicates warning.
Press to adjust the size of the projected image.
Press to adjust the focus of the projected image.
Press to display the projector’s menu on the screen.
OK: Press to select the menu item.
Up/Down/Right/Left keys: Press to navigate through the menu items.
Press to leave current menu and go to the upper menu of the on-screen display menu.
Press to switch your input source.

Press to change the aspect ratio of the projected image.
Rear View
1.3 Connector Panel
Video INPUT
connector
Y/CD/PB/Cr/Pr
HDMI connector
T
rigger jack
Output a 12V signal.
USB connector
S Video input connector
Video input connector
Power switch
Connector Panel
AC IN socket

1.4 Remote Control
Button Name Description
Light Press to illuminate the buttons on the remote control.
Standby Indicate the standby mode when the projector is powering on or powering off and waits for the
cooling to be completed.
On Press to turn on the projector.
Video Press to switch your input source to video.
VGA Press to switch your input source to VGA.
S-Video Press to switch your input source to S-Video.
Component Press to switch your input source to component connector.
HDMI Press to switch your input source to equipment with HDMI connector.
Dynamic Press to switch to the dynamic color mode.
Standard Press to switch to the standard color mode.
Theater Press to switch to the theater color mode.
Memory 1, 2, 3 Press to settings saved in memory 1, 2, or 3.
Exit Press to leave current menu and go to the upper menu.
Menu Press to show the on-screen display menu for further adjustment.
VUY ZPress arrows to move to the right, left, up, or down in the on-screen display menu.
OK Press to select a menu item or enter the option for the menu item.
Aspect Press to select the aspect ratio of the projected image.
Blank Press to show an entire blue or black screen.
Zoom Used to enlarge or reduce the projected image.
IRIS Press to adjust the IRIS of the projected image.
Focus Press to adjust the focus of the projected image.
Notes : To make effective use of remote control, please use it facing the front or the rear of the projector at
an anglewithin 15 degrees of the projector’s IR remote control sensor.
Remote Control
15°
15°

2. Installing the Projector
2.1. Before Installing the Projector
Avoid installing the projector in the following locations:
- Poorly ventilated
- Hot and humid
- Near a heat or smoke sensor
- Very dusty or extremely smoky
Note: Please install the projector on a flat surface.
Do not tilt the front or the rear of the projector more than 15°.
2.2. Installing the Screen
Before installing the projector, please make sure that your screen has been properly installed. (Ensured that no direct light is on the
screen)
Notice: In order to get the best 1080p projection performance, please consult with your installer for a proper screen that matches with
your home theatre environment.
[
[
[
[
¼
.….
……..
………
.………..
………
……….

2.3 Positioning Your Projector and Screen
1. Place the projector on a stable and flat platform, and position the projector lens on the center of the screen as possible as you can. (If you
prefer to place the projector on the ceiling, make sure that the ceiling installation is done by a professional installer for safety concerns.)
2. When the projector is properly positioned, please connect all the connectors or cables with the projector before the projector is powered on.
(Please refer to the “Projector Operation” page for more detail information.)
3. When the blue picture is projected to the screen, you may adjust the three adjust feet to get the picture aligned with the screen horizontally.
4. Select the Zoom button on the control panel(or on the remote control) to zoom in (or zoom out) the picture until it is completely aligned with
the screen.
5. Select the Focus button to adjust the focus until the focus is clear。
6. If you still can not align the picture with the screen, you may select the “keystone” feature to adjust the four corners of the picture until the
picture is completely aligned with the screen。
7. If you prefer to have your electronic screen being turned on when the projector is powered on, please connect the 12V connector of the
screen to the trigger port of the projector before you turn on the projector。
8. Please position your projector and screen within the areas indicated in gray color in the following illustration. A proper throwing distance
between the projector and screen results in a good quality picture.

a: Minimum throwing distance between the screen and the center of the projector’s lens
b: Maximum throwing distance between the screen and the center of the projector’s lens
Whenusing the 16:9aspect ration screen Unit:mm (inches)
Screen Size 40 60 80 100 120 150 180 200 250 300
A(shortest) 1399.5
(55.1)
2120.1
(83.5)
2840.8
(111.8)
3561.4
(140.2)
4282.0
(168.6)
5363.0
(211.1)
6443.9
(253.7)
7164.5
(282.1)
8966.1
(353)
10767.7
(423.9)
B (longest) 1917.4
(75.5)
2895.9
(114)
3874.3
(152.5)
4852.8
(191.1)
5831.2
(229.6)
7298.9
(287.4)
8766.6
(345.1)
9745.0
(383.7)
12191.2
(480)
14637.3
(576.3)
Note : The screen size is measured by its diagnose dimension, not the width.
9. Position the projector so that the lens is parallel to the screen.
Top view
a
b
Center of the screen
Center of projector’s lens
Ceiling installation
Floor installation
Note:
For installation of the projector on a ceiling,
see “Ceiling Installation” on page 35.

2.4 Connecting Your Projector
Before connecting the projector, please check the following:
- Turn off all equipment before making any connection.
- Insert the cable plugs properly. (When pulling out a cable, be sure to pull it out from the plug, not the cable itself.)
2.4.1 Connecting to a DVD Player/Recorder or Digital Tuner
■Refer to the following illustration to connect the projector to ■Refer to the following illustration to connect the projector to
a DVD player/recorder or digital tuner, likes Set-up box with aDVD player/recorder with HDMI output
video connectors.

2.4.2 Connecting to Video Equipment
■Refer to the following illustration to connect the projector
to a DVD player/recorder which is not equipped with video
connectors, hard disk video recorder, VCR or laser disk player.
2.4.3 Connecting the Projector to a Computer
■Refer to the following illustration to connect the projector to a
computer with a HD D-sub 15-pin VGA cable.
HDD-sub 15-pin VGA cable

3. Projecting
3.1 Projecting the Picture on the Screen
3.1.1 Turning on the power
1. Turn on all equipment connected to the projector.
2. Remove the lens cap.
3. Connect the AC adapter of the projector into a power outlet.
4. Press the power switch to the “on” (I) position. The Power LED flashes in red and then lights steadily in red to indicate standby status.
5. Press the Power button on the projector or on the remote control. The Power LED flashes in green for about 10 seconds and then lights
steadily in green to indicate ready status.
STATUS
TEMP FAN
POWER
Power LED lights in green
STATUS
TEMP FAN
POWER
Power LED lights in red
Standby Status
Ready Status
Power Switch

3.1.2 Selecting Your Input Signal
Press the Source button on the projector to open the on-screen display menu to input your input source. Choice: Composite, S-Video,
Component, RGB, HDMI
Or
Select your input source directly from the remote control. For example, if your input source is Component, press Component on the remote
control.
3.1.3 Adjusting the Picture Size
Adjust your picture size by pressing the Zoom button on the projector or the remote control.
To enlarge your picture size, Press Z.
To make your picture size smaller, press Y.
3.1.4 Adjusting the Focus
Adjust your picture focus by pressing the Focus button on the projector or the remote control.
Press Zor Yto adjust the focus.
Zor Y
Zor Y

3.1.5 Adjusting the Vertical Position
There are three adjuster feet on the bottom of the
projector. These adjuster feet change the image
height and projection angle. To adjust the projector,
you can turn the adjuster feet clockwise or covert
clockwise to obtain the desired vertical position of the
projected image.
Or you may adjust the vertical position by pressing Menu to open the on-screen display menu and
choose Input Signal Menu>Position Adjustment>Vertical Position.
3.1.6 Turning Off the Power
1. Press the Power button on the projector or on the remote control. The Power LED flashes in green for about 3 minutes while the fan is cooling
the system. After the system is cooled, the Power LED lights steadily in red to indicate the standby status.
2. Press the power switch to the “Off” (0) position if you are not using the projector for a short period of time.
3. Unplug the power cable from the power outlet if you are not using the projector for a long period of time.
Adjustable Feet
STATUS
TEMP FAN
POWER
Power LED lights in red
Standby Status
Table of contents
