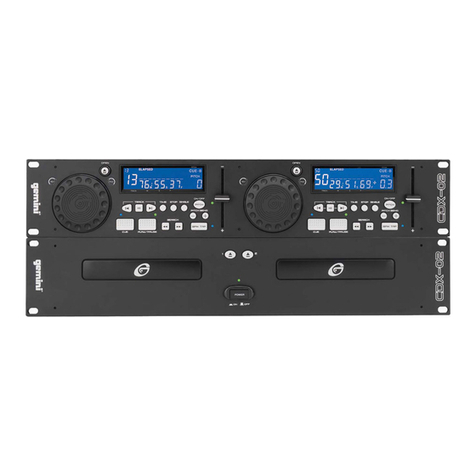
Citronic MPCD-4 Ultima User manual

®

®
Important Safety Information
WARNING:
TO PREVENT FIRE OR SHOCK HAZARD, DO
NOT EXPOSE THIS APPLIANCE TO RAIN OR
MOISTURE.
CAUTION:
1. Handle the power supply cord carefully
Do not damage or deform the power supply cord. If
it is damaged or deformed, it may cause electric
shock or malfunction when used. When removing
from wall outlet, be sure to remove by holding the
plug attachment and not by pulling the cord.
2. In order to prevent electric shock, do not open
the top cover. If a problem occurs, contact your
dealer.
3. Do not place metal objects or spill liquid inside
the CD player. Electric shock or malfunction may
result.
NOTE:
This CD player uses the semiconductor laser. To
allow
you to enjoy music at a stable operation, it is
recommended to use this in a room of 5℃41℉-
35℃95℉.
CAUTION:
USE OF CONTROLS OR ADJUSTMENTS OR
REFORMANCE OF PROCEDURES OTHER THAN
THOSE SPECIFIED HEREIN MAY RESULT IN
HAZARDOUS RADIATION EXPOSURE.
THE COMPACT DISC PLAYER SHOULD NOT BE
ADJUSTED OR REPAIRED BY ANYONE EXCEPT
PROPERLY QUALIFIED SERVICE PERSONNEL.
DOUBLE INSULATED - WHEN SERVICING, USE
ONLY
IDENTICAL REPLACEMENT PARTS.

®
Important Safety Instructions
1. Read Instructions – All the safety and operating
instructions should be read before this product is
operated.
2. Retain Instructions -The safety and operating
instructions should be retained for future reference.
3. Heed Warnings -All warnings on the appliance
and in the operating instructions should be adhered
to.
4. Follow Instructions -All operating and use
instructions should be followed.
5. Water and Moisture -The appliance should
not be used near water - for example, near a
bathtub, washbowl, kitchen sink, laundry tub, in a
wet basement, or near a swimming pool, and the
like.
6. Carts and Stands -The appliance should be
used only with a cart or stand that is recommended
by the manufacturer. An appliance and cart
combination should be moved with care.
Quick stops, excessive force, and uneven
surfaces may cause the appliance and cart
combination to overturn.
7. Heat -The appliance should be situated away
from heat sources such as radiators, heat registers,
stoves, or other appliances (including amplifiers)
that produce heat.
8. Power Sources – This product should be
operated only from the type of power source
indicated on the making label. If you are not sure of
the type of power supply to your home, consult your
product dealer or local power company. For
products intended to operate from battery power, or
other sources, refer the operating instructions.
9. Power-Cord Protection-Power-supply cords
should be routed so that they are not likely to be
walked on or pinched by items placed upon or
against them, paying particular attention to the cord
in correspondence of plugs, convenience
receptacles, and the point where they exit from the
appliance.
10. Cleaning - The appliance should be cleaned
only as recommended by the manufacturer. Clean
by wiping with a cloth slightly damp with water.
Avoid getting water inside the appliance.
11. Non-use Periods-The power cord of the
appliance should be unplugged from the outlet
when left unused for a long period of time.
12. Object and Liquid Entry -Care should be
taken so that objects do not fall and liquids are not
spilled into the enclosure through openings.
13. Damage Requiring Service-The appliance
should be serviced by qualified service personnel
when:
A. The power-supply cord or the plug has
been damaged; or
B. Objects have fallen, or liquid has been
spilled into the appliance; or
C. The appliance has been exposed to rain; or
D. The appliance does not appear to operate
normally or exhibits a marked change in
performance; or
E. The appliance has been dropped, or the
enclosure damaged.
14. Servicing -The user should not attempt any
service to the appliance beyond that described in
the operating instructions. All other servicing should
be referred to qualified service personnel.
15. Ventilation – Slots and openings in the cabinet
are provided for ventilation and to ensure reliable
operation of the product and to protect it from
overheating, and these openings must not be
blocked or covered. The openings should never be
blocked by placing the product on a bed, sofa, rug,
or other similar surface. This product should not be
placed in a built-in installation such as a bookcase
or rack unless proper ventilation is the
manufacturer’s instructions have been adhered to.
16. Attachments – do not use attachments not
recommended by the product manufacturer as they
may cause hazards.
17. Accessories – Do not place this product on an
unstable cart, stand, tripod, bracket, or table. The
product may fall, causing serious injury to a child or
adult, and serious damage to the product. Use only
with a cart, stand, tripod, bracket, or table
recommended by the manufacturer, or sold with the
product. Any mounting of the product should follow
the manufacturer’s instructions, and should use a
mounting accessory recommended by the
manufacturer.
18. Lightning – For added protection for this
product during a lightning storm, or when it is left
unattended and unused for long periods of time,
unplug it from the wall outlet. This will prevent
damage to the product due to lightning and power-
line surges.
19. Replacement Parts – When replacement parts
are required, be sure the service technician has
used replacement parts specified by the
manufacturer or have the same characteristics as
the original part.
Unauthorized substitutions may result in fire,
electric shock, or other hazards.
20. Safety Check – Upon completion of any service
or repairs to this product, ask the service technician
to perform safety checks to determine that the
product is in proper operating condition.

®
Setting up the MPCD-4 Ultima
1.Checking the Contents
Check that the carton contains the following items:
1. Main unit
2. Control unit
3. Operating instructions
4. Pair of 8-pin Din connector cables
4. Pair of RCA phono leads
5. A pair of 3.5mm mini jack leads
6. An AC power cord
2. Installing the Unit
1. Place your unit on a flat surface or mount it in a
secure rack mount case.
2. Be sure the player is mounted in a well ventilated
area where it will not be exposed to direct sunlight,
high temperatures, or high humidity.
3. Try to place the unit as far as possible from TVs and
tuners, as the unit may cause undesirable
interference.
CAUTION:
The player will work normally when the main unit is
mounted with the front panel at within 15 degrees of
the vertical plane. If the unit is tilted excessively,
discs may not be loaded or unloaded properly.
Compact Discs
1. Precautions on handling compact discs
•Do not allow fingerprints, oil or dust to get
on the surface of the disc.
•If the disc is dirty, wipe it off with a soft dry
cloth.
•Do not use benzene, thinner, water, record
spray, Electrostatic-proof chemicals, or
silicone-treated cloths To clean discs.
•Always handle discs carefully to prevent
damaging the Surface; in particular when
removing a disc from its Case or returning
it.
•Do not bend the disc.
•Do not apply heat.
•Do not enlarge the hole in the center of the
disc.
•Do not write on the label (printed side) with
a hard tipped Implement such as a pencil or
ballpoint pen.
•Condensation will form if a disc is brought
into a warm area from a colder one, such
as outdoors in winter. Do not attempt to dry
the disc with a hair dryer, etc.
2. Precaution on storage
•After playing a disc, always unload it from
the player.
•Always store the disc in the jewel case to
protect from dirt or damage.
•Do not place discs in the following areas:
Areas exposed to directs sunlight for a
considerable time. Areas subject to
accumulation of dust or high humidity.
Areas are affected by heat from indoor
heaters, etc..

®
Features and functions of Player
Front:
1. Eject Buttons
Pressing this button will eject the disc on its respective side. The disc will not eject unless the player is in cue
or pause mode, this prevents the user accidentally ejecting the disc while in play mode.
2. Power Button
This button is used to switch the main power to the unit; a bright blue LED indicates power on.
3. Disc Present LED
When no disc is present the LED will be lit giving a visual guide for inserting the disc into the slot. As the disc
is loading the LED will flash, once loaded the LED will turn off to indicate a disc is present.
4. Slot Loading Drive
The MPCD-4 is equipped with a high quality slot loading drive. Do not force the disc in to the slot; the
mechanism will take the disc automatically without force.
Rear:
1. Remote Control Connector 2
Connect the 8-pin mini din connecting lead supplied from this connection to the remote connector 2 (1) on the
remote control unit this allows the control of deck 2.
2. Remote Control Connector 1
Connect the 8-pin mini din connecting lead supplied from this connection to the remote connector 1 (2) on the
remote control unit this allows the control of deck 1.
3. Deck 2 Audio Output
These stereo RCA jacks provide the output signal for deck 2. Connect the left and right jacks to there
respective jacks on the mixer or receiver.
4. Deck 1 Audio Output
These stereo RCA jacks provide the output signal for deck 1. Connect the left and right jacks to there
respective jacks on the mixer or receiver.
5. Digital Output Deck 1
This output will give a Stereo digital music signal of deck 1. This can be used for connection to compatible
digital devices such as a digital amplifier, mixer, and recording device.
6. Digital Output Deck 2
This output will give a Stereo digital music signal of deck 2. This can be used for connection to compatible
digital devices such as a digital amplifier, mixer, and recording device.
7. AC Connection
This socket accepts a standard figure of eight connection power lead.
8. Voltage Selector Switch
This allows you to select the correct voltage for your country. (230V for UK)

®
Features and functions of Controller
Front:
1. Eject Button
Pressing this button will eject the disc on its respective side. The disc will not eject unless the player is in cue
or pause mode, this prevents the user accidentally ejecting the disc while in play mode.
2. Jog Wheel
The jog wheel is multi functional. When in pause mode turning the jog wheel will search the CD frame by
frame in 1-second increments. When in play mode the jog wheel can be used to pitch bend, or when “Scratch
Mode” is activated the jog wheel can be used to scratch.
3. Search/Scan Control
This knob is used to skip through the track selected; it has a 4-speed search in forward or reverse allowing
the user to quickly find a desired point in the track. The more the knob is turned the faster it will search.
4. Track Select Control
This knob is used to skip through the tracks on the CD; each rotation will search 20 tracks. With an MP3 disc
inserted and the folder access (5) is activated pushing and holding this knob in will allow searching of folders,
pushing once will show the name of the selected folder on the screen, pushing once more will return is to the
track name.
5. Folder access
This button activates folder access on an MP3 disc. When active the button will be illuminated in red.
6. CUE Button
Pressing the CUE button will return the CD back to its most recently set CUE point. If you create a seamless
loop during play mode pressing the CUE button will return the CD to the point where the user pressed the IN
button. To set an normal CUE point in pause mode use the jog wheel or search control to find the point where
the CUE point is to be set, press PLAY (6) to set the CUE point, now press the CUE button to return to the
CUE point.
7. Play/Pause Button
Pressing this button will change the deck from Play mode to Pause mode. It is also used to set a CUE point,
see details in (6).
8. Pitch Bend – Button
Pressing these buttons will increase (+) or decrease (-) the pitch of the CD playing when the button is
released the pitch returns to normal as determined by the pitch slider. The percentage of pitch adjustment is
determined by the pitch range select button (11).
9. Pitch Activation Button
Pressing this button will activate the pitch slider adjustment. When deactivated the pitch will return to 0%
pitch. The button will illuminate red to indicate activation.
10. Pitch Lock Button
This button is used to turn the pitch lock ON or OFF. The button will be lit red when pitch lock is on. Pitch lock
mode allows the tempo of the track to be change while maintaining its original key.
11. Pitch Range Select Button
Pressing this button selects the pitch range for the pitch slider (16) the selection flashes briefly in the screen
display when selected. The pitch range selection is also indicated by the pitch select LEDs see (12)

®
12. Pitch selection LEDs
These LEDs give a visual indication of the pitch range that is currently selected as follows:
•±4% - The % (11) button will be illuminated red
•±8% - The % (11) button will not be lit and the 8% LED will be illuminated in red
•±16% - The % (11) button will not be lit and the 16% LED will be illuminated in blue
•±100% - (CD-A ONLY) The %, 8% and 16% will be illuminated
13. Time Select Button
The time select function will switch the time value on the LCD display from Elapsed play time, track remaining
time and total remaining time. Note: Total remaining time is not available on MP3 discs.
The Time button is dual function, it will also activate relay play mode, see section on activation further in the
is manual.
14. SGL/CTN Button
This function allows the user to select single play (when the track reaches the end the CD will stop) or
continuous play (when the track ends the next track on the CD will play in order)
15. FL Tube Display
This highly visible display, gives information on selected feature and track/CD information See “Display
Section” for more detail.
16. Pitch Slider
This slider is used to set the pitch of the playing CD. To activate the slider press (9) the slider can then be
used to adjust the pitch/BPM of the track. The amount of pitch adjustment is determined by the pitch range
select button (11)
17. Seamless Loop IN Button
IN – This button has two functions. It can be used to set a CUE point on the fly, press once at the desired
position to set an instant CUE point, this also sets the beginning of the loop feature.
18. Seamless Loop OUT Button
OUT – This button when pressed selects the end point for the seamless loop. Press once to set the end point
the loop will then begin from the IN point and continuously loop until the OUT button is pressed once again to
exit the loop feature
19. Reloop Button
RE-LOOP – This button is used to re-enter the seamless loop and can be pressed at anytime as long as the
loop created is on the same disc. This button can also be used to create a stutter when pressed repeatedly.
20. Memory Button
This button allows the user to program up to 3 cue points or 3 loops to the 3 ‘Memory Bank Buttons’ (21) the
loops or cue points can be recalled at any time even when the disc has been removed and reloaded at a later
time. Pressing and holding this button for 4 seconds will save the cue/loop points into the IMS memory, so
when the disc is next inserted the cue/loop points will be recalled.
21. Memory Bank
These 3 buttons are used to store 3 cue points if the cue point is the beginning of an active loop the memory
bank will save the loop information. These buttons can also be used to stutter the music, pressing repeatedly
will return the track to its cue point but remain in play mode.
22. BPM Button
This button will switch between Auto and Manual BPM.
23. TAP button
Use this button to manually TAP the BPM of a track. This is particularly useful when a track has a weak or no
continuous beat.
24. Scratch Button
This button will activate the scratch mode; this is available for both CD and MP3. The button will illuminate
Blue when active. Using the jog wheel (2) move in the desired direction to produce the scratch, when the jog
wheel is not moving normal play will resume.

®
Rear:
1. Remote Control Connector 2
Connect the 8-pin mini din connecting lead
supplied from this connection to the main player
unit remote control connector. This allows the
control of deck 2 via the controller.
2. Remote Control Connector 1
Connect the 8-pin mini din connecting lead
supplied from this connection to the main player
unit remote control connector. This allows the
control of deck 1 via the controller.
3. Control Start Deck 2
Connect the 3.5mm mini jack lead from here to a
compatible mixer with fader start. This will allow
the fader or Crossfader of the mixer to control
deck 2 of the MPCD-4 to activate play mode or
return to the set cue point.
4. Control Start Deck 1
Connect the 3.5mm mini jack lead from here to a
compatible mixer with fader start. This will allow
the fader or Crossfader of the mixer to control
deck 1 of the MPCD-4 to activate play mode or
return to the set cue point.
Display:
1. Data Display
This tells you whether the format is CD or MP3
data
2. Auto Cue
This indicates whether the player is in Auto Cue
mode, pressing the SGL/CTN button for a few
seconds will enable or disable the Auto Cue
function.
3. Single
If this text is lit the player is in single mode, when
the text is not shown the player is in continuous
mode.
4. Play Symbol
This symbol is illuminated when in play mode.
5. Pause Symbol
This symbol flashes when the player is in Pause
mode.
6. Cue Active
This text will be illuminated when in pause mode
and a Cue point is available. The text will flash
briefly when a new Cue point is made.
7. Track
When the folder access is disabled, this text will
be illuminated and (8) will show the track number
of the disc.
8. Track number
This gives the track number of the disc up to 999.
When folder access is enables it shows the track
number of the selected folder.
9. Folder Access
When folder access is enabled this text will
illuminate giving an indication of the folder
number selected up to a total of 99.
10. Total/Remain Time
This gives an indication of the track time selected
time remain, (remain will be lit) Total Time remain
(CD-A only, Total Remain will be lit) when neither
is lit this indicates Time Elapsed.
11. Time display
This indicates the minutes and seconds of the
disc, or track.
12. Frames
This displays the Frames per second for
accurate searching and cueing.
13. Pitch level.
This indicates the level of pitch that is set via the
pitch slider.
14. Pitch Lock
This symbol; indicates that pitch lock is active.
15. Auto/BPM

®
This indicates whether the BPM is set to
Automatic or manual. Auto appears in red when
active.
16. BPM
This gives the BPM reading.
17. Reloop
This text will illuminate when a loop is available,
when in a loop it will flash until the OUT button is
pressed.
18. Anti-Shock
This gives an indication of what level the Anti-
Shock buffer memory is at, 12 indicating the
memory is full.

®
Operation
Setting A Cue Point
There are a few different ways to set a Cue point, a
Cue point can be made anywhere on the disc. Once
set, pressing the Cue button (6) will return the CD
to this point. A Cue point can also be assigned to
each of the three memory bank buttons (21)
allowing for three independent accessible Cue
points set from anywhere on the disc.
To set a Cue point, select one of the following:
1) Pinpoint Cue: First find the approximate Cue
point by using the play/pause button (7) or
search control (3) when located access
pause mode by pressing the play/pause
button (7). When in pause mode use the jog
wheel (2) to scan frame by frame until you
reach the desired point. Pressing play (7) will
now set the cue point. At any time pressing
the cue button (6) will return the CD to the set
point.
2) On-the-fly Cue: With the deck in play mode
press the ‘IN’ button of the seamless loop
section (17) your cue point is now set.
Pressing the cue button (6) will now return
the CD to that point in pause mode.
Note: Pressing the Re-loop button (19) will also
return to the cue point set but the music will
continue in play mode, this can be used to give a
stutter effect sometimes referred to as ”BOP”.
Creating a Seamless Loop
A ‘Seamless Loop’ is created by setting two points
on a CD; the music will then loop without music
interruption between these two points. To create a
seamless loop follow these instructions:
1) While in Play mode; press the ‘IN’ button
(17) of the seamless loop section at the
desired point you wish the loop to begin.
The ‘CUE’ button (6) will flash twice to
indicate the point has been set.
2) Next you will need to set an ‘OUT’ point for
the loop. At the desired point you wish the
loop to end press the ‘OUT’ button (18) of
the seamless loop section. The loop has
now been created and the music will
continuously loop from the ‘IN’ point to the
‘OUT’ point without music interruption. Both
the ‘IN’ button and ‘OUT’ button will flash
continuously to indicate that the player is
now in loop mode.
3) To exit the loop press the ‘OUT’ button
once more. Both the ‘IN’ and ‘OUT’ buttons
will stop flashing and just glow to indicate
the player is now in normal play mode, but
there is a loop available to enter in to.
Once the loop has been set a loop can be re-
entered at any time during the same disc by
pressing the Reloop button (19) in the seamless
loop section. Pressing the Reloop button rapidly will
create a stuttering effect.
Adding the CUE/Loop Points to the
Memory Bank
To add a Cue/loop point to memory when a
Cue/loop point has been set (see the section
‘Setting a CUE point’ or ‘Creating a Seamless
Loop’) please follow these instructions:
1) Press the Memory Button (20) this will glow
blue on activation.
2) Press the desired Bank button 1, 2 or 3 (21)
this will flash blue to indicate the active Cue
point. If this is done while the player is in
‘Seamless Loop’ mode the memory will
save the loop points.
Now pressing the assigned Bank Button (21) will
return to the cue point set but the music will
continue in play mode or Loop mode, this can be
used to give a stutter effect.
Saving to the Intelligent Memory
System (IMS)
The MPCD-4 Ultima comes with an Intelligent
Memory System (IMS) where it has the capability to
memorise the Cue/Loop permanently and recall
them when the disc has been removed and
reloaded at a later time.
To save to the IMS follow this instruction:
1) Once your Cue/loop points have been
created, press and hold the Memory Button
(21) for 5 seconds, when the settings have
been stored the Memory Button will light
will turn off.
The MPCD-4 IMS memory has now saved your
cue/loop points in its central memory bank.
Restoring from the IMS Memory
Your saved Cue/Loop points can be restored from
either deck, irrespective of which deck they were
originally saved. Before inserting the disc, press
the Memory button (20) this will illuminate blue, next
insert the disc, the IMS will recognise the disc and
reload the cue points into the active memory.

®
Clearing IMS Memory
The IMS memory will hold up to 500 Cue/Loop
points. When full the memory can be cleared, to do
this, with the unit power off, press the Memory
button (20) hold and switch the power on (2) the
screen (15) will indicate the settings are being clear
by showing the word “Erasing”.
Saving User Profile
The MPCD-4 allows the user to save a profile of
which settings are available on start-up. You can
select the pitch range (12) Single or continuous play
(14) Time Elapsed or remain (13) and whether the
pitch slider is on/off (9). Once selection has been
made press and hold the memory button on both
decks(20) the screen (15) will indicate the setting
are being store by showing “Now Saving”.
Note: Clearing the IMS memory will also clear these
settings.
Buffer Memory Updates
As technology improves and new features become
available for MP3, the MPCD-4 can be easily
updated. When an update is made it will become
available for download from the Citronic website.
Simply download the file and burn it to disc, place
the disc into each side the MPCD-4 and the
memory will automatically be updated.
Creating MP3 discs
No matter what software you use to create MP3
discs, for maximum performance we recommend
that a good quality disc is used and the CD is
created (burnt) at a low speed 8x is recommended.
This will ensure that there is no data loss during the
recording process which can cause the player to
take longer to read the disc and possibly error.
Notes:

®
Technical Specifications
Performance
Characteristics (test disc: TCD-782, Load=47Kohm)
Quantization : 16 bit linear per
channel
Sampling Rate : 44.1 KHz at
normal pitch
Over Sampling Rate : 8 x
Output level : 2Vrms ±0.5dB
Load Impedance: : >47K ohm
Channel Balance : 0.1dB
Frequency Response : ±0.4dB (20Hz-
20KHz, 0dB)
De-Emphasis : ±2.4/-0dB
(16KHz, -20dB)
Channel Separation* : 100dB
THD – Noise* : 0.006%
S/N Ratio (HF-A)* : 102dB
Note* with 20KHz low pass filter.
Search Time
Short access time CD-A : 2sec
Condition: Play next track
Long access time CD-A : 4sec
Condition: Track 1 – Track 20 – Track 20 –
Track 1
Short access time MP3 : 2sec
Condition: Play next track
Long access time MP3 : 4sec
Condition: Track 1 – Track 99 – Track 99 –
Track 1
Pick-up
System : Object lens drive
system optical pick-up
Object lens drive system : 2 dimensional
paralleled drive
Tracking detection : 3 spot beam
detection
Optical source : Semiconductor
laser
Wave length : 780nm
General
System : Compact Disc
Digital Audio
Disc Loading : Front Loading
Display : VFD
Pitch Control Range : ±4%, ±8%, ±16%,
±100%
Pitch Bend : Up to ±100%
Pitch Accuracy : 0.1%
Environmental Conditions
Operating Temperature : 5 to 35 deg. C
Humidity : 25 to 85% RH
(non-condensing)
Storage Temperature : -20 to 60 deg. C
Weight & Dimensions
Dimensions : Player: 482(W) x 90.3(H) x
311(D)mm Controller: 482(W) x
132(H) x 77.6(D)mm
Weight : Player: 6kg
Controller: 2kg
Power Requirements
Power Supply: AC 115/230V,
50/60Hz
Consumption: 23W
Note: Specifications and design are subject to change without
notice for purpose of improvement.

®
Belangrijke veiligheidsinformatie
WAARSCHUWING:
OM VUUR OF SCHOK GEVAAR TE
VOORKOMEN, STEL DAN DIT TOESTEL NIET
BLOOT AAN REGEN OF VOCHTIGHEID.
VOORZICHTIGHEID:
1. Wees voorzichtig met de stroomkabel. Beschadig
of vervorm de stroomkabel niet. Als het beschadigd
of misvormd is, kan het een elektrisch schok of
defect veroorzaken wanneer het gebruikt word. Bij
het verwijderen uit de wandcontactdoos, pak het
dan bij de stekker, maar niet door aan de kabel te
trekken.
2. Open niet de behuizing, om een elektrische
schok te voorkomen. Indien een probleem zich
voordoet, neem dan contact op met uw dealer.
3. Voorkom dat er metalen voorwerpen in de CD
speler gedrukt worden of het morsen van
vloeistoffen in de CD speler. Er kan dan een
elektrische schok of een defect ontstaan.
NOTITIE:
Deze CD speler gebruikt een semiconductor laser.
Om de unit stabiel en bedrijfszeker te bedienen,
wordt het geadviseerd om dit in een ruimte van 5℃
- 35℃te doen.
Deze speler kan storing veroorzaken op radio en
TV-signalen, zorg en dan ook voor dat deze niet in
de buurt van deze bekabelingen komt te staan.
VOORZICHTIGHEID:
HET GEBRUIK VAN CONTROLES OF
AANPASSINGEN OF REFORMANCE VAN
PROCEDURES BUITEN DIE HIER
GESPECIFICEERD ZIJN, KAN RESULTEREN IN
EEN GEVAARLIJKE BLOOTSTELLING AAN
STRALING. HET IS NIET AAN TE RADEN OM
ZOMAAR IEMAND AANPASSINGEN OF
REPARATIES AAN THE COMPACT DISC
PLAYER TE LATEN DOEN, LAAT HET DOEN
DOOR GEKWALIFICEERDE PERSONEEL.
DUBBEL GEÏSOLEERD – GEBRUIK TIJDENS
ONDERHOUD ALLEEN IDENTIEKE
ONDERDELEN VOOR VERVANGING.
Waarschuwing: Om het gevaar van elektrische
schokken te voorkomen nooit de behuizing openen.
In het toestel bevinden zich geen service gevoelige
componenten. Laat het herstellen over aan
gekwalificeerde personen.
De bliksem schikt welke geplaatst is in een
driehoek is ervoor om gebruikers te waarschuwing
voor onder hoog spanning staande componenten
binnenin het toestel. Als het toestel dus geopend
wordt is er een gevaar op elektrische schokken.
Het uitroepteken welke geplatst is in een driehoek
geeft aan dat er een belangrijke handleiding en/of
service instructie bij het toestel geleverd zijn welke
door de gebruiker gelezen dient te worden.

®
Belangrijke veiligheidsvoorschriften
1. Lees instructies - Lees alle veiligheid- en
bedieningsinstructies alvorens dit product in werking
te stellen.
2. Behoud Instructies - De veiligheids- en de
bedieningsinstructies moeten voor toekomstige
verwijzing worden behouden.
3. Aandacht waarschuwingen - Alle
waarschuwingen op het toestel en in de
werkinstructies moeten zichtbaar bij het toestel
aanwezig zijn.
4. Volg instructies - Alle gebruiks- en
bedieningsinstructies moeten gevolgd worden.
5. Water en vochtigheid - Het toestel niet dichtbij
water en in vochtige ruimtes gebruiken -
bijvoorbeeld, dichtbij een badkuip,
keukengootsteen, een wasmachine, in een natte
kelderverdieping, een zwembad en of in de buurt
gebruikt worden..
6. Vervoer en plaatsing - Het toestel vervoeren in
een door de fabrikant geadviseerde transport
middel. Het toestel moet met zorg worden
verplaatst. Snelle stops, bovenmatige
krachten ongelijke oppervlakten kunnen het
toestel en ten val brengen.
7. Hitte - Het toestel mag niet dicht bij
hittebronnen zoals radiators, hitteregisters,
fornuizen, of andere toestellen (met inbegrip van
versterkers) worden geplaatst.
8. Aansluitspanning - Dit product alleen gebruiken
op een aansluitspanning welke vermeld wordt op
het etiket. Als u niet zeker bent van het type
aansluiting in uw huis, raadpleeg dan uw
productdealer of lokaal energiebedrijf.
9. Stroomkabel bescherming - De stroomkabels
moeten zo gelegd worden dat er niet over gelopen
word of bekneld raakt door andere voorwerpen die
erop of er tegen geplaatst worden. Extra aandacht
voor de kabels waar hij aangesloten wordt in de
wandcontactdoos en het punt waar zij van het
toestel weggaan.
10. Schoonmaken – Het toestel moet alleen
worden schoongemaakt indien de fabrikant het
aanraad. Maak het schoon doormiddel van een
doek licht vochtig te maken met water. Voorkom dat
het water in het toestel komt.
11. Ongebruikte periodes – Haal de stroomkabel
van het apparaat eruit als u het apparaat voor
langere tijd niet gebruikt.
12. Voorwerp en vloeibare stoffen - Zorg ervoor
dat de voorwerpen welke geplaatst worden op de
unit niet vallen en dat vloeistoffen niet gemorst
worden in de units door de openingen.
13. Schade die service vereist - Door
gekwalificeerd dienstpersoneel onderhouden en/of
herstellen wanneer:
A. indien de stroomkabel of plug beschadigd is; of
B. Objecten zijn gevallen, of vloeistof in het
apparaat is gemorst; of
C. Het apparaat blootgesteld is aan regen; of
D. Het toestel schijnt niet normaal te werken of
stelt een duidelijke verandering in prestaties
tentoon; of
E. Het apparaat is gevallen of beschadigd is.
14. Onderhouden - De gebruiker moet geen
poging doen zelf service op het apparaat uit te
voeren tenzij dat in de bedieningsinstructies staat.
Al het andere onderhoud alleen door
gekwalificeerde personen laten uitvoeren.
15. Ventilatie - De groeven en de openingen in het
kabinet zijn voor ventilatie en voor het zekerstellen
van betrouwbare verrichting van het product en het
te beschermen tegen het oververhitten, deze
openingen mogen niet worden geblokkeerd of
bedekt. De openingen zouden nooit moeten
worden geblokkeerd door het product op een bed,
bank, deken, of andere gelijkaardige oppervlakten
te plaatsen. Dit product zou niet in een ingebouwde
installatie zoals een boekenkast of een rek
geplaatst moeten worden tenzij de juiste ventilatie
aanwezig is volgens de instructies van de fabrikant.
16. Toevoegingen – Gebruik geen toevoegingen
die niet goedgekeurd zijn door de fabrikant, omdat
dat gevaren kan opleveren.
17. Accecoires - Plaats dit product niet op een
onstabiele kar, een tribune, een driepoot, een
steun, of een lijst. Het product kan vallen,
veroorzakend ernstige verwonding aan een kind of
een volwassene, en ernstige schade aan het
product. Gebruik slechts met een kar, een tribune,
een driepoot, een steun, of lijst die door de
fabrikant wordt geadviseerd, of die met het product
wordt verkocht. Alle steun van het product moet
voldoen aan de instructies van de fabrikant en moet
gebruikt worden als een steun accesoires
aangeraden door de fabrikant.
18. Bliksem - Voor toegevoegde bescherming voor
dit product tijdens een bliksemonweer, of wanneer
het onbeheerd en voor lange tijd ongebruikt wordt
verlaten, sluit het van de muurafzet af. Dit zal
schade aan het product toe te schrijven aan
bliksem en power-line schommelingen verhinderen.
19. Vervangende onderdelen - Wanneer
vervangingsdelen nodig zijn, zorg dan dat de
servicetechnicus vervangingsdelen gebruikt heeft
die door de fabrikant gespecificeerd zijn of dezelfde
kenmerken bevat zoals het orgionele deel had.
Onbevoegde substituties kunnen resulteren in
brand, elektrische schok, of andere gevaren.
20. Veiligheidscontrole - Op voltooiing van elke
service of reparatie aan het product, vraag dan de
service technicus om veiligheidscontroles uit te
voeren om te bepalen of het product in een juist
werkende conditie verkeert.

®
Opzetten van de MPCD-4 Ultima
1.Controle op de inhoud
Controle dat het karton de volgende punten bevat:
1. Hoofdeenheid
2. Controle eenheid
3. Bedienings instructie
4. Paar van 8pin DIN schakelaarkabels
5. Paar RCA phono leads
6. Paar 3.5mm mini jack leads
7. Een AC Power cord
2. Installatie van de eenheid
1. Plaats uw eenheid op een vlakke oppervlakte of
zet het in een veilig opgesteld rek.
2. Zorg ervoor dat de speler op een goed
geventileerd gebied wordt opgezet waar het niet
aan direct zonlicht, hoge temperaturen, of hoge
vochtigheid zal blootgesteld worden.
3. Probeer de speler zover mogelijk van TV’s en
tuners te plaatsen, de speler kan ongewenste
interferentie veroorzaken.
VOORZICHTIG:
De speler zal normaal werken wanneer de
belangrijkste eenheid met het voorpaneel bij binnen
15 graden van het vertikale vlak wordt opgezet. Als
de eenheid bovenmatig overgeheld is, kunnen de
discs niet behoorlijk worden geladen of worden
leeggemaakt.
Compact Discs
1. Precautions on handling compact discs
•Sta geen vingerafdrukken, olie of stof toe op de
oppervlakte van de disc.
•Als de disc vuil is, veeg het af met een zachte
droge doek.
•Gebruik geen benzeen, verdunner, water,
record spray, elektrostatisch bestendige
chemicaliën, of silicoon behandelde kleding om
de disc schoon te maken.
•Behandel de discs met de nodige
voorzichtigheid om schade aan het oppervlak te
voorkomen. Vooral tijdens het verwijderen of
het terug stoppen in de case.
•Buig de disc niet.
•Pas geen hitte toe.
•Vergroot het gat in het midden van de disc niet.
•Schrijf niet op de label(bedrukte kant) met een
harde getipte implement zoals een potlood of
een balpen.
•Als de disc van een warme naar een koude
plekken zoals naar buiten gaan in de winter
word gebracht kan er condensatie vormen.
Probeer niet de disc te drogen met een föhn.
2. Voorzichtigheid bij opslag
•Haal na het afspelen van een disc het altijd uit
de speler.
•Bewaar de disc altijd in de jewel case om het te
beschermen tegen vuil of schade.
•Plaats geen discs op de volgende plekken:
Plekken waar het lang aan zonlicht
blootgesteld word. Plekken met accumulatie
van stof of hoge vochtigheid. Plekken die
beinvloed word door warmte van
verwarmingen enzovoort.

™
16
Eigenschappen en functies van de Speler
Voorkant:
1. Eject knoppen
Het drukken op deze knop zal de disc aan zijn respectieve kant doen uitwerpen.
2. Power knop
Deze knop word gebruikt om het apparaat van stroom te voorzien; een heldere blauwe LED maakt
zichtbaar of het apparaat aanstaat.
3. Disc Present LED
Indien er geen disc aanwezig is zal de LED schijnen om zo te dienen als een visuele gids voor het
opnemen van de disc in de slot. Als de disc aan het laden is zal de LED knipperen, eenmaal geladen zal de
LED uitgaan om aan te geven dat er een disc aanwezig is.
4. Slot loading Drive
De MPCD-4 is uitgerust met een van hoge kwaliteit slot loading drive. Forceer de disc niet in het slot; het
mechanisme zal de disc automatisch pakken zonder te forceren.
Achterkant:
1. Afstand bedienging connector 2
Verbind de 8-pin mini din connecting lead supplied van deze verbinding naar de afstand connector 2 (1) op
de afstand bediening eenheid dit zorgt voor de bediening van dek 2.
2. Afstand bediening connector 1
Verbind de 8-pin mini din connecting lead supplied van deze verbinding naar de afstand connector 1 (2) op
de afstand bediening eenheid dit zorgt voor de bediening van dek 1.
3. Dek 2 audio output
Deze stereo RCA jacks zorgen voor de output signaal van dek 2. Verbind de linker en rechter jacks naar
hun respectieve jacks op de mixer of ontvanger.
4. Dek 1 audio output
Deze stereo RCA jacks zorgen voor de output signaal van dek 1. Verbind de linker en rechter jacks naar
hun respectieve jacks op de mixer of ontvanger.
5. Digitaal output dek 1
Deze output geeft een stereo digitaal muziek signaal van dek 1. Deze kan gebruikt worden voor het
verbinden naar compitabel digitale apparaten zoals een digitale versterker, mixer en opname apparatuur.
6. Digitaal output dek 2
Deze output geeft een stereo digitaal muziek signaal van dek 2. Deze kan gebruikt worden voor het
verbinden naar compitabel digitale apparaten zoals een digitale versterker, mixer en opname apparatuur.
7. AC verbinding
Deze contactdoos accepteerd een standaard figuur van acht connection power lead.

™
17
8. Voltage Selector Switch
Dit laat je toe om te kiezen voor de correcte voltage voor jouw land. (220V voor Nederland)
Eigenschappen en functies van de Controller
Voorkant:
1. Eject knop
Als u op deze knop drukt zal de disc uitgeworpen worden aan de respectieve kant. De disc zal niet worden
uitgeworpen tenzij de speler in cue of pauze stand staat, dit voorkomt dat de gebruiker per ongeluk de disc
uitwerpt tijdens het afspelen.
2. Draaiknop
De draaiknop is multi functioneel. Als je aan de draaiknop draait terwijl het apparaat op pauze staat zal het
de CD frame voor frame -1 seconde toenemen. Als je draaiknop gebruikt tijdens het afspelen kan het
gebruikt worden voor pitch bend, of wanneer “Scratch Mode” is geactiveerd, dan kunt u er ook mee
scratchen.
3. Zoek/Scan Bediening
Deze knop word gebruikt om door te spoelen binnen de geselecteerde track; het heeft een 4-speed zoek
snelheid voorwaards of achteruit om snel naar het gewilde punt in de track te komen. Hoe verder je de knop
draait des te sneller zal het zoeken.
4. Track keuze bediening
Deze knop word gebruikt om door de tracks op de CD te zoeken; elke omwenteling zoekt 20 tracks af. Met
een MP3 disc en de map toegang geactiveerd kan met deze knop ingedrukt houden gezoekt worden tussen
de mappen, door één keer te drukken zal de naam van de geselecteerde map te zien zijn op de display,
nogmaals drukken en hij gaat terug naar de track naam.
5. Map toegang
Deze knop activeert de toegang tot de map op een MP3 disc. De knop zal rood oplichten als het actief is.
6. CUE knop
Indien u op de CUE knop drukt zal de CD terug naar zijn meest recentelijke CUE punt gaan. Als u een
seamless loop creeërt tijdens het afspelen en dan op de CUE knop drukt zal de CD terug keren naar het
punt waar de gebruiker de IN knop had ingedrukt. Om een normale CUE punt op te zetten tijdens de pauze
status moet u de draaiknop of de zoek bediening gebruiken om het punt te zoeken wat de CUE punt gezet
moet worden. Druk op Play(6) om de CUE punt in te stellen, druk nu op de CUE knop om terug te keren
naar de CUE punt.
7. Play/Pauze Knop
Door op deze knop te drukken veranderd het dek van Play status naar Pauze status. Het word ook gebruikt
voor het instellen van een CUE punt, zie details in (6).
8. Pitch Bend – Knop
Het indrukken van deze knoppen laat de pitch van de CD toenemen (+) of afnemen (-), indien de knop word
losgelaten zal de pitch weer terug naar zijn normale status gaan, zoals is ingesteld door de pitch slider. Het
percentage van de pitch aanpassing ligt aan de bij de pitch bereik ingestelde keuze knop. (11).
9. Pitch activatie knop
Door het drukken op deze knop word de pitch slider aanpassing geactiveerd. Indien gedeactiveerd zal de
pitch terug keren naar 0% pitch. De knop zal rood oplichten om aan te geven of het actief is.
10. Pitch lock knop

™
18
Deze knop word gebruikt om de pitch lock AAN of UIT te zetten. De knop licht rood op als het op lock staat.
Pitch lock mode laat toe het tempo van de track te veranderen tijdens het handhaven van de orgionele
knop.
11. Pitch Bereik Selecteer Knop
Door deze knop in te drukken selecteerd u de pitch range voor de pitch slider (16) de selectie komt kort in
beeld op de display als u geselecteerd heeft. De pitch range selectie word ook aangegeven bij de pitch
select LEDs.
12. Pitch selectie LEDs
Deze LEDs geven een visuele indicatie van de pitch bereik dat op dit moment als volgt geselecteerd is:
±4% - De % (11) knop zal rood oplichten.
±8% - De % (11) knop word niet ontstoken en de 8% LED zal rood oplichten.
±16% - De % (11) knop word niet ontstoken en de 16% LED zal blauw oplichten.
±100% - (CD-A ONLY) De %, 8% en 16% zullen oplichten.
13. Time Select Button
De tijd select functie zal de tijd waarde op de LCD display van Elapsed afspeel tijd, overgebleven track tijd
en de totale overgebleven tijd. Let Op: Het totaal overgebleven tijd is niet beschikbaar bij MP3 discs. De tijd
knop is een dual functie, het zal ook relay play mode activeren, zie sectie over activatie verder in de
handleiding.
14. SGL/CTN Knop
Deze functie stelt de gebruiker in staat om een een enkele play(wanneer de track eindigt stopt de CD)of
een voortgaande play(wanneer de track eindigt gaat een volgende track verder op volgorde van de CD) te
selecteren.
15. FL Buis Display
Deze hoog zichtbare display, geeft informatie over geselecteerde eigenschappen en track/CD informatie.
Zie “Display Sectie” voor meer details.
16. Pitch Slider
Deze slider word gebruikt om de pitch in te stellen voor de afspelende CD. Om de slider te activeren druk
(9), de slider kan dan worden gebruikt om de pitch/BPM van de track aan te passen. De hoeveelheid pitch
aanpassingen is afhankelijk van de pitch range select knop (11).
17. Seamless Loop IN Knop
IN – Deze knop heeft twee functies. Het kan gebruikt worden om een CUE punt te zetten ‘on the fly’, druk
eenmaal op de gewilde positie om een directe CUE punt vast te stellen, dit zet tevens het begin van de loop
eigenschappen.
18. Seamless Loop OUT Knop
OUT – Door het drukken op deze knop selecteerd u het eindpunt van de seamless loop. Druk eenmaal om
het eindpunt te selecteren, de loop zal dan beginnen bij het IN punt en loopt door tot de OUT knop weer
word ingedrukt om uit de loop eigenschappen te gaan.
19. Reloop Knop
RE-LOOP – Deze knop kan gebruikt worden om de seamless loop weer terug te halen en kan altijd gebruikt
worden zolang de desbetreffende loop op dezelfde CD is gemaakt. Deze knop kan ook gebruikt worden om
een stutter te creëren indien u herhaaldelijk drukt.
20. Geheugen Knop
Deze knop laat u 3 cue punten of 3 loops op de ‘Memory Bank Buttons’(21) opslaan. De loops of cue points
kunnen altijd opgeroepen worden, zelfs als de disc is verwijderd en later herladen word op een later tijdstip.
Het inhouden van de knop voor 4 seconden zorgt ervoor dat de cue/loop opgeslagen word op de IMS
memory, dus als de disc word herladen kan de cue/loop altijd worden achterhaald.
21. Memory Bank
Deze 3 knoppen worden gebruikt voor opslag van 3 cue punten, als de cue punt het begin is van een
actieve loop, dan slaat de memory bank the loop informatie. Deze knoppen kunnen ook gebruikt worden om
de muziek te voorzien van een stutter. Herhaaldelijk drukken zorgt ervoor dat de track terug gaat naar de
cue punt, maar blijft in play mode.
22. BPM knop
Deze knop schakelt tussen Auto en Manual BPM.
23. TAP knop
Gebruik deze knop om handmatig TAP toe te passen op de BPM van een track. Dit is vooral handig in
gebruik wanneer een track een zwak of geen doorgaande beat heeft.
24. Scratch Knop

™
19
Deze knop activeerd de scratch mode; dit is beschikbaar voor zowel CD als MP3. De knop zal blauw
oplichten indien actief. Gebruik de draaiknop (2), beweeg in de gewilde riching om een scratch te
produceren, indien de draaiknop niet normaal beweegt gaat het verder in play mode.
Achterkant:
1. Afstand bediening connector 2
Verbind de 8-pin mini din connecting lead geleverd door deze verbinding naar de hoofd speler eenheid
afstand bediening connector. Dit laat de controle op dek 2 toe via de controller.
2. Afstand bediening connector 1
Verbind de 8-pin mini din connecting lead geleverd door deze verbinding naar de hoofd speler eenheid
afstand bediening connector. Dit laat de controle op dek 1 toe via de controller.
3. Control Start Dek 2
Verbind de 3.5mm mini jack lead van hier naar een compatibel mixer met fader start. Dit zorgt ervoor dat de
fader of Crossfader van de mixer dek 2 kan besturen van MPCD-4, om play mode te activeren of om terug
te gaan naar de gezette cue punt.
4. Control Start Dek 1
Verbind de 3.5mm mini jack lead van hier naar een compatibel mixer met fader start. Dit zorgt ervoor dat de
fader of Crossfader van de mixer dek 1 kan besturen van MPCD-4, om play mode te activeren of om terug
te gaan naar de gezette cue punt.
Display:
1. Data Display
Dit vertelt u of het gaat om CD of MP3 data.
2. Auto Cue

™
20
Dit geeft aan of de speler in Auto Cue mode staat, zodra u de SGL/CTN knop indrukt voor een aantal
seconden zal de Auto Cue functie ophouden.
3. Single
Wanneer de tekst zichtbaar is staat de player in single mode, wanneer het niet zichtbaar is staat het in
continuous mode.
4. Play Symbol
Dit symbool is opgelicht zodra hij in play mode staat.
5. Pause Symbol
Dit symbool knippert zodra de speler op pauze staat.
6. Cue Active
Deze tekst licht op wanneer in pause mode een Cue punt beschikbaar is. De tekst zal kort knipperen
wanneer een nieuwe Cue punt is gemaakt.
7. Track
Wanneer toegang tot de map niet mogelijk is, zal deze tekst oplichten (8) en laat dan het track nummer zien
van de disc.
8. Track nummer
Dit geeft het track nummer weer van de disc, maximaal 999. Indien een map de toegang onmogelijk maakt,
zie je de naam van de track nummer van de geselecteerde map.
9. Map toegang
Indien een toegang tot een map onmogelijk is, zal deze tekst oplichten om een indicatie te geven
hoeveelste folder geselecteerd is. Maximaal 99 in totaal.
10. Totale/overgebleven tijd
Dit geeft een indicatie hoelang de track al draait of hoelang de track nog duurt, (overgebleven word
opgelicht) totaal overgebleven tijd (CD-A alleend, totaal overbleven zal oplichten). Wanneer geen van
beiden word belicht geeft het de verstreken tijd aan.
11. Tijd display
Dit geeft de minuten en seconden van de disc of track aan.
12. Frames
Dit geeft het aantal Frames per seconde aan voor accuraat zoeken en cueing.
13. Pitch niveau
Dit geeft het niveau aan van de pitch die gezet word door de pitch slider.
14. Pitch Lock
Dit symbool geeft aan of de pitch lock actief is.
15. Auto/BPM
Dit geeft aan of de BPM automatisch of handmatig ingesteld staat. Auto licht op indien actief.
16. BPM
Dit geeft de BPM lezing.
17. Reloop
Deze tekst licht op wanneer er een loop beschikbaar is, in een loop blijft het knipperen tot de OUT knop
word ingedrukt.
18. Anti-Shock
Dit geeft een indicatie op wat voor niveau de Anti-Shock buffer memory staat, 12 betekent dat geheugen vol
is.
Table of contents
Languages:
Other Citronic CD Player manuals
