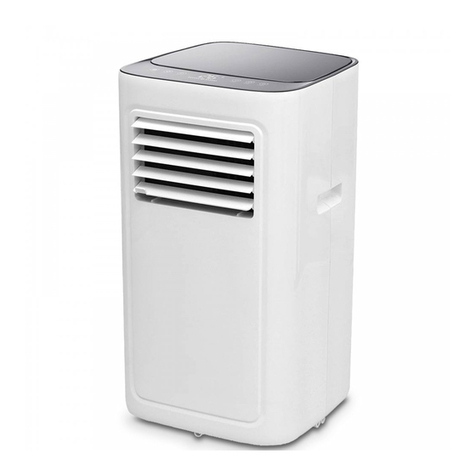
Clari FL-926-2 User manual

QUẠT ĐIỀU HÒA
HƯỚNG DẪN SỬ DỤNG
MODEL: FL-926-2
Chân thành cám ơn Quý khách đã lựa chọn sản phẩm
Quạt điều hòa CLARI FL-926-2.
Vui lòng đọc Sách Hướng Dẫn Sử Dụng này một cách cẩn thận.
Luôn lưu giữ và để Sách Hướng Dẫn Sử Dụng này ở nơi dễ lấy.

1. THÔNG SỐ KỸTHUẬT
2. CHỨC NĂNG
• Nguyên lý làm mát: nước được bơm từ bình chứa nước lên đỉnh, sau đó nước rơi vào tấm
làm mát. Khi nước ở trong tấm làm mát bay hơi thành hơi nước, không khí được làm mát,
Quý khách sẽ cảm nhận được luồng không khí mát tỏa ra từ quạt.
• Bảng điều khiển điện tử: an toàn, độ bền, ngoại quan bắt mắt.
• Điều chỉnh tốc độ: có ba tốc độ Low/Medium/High.
• Làm mát: thông qua không khí bay hơi, giảm nhiệt độ không khí và tăng độ ẩm tương
đối.
• Cung cấp gió ở góc rộng: đảo cánh tự động, cung cấp gió ở góc rộng theo phương
ngang. Xoay cánh quạt thủ công, chọn hướng tùy ý.
• Điều khiển từ xa: khoảng cách 6m, nhận tín hiệu ở góc 60 độ.
3. LẮP RÁP BÁNH XE VÀ ĐỔ NƯỚC VÀO BÌNH CHỨA NƯỚC
1. Lắp ráp bánh xe: đặt thiết bị trên mặt phẳng, lấy chìa vặn ra khỏi hộp xốp, sau đó lắp
ráp bánh xe.
2. Đổ nước vào bình chứa nước: kéo 1/3 bình chứa nước ra, sau đó đổ nước sạch vào.
Chú ý:
a. Chú ý đến mức nước của bình chứa khi thêm nước
b. Mức nước của bình chứa không được vượt quá thang “MAX” ở bất kỳ thời điểm nào.
Trong suốt thời gian tạo ẩm, mức nước của bình chứa không được dưới thang “MIN”.
c. Đặt hộp đá đông lạnh vào bình chứa nước nếu Quý khách muốn tăng hiệu quả làm
mát, tuy nhiên mức nước sau khi thêm hộp đá không được vượt quá thang“MAX”.
4. HOẠT ĐỘNG
1. On/O: bật thiết bị và tắt thiết bị.
2. Speed: tốc độ thay đổi theo chức năng tương ứng khi nhấn lần lượt: LOW-> MEDIUM
-> HIGH -> LOW.
3. Mode: quý khách có thể chọn chế độ gió thường, gió tự nhiên và gió ngủ.
4. Timer: chế độ hẹn giờ từ 1 giờ đến 15 giờ.
5. Cool: nhấn phím này để khởi động chế độ làm mát. Nhấn lại lần nữa để hủy chức năng
này. LƯU Ý: Quý khách hãy chắc chắn rằng có đủ nước trong bình chứa nước trước khi
nhấn phím này.
6. Swing: khi đèn báo bật sáng, hướng gió sẽ thay đổi. Chức năng này sẽ tắt khi Quý
khách ấn lại lần nữa.
7. Anion: nhấn phím này để khởi động chức năng lọc không khí.
8. Display: nhấn phím này để điều chỉnh màn hình hiển thị LCD.
Model Điện áp/Tần sốCông suất Dung tích bình chứa nước
FL-926-2 220V-240V/50Hz-60Hz 200W 14L
1

5. HƯỚNG DẪN SỬ DỤNG ĐIỀU KHIỂNTỪ XA
Sau khi lắp pin, điều khiển từ xa có thể sử dụng. Nó có chức năng tương tự như bảng điều
khiển, khoảng cách sử dụng hiệu quả là 6m. Khi không sử dụng điều khiển từ xa, Quý
khách vui lòng cất giữ cẩn thận để sử dụng vào lần sau.
Lưu ý:
a. Không sử dụng đồng thời cả pin cũ và pin mới.
b. Nếu không sử dụng trong thời gian dài, vui lòng tháo pin ra ngoài.
c. Sử dụng phím trên điều khiển từ xa bằng tay
6. HƯỚNG DẪN SỬ DỤNG HỘP ĐÁ
Tinh thể đá có một tính năng đặc biệt là giữ mát, nó có thể hấp thụ nhiệt từ nước và giữ
nhiệt độ nước trong bình chứa nước thấp hơn nhiệt độ môi trường, vì vậy không khí sẽ
mát hơn rất nhiều.
1. Thêm nước vào hộp đá (không đổ đầy) và đặt vào ngăn đông của tủ lạnh để
đảm bảo rằng nó được đóng băng tuyệt đối.
2. Mở nắp trên, đặt hộp đá.
3. Có 2 hộp đá, Quý khách có thể sử dụng thay thế.
7. VỆ SINH VÀ BẢO QUẢN
CẢNH BÁO: Ngắt kết nối nguồn điện và rút phích cắm của thiết bị trước khi tháo bộ lọc
1. Làm sạch tấm lọc
Ngắt nguồn điện, kéo tay cầm của tấm lọc ra khỏi thiết bị. Làm sạch tấm lọc bằng chất tẩy
rửa trung tính và bàn chải, sau đó làm sạch bằng nước sạch. Cuối cùng, đặt lại vào thiết
bị.
2. Làm sạch tấm làm mát
Ngắt nguồn điện, tháo tấm làm mát, sau đó rút tấm làm mát ra khỏi giá đỡ. Làm sạch tấm
làm mát bằng chất tẩy rửa trung tính và bàn chải, sau đó làm sạch bằng nước sạch. Cuối
cùng, đặt lại vào thiết bị.
Chú ý: tấm làm mát phải được lắp đặt theo chiều ngang để tránh bị rò rỉ.
3. Làm sạch bình chứa nước
Ngắt nguồn điện, lấy bình chứa nước ra, làm sạch bình chứa nước bằng chất tẩy rửa trung
tính và nước sạch, sau đó đặt lại vào thiết bị.
4. Làm sạch vỏ ngoài thiết bị
Làm sạch bằng chất tẩy rửa trung tính và vải mềm.
Chú ý: Ngắt nguồn điện khi vệ sinh thiết bị. Không để nước đọng trên bề mặt bảng điều
khiển.
8. CẢNH BÁO
1. Sử dụng theo điện áp định mức.
2. Không tự ý sửa chữa hoặc lắp ráp lại thiết bị.
3. Không vận hành thiết bị bằng tay ướt.
2

4. Nếu dây nguồn bị hỏng thì cần được thay thế bởi nhà sản xuất, đại lý dịch vụ hoặc kỹ
thuật viên để tránh nguy hiểm.
5. Khi không sử dụng, hãy tắt và rút phích cắm của thiết bị.
6. Không đặt vật lạ vào cửa thoát khí và cửa hút gió.
7. Không sử dụng thiết bị gần nơi có khí nổ hoặc khí gas. Tránh bức xạ mặt trời trực tiếp
lâu dài.
8. Chỉ sử dụng thiết bị trên bề mặt phẳng.
9. Không sử dụng ngoài trời.
10. Mức nước của bình chứa không được vượt quá thang “MAX” ở bất kỳ thời điểm nào.
Trong suốt thời gian tạo ẩm, mức nước của bình chứa không được dưới thang “MIN”.
11. Sau khi thêm nước vào bình chứa nước, không được nghiêng hoặc lật nó khi đặt hoặc
di chuyển. Nếu muốn di chuyển, vui lòng đẩy từ từ để tránh đổ.
12. Không lật thiết bị. Nếu thiết bị bị lật và có nước bên trong bình chứa nước, vui lòng
ngắt nguồn điện trước. Sau đó, gửi nó đến bộ phận sửa chữa hoặc dịch vụ bảo hành thiết
bị.
13. Không che lỗ thông hơi.
14. Vệ sinh bên ngoài thiết bị bằng khăn sạch. Không sử dụng bất kỳ loại chất tẩy rửa hoặc
dung dịch nào.
15. Không rửa thiết bị.
16. Không để cửa thoát khí và cửa hút gió gần tường hoặc rèm.
17. Không gõ hoặc lắc thân máy khi sử dụng, nếu không thiết bị có thể dừng tự động.
18. Nước trong bình chứa nước sẽ dễ biến chất và có mùi vào mùa hè, lưu ý làm mới nước
thường xuyên.
19. Thiết bị này không dành cho người sử dụng (kể cả trẻ em) bị giảm khả năng thể chất,
giác quan hoặc tinh thần, hoặc thiếu kinh nghiệm và kiến thức, trừ khi họ được người
chịu trách nhiệm giám sát hoặc hướng dẫn sử dụng thiết bị an toàn.
20. Trẻ em cần được giám sát khi sử dụng thiết bị.
21. Nếu cần phải di chuyển thiết bị sau khi thêm nước, hãy lăn nhẹ đến vị trí cần thiết sử
dụng giá đỡ của bánh xe.
9. HƯỚNG DẪN GIẢI QUYẾT SỰ CỐ
Sựcố
Nguyên nhân
Giải pháp
Không hoạt động
-Mất điện hoặc kết nối kém.
-Không nhấn phím ON trên
bảng điều khiển.
-Cắm lại dây nguồn và đảm
bảo kết nối tốt.
-Nhấn phím ON trên bảng
điều khiển.
Hiệu quảlọc kém
-Bộlọc bịbám bụi.
-Cửa hút gió bịchặn bởi vật lạ.
-Làm sạch bộlọc.
-Loại bỏvật lạra khỏi
cửa hút gió.
3

AIR COOLER
USER INSTRUCTIONS
MODEL: FL-926-2
Thank you for purchasing this Air cooler CLARI FL-926-2
Please thoroughly read through this instruction manual before use and
store it carefully for future use.

1. PERFORMANCE PARAMETERS
2. FUNCTIONS
• Principle of Cooling: Water is took from the water tank by pump to the top, then the water
drops into paper evaporator. When the water in paper evaporator evaporates to water vapor,
the air is cooled. People will feel cool wind when the cool air is delivered by fan.
• Electronics control: safe and durable, attractive appearance.
• Adjustable speed and wind type: have three speeds and fan types, blow at a wide
angle.
• Cooling: Through air evaporating, cut down the air temperature and raise relative
humidity.
•
Deliver wind at a wide angle:
swing the blades automatically, deliver wind at horizontal
wide angle. Swing the blades transversely manually, select the direction discretionarily.
•Remote control: 6 meters far away, receive at 60 degree wide angle.
3. ASSEMBLING AND WATERING
1. Assembling castors: put the appliance on a at surface, take out the wrench from foam
box, then assemble the castors.
2. Watering: pull 1/3 water tank, then add clean water
Attention:
a. Pay attention to the level of water tank when add water.
b.The level of water tank should not over“MAX”scale at any time, when humidifying, the
total level of water tank should not below“MIN”scale.
c. Put ice or frozen ice box to the water tank if you want to strengthen the eciency of
cooling. But the total level of water tank should not over“MAX”scale.
4. OPERATION
1. On/O: press the key, turn on the appliance and turn o the appliance.
2. Speed: press this key, start the appliance, the corresponding function changes as
follows when you press the key serially: LOW -> MEDIUM -> HIGH -> LOW.
3. Mode: press this key, you can choose the normal wind, natural wind and sleeping wind
circularly. Under the situation of normal wind it has no corresponding indicator light, but
others have.
4. Timer: press this key, the timer from 1 to 15 hours options with step 1 hours. It will
shutdown if the timer nished
5. Cool: press the key to start cooling system. It cancels this function when you press
again. IMPORTANT: Please be sure there is enough water in the water tank before press
this key.
4
Model
Rating Power
Power
Max Water Injection Rate
FL-926-2
220V-240V/50Hz-60Hz
200W
14L

6. Swing: press this key, the wind direction can swing atly, and the swing indicator light
is on. It cancels this function when you press again.
7. Anion: press the key to start the clean air function.
8. Display: press this key to control the LCD light
5. THE USE OF REMOTE CONTROL
Fit on batteries, it can works. It have the same function as control panel. Should aim at the
remote control reception window when you use, and the eective distance is 6 meters.
When the remote control is not in use, please put away it for using next time.
Attention:
a. Do not mix old battery with the new one in use.
b. Please take out the batteries for long time nonuse.
c. The remote control has no mode key, so press the key by your hands.
6. THE USE OF ICE BOX
The ice crystal has a particular feature of keeping cool, it can absorb heat from water and
let the water temperature in the water tank below environmental temperature, so the air
will be much cooler.
1. Add water to the ice box (not full) and put it into the refrigerating chamber of refrigera-
tor to make sure that it icing absolutely.
2. Open the door, put the frozen ice box into the water tank.
3 . There have two air boxes, can use circularly.
7. CLEANING AND MAINTENANCE
WARNING: Ensure that the fan is switched o from the supply mains before removing
the air lter screen.
1. Clean the air lter screen
Cut o the power supply, pull the handle of air lter screen, remove it from appliance.
Clean the air iter screen with neutral detergent and banister brush, then clean it with
clear water. Finally, reinstall to the appliance.
2 . Clean the wetted pad
Cut o the power supply, take down the air lter screen, then draw the wetted pad from
support. Clean the wetted pad with neutral detergent and banister brush, then clean it
with clear water. Finally, reinstall to the appliance.
Attention: the wetted pad must be installed horizontally, in order to aviod leaking.
3. Clean the water tank
Cut o the power supply, open the door, take out the water tank, clean it with neutral
detergent, and wash it with clear water, then reinstall to the appliance.
4. Clean the shell
Clean with neutral detergent and soft cloth.
Attention: cut o the power supply when clean the appliance as there have a high
pressure in the body. Do not leave any water on the surface of control panel.
5

8. CAUTION
1. Use as per the rating voltage.
2. Do not repair or remake the appliance by yourself, it should be repaired by the repair-
men.
3. Do not operate the appliance with wet hands, in order to avoide damage.
4. If the supply cord is damaged, it must be replaced by the manufacturer, its service
agent or similarly qualied persons in order to avoid a harzard.
5. When the appliance is not in use, switch o and unplug it.
6. Do not insert foreign things to air outlets and inlets, in order to avoid damage.
7. Do not use the appliance near explosive and combustible gas. Avoid long-term direct
solar radiation.
8 . Use the appliance only on a at surface.
9. Do not use outdoors.
10.The level of water tank should not over“MAX”scale at any time, when humidifying, the
total level of water tank should not below“MIN”scale.
11. After adding water to the water tank, do not tilte or knock over it when you put or
move. If you want to move, please push slowly from the side, in order to avoid spilling.
12. Do not turn over the appliance. If it is toppled over and there are some water in the
body, should unplug the power supply rst. Then send it to the repair department or
after-sales service and overhaul the appliance.
13. Do not cover the air vent.
14. Clean the appearance with a lightly damp cloth. Do not use any type of detergents or
solutions.
15. Do not rinse the appliance.
16. Do not make air outlets and inlets near the wall or curtain.
17.Do not knock or shake the body when using, otherwise it may cause stop automatical-
ly.
18.The water in tank will easily metamorphose and has odor in summer, please renew the
water frequently.
19.This appliance is not intended for use by persons (including children) with reduced
physical, sensory or mental capabilities, or lack of experience and knowledge, unless they
have been given supervision or instruction concerning use of the appliance by a person
responsible for their safety.
20. Children should be supervised to ensure that they do not play with the appliance.
21. Should it be necessary to move the unit after the water has been added, roll gently to
the required position and activate the bracket the castors.
6
9. MALFUNCTION AND MAINTENANCE
Malfunction
Causes
Solution
No action
-Power off or poor connection.
-Not press the “ON” key on the control panel.
-Plug the power cord and make sure it connects well.
-Press the “ON” key on the control panel.
Poor effect of dedusting
-Block the air filter screen with dust.
-
Block the air inlet with foreign things.
-Purify the air filter screen.
-
Remove foreign things from the air inlet.
Table of contents
Languages:
Popular Air Conditioner manuals by other brands
Hisense
Hisense AUC-18UX4SGAA Instruction and installation manual
Frigidaire
Frigidaire LRA257ST21 Use & care guide
Daikin
Daikin VRV III REMQ8P8Y1B installation manual

Fujitsu
Fujitsu AS*G09KXCA Series Service instruction

Beko
Beko BINA 090 installation manual
Toshiba
Toshiba RAV-RM561KRTP-E installation manual

