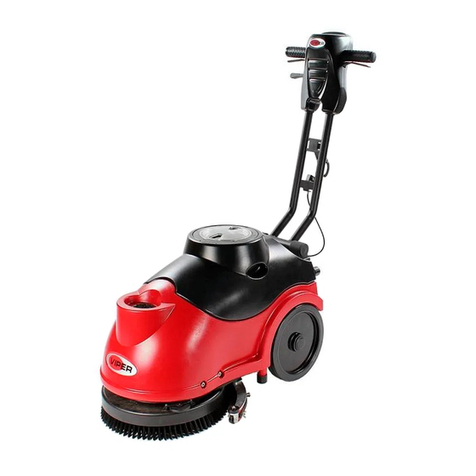
Clarke Technology ALTO EXT-10 User manual

Form No. 78052E 11/98 CLARKE TECHNOLOGY Printed in the U.S.A.
READ THIS BOOK
This book has important information for the use and safe operation of this machine. Failure to read this
book prior to operating or attempting any service or maintenance procedure to your ALTO machine could
result in injury to you or to other personnel; damage to the machine or to other property could occur as
well. You must have training in the operation of this machine before using it. If your operator(s) cannot
read English, have this manual explained fully before attempting to operate this machine.
Si Ud. o sus operadores no pueden leer el Inglés, se hagan explicar este manual completamente antes
de tratar el manejo o servicio de esta máquina.
All directions given in this book are as seen from the operator’s position at the rear of the machine.
For new books write to: ALTO U.S. Inc., 2100 Highway 265, Springdale, Arkansas 72764.
Operator's
Manual
EXT 10-15
Extractor
E

Page 2 CLARKE TECHNOLOGY Ext -10, 15 `Operator's Manual
CONTENTS OF THIS BOOK
Operator Safety Instructions ................................................................................. 3
Introduction and Machine Specifications ................................................................ 4
Controls and Machine Features .............................................................................. 5
How to Prepare the Machine for Operation ............................................................. 6
Instructions for Connection to the Power Supply - 115V
Extension Cords - 120V ............................................................................. 7
Instructions for Connection to the Power Supply - 230V
Extension Cords - 230V .......................................................................................... 8
Machine Operating Instructions ............................................................................... 9
How to Clean an Area of Carpet ................................................................. 9
How To Clean a Larger Area of Carpet ...................................................... 9
Maintenance ........................................................................................................... 10
After Each Use of the Machine .................................................................. 10
How to Prevent Damage from Freezing Temperatures ............................... 11
The Pump and Vacuum Motor ................................................................... 11
How To Check The Commutator and The Carbon Brushes ......................... 12
How to Correct Problems in the Machine ................................................................ 13
Machine Variables and Accessories ....................................................................... 14
Main Frame Assembly Drawing ............................................................................... 16
Parts List ................................................................................................. 17
Tank Assembly Drawing .......................................................................................... 18
Parts List ................................................................................................. 19
Motor Drawing & Parts List 120V ............................................................................ 20
Motor Drawing & Parts List 230V ............................................................................ 21
Pump Drawing & Parts List ..................................................................................... 22
Pump (45929A) Drawing & Parts List ...................................................................... 23
Wiring Diagram 120V ............................................................................................. 24
Wiring Diagram 230V ............................................................................................. 24

CLARKETECHNOLOGYExt-10,15 Owner's Manual Page 3
OPERATOR SAFETY INSTRUCTIONS
WARNING AVERTISSEMENT ADVERTENCIA
For the safe operation of this machine, read and understand all warnings and cautions.
DANGER means: Severe bodily injury or death can occur to you or other personnel if
the DANGER statements found on your machine or in your Owner's
Manual are ignored or are not adhered to. Read and observe all
DANGER statements found in your Owner's Manual and on your
machine.
WARNING means :Injury can occur to you or to other personnel if the WARNING
statements found on your machine or in your Owner's Manual are
ignored or are not adhered to. Read and observe all WARNING
statements found in your Owner's Manual and on your machine.
CAUTION means:Damage can occur to the machine or to other property if the
CAUTION statements found on your machine or in your Owner's
Manual are ignored or not adhered to. Read and observe all
CAUTION statements found in your Owner's Manual and on
your machine.
WARNING: You must have training in the operation of this machine before using it. READ THE
INSTRUCTION BOOK FIRST.
DANGER: Machines can cause an explosion when operated near flammable materials and vapors. Do not
use this machine with or near fuels, grain dust, solvents, thinners, or other flammable materials.
DANGER: Do not immerse. To reduce the risk of an electric shock, use only on a carpet that has been
moistened by a cleaning process. Protect the machine from rain. Keep the machine in a dry
building. Always clean the machine with a clean dry cloth.
WARNING: Always use a three-wire electrical system connected to the electrical ground. For maximum
protection against electric shock, use a circuit that is protected by a ground fault circuit
interrupter. Consult your electrical contractor.
WARNING: To prevent electric shock, always remove the electrical plug from the electrical outlet before
doing any repairs or maintenance to this machine.
WARNING: To prevent injury, always remove the electrical plug from the electrical outlet before leaving the
machine.
WARNING: Do not use this machine as a step or furniture. Injury could occur to the operator.
WARNING: To avoid serious injury, use proper lifting procedures when lifting the machine. Use two able
persons to lift the machine from a vehicle.
WARNING: Maintenance and repairs must be done by authorized personnel only.
WARNING: Keep all fasteners tight. Keep the adjustments according to specifications.
WARNING: Make sure that all the labels, decals, warnings, cautions and instructions are fastened to the
machine. Replace them when necessary by ordering them from Clarke Technology.
WARNING: Do not use water that is hotter than 60°C (140°F).

Page 4 CLARKE TECHNOLOGY Ext -10, 15 `Operator's Manual
OPERATOR SAFETY INSTRUCTIONS (CONT.)
WARNING: Improper discharge of waste water may damage the environment and be illegal. The
United States Environmental Protection Agency has established certain regulations
regarding discharge of waste water. Also, city and state regulation regarding this
discharge may be in effect in your area. Understand and follow the regulations in your
area. Be aware of the environmental hazards of chemicals that you dispose.
CAUTION: To prevent damage to the power cord, do not move this machine over the power cord,
instead, lift the power cord over the machine.
CAUTION: To prevent damage to the power cord and hoses, do not use the power cord or hoses
to pull the machine.
NOTE: When using the extractor to clean carpets, follow this procedure:
1. Do not walk on freshly cleaned carpets for at least four hours or until the carpet is dry to touch.
2. Do not remove aluminum or plastic pieces that have been placed under the legs of furniture until
the carpet is dry.
3. Do not allow children or pets to crawl or walk around on the damp carpet.
4. Vacuum right after the carpet is dry and then vacuum the carpet once a week as needed.
INTRODUCTION and MACHINE SPECIFICATIONS
Use the extractor for cleaning the carpet. When used with a floor tool, the machine applies cleaning solution
to the carpet and removes the dirty solution and soil from the carpet.
The extractor has controls to start the pump for the solution and the motor for the vacuum. The floor tools
have controls to release the solution. The power brush tools have controls to release the solution and to
operate the brush.
The extractor has a demand pump. The pump starts when the solution lever on the floor tool is activated.
The pump stops when the lever is released.
Code No. 07042A 04043A 04044A 04045A
Model
Electrical 115 V 60 Hz 230V 50Hz 115 V 60 Hz 230V 50Hz
Amps (Vac motor & pump) 14.5A 7A 14.5A 7A
Solution Pump 105 psi 7 bar 105 psi 7bar
Solution Tank 10 Gal 38 liters 15 Gal. 57 liters
Recovery Tank 9 Gal. 34 liters 13.5 Gal. 51 liters
Solution Flow 2.0 Gal. /M 7.61/m 2.0 Gal. /m 7.61/m
Vacuum Motor (x2) 1 hp (x2) 0.75kw(x2) 1 hp (x2) 0.75kw(x2)
Power Cable 35' 11m 35' 11m
Weight 88 lbs. 40kg 94 lbs. 43kg
Shipping Weight 98 lbs. 45KG 105 lbs. 48kg
Dimensions 31"x 20" x 32" 79x51x81cm 31"x20"x32" 79x51x81cm
Warranty 1 year 1 year 1 year 1 year
Noise (dBA) <70 <70
EXT-10 EXT-10 CE EXT-15 EXT-15 CE

CLARKETECHNOLOGYExt-10,15 Owner's Manual Page 5
CONTROLS and MACHINE FEATURES
The Vacuum Motor Switch
The vacuum motor switch is on the top of the extractor.
Put the switch in the "I" position to start the motor. Put the
switch in the "O" position to stop the motor.
The Pressure Gauge
The pressure gauge is on top of the machine. The gauge
indicates the amount of pressure.
The Vacuum Gauge
The vacuum gauge is on top of the machine. The gauge
indicates the inches of water.
The Switch to Activate The Pump
The pump motor switch is on the top of the extractor. Put
the switch in the "I" position to start the pump motor.
Press the lever on the floor tool to activate the pump.
Release the lever on the floor tool to stop the pump. Put
the switch in the "O" position to stop the pump motor.
NOTE: While the machine is in operation the pump
will shut off automatically when it reaches full pres-
sure. The pump will automatically turn on when the
pressure decreases.
The Hour Meter
The hour meter is on top of the machine. The gauge
indicates the amount of time the machine has been
operated.
The Solution Hose Adapter
The solution hose adapter is on the front of the machine.
The Vacuum Hose Adapter
The vacuum hose adapter is on the front of the machine.
The Drain Valve
The drain valve is below the vacuum hose adapter. Lift the
handle to open the drain.

Page 6 CLARKE TECHNOLOGY Ext -10, 15 `Operator's Manual
HOW TO PREPARE THE MACHINE FOR OPERATION
To prepare the machine for operation, follow this
procedure:
1. Connect the vacuum hose to the hose connector
on the extractor (1) and to the end of the vacuum
tube on the floor tool (2). See figure 1
2. Connect the solution hose to the extractor (1)
andthefloor tool(2). Fastenthe quick-disconnect
fitting, slide the knurled collar on the solution
hose away from the opening. Put the knurled
collar around the quick-disconnect and release
the knurled collar. See figure 2
WARNING: Do not use water that is hotter than
60°C (140°F).
3. Before moving the extractor onto the carpet, put
clean hot water into the solution tank.
4. Add a cleaning chemical, such as Clarkare®
Extractor Concentrate, to the hot water. For the
correct amount, follow the directions shown on
the container.
5. If the extractor removes an excess amount of
foam from the carpet, add a de-foamer such as
Clarkare®De-foamerConcentrateto therecovery
tank. The amount needed will vary according to
the amount of detergent already in the carpet.
CAUTION: To prevent damage, use a water-
based de-foamer rather than an
oil-based de-foamer.
CAUTION: Do not leave the extractor or
other cleaning machines or tools
on the carpet when not in use.
Cleaning solution in the machines
and tools can leak onto the carpet
and cause light spots or stains.
NOTE: To order Clarkare®Extractor Concentrate,order
part no. 398421. To order Clarkare®
Defoamer,order part no. 398420.
For instructions for preparation and operation of your
floor tool or power brush tool, read the operator's manual
given with your floor tool or power brush tool.
Figure 1
Figure 2
2
1
2
1

CLARKETECHNOLOGYExt-10,15 Owner's Manual Page 7
INSTRUCTIONS FOR CONNECTION TO THE
POWER SUPPLY AND ELECTRICAL GROUND 115 V
This product must be grounded. If it should malfunction or break-
down, grounding provides a path of least resistance for electric
current to reduce the risk of electric shock. This product is
equipped with a cord having an equipment-grounding conductor
and grounding plug. The plug must be inserted into an appropriate
outlet that is properly installed and grounded in accordance with all
local codes and ordinances.
WARNING: Improper connection of the equipment-
grounding conductor can result in a risk of
electric shock. Check with a qualified elec-
trician or service person if you are in doubt
as to whether the outlet is properly
grounded. Do not modify the plug pro-
vided with the product - if it will not fit the
outlet, have a proper oulet installed by a
qualified electrician.
This product is for use on a nominal 120 volt circuit and has a
grounding attachment plug that looks like the plug illustrated in
Figure 3 . Make sure that the product is connected to an outlet
having the same configuation as the plug. No adaptor should be
used with this product.
WARNING: To reduce the risk of fire, use only commer-
cially available floor cleaners and waxes
intended for machine application.
This machine is intended for commercial use.
WARNING: To prevent possible electric shock, protect
the machine from rain. Keep the machine in
a dry building.
WARNING: To prevent possible electric shock, always
use a 3-wire electrical system connected to
the electrical ground. for maximum protec-
tion against electrical shock, use a circuit
interrupter. Consult your electrical contrac-
tor.
WARNING: Do not cut, remove or break the ground pin.
If the outlet does not fit the plug, consult
your electrical contractor.
WARNING: Have worn, cut, or damaged cords replaced
by an authorized service person.
Extension Cords
Use only an approved extension cord with two main conductors,
and one earthing conductor. This machine has a power cord with
a wire size of 16 AWG (AWG means American wire gauge).
WARNING: If you use an extension cord, use one that
has a minimum wire size of 14 AWG. Do not
use an extension cord longer than 50 feet.
Do not join two extension cords.
Figure 3
Grounded
Outlet Box
Grounded
Outlet
Grounding
Pin

Page 8 CLARKE TECHNOLOGY Ext -10, 15 `Operator's Manual
INSTRUCTIONS FOR CONNECTION TO THE
POWER SUPPLY AND ELECTRICAL GROUND 230V
WARNING: This machine will operate only on AC
frequency and electrical voltage
shown on the nameplate. Make sure
you have the correct frequency and
voltage before connecting the power
cord to an outlet.
This machine must be connected to the electrical ground
to protect the operator from electric shock. The machine
has a power cord with two main conductors and one
earthing conductor. Connect the plug to the type of
receptacle shown in figure 4. The green and yellow
conductor in the cord is the ground wire. Never connect
this wire to any terminal other than the ground terminal.
WARNING: Always use this machine with an AC
three-conductor electrical ground.
When replacing any worn, cut, or
damaged cords contact an autho-
rized electrician. Do not move the
machine over the electrical cord. Al-
ways lift the cord over the machine.
Extension Cords
Use only an approved extension cord with two main
conductors and one earthing conductor. The machine
has a power cord with wire size 1.5mm2.
WARNING: If you use an extension cord, make
sure the cord has a minimum wire size
1.5mm2. Do not use an extension
cord longer than 15 meters. do not
join two extension cords.
WARNING: Do not cut, remove, or break the
ground terminal. Do not try to fit a
three-terminal plug into a receptacle
or connector body that does not fit
the plug. If the receptacle or connec-
tor body does not fit the plug, see
your authorized Clarke Technology
dealer or get an authorized electri-
cian to make the connection.
Figure 4

CLARKETECHNOLOGYExt-10,15 Owner's Manual Page 9
MACHINE OPERATING INSTRUCTIONS
How to Clean an Area of Carpet See Figure 5
WARNING: Do not use water that is hotter than
140°F.
To clean an area of carpet, follow this procedure:
1. Start the pump for the solution and the motor for the
vacuum on the extractor.
2. Begin at the right-hand corner of the carpet.
3. Hold the floor tool at the angle that gives the best
vacuum seal between the tool and the carpet.
4. Apply pressure to the lever for solution release. Pull
the tool toward you at a slow, steady speed. To remove
as much solution as possible, release the lever before
you stop moving backward.
5. To clean the edge of a room, move the tool along the
baseboard until the edge of all the carpet is cleaned.
6. To clean a small area of carpet, clean the carpet in
sections three feet square. As you make more
passes, repeat one inch of the area already cleaned.
7. To remove more liquid from the carpet, make passes
over the area already cleaned, but do not apply
pressure to the lever for the solution.
How To Clean A Larger Area Of Carpet See Fig. 6
To clean a larger area of carpet, follow this procedure:
1. Begin at the right-hand corner of the carpet.
2. Make a pass halfway along the edge of the carpet. Pull
the tool backward at a steady speed.
3. Move to the edge of the carpet. Make another pass
next to your first pass.
4. As you make more passes, repeat one inch of the area
already cleaned. If you use a power brush tool, repeat
one inch of the area already cleaned by the brush.
Make each pass four inches different in length to
prevent making a line in the center of the carpet.
5. Make more passes until half of the carpet is cleaned.
To remove more liquid from the carpet, make passes
over the area already cleaned, but do not apply
pressure to the lever for the solution.
6. Move to the right-hand corner of the part of the carpet
not yet cleaned.
7. Make a pass halfway along the edge of the carpet.
8. As you make passes, repeat one inch of the area
already cleaned.
9. Make more passes until all of the room is cleaned.
CAUTION: Clarke Technology will not be held
liable for damage to the carpet, or
poor results because of the operator's
lack of ability.
Figure 5
Figure 6
321
654

Page 10 CLARKE TECHNOLOGY Ext -10, 15 `Operator's Manual
MAINTENANCE
WARNING: Maintenance and repairs must
be done by authorized person-
nel only. Keep all fasteners tight.
Use only genuine Clarke Technol-
ogy parts.
WARNING: Do not operate this machine un-
less it is completely assembled.
NOTE: For maintenance of the floor tools or power
brush tools, read the manual given with the tools.
After Each Use of the Machine
1. To remove unused cleaning solution from the
solution tank, put the end of the vacuum hose in
the solution tank. Start the vacuum motor. Stop
the motor when the tank is empty.
2. To prevent damage to the valves and jets, flush
one gallon of clean water through the solution
system and the tools.
3. Disconnect the power cord from the outlet.
4. Put a bucket under the drain valve (1).
5. Pull the drain valve handle (2). See figure 7.
6. Drain the dirty solution from the tank.
7. Discard the dirty solution.
8. Use a dry cloth to wipe the tools and both tanks,
inside and out.
9. Apply a small amount of silicone lubricant to the
quick-disconnect fittings. To prevent damage to
the O-rings, do not use an oil lubricant.
10. Inspect the gasket or the vacuum shut-off valve. If
the gasket is damaged, replace the gasket.
11. Inspect and clean the filter screen in the bottom
of the solution tank. See figure 8. To remove the
filter, turn the filter to the left. To install the filter,
turn the filter to the right.
Figure 7
Figure 8

CLARKETECHNOLOGYExt-10,15 Owner's Manual Page 11
MAINTENANCE(CONT)
How To Prevent Damage From Freezing Tempera-
tures
To prevent damage from freezing temperatures follow
this procedure:
Remove all of the solution from the pumping system
before putting the machine in storage or moving the
machine in below-freezing temperatures.
To remove all the solution, follow this procedure:
1. Use the vacuum hose to remove all the solution
from the clean solution tank.
2. Connect the solution hose to the extractor and a
floor tool.
3. Put approximately 1 quart of windshield washer or
RV antifreeze solution in the solution tank.
4. Put the switch for the pump in the "I" position.
5. Put the end of the floor tool in the recovery pail.
6. Press the lever on the floor tool to activate the
pump.
7. Make sure the solution runs through the system.
8. Release the lever on the floor tool to stop the
pump.
9. Flush the antifreeze solution from the system
before using the extractor.
10. Make sure the machine is the same temperature
as the room before using the machine.
WARNING: Electrical repairs must be done by
authorized personnel only.
WARNING: After electrical repairs are done to
the machine, the machine must be
tested for electrical safety.
How To Get Access To The Pump and Vacuum
Motor
To get access to the pump and the vacuum motor,
follow this procedure:
1. Put the machine on its side.
2. Remove the screws that hold the bottom panel to
the machine. See figure 9
3. Remove the bottom panel from the machine.
Figure 9

Page 12 CLARKE TECHNOLOGY Ext -10, 15 `Operator's Manual
Maintenance Of The Motor
This machine has a vacuum motor that uses carbon
brushes. The carbon brushes in the motor must be
checked every three months, or every 500 hours of opera-
tion, whichever comes first. If either of the brushes is
shorter than 3/8 inch, replace both of the carbon brushes.
How To Check The Commutator And The Carbon
Brushes
WARNING: Electrical inspections must be made
by a person authorized to make
electrical repairs.
To check the commutator and the carbon brushes follow
this procedure:
1. Disconnect the power cord from the electrical outlet.
2. Empty both tanks.
3. Put the machine on its side.
4. Remove the ten screws that hold the bottom panel to
the machine.
5. Remove the bottom panel from the machine.
See Figure 10.
6. Disconnect the ground wire and wire clips.
7. Remove the plastic motor cover.
8. Inspect the commutator. Take the machine to a Clarke
Technology authorized repair location if you see any of
the following conditions:
a.Small holes in the surface of the commutator.
See "A" in figure 11.
b.Uneven color. Look for an even dark brown color.
Clean areas or very dark areas indicate a problem.
See "B" in figure 11.
c.High mica. The mica insulation must be lower than
the commutator bars. See "C" in figure 11.
9. To check the carbon brush assemblies, remove the
two screws from the holding bracket.
10. Remove the bracket.
11. Remove the carbon brush assemblies.
12. Check the carbon brush assembly. Replace both
carbon brush assemblies if either carbon brush is
shorter than 3/8inch. If either brush is shorter than ½
inch, order replacement brushes. Be ready to replace
both carbon brushes earlier than the normal inspection
time.
13. Put the motor brushes in position.
14. Using the two screws, install the bracket that holds
the carbon brushes.
15. Install the plastic motor cover.
16. Install the motor and fasteners.
Figure 10
Figure 11

CLARKETECHNOLOGYExt-10,15 Owner's Manual Page 13
HOW TO CORRECT PROBLEMS IN THE MACHINE
ActionCause
Problem
1. Make sure the machine is connected to the correct
frequencyand voltage,andall connectionsaretight.
Make sure the plug is in the electrical outlet.
2. Contact anauthorizedservice personto replace the
cord.
1. Put the switch for the vacuum in the "I" position.
2. Contact anauthorizedserviceperson.
3. Contact anauthorizedserviceperson.
4. Remove theobstruction.
5. Remove the liquid from the tank.
6. Contact anauthorizedservice personto replace the
gasket.
7. Put the dome in the correct position.
8. Contact anauthorizedserviceperson.
9. Replace thedome.
10. Replacethemotor brushes.
11. Use only the pail given with the machine.
1. Put the switch in the "I" position.
2. Contact anauthorizedserviceperson.
3. Contact anauthorizedserviceperson.
4. Contact anauthorizedserviceperson.
5. Contact anauthorizedserviceperson.
6. Straightenthe hose. Replaceif damaged.
7. Contact anauthorizedserviceperson.
8. Contact anauthorizedserviceperson.
9. Contact anauthorizedserviceperson.
10. Contactanauthorized serviceperson.
11. Contactanauthorized serviceperson.
12. Fill the solution tank.
13. Cleanthescreen.
14. Contactanauthorized serviceperson.
1. Contact anauthorizedserviceperson.
2. Contact anauthorizedserviceperson.
1. Clean the float. Replace if damaged.
2. Put defoamer in the solution. Order P/N 398420.
3. Clean thegasket. Replace ifdamaged.
1. The machinehasnopower.
2. The powercordisdamaged.
1. The vac motor does not run.
2. The vac motor switch is defective.
3. Thereis aloose motor connection.
4. There is an obstruction in the vacuum hose.
5. The recovery tank is full.
6. The domegasketisworn ordamaged.
7. The dome is not in the correct position.
8. The internalvachose isdamaged
orstopped.
9. Thedomeisdamaged.
10. Themotorbrushes areworn.
11. A wrongsize pailis being used.
1. The switch is inthe "OFF" position.
2. The pressureswitch isdamaged.
3. The pumpmotor will not run.
4. The pumpmotor brushesareworn.
5. The quick disconnect fitting is dirty
or stopped.
6. The solutionhose is bent.
7. Thepump is worn.
8. The pump switch is defective.
9. The pumpconnections areloose.
10. The pump intake andoulet valves are worn.
11. Thethermoprotector is open.
12. The solution tank is empty.
13. The intake screen is dirty.
14. The rectifier in the pump motor is bad.
1. The intakegasket is worn.
2. The tankis damaged.
1. The float is dirty or damaged.
2. There is too much foam.
3. The float gasket is dirty or damaged.
The machine will not run.
There is no suction.
Thereis no pressure.
Thesolution tank leaks.
Therecoverytank overflows.

Page 14 CLARKE TECHNOLOGY Ext -10, 15 `Operator's Manual
Clarke Technology EXT- 10, 15
Machine Variables and Accessories 11/98
04042A Breakdown: 04042A EXT -10 120V/60 Hz
04043A Breakdown: 04043A EXT -10 220V/50/60 Hz
04044A Breakdown: 04044A EXT -15 120V/60 Hz
04045A Breakdown: 04045A EXT -15 220V/50/60 Hz
Variable
Code
ACCESSORIES
Descriptions Part No.
Clarkare®Concentrate - case (4-1 gal.) 398425
Defoamer - case (4-1 gal.) 398426
Traffic Lane Spotter - case (4-1 gal.) 398427
Upkeep Shampoo - case (4-1 gal.) 398430
Carpet Dryer Deluxe 04130Bu
4" Metal Hand tool 59228Au
4" Plastic Hand Tool 59231Au
4" Tool & Hose Assembly 55173Au
8" Plastic Wand 59230Au
12" Metal Wand 59229Au
PB - 12 Power Brush 12" 04016B
10' Hose Assembly 59232Au
20' Hose Assembly 55183Au
1½ to 1½" Coupler 682408

CLARKETECHNOLOGYExt-10,15 Owner's Manual Page 15
NOTES

Page 16 CLARKE TECHNOLOGY Ext -10, 15 `Operator's Manual
CLARKETECHNOLOGYEXT-10,15
Main Frame Assembly Drawing 11/98
31
32
55
56
58
24 25
12
23 22
19
53
19
18
53
17
12 13
11 16
15
6
6
10
9
1
3
2
5
6
4
7
8
24 21
23
22 20
29
26 23 27
930
19
53
28 27 23 12 23 33
34
20
53
37
34
36
35
38
14
39
40
6
41
11
42
54
43
44
48
46
4547
14
14
50
49
49 51
51
54
11
43
52
652
43 54
43
44
14
46
44
43 42
40
6
44
43
60 61
59
54
39

CLARKETECHNOLOGYExt-10,15 Owner's Manual Page 17
35 66617A Plate, Q.D. Mounting 1
36 725729 Nipple, 1/8Hex 1
37 737140 Quick Disconnect 1
38 15631A Hose, Assembly, Applicator Ref
39u643418 Gasket, Vacuum Motor 2
40u44906A Motor, Vacuum120 Volt 2
44907A Motor, Vacuum 230 Volt 2
41 674112 Hose, Exhaust 1
42 954010 Wire, Assembly, Ground 2
43u980603 Washer, #10 Shakeproof 8
44u962987 Screw 10-24 x ½ Pn St. 6
45 620281 Adapter, Accessory 1
46 693473 Gasket, Vac Motor, Bottom 2
47 62605A Cover, Frame Bottom 1
48 Serial Plate 1
49 930093 Rivet, 1/8Dia., Pop 8
50 30602A Baffle Assembly, Air Intake 2
51 962109 Screw, 10-24 x 5/8Pn SS 2
52 920200 Nut, 10-24 Hex 2
53 980651 Washer 5/16 Plain 16
54 911933 Terminal 1
55 73276A Label, Spanish 1
56 73277A Label, Water 1
NI 911177 Nut, Wire (Not Shown) 4
NI 899254 Tie, Wire (Not shown) 1
58 66653A Plate, Pump, Adapter 1
59u49310A Lead Asm. (CE Machine only) 2
60u47201A Filter Asm. (CE Machine only) 1
61u69894A Bracket (CE Machine only) 1
NI 962009 Screw 4
NI 81901A Nut, Keps #10-24 4
NI 47802A Terminal, Ring 1
NI 47701A Terminal, ¼ FIFQDC 2
NI 42910A Fuse 1
NI 43004A Fuse Holder 1
NI = Not illustrated
NOTE:uindicates a change has taken place since last
publication of this manual.
1 34003B Main Frame EXT-10/15 1
2 42214A Cord, Power 120 Volt 1
42231A Cord, Power 230 Volt 1
3 38002A Strain, Relief 1
4 672011 Clamp, Strain Relief 1
5 672012 Clamp, cord 1
6 85522A Screw, 10-16 x 1 Pan Hd 19
7 215103 Label, Caution 1
8 215104 Label, Warning 1
9 35114B Hose, Pressure Gauge 1
10 35115A Hose, Vacuum 1
11 672013 Clamp, Hose 4
12 35147A Hose, Intake 4
13 49612A Harness Assembly Ref
14 962957 Screw, 10-16 x ½ PN*ST 16
15 62604A Cover, Upper Chamber 1
16 34217A Gasket, Upper Chamber 1
17 962983 Screw, ¼-20 x 5/8Pn 8
18 692473 Caster, Rear 2
19 962901 Screw, 9/32 -16 x ¾ Hx 16
20 692472 Caster, Front, Swivel 2
21 45905C Pump, 115 Volt 1
45929A Pump, 230 Volt 1
22 692870 Elbow, Swivel 3/8Hose Barb 2
23u50248A Clamp, Hose 5
24 980982 Washer, #10 Plain 10
25 962970 Screw 10-6 x 1¼ Pn Hi-Lo 4
26 69404A Hose, Discharge 1
27 170030 Coupling, ¼ MPT x 1/8MPT 1
28 729221 Tee, ¼ FPT 1
29 851144 Bushing, ¼ MPT x 1/8FPT 1
30 52401A Connector, ¼ Tube x 1/8FPT 1
31 215104 Label, Fire Warning 1
32 73275A Label, Warning, Rain 1
33 50300A Adapter, 1/8FPT to 3/8H1
34 980645 Washer 3
CLARKETECHNOLOGYEXT-10,15
Main Frame Assembly Parts List
11/98
Item # Description Qty.
Part No. Item # Description Qty.
Part No.

Page 18 CLARKE TECHNOLOGY Ext -10, 15 `Operator's Manual
CLARKETECHNOLOGYEXT-10,15
Tank Assembly Drawing
11/98
5
4
3
1
6
8
7
53 12
51
50
51
52
50
19 13
14 15
16 17 18
22
26 27
28
27 21
20
19
98
29
30
24
25
21
18
32
16
33
34
35
36
37
38
39
40
31 23
41
42
21
43
44
8
48
49
46 47

CLARKETECHNOLOGYExt-10,15 Owner's Manual Page 19
CLARKETECHNOLOGYEXT-10,15
Tank Assembly Parts List
11/98
26 692802 Elbow, 90 Street 1
27 962350 Screw, 10-32 x ½ 4
28 39303A Tube, float Shut-Off 1
29 925596 Pin, Cotter 1/8x 2" 1
30 691304 Ball-Float Shut-Off 1
31 34219A Gasket, Float Tube 1
32 690208 Adapter, Minature Hose 1
33 728535 Strainer, solution Tank 1
34 60306A Adapter, Filter 1
35 833401 Gasket, Drain 1
36 980630 Washer, ¾ ID, Plain 1
37 920264 Nut, ¾-16 x 3/8Hx Jam 1
38 170030 Coupling, ¼ P x 5/8H1
39u50248A Clamp, Hose 1
40 35147A Hose, Intake Ref
41 692701 Deflector 1
42 693406 Gasket, Swivel Coupling 1
43 690212 Adapter, Vac Hose 1
44 85522A Screw, 10-16 x 1 Pan Hd 3
45 920797 Nut, Drain Valve 1
46 733442 Gasket, Drain Valve 1
47 980422 Washer, Drain Valve 1
48 59721A Valve, Drain 1
49 53606A Elbow, 2" x 45° St 1
50 81800A Well Nut 4
51 962113 Screw, 10-32 x 1 Pn Hd 4
52 33300A Enclosure, Bottom 1
53 34238A Gasket, Plate 1
NI 962983 Screw, ¼-20 x 5/88
1 47316B Switch - On/Off 2
2
3 44400B Meter, Hour 120V 1
44401B Meter, Hour 230V 1
4 54204B Gauge, Pressure 1
5 54205B Gauge, Vac 1
6 37304C Plate, Switch & Gauge, EXT10/15 1
7 85811A Screw, 10-24 x ¾ Pn St Blk 6
8 962109 Screw 10-24 x 5/8Pn Hd SS 3
9 692409 Chain, Cover 2
10 83003A Rivet, 1/8Dia. Pop 2
11 920068 Nut, 10-24 Tinnerman 6
12 32317B Cover, Tank, EXT-10/15 1
13 49612B Harness Assembly 1
14 742880 Elbow , 1/8Pipe Thread 2
15 693303 Fitting, 1/8Hose x 1/8Pipe 1
16 52401A Connector, ¼ Tube x 1/8MPT 1
17 35114B Hose, Pressure Gauge Ref
18 694104 Hose, Vac Gauge 1
19 832322 Cover, Solution Tank 2
20 34218A Gasket, Tank Cover 1
21 920296 Nut, 10-24 Elastic-Stop 3
22u38919C Tank, Solution EXT-10 1
38920C Tank, Solution EXT-15 1
23u38916C Tank, Recovery EXT-10 1
38917C Tank, Recovery EXT-15 1
24 35115A Hose, Vac Tank to Base Ref
25 672013 Clamp, 2¾" 1
Item # Description Qty.
Part No. Item # Description Qty.
Part No.
NOTE:
uindicates a change has been made
since last publication of this manual
since
u
u

Page 20 CLARKE TECHNOLOGY Ext -10, 15 `Operator's Manual
CLARKETECHNOLOGY EXT-10,15
Motor 120V (44906A) Drawing & Parts List
11/96
Item # Qty.
Description
Part No.
1 51913A Clip (Optional) 2
2 54809A Housing, Vent 1
3 53905A Fan 1
4 51914A Clamp 2
5 51401A Carbon Brushes 2
6 50618A Commutator End Bracket 1
7 638313 Load Spring 1
8 53100A Disc 1
9 902679 Ball Bearing 1
10 902648 Ball Bearing 1
11 59803A Neoprene Washer 1
12 50610A Fan End Bracket 1
13 58501A Spacer 1
14 53914A Vacuum Fan 2
15 658201 Spacer 1
16 53908A Stationary Fan 1
17 57904A Fan Shell 1
18 980205 Washer 1
19 920329 Nut 1
12
3
4
5
6
7
8
9
10
11
12
13
14
15
16
17
18
19
This manual suits for next models
7
Table of contents

