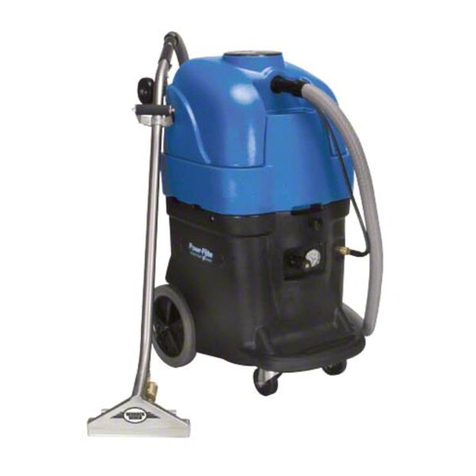
Pioneer Eclipse BRIGHTSTAR BS300H User manual

Operators Manual
Heated Box Extractor
BS300H
READ OPERATORS MANUAL BEFORE OPERATING
ToOrderPartsCall1-888-702-5326-https://monsterfloorequipmentparts.com

ToOrderPartsCall1-888-702-5326-https://monsterfloorequipmentparts.com

Record this Important Information
Date of Purchase
Purchased From
Address
City State Zip
Phone Contact
Serial Number
Emergency Contacts
Medical Emergency
Police
Fire
ToOrderPartsCall1-888-702-5326-https://monsterfloorequipmentparts.com

ToOrderPartsCall1-888-702-5326-https://monsterfloorequipmentparts.com

Introduction . . . . . . . . . . . . . . . . . . . . . . . . . . . . . . . . . . . . . . . . . . . . . . . . . . . 2
Unpacking . . . . . . . . . . . . . . . . . . . . . . . . . . . . . . . . . . . . . . . . . . . . . . . . . . . .2
Serial Number Plate . . . . . . . . . . . . . . . . . . . . . . . . . . . . . . . . . . . . . . . . . . . .2
Parts and Service . . . . . . . . . . . . . . . . . . . . . . . . . . . . . . . . . . . . . . . . . . . . . .2
Safe Operating Procedures
Important Safety Instructions . . . . . . . . . . . . . . . . . . . . . . . . . . . . . . . . . . . .3
Description
Become Familiar with Your New Machine . . . . . . . . . . . . . . . . . . . . . . . . . . .4
BrightStar 300H Machine (Figure 1) . . . . . . . . . . . . . . . . . . . . . . . . . . . . . . . .4
Machine Description . . . . . . . . . . . . . . . . . . . . . . . . . . . . . . . . . . . . . . . . . . .4
Machine Operation . . . . . . . . . . . . . . . . . . . . . . . . . . . . . . . . . . . . . . . . . . . . .5
Ball Float Vacuum Shut-Off . . . . . . . . . . . . . . . . . . . . . . . . . . . . . . . . . . . . . .6
BrightStar 300H Wiring Schematic (Figure 2) . . . . . . . . . . . . . . . . . . . . . . . .7
Exploded View & Parts List . . . . . . . . . . . . . . . . . . . . . . . . . . . . . . . . . . . . . . . .8
Machine Specifications . . . . . . . . . . . . . . . . . . . . . . . . . . . . . . . . . . . . . . . . . . .10
Preventive Maintenance . . . . . . . . . . . . . . . . . . . . . . . . . . . . . . . . . . . . . . . . . .10
Warranty
Table of Contents
1
ToOrderPartsCall1-888-702-5326-https://monsterfloorequipmentparts.com

Introduction
This operator's manual will help you get the most use of your new BrightStar 300H machine. Please read
the instructions thoroughly before operating the machine. This product is intended for commercial use only.
UNPACKING
When the machine is delivered, carefully inspect the shipping carton and the machine for damage. If damage
is evident, save the shipping carton so that it can later be inspected by the Freight Company. Contact Pioneer
Eclipse Customer Service immediately for instructions on how to file for a freight damage claim.
SERIAL NUMBER PLATE
The Serial Number plate of your machine is located on the left side of the wall in the base compartment.
Please make a note of the Model and Serial Numbers of your machine, below, for future reference.
MODEL: ______________________
SERIAL NUMBER: _____________________
Be sure to fill out and return your warranty card.
PARTS AND SERVICE
Repairs, when needed, should be performed by your authorized Pioneer Eclipse dealer only. They maintain a
complete inventory of original replacement parts and accessories. Call the distributor from whom you
purchased your machine when you need parts or service. Please specify the Model and Serial numbers of
your machine when calling for parts or service.
2
DO NOT OPERATE THE MACHINE UNTIL YOU HAVE READ
THIS SECTION.
IMPROPER USE WILL VOID THE WARRANTY.
•Always use a defoamer when foaming occurs to prevent vacuum motor damage.
•Never use water above 134ºF (54ºC).
•Do not use outdoors or where temperature is below freezing. Protect your machine
from any extremes in temperatures.
•Do not let pump run dry. Turn the pump off and refill the tank when cleaning
solution gets low.
•Flush the machines with acid de-scaler regularly (monthly or more often) to prevent
a build-up of minerals or chemicals in the pump, lines and heat system. Follow the
flush with a clear water rinse to remove any particles and to rinse the acid from the
machine.
•Use approved chemicals only. All chemicals should be mixed thoroughly. Liquid
chemicals are recommended to prevent powder buildups. A pH between 6 and 9 is
highly recommended. The use of high alkaline detergents or strong acids will
accelerate the wear of the pump and seals, and will void the warranty.
•All extension cords must have a rating of at least 12/3 (#12 cord). Extension cords
should be no longer than 50 feet (15 m). Replace the plug immediately if the
ground prong becomes damaged or is broken off.
ToOrderPartsCall1-888-702-5326-https://monsterfloorequipmentparts.com

3
IMPORTANT SAFETY INSTRUCTIONS
This machine is suitable for commercial use in hotels, schools, hospitals, factories, shops, and offices other
than normal residential housekeeping purposes.
When using any electrical appliance, basic precautions should always be followed, including the following:
NOTE:Read all instructions before using machine. Use the machine as described in this manual only.
•Keep loose clothing, hair, fingers, and all parts of your body away from openings and moving parts.
•Turn off all controls before unplugging the unit.
•Use manufacturer recommended attachments only.
•Use extra care when cleaning on stairs.
•Connect machine to properly grounded outlets only.
•Liquid ejected at the spray nozzle could be dangerous as a result of its temperature, pressure or
chemical content.
WARNING: TO REDUCE THE RISK OF FIRE, ELECTRIC SHOCK OR INJURY:
•Do not leave the machine unattended when it is plugged in. Unplug the unit from the outlet when not in
use and before servicing.
•Do not expose to rain or snow. Store and use indoors. If left outdoors or dropped in water, return the
machine to service center.
•Do not use as a toy. Close attention is necessary when used near children.
•Do not use the machine with damaged cord or plug. If machine is not working, has been dropped or
damaged, return the machine to service center.
•Do not unplug the machine by pulling the cord. To unplug, hold the plug and not the cord.
•Do not handle the plug, the cord or the machine with wet hands.
•Do not put any objects into the openings. Do not operate the machine with any openings blocked.
Keep the openings free of dust, lint, hair and any debris that may reduce the airflow.
•Do not use to pick up anything that is burning or smoking, such as cigarettes, matches, or hot ashes,
or any health endangering dusts.
•Do not use to pick up flammable or combustible liquids, such as gasoline, or use in any areas where
they may be present.
Safe Operating Procedures
ToOrderPartsCall1-888-702-5326-https://monsterfloorequipmentparts.com

4
Description
BECOME FAMILIAR WITH YOUR NEW MACHINE
A general description of your new BrightStar 300H machine with heater is shown in Figure 1. The BrightStar
300H Wiring Schematic is shown in Figure 2.
BrightStar 300H Machine
Figure 1
MACHINE DESCRIPTION
(1) Operator Handle - Operator holds this to move the machine from one location to another.
(2) Solution Tank - Fill Solution Tank here with warm water and chemicals.
(3) Switch Plate - This is where the switches for the pump, vacuum, and heater are located.
(4) Recovery Tank - This tank can be flushed out by running clean water into this opening with the drain
gate open. The vacuum float Shut-OFF can also be accessed through this opening for maintenance.
(5) Vacuum Inlet - This where the vacuum hose attaches to the machine.
(6) Latch - Open the latches to access the base compartment, which contains the motors and heater.
(7) Drain Gate - Open this gate to drain the recovered solution out of the machine. Be sure to keep this
gate clean.
(8) Castor - The casters swivel for easy maneuvering in tight spots.
(9) Pressure Gauge - This is where the operator reads the spraying pressure.
(10)Wheels - Large, non-marking wheels for ease of transport.
(11)Power Cords - Two, 25-foot (7,6 m) long cords rated 12 gauge, 3 wire. The cord with the red sleeve
operates the vacuum and the pump. The other cord operates the heat exchanger.
4-button switch plate
recovery tank lid
castor
wheel
pressure gauge
cords
solution tank lid
operators handle
lift handle
drain gate
latch
vacuum inlet
ToOrderPartsCall1-888-702-5326-https://monsterfloorequipmentparts.com

5
MACHINE OPERATION
1. Inspect the machine, hoses, and cleaning tools for cleanliness and completeness.
2. Fill the solution tank with warm water. Using warm water may be a benefit in cleaning effectiveness, but
do not use hot water above 130ºF (54ºC) in the tank. Add liquid cleaning solution with a pH value of
between 6 and 9. High pH detergents and/or acid rinses will accelerate the wear of the seals and will void
the warranty.
CAUTION: Use of the "Heat" switch when the cords are on the same circuit may cause the circuit breaker in
the wall to trip.
3. Plug in the power cords. Do not connect both cords to the same outlet; the circuit locator light on the
switch plate should light up. If the locator light does not come on, try different outlets until it does. If you
are certain the cords are on separate circuits, turn the heat switch on.
NOTE: The cord with no red sleeve powers the Heat Exchanger. The cord with the red sleeve powers the
vacuums and pump.
4. Connect the priming hose to the machine, turn the pump on and prime the air out of the pump. When the
water is clear (no air in it) turn the pump off and remove the priming hose.
NOTE: Priming may take 20 - 60 seconds.
5. Add liquid cleaning solution, with a pH of between 6 and 9, to the solution tank.
6. Attach the spray hose to the solution quick disconnect and the vacuum hose to the hose barb on the
recovery tank. Attach the other ends of the hoses to the cleaning tool.
7. Allow the heat exchanger two minutes to reach operating temperature.
8. Turn the pump on. Select carpet or upholstery. Turn the vacuum on.
9. Begin cleaning.
10. Use defoamer in the recovery tank any time foaming occurs.
11. Monitor water level in the solution tank. Do not let the pump run dry.
12. When the solution tank gets low, turn the pump and the vacuum off, fill the solution tank, empty and clean
the recovery tank.
13. When finished with the job, remove any unused solution from the solution tank, and run a few gallons of
clean water through the system. Plug in the cords. Do not connect both cords to the same outlet. If you
are certain the cords are on separate circuits, turn the "Heat" switch on.
ToOrderPartsCall1-888-702-5326-https://monsterfloorequipmentparts.com

6
BALL FLOAT VACUUM SHUT-OFF
Prior to using the machine, always check that the float filter is clean and the ball can travel freely. When the
recovery tank is full, the ball float will rise and will shut off the vacuum flow to prevent any more water from
entering the tank. Turn off the vacuum, and empty the recovery tank.
NOTE: If foam is present, or if the ball float is prevented from rising, the float will not be able to stop the air
flow, and the tank may over fill.
CAUTION!
To avoid vacuum motor damage, always make sure the float filter is clean and the ball can travel freely prior
to using the machine. And always use a defoamer when foaming occurs.
ELECTRIC CIRCUIT LOCATOR
This unique, patented system is operated by a solid state circuit. It will inform the operator when the two
cords are plugged into separate circuits by turning on the circuit locator light (see 1 on switch plate). This
helps to prevent tripping circuit breakers.
NOTE: If the circuit locator light does not illuminate when the cords are plugged in, then both cords are on
the same circuit. Try other outlets with one of the cords until you get the locator light to come on.
NOTE: If the heat switch (2 on switch plate) is turned on when both cords are on the same circuit, the breaker
will trip.
ToOrderPartsCall1-888-702-5326-https://monsterfloorequipmentparts.com

7
BrightStar 300H Machine
Figure 2
ToOrderPartsCall1-888-702-5326-https://monsterfloorequipmentparts.com

8
Exploded View - BS300H
PSI
ToOrderPartsCall1-888-702-5326-https://monsterfloorequipmentparts.com

9
BS300H - Parts List
REF PART# DESCRIPTION QTY
1 VT-5 RECOVERY TANK 1
2 908A LATCH 2
3 21C SCREW, 8-32 X 5/8 IN 4
4 325 LOCKNUT, 8-21 4
5 903D DRAIN GATE, FEM THREADS 1
6 907 VACUUM INLET HOSE BARB,
1-1/2 IN 1
7 2086 LID, WITH RING 1
8 1074 GASKET 1
9 382C SCREW, 8-32 X 1 IN 6
10 325 LOCK NUT, 8-32 6
10A 805 CHAINASSEMBLY 2
11 FP193 BALL FLOAT, WITH MANIFOLD 1
12 185 NUT, ALUMINUM, 1-1/2 IN 1
13 190 O-RING 1
14 922 ELBOW, PVC 1
15 156 HOSE CLAMP 4
16 430 HOSE, RIBBED 2 X 13 IN 1
17 FP233A CHAINASSY 1
18 FP323 VACUUM MOTOR, 3-STAGE,
W/GASKET, 120 V 1
19 430 HOSE, RIBBED, 2" X 26" 1
20 BS-6 BASE COMPARTMENT 1
21 928 LOUVER, INCLUDES 3 SCREWS 2
22 FP228B GASKET 1
23 909A LATCH STRIKE 2
24 2010 HANDLE, CHROME 1
25 45 QUICK DISCONNECT, ¼ NPT 1
26 115 WASHER, FIBER 3
27 116 BUSHING, FIBER 1
28 31 WASHER, BRASS 1
29 92A NIPPLE, ¼-NPT 1
30 91 ELBOW, BRASS, ¼ NPT 1
31 2023A HOSEASSEMBLY, HEAT
& HIGH PRESSURE 1
32 103 ELBOW, BRASS, 1/8 NPT 2
33 FP256 BI-METALLIC SWITCH
REPAIR KIT 1
34 76 HOSE CLAMP 1
35 455 MOUNTING BRACKET,
HEAT EXCHANGER 1
36 FP257 HEAT EXCHANGER,
COMPLETE, 120V 1
37 2012 HOSE, HEAT/
HIGH PRESSURE, 26" 1
38 270 BOLT, 1/4–20 X 5 IN 3
39 137 WASHER, SPLIT LOCK 3
40 136 NUT, FINISH, ¼ 3
41 14 WASHER, FLAT 3
REF PART# DESCRIPTION QTY
42 17 LOCKNUT, 10-32 3
43 905 CASTOR, 4" 2
44 180 BRACKET, AXLE MOUNT 2
45 901 AXLE 1
46 2003 WHEEL 2
47 27A AXLE CAP 2
48 923 CIRCUIT BOARD,
CIRCUIT SENSOR 1
49 931 MOUNTING TRACK,
CIRCUIT BOARD 1
50 184 RETAINER, POWER CORD 2
51 495 POWER CORD, 25 FT 2
52 HT-5 HOLDING TANK 1
53 917 HINGE, 8 IN 1
54 901 LID, SOLUTION TANK COVER 1
55 2006 SWITCH PLATE 1
56 28 SCREW, #4 X 3/8 IN 5
57 FP311 SWITCH, SPST 3
57A FP312 SWITCH, DPST 1
58 207A FILTER, PUMP INLET 1
59 951 GAUGE, PUMP PRESSURE 1
60 219 QUICK COUPLING, MALE 1
60A 220 QUICK COUPLING, FEMALE 1
61 210 SNUBBER, PULSATION FILTER 1
62 944 HOSE, PULSATION DAMPENING 1
63 950 PUMP, NO BRASSAND
NO MOTOR (SEE MISC.) 1
64 945 VALVE, BYPASS 1
65 950A CAM & BEARINGASSEMBLY 1
66 2060 MOTOR, FOR PUMP, 120V 1
67 FP169C HOSE, BYPASS, 3/8" X 18" 1
68 805 CHAIN, LID RETAINING 2
68 FP230 SOLENOID, WITH FITTINGS, 120V1
69 925 HOSE, 3/8" X 8" 1
70 2013 GASKET, VACUUM MOTOR 1
71 MA-6 MANIFOLD, VACUUM 1
72 440 FLANGE, EXHAUST HOSE 1
76 4200B LABEL 2
MISCELLANEOUS PARTS /ASSEMBLIES
FP167F PUMP, COMPLETE WITH BRASS,
NO MOTOR
FP212B PUMP & MOTOR COMPLETE
291 REBUILD KIT, BYPASS VALVE
229 REBUILD KIT, PUMP VALVES
& O-RINGS
250 REBUILD KIT, PUMP
PISTONAND SEALS
ToOrderPartsCall1-888-702-5326-https://monsterfloorequipmentparts.com

10
Wand - BS11 - Before Nov. 2003
ToOrderPartsCall1-888-702-5326-https://monsterfloorequipmentparts.com

11
REF PART # DESCRIPTION QTY
1 700 Wand Body 1
2-6 729 Grab HandleAssembly 1
7 204A Lock Nut 1
8 204 Screw 1
9 283 Filter 1
10 199 Spray Tip, size 110015 1
11 FP202 1/4” Hose & SwageAssembly 1
12 700MAN* Manifold 1
13 85D Valve Lever 1
14 85A Valve Body 1
15 14O Brass Elbow, 45 Degrees,
1/4” Pipe 1
16 92 Brass Nipple, 1/4” Pipe 1
17 45 Brass Quick-Disconnect,
1/4” Plug 1
18 292 Spray TipAssembly 1
85C Valve Rebuild Kit 1
Wand - BS11 - Before Nov. 2003
*Manifold that requires compression nuts on small
tubing for tips #00700MAN
ToOrderPartsCall1-888-702-5326-https://monsterfloorequipmentparts.com

12
Wand - BS11 - After Nov. 2003
ToOrderPartsCall1-888-702-5326-https://monsterfloorequipmentparts.com

13
REF PART # DESCRIPTION QTY
1 CSW-12HP-500 Wand, Complete 1
2-6 729 Grab HandleAssembly 1
7 204A Lock Nut 1
8 204 Screw 1
9 283 Filter, spray tip 1
10 199 Spray Tip, size # 110015 1
11 FP202 Hose, 1/4”, and swage assembly 1
12 700MAN-RD Manifold 1
14 85K Valve, complete 1
15 140 Elbow brass 45 Degrees 1
16 92 Nipple, brass, 1/4 p.t. 1
17 45 Quick Disconnect, brass, 1/4 p.t. 1
18 292 Spray tip assembly 1
85J Rebuild kit, valve 1
Wand - BS11 - After Nov. 2003
ToOrderPartsCall1-888-702-5326-https://monsterfloorequipmentparts.com

Preventive Maintenance
14
POWER SOURCE: 110-120V 50/60
RUNNINGAMPS: PUMP, VACUUMAND FAN - 15AMPS
HEATER - 16 AMPS
WAND & SPRAY TIPS: S/S, 12 IN (30,5 CM), DOUBLE BEND
2 TIPS, SIZE #110015
HOSES: LENGTH - 15 FT (4,6 M)
SOLUTION - 1/8 IN I.D.
VAC - 1-1/2 IN I.D.
DIMENSIONS: HEIGHT - 26.5 IN (67,3 CM)
WIDTH - 18.0 IN (45,7 CM)
LENGTH - 28.75 IN (73,0 CM)
WEIGHT: COMPLETE - 99 LBS (45 KG)
CAPACITY: HOLDING TANK - 10.0 GAL (37,9 L)
RECOVERYTANK - 10.0 GAL (37,9 L)
POWER CORDS: 2 - 25 FT (7,6 M), 3/12 GA
HEAT EXCHANGER: 2000 WATTS
PUMP: 300 PSI PISTON PUMP
VACUUM: 1 - THREE STAGE MOTOR 140 IN (3,5 M)
BALL FLOAT AUTO SHUT-OFF
CFM: 94
LIFT: 140 IN (3,5 M)
Machine Specifications
Maintenance Task Daily Monthly Yearly
Flush Lines & Pump X
Clean Vacuum Float Filter X
Clean Solution Filter X
Check Inlet Airways X
Descale Machine X
Check Vacuum Motor Brushes X
ToOrderPartsCall1-888-702-5326-https://monsterfloorequipmentparts.com

1) Machine must be registered at the time of purchase on a form provided by Pioneer Eclipse
Corporation. Your Pioneer Eclipse Distributor is responsible for the registration of your machine.
Please cooperate with the distributor in supplying necessary information on the card.
2) The machine must be purchased from Pioneer Eclipse or an authorized Pioneer Eclipse Distributor.
3) This warranty extends to the original purchaser only and is not transferable to subsequent owners.
TIME PERIODS
ONE (1) YEAR PARTS AND LABOR - warranted for the fore mentioned time periods to be free from
defects in material and workmanship from date of purchase by the original owners. (See Exclusions)
EXCLUSIONS (Not Covered by Warranty)
1) Parts that fail through normal wear by reason of their characteristics (pads, brushes, belts, bumpers,
skirting, or other consumable parts).
2) This warranty does not extend to parts affected by misuse, neglect, abuse or improper maintenance.
All defective parts must be returned to the Distributor for credit.
3) Motors warranted by motor manufacturer.
THE OBLIGATION OF PIONEER ECLIPSE CORPORATION
1) The obligation of Pioneer Eclipse under this warranty is limited to repairing or replacing, at its option,
any part which is proven to be defective in material or workmanship under normal use for the
applicable period stated above.
2) Warranty repairs will be made by your Pioneer Eclipse Distributor without charge for parts and labor.
3) Parts repaired or replaced under this warranty are warranted only during the balance of the original
warranty period. All defective parts replaced under these warranties become property of Pioneer
Eclipse.
WARRANTY SERVICE
To obtain warranty service, take your machine and proof of purchase to any authorized Pioneer
Eclipse Distributor, preferably to the distributor from whom the machine was purchased. For the
Distributor in your area, call Pioneer Eclipse Customer Service Department at 800-367-3550. If you
are dissatisfied with the service that you receive, call or write Pioneer Eclipse Customer Service
Department for further assistance.
DISCLAIMER OF CONSEQUENTIAL
PIONEER ECLIPSE DISCLAIMS ANY RESPONSIBILITY FOR LOSS OF USER TIME OF THE
PIONEER ECLIPSE MACHINE OR ANY OTHER INCIDENTAL OR CONSEQUENTIAL DAMAGE
EXCEPT AS STATED IN THE WARRANTY APPLICABLE TO EACH MACHINE. EXCEPT AS STATED
IN SUCH WARRANTIES, THE COMPANY DOES NOT OTHERWISE WARRANTY ANY MACHINE
AND NO WARRANTY, EXPRESS, IMPLIED OR STATUTORY IS MADE BY THE COMPANY.
LIMITED WARRANTY
BS300H
TO QUALIFY FOR THIS WARRANTY:
ToOrderPartsCall1-888-702-5326-https://monsterfloorequipmentparts.com

P.O. Box 909
Sparta, NC 28675
1-800-367-3550; 1-336-372-8080
Fax: 1-336-372-2895
LT041100-C, 11/14/06
ToOrderPartsCall1-888-702-5326-https://monsterfloorequipmentparts.com
Table of contents
Other Pioneer Eclipse Scrubber manuals
Popular Scrubber manuals by other brands

Ghibli
Ghibli ROUND 45 E 55 TOUCH Use and maintenance

Abatement Technologies
Abatement Technologies HEPA-AIRE PAS1200 instruction manual

Thermo Scientific
Thermo Scientific Dionex AutoTrace 280 Operator's manual

Crescent
Crescent SC351 troubleshooting guide

Clarke
Clarke Focus S28 Operator's manual

IPC
IPC CT40 R quick guide