Clatronic MRC 498 DT User manual

R
MRC 498 DT
Bedienungsanleitung/Garantie
Instruction Manual/Guarantee
Instrukcja obsługi/Gwarancja
Instrucciones de servicio/Garantía
A használati utasítás/Garanflie
Istruzioni per l’uso/Garanzia
Uhrenradio
Clock Radio
Radio z zegarem
Equipo de música estéréo
Ceas cu RadioCeas cu Radio
Radiosveglia
44083-05-MRC 498 DT 03.12.2002 15:49 Uhr Seite 1

Inhalt
Contents • Spis treści • Indice • Conflinut • Indice
DÜbersicht Bedienelemente . . . . . . . . . . . . . . . . . . . . . . . . . .Seite 3
Bedienungsanleitung . . . . . . . . . . . . . . . . . . . . . . . . . . . . . . .Seite 4
Garantie . . . . . . . . . . . . . . . . . . . . . . . . . . . . . . . . . . . . . . . .Seite 7
GB Control element overview . . . . . . . . . . . . . . . . . . . . . . . . . . .Page 3
Instruction Manual . . . . . . . . . . . . . . . . . . . . . . . . . . . . . . . . .Page 8
Guarantee . . . . . . . . . . . . . . . . . . . . . . . . . . . . . . . . . . . . . .Page 11
PL Przegląd elemet w obsługi . . . . . . . . . . . . . . . . . . . . . . . . .Strona 3
Instrukcja obsługi . . . . . . . . . . . . . . . . . . . . . . . . . . . . . . . .Strona 12
Gwarancja . . . . . . . . . . . . . . . . . . . . . . . . . . . . . . . . . . .Strona 15
EVista de conjunto Elementos de mando . . . . . . . . . . . . . . . .Página 3
Instrucciones de servicio . . . . . . . . . . . . . . . . . . . . . . . . . . . .Página 17
Garantia . . . . . . . . . . . . . . . . . . . . . . . . . . . . . . . . . . . . . . . .Página 20
RO Privire de ansamblu al modului de întrebuinflare . . . . . . . .Paginæ 3
Mod de întrebuinflare . . . . . . . . . . . . . . . . . . . . . . . . . . . . . .Paginæ
Garanflie . . . . . . . . . . . . . . . . . . . . . . . . . . . . . . . . . . . . . .Paginæ 5
IDescrizione dei singoli pezzi . . . . . . . . . . . . . . . . . . . . . . . .Pagina 3
Istruzioni per l’uso . . . . . . . . . . . . . . . . . . . . . . . . . . . . . . . . .Pagina 26
Garanzia . . . . . . . . . . . . . . . . . . . . . . . . . . . . . . . . . . . .Pagina 39
44083-05-MRC 498 DT 03.12.2002 15:49 Uhr Seite 2

Grafik 1:
1. Lautstärke Regler
2. Sendersuchlauf Regler
3. Frequenzband Display
4. Jumbo LCD Display
5. Schlummer Taste
6. Lautsprecher
7. Alarm EIN/AUS Taste
8. Funktionstaste
RADIO/EIN/AUS/AUTO
Rückansicht:
9. Vorrichtung für Wandhalterung
10. Taste zum Einstellen der Uhrzeit
11. Vorwärts/+, 12/24 Stunden Taste
12. Rückwärst/-,°C/°F Temperatur
Taste
13. Weckfunktionstaste
14. Stützen
15. Batteriefach
16. RESET Taste
3
D
Übersicht Bedienelemente:
44083-05-MRC 498 DT 03.12.2002 15:49 Uhr Seite 3

Allgemeine Sicherheitshinweise
Um das Risiko von Feuer oder einem elektrischen Schlag zu vermeiden, sollten
Sie das Gerät nicht Regen oder Feuchtigkeit aussetzen. Das Gerät nicht in
unmittelbarer Nähe von Wasser betreiben (z.B. Badezimmer, Schwimmbecken,
feuchte Keller).
Verwenden Sie das Gerät nur für den vorgesehenen Zweck.
Das Gerät ausschließlich an eine vorschriftsmäßig installierte Steckdose
anschließen. Achten Sie darauf, dass die angegebene Spannung mit der Spannung
der Steckdose übereinstimmt.
Bei Verwendung von externen Netzteilen auf die richtige Polarität und Spannung
achten, Batterien stets richtigherum einlegen.
Das Gerät so aufstellen, dass vorhandene Lüftungsöffnungen nicht verdeckt werden.
Niemals das Gehäuse des Gerätes öffnen. Durch unsachgemäße Reparaturen
können erhebliche Gefahren für den Benutzer entstehen. Bei Beschädigung des
Gerätes, insbesondere des Netzkabels, das Gerät nicht mehr in Betrieb nehmen,
sondern von einem Fachmann reparieren lassen. Netzkabel regelmäßig auf
Beschädigungen prüfen.
Ein defektes Netzkabel darf nur vom Hersteller, unserem Kundendienst oder einer
ähnlich qualifizierten Person durch ein gleichwertiges Kabel ersetzt werden, um
Gefährdungen zu vermeiden.
Benutzen Sie das Gerät längere Zeit nicht, ziehen Sie den Netzstecker aus der
Steckdose, bzw. entnehmen Sie die Batterien.
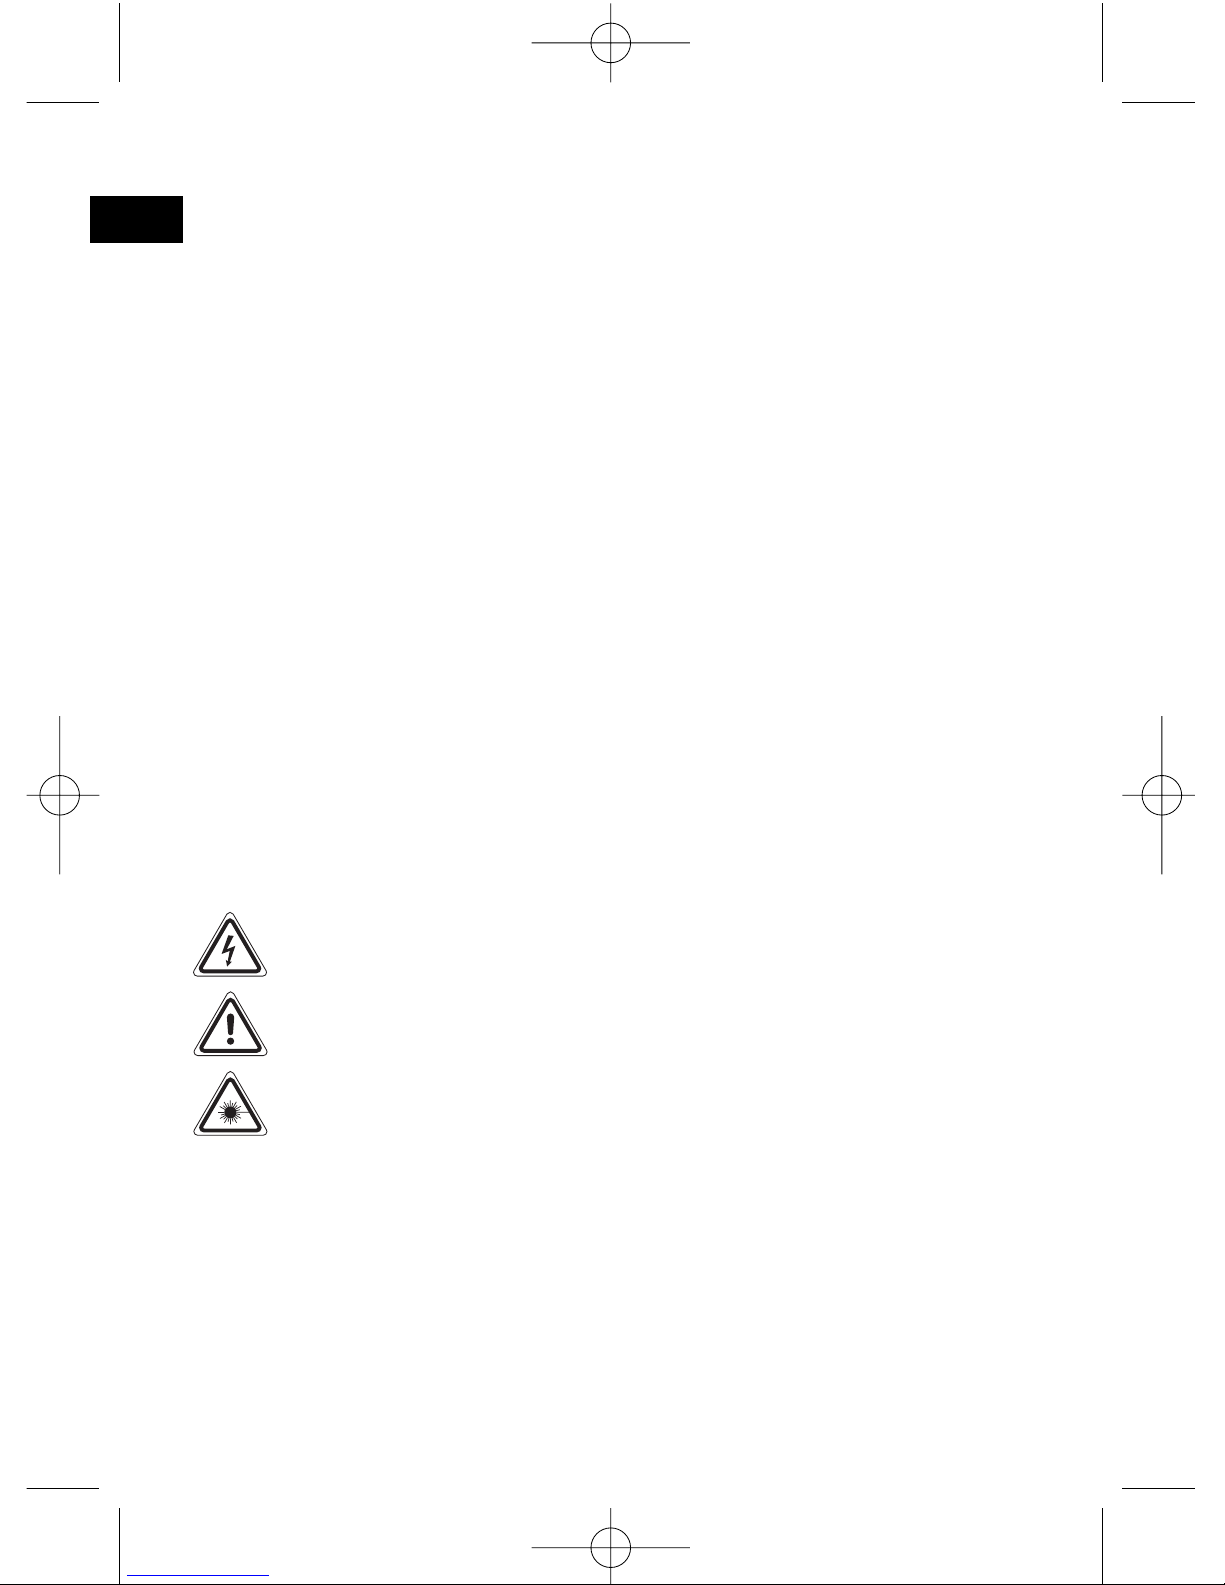
Diese Symbole können sich ggfs. auf dem Gerät befinden und sollen Sie auf fol-
gendes hinweisen:
Das Blitz-Symbol soll den Benutzer auf Teile im Inneren des Gerätes hin-
weisen, die gefährlich hohe Spannungen führen.
Das Symbol mit Ausrufezeichen soll den Benutzer auf wichtige
Bedienungs- oder Wartungs-Hinweise in den Begleitpapieren hinweisen.
Geräte mit diesem Symbol arbeiten mit einem „Klasse 1-Laser“ zur
Abtastung der CD. Die eingebauten Sicherheitsschalter sollen verhindern,
dass der Benutzer gefährlichem, für das menschliche Auge nicht sichtba-
rem Laserlicht ausgesetzt wird, wenn das CD-Fach geöffnet ist.
Diese Sicherheitsschalter sollten auf keinen Fall überbrückt oder manipuliert wer-
den, sonst besteht die Gefahr, dass Sie sich dem Laser-Licht aussetzen.
4
D
44083-05-MRC 498 DT 03.12.2002 15:49 Uhr Seite 4

Inbetriebnahme
Öffnen Sie das Batteriefach, indem Sie die Abdeckung in Richtung OPEN ziehen.
Legen Sie für die Uhr 2 x 1,5V Batterien („AAA“ / UM-4/LR03) und für das Radio 3
x 1,5 V (UM 3/ „AA“/LRG Batterien ein. Achten Sie auf korrekte Polarität. Schließen
Sie das Batteriefach wieder, indem Sie die Abdeckung auflegen und in Richtung
CLOSE schieben.
Sie können das Uhrenradio aufstellen, indem Sie die zwei seitlichen Stützen an der
Rückseite des Gerätes ausklappen. Möchten Sie das Gerät an die Wand hängen,
ist hierfür an der Rückseite eine Vertiefung vorgesehen.
Sendereinstellung
Schieben Sie den Funktionsschalter an der linken Geräteseite auf Position EIN.
Wählen sie durch Drehen des Sender Knopfes (2) einen Sender. Die Senderskala
zeigt die abgestimmte Frequenz an.
Mit dem Lautstärkeregler (1) an der rechten Geräteseite stellen Sie die gewünschte
Lautstärke ein. Möchten Sie das Radio ausschalten, schieben Sie den
Funktionsknopf RADIO/EIN/AUS/Alarm/AUTO (8) auf die Position AUS.
Einstellen der Uhrzeit
1. Stunden: Halten Sie die TIME Taste (10) an der Rückseite des Gerätes
gedrückt, bis die Stundenanzeige zu blinken beginnt.
2. Drücken Sie dann die +/- Tasten (11/12) an der Rückseite Ihres Gerätes, bis
die gewünschte Stunde erreicht ist. Drücken Sie erneut die TIME TASTE (10).
Die Minutenanzeige beginnt zu blinken. Gehen Sie weiter vor, wie unter
Punkt 2 beschrieben.
3. Erneutes Drücken der TIME Taste (10) beginnt die Jahresangabe zu blinken.
Zum Einstellen gehen Sie bitte vor, wie unter Punkt 2 beschrieben.
4. Weiteres Drücken der TIME Taste bringt Sie zu den Einstellungsmöglichkeiten
für Monat und Datum. Der jeweilige Tag wird automatisch verändert, sobald Sie
das Datum ändern.
Sie können die Anzeige der Uhrzeit beliebig auf 24:00 Stunden Anzeige oder 12:00
Stunden Anzeige einstellen, indem Sie +/12/24 Std. Taste drücken. Wird innerhalb
von ca. 15 Sekunden keine Taste gedrückt, schaltet das Gerät automatisch in die
normale Uhrzeitanzeige zurück.
Ein eingebauter Sensor liest die Temperatur und zeigt sie unten rechts auf dem
Display. Die Einstellung kann von Celsius (°C) auf Fahrenheit (°F) umgestellt wer-
den, indem Sie die -/°C/°F TEMP Taste (12) drücken.
5
D
44083-05-MRC 498 DT 03.12.2002 15:49 Uhr Seite 5

Einstellen der Weckzeit
1. Drücken Sie die ALARM Taste, bis die Anzeige im Display zu blinken beginnt.
2. Drücken Sie dann die +/12/24 Std. Taste (11), um vorwärts zu gehen oder
die -/°C/°F TEMP Taste (12), um rückwärts zu gehen, bis die gewünschte
Stunde erreicht ist.
3. Drücken Sie erneut die ALARM Taste. Die Minuten beginnen nun zu blinken.
Gehen Sie weiter vor wie in Punkt 2 beschrieben.
Schieben Sie, zum Aktivieren der Weckfunktion, den Funktionsschalter (8) in
Position AUTO. Im Display leuchtet eine LED auf. Möchten Sie mit einem Signalton
geweckt werden, schieben Sie den RADIO/EIN/AUS/AUTO Knopf (8) in die mittlere
Position. Drücken Sie die EIN/AUS Taste (7), um den Alarm zu aktivieren.
Bei aktivierter Weckfunktion erscheint im Display oben links ein Wecker. Um die
Weckfunktion auszuschalten, drücken Sie die EIN/AUS Taste. Das Symbol im
Display in der oberen linken Ecke wird gelöscht.
Intervall-Weckautomatik
Die automatisch eingestellte Weckfunktion kann mit der Schlummer Taste für ca. 5
Minuten ausgeschaltet werden. Die Weckfunktion schaltet sich nach ca. 1 Stunde,
bis zum nächsten Tag, vollständig ab.
Reinigung
Ziehen Sie vor der Reinigung den Netzstecker.
Reinigen Sie das Gerät mit einem leicht feuchten Tuch ohne Zusatzmittel.
Tauchen Sie das Gerät nicht in Wasser.
Bitte werfen Sie verbrauchte Batterien nicht in den Hausmüll. Führen Sie
Altbatterien einer umweltgerechten Entsorgung zu.
Dieses Gerät entspricht den einschlägigen CE-Richtlinien und
ist nach den neuesten sicherheitstechnischen Vorschriften gebaut.
Technische Änderungen vorbehalten!
6
D
44083-05-MRC 498 DT 03.12.2002 15:49 Uhr Seite 6

Garantie
Wir übernehmen für das von uns vertriebene Gerät eine Garantie von 24 Monaten
ab Kaufdatum (Kassenbon).
Innerhalb der Garantiezeit beseitigen wir unentgeltlich die Mängel des Gerätes, die
auf Material- oder Herstellungsfehler beruhen, durch Reparatur oder, nach unserer
Entscheidung, durch Umtausch. Garantieleistungen bewirken weder eine
Verlängerung der Garantiefrist, noch beginnt dadurch eine neue Garantiefrist!
Als Garantienachweis gilt der Kaufbeleg. Ohne diesen Nachweis kann kein
kostenloser Austausch oder eine Reparatur nicht kostenlos erfolgen.
Im Garantiefall geben Sie bitte das vollständige Gerät in der Originalverpackung
zusammen mit dem Kassenbon an Ihren Händler.
Defekte an Zubehörteilen führen nicht zum Umtausch des Gerätes, sondern wer-
den kostenlos im Austausch zugesandt. In diesem Fall nicht das Gerät einschicken,
sondern nur das defekte Zubehörteil bestellen! Glasbruchschäden sind grundsätz-
lich kostenpflichtig!
Sowohl Defekte an Verbrauchszubehör bzw. Verschleißteilen (z.B. Motorkohlen,
Knethaken, Antriebsriemen, Ersatzfernbedienung, Ersatzzahnbürsten, Sägeblättern
usw.), als auch Reinigung, Wartung oder der Austausch von Verschleißteilen, fallen
nicht unter die Garantie und sind deshalb kostenpflichtig!
Die Garantie erlischt bei Fremdeingriff.
Nach der Garantie
Nach Ablauf der Garantiezeit können Reparaturen kostenpflichtig vom entsprechen-
den Fachhandel oder Reparaturservice ausgeführt werden.
Service
Verschleißteile (soweit diese nicht vom Fachmann ausgewechselt werden müssen),
Ersatzkannen, Staubsaugerfilterbeutel usw. können Sie mit Angabe des Gerätetyps
unter folgender Telefon-Hotline bestellen:
0 21 52 / 20 06 –6 66
Für die Bestellung via Internet haben wir für Sie folgende e-mail-Adresse
eingerichtet: [email protected]
Interessieren Sie sich für weitere Clatronic-Produkte?
Besuchen Sie doch einmal unsere Homepage unter
www.clatronic.de oder www.clatronic.com
7
D
44083-05-MRC 498 DT 03.12.2002 15:49 Uhr Seite 7

General safety instructions
To avoid the risk of fire or an electric shock, you should not expose the device to
rain or moisture. Consequently, do not use the device in the immediate vicinity of
water - for example near a bath tub, a swimming pool or in a damp cellar.
Use the device only for the intended purpose.
Only connect the device at a properly installed plug socket. Pay attention that the
specified voltage corresponds to the voltage of the plug socket.
When using external mains supply, pay attention to the correct polarity and voltage.
Always place the batteries in the correct direction.
Assemble the device in such a way that the available ventilation openings are not
covered.
Never open the housing of the device. Incorrect repairs can constitute a considera-
ble risk for the user. Should the device become damaged, in particular the mains
supply cable, do not operate the device any longer, but rather have it repaired by an
expert. Check the mains supply cable regularly for damage.
For safety reasons a broken or damaged mains lead may only be replaced by an
equivalent lead from the manufacturer, our customer service department or a
similary qualified person.
If the device is not used for a longer period, remove the plug connector from the
plug socket or take out the batteries.
These symbols may be found on the machine and are intended to indicate the
following:
The lightning symbol should advise the user of parts in the inside of the
device which carry dangerously high voltage levels.
The symbol with an exclamation mark should advise the user of important
operation or maintenance instructions in the accompanying documentation.
Devices bearing this symbol work with a „class 1 laser“ for tracing the CD.
The built-in safety switches should prevent the user being exposed to dan-
gerous laser light, which is invisible to the human eye, when the CD com-
partment is opened.
Under no circumstances should these safety switches be bypassed or manipulated,
as this could result in a danger of exposure to the laser light.
8
GB
44083-05-MRC 498 DT 03.12.2002 15:49 Uhr Seite 8

Controls
Initial Use
Open the battery compartment by moving the cover in the OPEN direction. Insert
two 1.5V batteries (AAA / UM-4/LR03) for the clock, and three 1.5V batteries (UM
3/AA/LRG) for the radio. Ensure the correct polarity of the batteries. Then close the
battery compartment again by placing the cover in position and pushing in the
direction of CLOSE.
The clock radio can be placed in a standing position if the two side supports on the
back of the machine are folded out. If you would prefer to hang the clock radio on
the wall, an indentation is provided for this on the back.
Setting the Stations
Turn the function switch on the left side of the machine to the ON position.
Select a station by turning the station button (2). The station scale shows the fre-
quency which has been set.
The desired volume can be set with the volume control (1) on the right-hand side of
the clock radio. If you would like to switch off the radio, move the
RADIO/ON/OFF/ALARM/AUTO button (8) to the OFF position.
Setting the Time
1. Hours: Keep the TIME button (10) on the back of the machine pressed down
until the hour display begins to flash.
2. Then press the +/- buttons (11/12) on the back of the clock radio until the
desired hour has been reached. Then press the TIME button (10) again.
The minutes display begins to flash. Repeat the procedure described above.
3. When the TIME button (10) is pressed again, the year begins to flash.
Repeat the procedure described in 2 above to set the year.
9
GB
Illustration I:
1. Volume control
2. Station search control
3. Frequency band display
4. Jumbo LCD display
5. Snooze button
6. Loudspeakers
7. Alarm ON/OFF button
8. RADIO/ON/OFF/AUTO
function button
Rear View:
9. Wall mounting device
10.Button for setting the time
11.Forwards/+, 12/24 hour button
12.Backwards/-, °C/°F temperature but-
ton
13.Alarm function button
14.Supports
15.Battery compartment
16.RESET button
44083-05-MRC 498 DT 03.12.2002 15:49 Uhr Seite 9

4. When the TIME button is pressed again, it is possible to set the month and the
date. The weekday changes automatically when the date is altered.
The time can be displayed according to the 12 hour or 24 hour system.
To change from one system to the other, press the +/12/24 hour button.
If no button is pressed within 15 seconds, the machine automatically switches
back to the normal time display.
An integrated sensor reads the temperature and displays it in the bottom right-hand
corner of the display. This can be changed from Celsius (°C) to Fahrenheit (°F) by
pressing the -/°C/°F TEMP button (12).
Setting the Alarm
1. Press the ALARM button until the display begins to flash.
2. Then press the +/12/24 hour button (11) in order to go forwards or the -/°C/°F
TEMP button (12) in order to go backwards until the desired hour has been rea-
ched.
3. Press the ALARM button again. The minutes now begin to flash. Proceed as
described above in item 2.
In order to activate the alarm, move the function button (8) to the AUTO position. An
LED lights up in the display. If you would like to be woken up by a buzzer, move the
RADIO/ON/OFF/AUTO button (8) to the middle position. Press the ON/OFF button
(7) in order to activate the alarm.
When the alarm is activated, an alarm clock symbol appears in the display in the
top left-hand corner. In order to switch off the alarm, press the ON/OFF button. The
symbol in the top left-hand corner of the display disappears.
Automatic Interval Alarm
The alarm can be switched off for approximately 5 minutes with the snooze button.
After approximately 1 hour the alarm switches off completely until the following day.
Cleaning
Always remove the mains plug before cleaning the device.
Clean the machine with a slightly damp cloth without any additives.
Do not immerse the machine in water.
Please do not throw old batteries in the domestic waste, but return them to a suita-
ble location for environmentally-friendly disposal.
10
GB
44083-05-MRC 498 DT 03.12.2002 15:49 Uhr Seite 10

This appliance conforms with the CE directives for radio interference suppression
and low-voltage safety and has been built to meet current safety requirements.
Subject to technical changes without prior notice!
Guarantee
We undertake to guarantee the appliance sold by our company for 24 months as of
the date of purchase (cash receipt).
Within the guarantee period we rectify faults to the machine free of charge which
result from material or manufacturing faults, either by repairing the machine or, or
our discretion, by replacement. Any such repair or replacement associated with the
guarantee shall not cause the guarantee period to be extended, nor be deemed to
be the start of a new guarantee period!
Proof for the warranty is provided by the purchase document. The replacement and
repair will not be performed free of charge without this proof of purchase.
Should the warranty be valid, please consign the complete appliance in its original
packing together with the cash receipt to your local dealer.
Defects to the accessories do not entitle to the change of the appliance. These will
be replaced free of charge. In this case do not send back the appliance. Just order
the faulty accessory! Broken glass parts are replaced at the expense of the owner!
Neither defects to consumables and wearing parts (e.g. motor pistons, kneading
hooks, drive belts, spare remote controls, spare toothbrushes, saw blades, etc.) nor
the cleaning, maintenance or change of wearing parts fall under this warranty and
hence are subject to payment of costs!
The warranty is terminated in case of handling on the part of Third parties.
After the warranty
Once the warranty has expired, repairs can be carried out by specialized technici-
ans or repair services against the payment of the service.
11
GB
44083-05-MRC 498 DT 03.12.2002 15:49 Uhr Seite 11

Ogólne wskazówki związane z bezpieczną obsługą
Urządzenie chronić należy przed deszczem i wilgocią, aby zapobiec groźbie
pożaru lub porażeniu prądem. Nie należy go więc używać w pobliżu wody, a
więc przykładowo w pobliżu wanny, basenu lub w zawilgoconej piwnicy.
Urządzenie należy używać tylko zgodnie z jego przeznaczeniem.
Urządzenie należy podłączyć tylko i wyłącznie do przepisowo zamontowanego
gniazdka.
Proszę zwr cić uwagę na to, żeby podane napięcie zgadzało się z napięciem w
gniazdku.
W przypadku używania oddzielnych zasilaczy należy zwr cić uwagę na bieguno-
wość i napięcie, baterie muszą zostać włożone do urządzenia zgodnie z oznac-
zoną biegunowością.
Urządzenie należy w taki spos b ustawić, żeby istniejące otwory wentylacyjne
nie zostały przykryte.
Nigdy nie wolno otwierać obudowy urządzenia. Niefachowo przeprowadzone
naprawy mogą być groźne w skutkach dla użytkownika. Przy uszkodzeniu
urządzenia, w szczeg lności kabla sieciowego, urządzenie nie może być
używane dop ki nie zostanie naprawione przez osobę z wymaganymi uprawnie-
niami. Kabel sieciowy należy regularnie sprawdzać, czy nie jest uszkodzony.
W celu uniknięcia niebezpieczeństwa, uszkodzony kabel podłączenia do sieci
może być wymieniany na kabel tej samej jakości wyłącznie przez producenta,
nasz serwis lub inną osobę o odpowiednich kwalifikacjach.
Jeżeli urządzenie nie będzie przez dłuższy czas używane, należy wyciągnąć
wtyczkę z gniazdka lub wyjąć baterie.
Poniższe symbole mogą znajdować się na urządzeniu i mają zwracać Państwa
uwagę na:
Symbol błyskawicy ma zwr cić uwagę użytkownika na znajdujące się
we wnętrzu urządzenia części, kt re są pod niebezpiecznie wysokim
napięciem.
Symbol z wykrzyknikiem ma zwr cić uwagę użytkownika na znajdujące
się w załączonych dokumentach ważne wskaz wki związane z obsługą
i konserwacją urządzenia.
Urządzenia z tym symbolem używają do odczytywania dźwięku z płyty
kompaktowej „Lasera klasy ą“. Wbudowany wyłącznik bezpieczeństwa
ma zapobiec temu, żeby użytkownik w czasie otwierania kieszeni odt-
warzacza płyt kompaktowych został poddany niebezpiecznemu dla
ludzkich oczu oddziaływaniu niewidocznego światła lasera.
12
PL
44083-05-MRC 498 DT 03.12.2002 15:49 Uhr Seite 12

Wyłącznika tego nie należy w żadnym wypadku zmostkować lub też przy nim
manipulować, ponieważ grozi to niebezpieczeństwem, że użytkownik poddany
zostanie oddziaływaniu niebezpiecznego dla ludzkich oczu niewidocznego
światła lasera.
Elementy obsługi
Uruchomienie
Proszę otworzyć pojemnik na baterie pociągając za pokrywę w kierunku OPEN.
Dla zegarka proszę umieścić 2 baterie a 1,5 V („AAA” /Um-4 /LR03), dla radia 3
baterie a 1,5 V (UM3 /”AA” /LRG). Proszę pamiętać o poprawnym umieszczeni
ich biegun w. Następnie proszę zamknąć pojemnik na baterie umieszczając na
nim pokrywę i przesuwając ją w kierunku CLOSE.
Aby postawić radio z zegarem należy rozłożyć dwa wsporniki znajdujące się na
tylnej stronie urządzenia. Gdy pragniecie Państwo zawiesić radio na ścianie, do
tego celu przewidziane zostało zagłębienie umieszczone na tylnej ściance
urządzenia.
13
PL
Grafika 1:
1. Regulator głośności
2. Pokrętło poszukiwania stacji
3. Wyświetlacz pasma częstotliwości
4. Wyświetlacz ciekłokrystaliczny
Jumbo
5. Przycisk trybu drzemania
6. Głośnik
7. Przycisk włączania / wyłączania
alarmu
8. Przycisk funkcyjny RADIO/WŁĄCZ/
WYŁĄCZ /AUTO
Strona tylna:
9. Element do montażu naściennego
10. Przycisk do ustawiania godziny
11. Przycisk przestawiania do przodu
/+, 12/24 godziny
12. Klawisz ustawiania do tyłu/-, przy-
cisk oC/oF
13. Przycisk funkcyjny budzika
14. Wsporniki
15. Pojemnik na baterie
16. Przycisk RESET
44083-05-MRC 498 DT 03.12.2002 15:49 Uhr Seite 13

Ustawienie stacji radiowej
Przycisk funkcyjny znajdujący się na lewej stronie urządzenia proszę ustawić w
pozycji WŁĄCZ.
Pokręcając gałką służącą do wyboru stacji nadawczej (2) proszę wybrać stację
radiową. Na skali pokazuje się wybrana częstotliwość.
Za pomocą regulatora głośności znajdującego się po prawej stronie urządzenia
proszę ustawić głośność. Gdy pragniecie Państwo wyłączyć radio, wtedy
należy przesunąć przycisk funkcyjny RADIO/ WŁĄCZ /WYŁĄCZ /Alarm /AUTO
(8) na pozycję WYŁĄCZ.
Ustawianie godziny
1. Ustawianie godziny: Przycisk TIME (10) znajdujący się na tylnej stronie urząd-
zenia należy tak długo przytrzymać, aż wskazywana godzina zacznie migać.
2. Następnie należy przyciskać klawisze +/- (11/12) znajdujące się na stronie
tylnej urządzenia tak długo, aż ustawimy właściwą godzinę. P źniej należy
ponownie nacisnąć przycisk TIME (10). Wskazywane minuty zaczynają
migać. Przy ustawianiu minut należy postępować tak, jak zostało to opisane
w punkcie 2.
3. Ponowne wciśnięcie przycisku TIME (10) powoduje pulsowanie wskaźnika
roku. Aby ustawić rok należy postępować tak, jak zostało to opisane w
punkcie 2.
4. Dalsze wciskanie przycisku TIME (10) umożliwia nam ustawianie miesiąca i
daty. Każdy dzień tygodnia jest zmieniany automatycznie z chwilą zmiany
daty.
Wyświetlanie godziny może zostać ustawione na wyświetlanie 24 - godzinowe
lub 12 - godzinowe, przełączenie tej funkcji możliwe jest poprzez wciśnięcie
przycisku +/12/24 godz. Jeżeli w ciągu ok. 15 sekund nie zostaje wciśnięty
kolejny klawisz wtedy urządzenie przełącza automatycznie na normalne
wyświetlanie czasu.
Zintegrowany czujnik odczytuje temperaturę, kt ra wyświetlana jest na wyświet-
laczu znajdującym się w prawym dolnym rogu urządzenia. Wciskając przycisk -
/oC/oF (12) możemy zmienić ustawienie ze stopni Celciusza (oC) na stopnie
Fahrenheita (oC).
Ustawianie budzenia
1. Proszę wciskać przycisk ALARM, aż wyświetlana na wyświetlaczu informacja
zacznie migać.
2. Aby przestawiać do przodu proszę wciskać przycisk +/12/24 godz. (11),
przycisk -/oC/oF TEMP (12) zaś w celu cofnięcia się, aż do momentu osiąg-
nięcia żądanej godziny.
14
PL
44083-05-MRC 498 DT 03.12.2002 15:49 Uhr Seite 14

3. Proszę wcisnąć ponownie przycisk ALARM. Teraz minuty zaczynają migać.
Ustawiając je proszę postępować zgodnie z opisem podanym w punkcie 2.
W celu aktywowania funkcji „budzenie” proszę przesunąć klawisz funkcyjny (8)
w pozycji AUTO. Na wyświetlaczu zaświeci się dioda. Jeżeli pragniecie Państwo
być budzeni sygnałem alarmowym, proszę przesunąć przycisk funkcyjny RADIO
/WŁĄCZ /WYŁĄCZ /AUTO (8) do pozycji środkowej. Aby uruchomić alarm
proszę wcisnąć przycisk WŁĄCZ /WYŁĄCZ.
Przy aktywnej funkcji budzenia na wyświetlaczu w g rnym lewym rogu pojawi
się symbol budzika. Aby wyłączyć funkcję budzenia proszę wcisnąć przycisk
WŁĄCZ /WYŁĄCZ. Symbol w g rnym lewym rogu wyświetlacza zniknie.
Przerywana automatyka budzenia
Automatycznie ustawiona funkcja budzenia może zostać wyłączona na ok. 5
min. poprzez wciśnięcie przycisku „drzemanie”. Funkcja budzenia wyłącza się
po ok. 1 godzinie do następnego dnia.
Czyszczenie
Przed przystąpieniem do czyszczenia należy wyłączyć urządzenie z sieci.
Urządzenie należy czyścić lekko wilgotną szmatką bez dodatkowych substancji.
Proszę nie zanurzać urządzenia w wodzie.
Zużytych baterii proszę nie wyrzucać do zwykłych śmieci lecz usunąć je do
odpad w specjalnych.
Niniejsze urządzenie odpowiada normom CE sieci tradiowo-telewizyjnej i
bezpieczeństwa niskonapięciowego oraz zbudowane jest według najnowszej
techniki bezpieczeństwa pracy.
Zastrzega się prawo do zmian technicznych!
ARUNKI G ARANCJI
Przyznajemy 24 miesięcy gwarancji na produkt licząc od daty zakupu.
W tym okresie będziemy bezpłatnie usuwać w terminie 14 dni od daty dostarcze-
nia wadliwego sprzętu z kartą gwarancyjną do miejsca zakupu wszystkie uszko-
dzenia powstałe w tym urządzeniu na skutek wady materiał w lub wadliwego
wykonania, naprawiając oraz wymieniając wadliwe części lub (jeśli uznamy za sto-
sowne) wymieniając całe urządzenie na nowe.
Sprzęt do naprawy powinien być dostarczony w komplecie wraz z dowodem
zakupu oraz z ważną kartą gwarancyjną do sprzedawcy w miarę możliwości w
15
PL
44083-05-MRC 498 DT 03.12.2002 15:49 Uhr Seite 15

oryginalnym opakowaniu lub innym odpowiednim dla zabezpieczenia przed uszko-
dzeniem. W razie braku kompletnego opakowania fabrycznego, ryzyko uszkodze-
nia sprzętu podczas transportu do i z miejsca zakupu ponosi reklamujący.
Naprawa gwarancyjna nie dotyczy czynności przewidzianych w instrukcji obsługi,
do wykonania kt rych zobowiązany jest użytkownik we własnym zakresie i na
własny koszt.
Gwarancja nie obejmuje:
• mechanicznych, termicznych, chemicznych uszkodzeń sprzętu i wywołanych
nimi wad,
• uszkodzeń powstałych w wyniku działania sił zewnętrznych takich jak wyłado-
wania atmosferyczne, zmiana napięcia zasilania i innych zdarzeń losowych,
• nieprawidłowego ustawienia wartości napięcia elektrycznego, zasilanie z nieod-
powiedniego gniazda zasilania,
• sznur w połączeniowych, sieciowych, żar wek, baterii, akumulator w,
• uszkodzeń wyrobu powstałych w wyniku niewłaściwego lub niezgodnego z
instrukcją jego użytkowania, przechowywania, konserwacji, samowolnego
zrywania plomb oraz wszelkich przer bek i zmian konstrukcyjnych dokonanych
przez użytkownika lub osoby niepowołane,
• roszczeń z tytułu parametr w technicznych wyrobu, o ile są one zgodne z
podanymi przez producenta,
• prawidłowego zużycia i uszkodzeń, kt re mają nieistotny wpływ na wartość lub
działanie tego urządzenia.
Karta gwarancyjna bez pieczątki sklepu, daty sprzedaży, nie wypełniona, źle
wypełniona, ze śladami poprawek, nieczytelna wskutek zniszczenia, bez
możliwości ustalenia miejsca sprzedaży oraz dołączonego dowodu zakupu jest
nieważna.
Korzystanie z usług gwarancyjnych nie jest możliwe po upływie daty ważności
gwarancji. Gwarancja na części lub całe urządzenie, kt re są wymieniane kończy
się, wraz z końcem gwarancji na to urządzenie.
Wszystkie inne roszczenia, wliczając w to odszkodowania są wykluczone chyba, że
prawo przewiduje inaczej. Roszczenia wykraczające poza tą umowę nie są
uwzględniane przez tą gwarancję.
Gwarancja oraz zawarte w niej warunki obowiązują na terenie Rzeczpospolitej
Polskiej.
16
PL
44083-05-MRC 498 DT 03.12.2002 15:49 Uhr Seite 16

Indicaciones generales para su seguridad
Vd. no debe dejar expuesto el aparato ni a la lluvia ni a la humedad, a fin de dismi-
nuir así el riesgo de incendio o de sacudida eléctrica.
Por tanto, no debe utilizar el aparato cerca de agua – por ejemplo, cerca de la
bañera, de una piscina o de un sótano húmedo.
Utilice el aparato únicamente para la finalidad para la que ha sido construido.
El aparato se ha de conectar únicamente a una caja de toma de corriente instalada
reglamentariamente. Cerciórese de que la tensión indicada concuerda con la ten-
sión de la caja de enchufe.
Preste atención a que sea correcta la polaridad cuando se empleen fuentes de ali-
mentación externas. Las pilas se han de introducir siempre correctamente.
El aparato se ha de dejar puesto de modo que no se tapen los orificios de airea-
ción existentes.
Jamás se abrirá la carcasa del cuerpo del aparato. Las reparaciones mal hechas
pueden generar considerables peligros para el usuario.
En caso de estar deteriorado el aparato, en especial el cable de conectar a red, ya
no se ha de poner más en servicio el aparato, sino que se hará que lo repare un
especialista. Controle periódicamente el cable de conexión a red para ver si se ha
deteriorado.
Sólo el fabricante, nuestro servicio posventa o un técnico con una cualificación
similar pueden cambiar un cable defectuoso por otro similar, para evitar todo tipo
de riesgo.
Saque de la toma de corriente la clavija de conectar a la red o bien quite las pilas
cuando no se vaya a usar el aparato durante largo tiempo.
Estos símbolos pueden encontrarse en caso dado en el aparato, y son para indicar
lo siguiente:
El símbolo del rayo advierte al usuario que hay componentes internos del
aparato que pueden tener tensiones peligrosamente altas.
El símbolo con el signo de exclamación advierte al usuario que hay
instrucciones de manejo y de mantenimiento importantes en la docu-
mentación que va adjunta.
Aparatos que llevan puesto este símbolo operan con un ”Lector Clase 1”
para explorar el CD. Los interruptores de seguridad incorporados sirven
para impedir que el usuario esté expuesto a luz láser invisible peligrosa
para la vista del usuario cuando está abierto el compartimiento del CD.
Bajo ningún concepto se ha de hacer un puenteado sobre estos interruptores de
seguridad ni deben ser manipulados. De hacerlo, existe el peligro de que Vd. esté
expuesto a la luz láser.
17
E
44083-05-MRC 498 DT 03.12.2002 15:49 Uhr Seite 17

Elementos de mando
Puesta en servicio
Abra el compartimento de baterías, tirando de la cubierta en dirección OPEN. Para
el reloj coloque 2 baterías de 1,5 V (“AAA“ / UM-4 / LR03) y para la radio 3 baterías
de 1,5 V (UM3 / “AA“ / LRG). Tenga atención de la polaridad correcta. Cierre el
compartimento de nuevo, colocando la cubierta en su sitio y empujando en direc-
ción CLOSE. Puede colocar el radioreloj sobre una base, abriendo los dos sopor-
tes laterales que se encuentran en la parte trasera del aparato. En caso que quiera
colocar el aparato en la pared, se tiene previsto una hendidura.
Ajuste de las emisoras
Empuje la tecla de función que se encuentra en la parte izquierda del aparato a la
posición EIN. Girando el botón (2) puede elegir una emisora. La escala de emiso-
res indica la frecuencia sintonizada. Con el regulador de volumen (1) que se encu-
entra en la parte derecha del aparato, puede ajustar el volumen deseado. Si quiera
desconectar la radio, empuje la tecla de función RADIO/EIN/AUS/Alarm/AUTO (8)
a la posición AUS.
Ajuste del horario
1. Horas: Mantenga la tecla TIME (10) que se encuentra en la parte trasera del
aparato presionada, hasta que empiece a parpadear la indicación de las horas.
2. Después presione las teclas +/- (11/12) que se encuentran en la parte trasera
de su aparato hasta que haya alcanzado el horario deseado. Presione de nueve
la tecla TIME (10). La indicación de los minutos empieza a parpadear.
18
E
Gráfico 1:
1. Regulador de volumen
2. Regulador de exploración
automática
3. Visualizador de la banda de
frecuencias
4. Visualizador LCD Jumbo
5. Tecla de sueño
6. Altavoz
7. Tecla alarma conectado/
desconectado
8. Tecla de función RADIO/CONECTA-
DO / DESCONECTADO/AUTO
Vista posterior:
9. Dispositivo para la fijación en la
pared
10.Tecla para ajustar el horario
11.Tecla de avance/+, 12/24 horas
12.Tecla de retroceso/-, ºC/ºF, tempera-
tura
13.Tecla para la función de despertar
14.Soportes
15.Compartimiento de baterías
16.Tecla RESET
44083-05-MRC 498 DT 03.12.2002 15:49 Uhr Seite 18

Proceda de la misma manera como indicado bajo el punto 2.
3. Si presiona de nueve la tecla TIME (10) empieza a parpadear la indicación del
año. Para el ajuste del año, proceda por favor de la misma manera como indica-
do bajo el punto 2.
4. Si presiona otra vez la tecla TIME podrá ajustar el mes y la fecha. El día corre-
spondiente se cambiará de forma automática, en el momento que usted cambie
la fecha.
Puede ajustar su indicación del horario a su gusto a la indicación de 24:00 horas o
a la indicación de 12:00 horas. Para ello presione la tecla +/12/24 horas. Si en unos
15 segundos no se ha presionado ninguna tecla, el aparato se ajusta automática-
mente a la indicación normal del horario.
Un sensor integrado capta la temperatura y la indica abajo a la derecha en el
visualizador. El ajuste se puede cambiar de Celsio (ºC) a Fahrenheit (ºF), presio-
nando la tecla -/ºC/ºF (12).
Ajuste del horario de despertar
1. Presione la tecla ALARM hasta que la indicación en el visualizador comience a
parpadear.
2. Después presione la tecla +/12/24 horas (11) para avanzar o la tecla -/ºC/ºF
TEMP (12) para retroceder, hasta que haya alcanzado el horario deseado.
3. Presione de nuevo la tecla ALARM. Ahora empiezan a parpadear los minutos.
Proceda de la misma manera como indicado bajo el punto 2.
Para activar la función de despertar, empuje la tecla de función (8) en la posición
AUTO. En el visualizador se ilumina un LED. Si quiere ser despertado con un tono
de señal, empuje la tecla RADIO/EIN/AUS/AUTO (8) a la posición mediana.
Presione la tecla conectado / desconectado (EIN/AUS) (7) para activar el alarma.
En caso de que tenga la función de despertar activada, aparecerá arriba a la
izquierda en el visualizador un despertador. Para desactivar la función de despert-
ar, presione la tecla EIN/AUS (7). El símbolo en el visualizador arriba a la izquierda
desaparecerá.
Automática de despertar en intervalos
La función de despertar ajustada de forma automática, se podrá desconectar por
unos 5 minutos con la tecla de sueño. La función de despertar se desconectará
después de aprox. 1 hora, hasta el próximo día.
19
E
44083-05-MRC 498 DT 03.12.2002 15:49 Uhr Seite 19

Limpieza
Antes de la limpieza retire la clavija de la caja de enchufe.
Limpie el aparato con un paño levemente humedecido sin aditivos.
No sumerja el aparato en agua.
Por favor no tire las baterías usadas en la basura ordinaria. Realice el deshecho de
baterías usadas respetando el medio ambiente.
Este aparato responde a las directivas de CE para la supresión de interferencias y
la seguridad de baja tensión y ha sido construido según las últimas prescripciones
de seguridad técnica.
No reservamos el derecho de efectuar modificaciones técnicas.
Garantía
Este producto está garantizado por nosotros durante 24 meses a partir de la fecha
de adquisición (factura de compra).
Dentro del tiempo de garantía nos responsabilizamos gratuítamente de todos los
defectos del aparato que sean originados por defectos de material o de fabricación.
¡La posible reparación o según nuestro criterio el recambio del aparato, no efectua
una alargación del tiempo de garantía ni el comienzo de un nuevo tiempo de
garantía!
La garantía tendrá validez con la factura de compra. Si no dispone de la factura no
se podrá realizar el cambio o la reparación de forma gratuita.
En caso de garantía debe llevar el producto completo con el embalaje original y la
factura de compra a su establecimiento de adquisición.
En caso de que un accesorio esté defectuoso no quiere decir que se cambie todo
el aparato, sino el accesorio defectuoso se recambiará enviando gratuitamente uno
en buen estado. ¡En este caso no envie todo el aparato, sino encargue solamente
el accesorio defectuoso! ¡En caso de roturas de vidrio, el fabricanteno se hará
cargo de los gastos!
¡Defectos en accesorios de consumo o en piezas de desgaste (p.ej. escobillas de
carbón del motor, varillas amasadoras, correas de transmisión, mando a distancia
de repuesto, cepillos de dientes de repuesto, hojas de sierra etc.) o también la lim-
pieza, mantenimiento o recambio de piezas de desgaste no recaen en la garantía
e irán al cargo del cliente!
La garantía no tendrá validez si el defecto es ocasionado por tercera personas.
20
E
44083-05-MRC 498 DT 03.12.2002 15:49 Uhr Seite 20
Table of contents
Languages:
Other Clatronic Clock Radio manuals