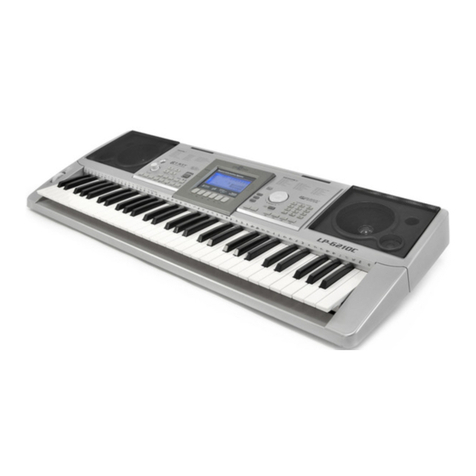
Clavitech CK62 User manual


Thank you for purchasing this digital instrument. For perfect operation and security,
please read the manual carefully and keep it for future reference.
Precaution
Safety Precautions
Important Safety Instructions
DO NOT OPEN
RISK OF ELECTRIC SHOCK
CAUTION
The lightning flash with arrowhead symbol within an equilateral triangle is in
tended to alert the user to the presence of uninsulated “dangerous voltage”
Within the product s enclosure that may be of sufficient magnitude to constitute a
risk of electric shock to persons.
The exclamation point within an equilateral triangle is intended to alert the user
to the presence of important operating and maintenance(servicing) instructions in
the literature accompanying the product.
’
1) Read these instructions.
2) Keep these instructions.
3) Heed all warnings.
4) Follow all instructions.
5) Do not use this apparatus near water.
6) Clean only with dry cloth.
7) Do not block any ventilation openings, install in accordance with the manufacturer's instructions.
8) Do not install near any heat sources such as radiators, heat registers, stoves, or other apparatus
(including amplifiers) that produce heat.
9) Do not defeat the safety purpose of the polarized or grounding-type plug. A polarized plug has two blades
with one wider than the other. A grounding type plug has two blades and a third grounding prong. The wide
blade or the third prong are provided for your safety, if the provided plug does not fit into your outlet.
consult an electrician for replacement of the obsolete outlet.
10)Protect the power cord from being walked on or pinched particularly at plugs. convenience receptacles,
and the point where they exit from the apparatus.
11)Only use attachments/accessories specified by the manufacturer.
12)Use only with the cart, stand, tripod, bracket, or table specified by the manufacturer, or sold with the
apparatus. When a cart is used, use caution when moving the cart/apparatus combination to avoid injury
from tip-over (Figure 1).
13)Unplug this apparatus during lightning storms or when unused for a long periods fo time.
14)Refer all servicing to qualified service personnel. Servicing is required when the apparatus has been dam
aged in any way, such as power-supply cord or plug is damaged, liquid has been spilled or objects have
fallen into the apparatus, the apparatus has been exposed to rain or moisture, does not operate normally, or
has been dropped.
WARNING: To reduce the risk of fire or electric shock, do not expose this apparatus to rain or moisture.
CAUTION: Apparatus shall not be exposed to dripping or splashing and no objects filled with liquids,
such as vases, shall be placed on the apparatus.
Always make sure all batteries are inserted in conformity with the +/- polarity markings.
Always replace all batteries at the same time. Do not use new batteries together with old ones. Also,
do not mix battery types, since this can cause overheating, fire, or battery fluid leakage.
Remove the batteries from the instrument if it is not to be used for a long time.
(Figure 1)

Thanks For Using Our Electronic Keyboard
Your instrument is a high-quality electronic keyboard with 61standard size
keyboard and combines the advanced PCM tone generation technology. Your
instrument has 100 voices and 100 accompaniment styles that can be used to provide
fully-orchestrated Auto Accompaniment.
In order to obtain maximum performance and enjoyment, please read this manual
thoroughly while trying out the various features described.

Contents
-1-
Panel Control 2
Basic Operation 4
Turn On…………………………………………………………………………… 4
Use Battery………………………………………………………………………… 4
Adjust Main Volume……………………………………………………………… 4
Setting Music Rest………………………………………………………………… 5
Demo Songs……………………………………………………………………… 5
Connection…………………………………………………………………………… 7
Power Socket……………………………………………………………………… 7
Headphone………………………………………………………………………… 7
Line Out…………………………………………………………………………… 7
Voice………………………………………………………………………………… 8
Select a Voice……………………………………………………………………… 8
Grand Piano button………………………………………………………………… 8
Percussion button………………………………………………………………… 8
Effect………………………………………………………………………………… 9
Sustain……………………………………………………………………………… 9
Vibrato……………………………………………………………………………… 9
Auto Accompaniment……………………………………………………………… 10
Select a Style……………………………………………………………………… 10
Start/Stop a Style………………………………………………………………… 10
Synchro…………………………………………………………………………… 10
Chord Function…………………………………………………………………… 11
Normal…………………………………………………………………………… 12
Fill In……………………………………………………………………………… 12
Accomp. ………………………………………………………………………… 13
Tempo…………………………………………………………………………… 13
Metronome……………………………………………………………………… 13
Recording Function……………………………………………………………… 14
Start Record……………………………………………………………………… 14
Play……………………………………………………………………………… 14
Program…………………………………………………………………………… 15
Pro.play…………………………………………………………………………… 15
Appendix…………………………………………………………………………… 16
1.Percussion List………………………………………………………………… 16
2.Voice List……………………………………………………………………… 17
3.Style List……………………………………………………………………… 18
4.Specifications………………………………………………………………… 19
…………………………………………………………………………
………………………………………………………………………

SUSTAIN VIBRATO
GRAND PIANO PERCUSSION
ONE KEY FOLLOW
LOOP ALL LOOP ONE
FILL IN SINGLE FINGERED NORMAL METRONOME
ACCOMPANIMENT CONTROL
DEMO
VOICE
RECORD
STYLE
DEMO
VOICE
00 Piano
01 Banjo
02 Vibes
03 Flute
04 Violin
05 Pipeorgan
06 Oboe
07 Trumpet
08 Guitar
09 Bass
10 E Piano
11 Harpsichord
12 Bell
13 Pan Flute
14 Strings
15 Organ
16 Clarinet
17 Sybrass
18 Accordion
19 E bass
20 Echo Violin
21 Echo Panflute
22 Echo Bass
23 Echo Viola
24 Echo Trumpet
25 Echo Accordion
26 Echo Vibes
27 Echo Strings
28 Echo Cello
29 Echo Organ
30 Echo Flute
31 Echo Piccolo
32 Echo Acoustic Bass
33 Echo Guitar
34 Echo Recorder
35 Sustain Piano
36 Sustain Vibes
37 Sustain Organ
38 Sustain Guitar
39 Sustain Bass
40 Short Piccolo
41 Short Guitar
42 Short Trumpet
43 Short Piano
44 Short Organ
45 Short Bright Grand Piano
46 Short Flute
47 Short Bass
48 Short Strings
49 Short Sybrass
50 Short Pan Flute
51 Short Electric Bass
52 Short Banjo
53 Short Acoustic Bass
54 Short Vibes
55 Short Acoustic Guitar
56 Short Shakuhachi
57 Short Violin
88 Ballad Rock
89 Beijin
90 Vienna Waltz
91 West Country
92 Jazz Ballad
93 Bujel
94 Kasha
95 Detroit Rock
96 Synth Jazz
97 Slow Fox Trot
98 Old Rock
99 Jamaica
43 Modern Tango
44 Modern Disco
45 Classic Waltz
46 Normal Rock
47 Mix Rock
48 Fast Swing
49 Africa Cariban Dance
50 Rock Disco
51 Lullaby1
52 Mix Pop 8 Beat
53 Rock Cha-Cha Dance
54 Fast Disco
55 Classic Rhumba
56 16 Beat Mambo
57 Argentina Tango
58 8 Beat Bossanova
59 Country Cha-Cha
60 Pop 8 Beat
61 Brazil Cha-Cha 2
62 Mix Cariban Dance
63 Slow Waltz
64 Country Rock
65 Brazil Samba
66 Slow Bossanova
67 Pop 16 Beat
68 Lullaby2
69 Slow Rock
70 Pop 8 Beat 2
71 Habanela Dance
72 Fast Jazz
73 Indonesia Dance
74 Jazz Samba
75 England Dance
76 Cariban Negro
77 Aboil Rock
78 Latin Disco
79 Hot Latin
80 New Orleans Jazz
81 Genius Disco
82 Floor Bear
83 Mix Dance
84 Europe Beat
85 Mix Soul
86 Big Bear
87 Soul
MASTER VOLUME
ACCOMP.
TEMPO
VOICE
STYLE
SYNCHRO START/STOP RECORD PLAY PROGRAM PRO.PLAY
RECORDING FUNCTION
POWER
ON OFF
STY LE
58 Short Music Box
59 Short Organ
60 Viola
61 Astro1
62 FX (Trumpet)
63 FX (Guitar)
64 FX (Acouctzc bass)
65 Shakuhachi
66 Glockenspiel
67 Viola
68 Astro2
69 FX (Vibes)
70 FX (Violin)
71 Rock Organ
72 FX (Picclol)
73 FX (Flute)
74 FX (String)
75 Bassoon
76 String Ensemble
77 Astro3
78 Percussive Organ
79 English Horn
80 Violin
81 Ocarina
82 Electric Guitar (muted)
83 Tremolo Strings
84 Electric Bass (finger)
85 Bright Acoustic Piano
86 Recorder
87 Music Box
88 Astro4
89 Acoustic Guitar(steel)
90 Honky-tonk Piano
91 Lead(sawtooth)
92 Trombone
93 Church Organ
94 Piccolo
95 Electric Guitar(jazz)
96 Acoustic Guitar(nylon)
97 Fiddle
98 Astro5
99 Marimba
00 Disco
01 8 Beats
02 Rock & Roll
03 Rhumba
04 Tango
05 March
06 Country
07 Bossanova
08 Waltz
09 Cha-Cha
10 Pops
11 16 Beats
12 New Slow Rock
13 Samba
14 Swing
15 Polka
16 Mambo
17 Cariban Dance
18 Lullaby
19 Blue Grass
20 Africa Dance
21 Blue Rhumba
22 South Africa Swing
23 Country Jazz
24 Country Samba
25 Emotion Pops
26 India blue Grass
27 8 Beats Swing
28 Cariban Dance 2
29 Pops Dance
30 16 Beats Blue Grass
31 Sing Disco
32 4 Beats Mambo
33 Brazil Cha-Cha 1
34 Argentina Mambo
35 Classic Waltz
36 Mix Cariban Dance
37 Blue Grass
38 India Disco
39 16 Beats Pops
40 8 Beats Mambo
41 Hotdog Cariban Dance
42 Swing Pops
Panel Controls
LIN E OUT PHONES DC 9-12V
MASTER VOLUME
ACCOMP.
TEMPO
SUSTAIN VIBRATO
GRAND PIANO PERCUSSION
ONE KEY FOLLOW
LOOP ALL LOOP ONE
VOICE
STYLE
SYNCHRO START/STOP FILL IN SINGLE FINGERED NORMAL METRONOME RECORD PLAY PROGRAM PRO.PLAY
ACCOMPANIMENT CONTROL RECORDING FUNCTION
DEMO
POWER
ON OFF
VOICE
RECORD
STYLE
DEMO
LINE OUT PHONES DC 9-12V
1 2 3
4 5 6
7 8 9
-0 +
1 2 3
4 5 6
7 8 9
-0 +
1
2
3
4
5
6 7
8 9
10
11
12
13
14
15
16 17 18
-2-

Top Panel
1. Power(on/off)
2. LED Display
3. Master Volume +/-
4. Accomp. +/-
5. Tempo +/-
6. Sustain
7. Vibrato
8. Grand Piano
9. Percussion
10. Accompaniment Control
Synchro
Start/Stop
Fill In
Single
Fingered
Normal
Metronome
11. Demo
One Key
Follow
Loop All
Loop One
12. Voice
13. Style
14. Number(0-9/+/-)
15. Recording Function
Record
Play
Program
Pro.play
Rear Panel
16. Line Out
17. Phones
18. DC 9-12V
-3-

Basic Operation
AC POWER
Turn On the Power
Plug the DC output cable from the Power adaptor into the
DC 9-12V jack on the rear panel of your instrument , then plug
the Power adaptor (or the AC cable of the Power Adaptor) into
a convenient wall AC power socket, then turn the power on.
The instrument use 6×1.5V D size battery. When the batteries need to be replaced, the volume
may be reduced, the sound may be distorted, and other problems may be occurred. Please change
new battery after turn off the power.
1. open the battery compartment cover located on the bottom of the instrument.
2. Insert six new batteries, be careful to follow the polarity markings on the inside of the compartment.
3. Replace the batteries run down, replace them with a complete set of six new batteries,
never mix old and new batteries, do not use different kinds of batteries at the same time, to prevent
possible damage due to battery leakage, remove the batteries from the instrument if it is not to be
used for an extended period of time.
Use Battery
Adjust Main Volume
Use [MASTER VOLUME+/-] button to adjust the main volume,Range:00~15
MASTER VOLUME
-4-

Setting Music Rest
Please set up the music rest as the instruction below:
Demo Songs
There are 12 preset demo songs that you can play and learn individually.
1 Jingle bells
2 For Elise
3 If you are happy and you know it, clap your hands
4 Swan lake
5 We wish you a merry Christmas
6 Beautiful blue Danube
7 Turkish march
8 the childhood
9 Green sleeves
10 Yankee doodle
11 Music-box dancer
12 the poem for love
Listen to the Demo Song
Press [LOOP ALL] button, the current song will be played and will automatically play all the
following songs without stopping until the [LOOP ALL] button will not be pressed again.
LOOP ALL LOOP ONE
DEMO
Press [LOOP ONE] button, the current song will be played repeatedly, if you want to select
the next song, please press the [LOOP ONE] button again to stop playing, and then press the same
button again to play the next song.
LOOP ALL LOOP ONE
DEMO
-5-

Learning Function
There are two methods for Learning: [ONE KEY] and [FOLLOW]
Press [ONE KEY] to learn the style of the song, you can play any key on the keyboard, the
instrument will play accurately according as the tempo and style you played.
Press [ONE KEY] button,current song number will be displayed,press any key on the
keyboard to start the song, all the demo songs will be played in sequence repeatedly, press
[ONE KEY] button again to stop playing.
ONE KEY FOLLOW
Use [FOLLOW] to learn the song accurately. Press [FOLLOW] button, LED display --- ,
now play the keyboard to start the song. If you do not play any key on the keyboard within 5 seconds,
the instrument will play the melody automatically. Press this button again to stop playing.
“ ”
ONE KEY FOLLOW
Note: use [LOOP ] or [LOOP ] button to select the song's number.ONE ALL
For example: To learn sixth song, press [LOOP ONE] or [LOOP ALL] button repeatedly to
select “d05” (the fifth song ), then press [LOOP ONE] or [LOOP ALL] button to stop playing,
next, press [ONE KEY] or [FOLLOW] button to learn the sixth song. To select other songs please
reference this method.
ONE KEY FOLLOW
LOOP ALL LOOP ONE
DEMO
-6-

MASTER VOLUME
Stereo
System
LINE OUT
PHONES
DC 9-12V
Connection
Power Socket
Plug the DC output cable from the Power adaptor into this socket,
ensure the keyboard is turned off when connecting and disconnecting
the power.
Headphone
A standard pair of stereo headphones can be plugged into the rear-panel PHONES jack for
private practice or late-night playing. The internal speaker system is automatically shut off when
a pair of headphones is plugged into the PHONES jack. Use [MASTER VOLUME+/-] button to
adjust headphone volume. Never use headphones in high volume, as it may hurt your ears.
Line Out
The Line out jack can be used to deliver the output of the to an amplifier,
stereo sound system, mixing console or tape recorder.
keyboard
-7-

Voice
100 voices in total (see voice list)
Select a Voice
Press [VOICE] button to enter voice mode, use number button or [+/-]button to select voice
that you want.
VOICE
Grand Piano button
Press [GRAND PIANO] button to call up the grand piano voice.
GRAND PIANO PERCUSSION
Percussion button
Press [PERCUSSION] button to call up the percussion voice, press this button again to exit
from percussion mode.
-8-
Voice 01----09 : press number 0 first, then press 1-----9
Voice 10----99 : press two numeric buttons directly, for example: to select No. 65:
press the number 6 button and then the number 5 to select the sound.

Effect
Sustain
Press [SUSTAIN] button to turn on or turn off sustain function, turning sustain on to sustain
notes after the keys are released.
SUSTAIN VIBRATO
Vibrato
Press [VIBRATO] button to turn on or off vibrato. The [ on ] or [ OFF ] will appear on the
display. Turning Vibrato on to give the voice vibrato effect. Press [VIBRATO] button again to turn
vibrato off .
SUSTAIN VIBRATO
Turn on sustain Turn off sustain
Turn on vibrato Turn off vibrato
-9-
GRAND PIANO PERCUSSION

Auto Accompaniment
The keyboard has a total of 100 accompaniment styles which can be used to provide
Fully-orchestrated Auto Accompaniment
Select a Style
Press [STYLE] button to enter the style selection mode, use [+/-] button or number button
to select the style that you want.
STYLE
Start/Stop a Style
Press [START/STOP] button can start or stop the current style.
SYNCHRO START/STOP FILL IN
Synchro
Press [SYNCHRO] button, the BEAT indicator dots will flash at the current tempo. The
accompaniment will start as soon as when you play the first note or chord on the AUTO
ACCOMPANIMENT section of the keyboard
-10-
Style 01----09 : press number 0 first, then press 1-----9
Style 10----99 : press two numeric buttons directly, for example: to select No. 65:
press the number 6 button and then the number 5 to select the style.

When the style is playing, press button to stop playing and enter the synchro mode. [SYNCHRO]
SYNCHRO START/STOP FILL IN
Chord Function
This instrument provides single and fingered chord function for you, press one of the buttons
to turn on chord function, the left section of the keyboard becomes the auto accompaniment
control section
Single:Press [SINGLE] button to enter single mode, LED display“C-1”
SINGLE FINGERED NORMAL
Major chord:press the root sound of the chord.
Minor chord:Simultaneously press the root key and a black key to its left
Seventh chord:Simultaneously press the root key and a white key to its left.
Minor seventh:Simultaneously press the root key and a white key and a black key to its left.
CCm C7 Cm7
-11-
SYNCHRO START/STOP FILL IN

Fingered: Press [FINGERED] button to enter fingered mode, LED display“C-2”
Your instrument will accept the following chord type: ([C] for Example)
Major(C): 1,3,5
b
Minor(Cm):1,3,5
b
Seventh(C7): 1,3,[5], 7
b b
Minor seventh(Cm7):1,3,[5], 7
b b
Diminished triad(Cdim):1,3,5
Sus 4th(Csus4):1,4,5
ninth(C9):1,2,3,5
b
minor ninth(Cm9):1,2,3,5
SINGLE FINGERED NORMAL
Normal
Press [NORMAL] button to turn the chord function off.
SINGLE FINGERED NORMAL
Fill In
Press the [FILL IN] button at any time while the accompaniment is playing to add one measure
fill in and return to the MAIN section.
SYNCHRO START/STOP FILL IN
-12-

Accomp.
Use [ACCOMP.+/-] to adjust accompaniment volume Range: 00~15
ACCOMP.
Tempo
Use [TEMPO+/-] button to adjust the accompaniment and metronome tempo.
Range: 60-240bmp
TEMPO
Metronome
Press [METRONOME] button to turn the metronome on, press it again to stop metronome.
Here are 8 metronome type let you select:
press [METRONOME] button repeatedly can select metronome type 1-8,
LED display “ ” -“ ”
FINGERED NORMAL METRONOME
-13-

Recording Function
Start Recording
Press [RECORD] button to enter recording mode, and the metronome started automatically,
LED display“REC”, now, play the keyboard to start recording. This instrument can record
about 70 notes.
RECORD PLAY PROGRAM PRO.PLAY
Press [RECORD] button again to stop recording, LED display“1CH”.
Press [RECORD] button again to quit the record mode when “1CH” is displayed, return
to the normal operation status.
RECORD PLAY PROGRAM PRO.PLAY
Play
Press [PLAY] button to play your recording song, LED display“PLY”,press it again to
stop playing.
RECORD PLAY PROGRAM PRO.PLAY
-14-

Program
You can record one user style in this mode, Maximum notes: 32
Press [Program] button, LED display“Prg”, and the percussion voice is called up, you can
play the keyboard to record user style. Press [Program] button again to stop.
RECORD PLAY PROGRAM PRO.PLAY
Prg.play
Press [Pro.play]button to play user style, it also can be played with chord function.
RECORD PLAY PROGRAM PRO.PLAY
-15-

Appendix
C1
C#1
D1
D#1
E1
F1
F#1
G1
G#1
A1
A#1
B1
C2
C#2
D2
D#2
E2
F2
F#2
G2
G#2
A2
A#2
B2
C3
C#3
D3
D#3
E3
F3
F#3
G3
G#3
A3
A#3
B3
C4
C#4
D4
D#4
E4
F4
F#4
G4
G#4
A4
A#4
B4
C5
C#5
D5
D#5
E5
F5
F#5
G5
G#5
A5
A#5
B5
C6
Bass drum
Bass drum
Hi-Hat close
Crash cymble
Tom low
Tom mid
Cow bell
Snare
Crash cymble
Tom High
Tom Low
Snare
Bass drum
Cow bell
Bass drum
Hi-Hat close
Cow bell
Hi-Hat close
Bass drum
Snare
Tom low
Crash cymble
Bass drum
Tom mid
Snare
Bass drum
Hi-Hat close
Tom high
Cow bell
Tom low
Crash cymble
Bass drum
Tom low
Cow bell
Crash cymble
Hi-Hat close
Snare
Tom High
Bass drum
Bass drum
Hi-Hat close
Snare
Cow bell
Bass drum
Tom mid
Crash cymble
Bass drum
Tom high
Tom high
Tom low
Bass drum
Crash cymble
Snare
Hi-Hat close
Bass drum
Bass drum
Crash cymble
Bass drum
Tom mid
Hi-Hat close
Snare
Note Voice
1.Percussion List
Note Voice
-16-
Table of contents
Other Clavitech Electronic Keyboard manuals
