ClimaxDigital VCAP901G User manual

ClimaxDigital
1
VCAP901G Game Capture
Thank you for purchasing ClimaxDigital VCAP901G Game capture.
Please take the steps below to get it working. If you need any assistance, please
1. Driver/Software Installation
Step 1: plug the VCAP901G Game Capture into USB 2.0 port at the REAR of the
PC or laptop
Important for Windows XP:
1) please make sure XP service pack 3 (SP3) is installed
2) when you get a message “found New Hardware Wizard”, please
click “cancel” and install the driver from the enclosed software CD
Step 2: insert the software CD for VCAP901G game capture into the CDROM
the main menu will appear. Click “Quick Installation” to install the driver/VCAP
capture software by following the instruction on screen.

ClimaxDigital
2
Step 3: when the driver/VCAP capture software is installed, please restart the
computer.
Step 4: check if the driver/device is installed successfully
1)Click windows “start” and right click “computer”
2)Click “manage”
3) Click “Device manager”
4)Click “sound, video and game controllers”
you will see “VCAP901G Capture device” and “USB Capture device” and make
sure there are no yellow marks before them.
IMPORTANT: If you do not see the two devices or there are errors, please plug
VCAP901G to a different USB 2.0 port or reinstall the driver

ClimaxDigital
3
2.
Hardware Connection
Please follow the connection diagram below to connect the xbox 360, ps3, wii to
the VCAP901G game capture and HDTV.

ClimaxDigital
4
Step 5: Connect component (YPbPr, green,blue,,red) from Xbox 360, PS3 or Wii to
the component video IN port (YPbPr, green, blue, red) on VCAP901G Game
Capture.
Step 6: Connect the L/R (white/red) audio cable from Xbox 360, PS3 or Wii to the
L/R Audio IN port (white, red) on VCAP901G Game Capture
Step 7: Connect component video output port (YPbPr, green, blue, red) from
VCAP901G game capture to the component (YPbPr, green,blue, red) INPUT port
on your HDTV. Then connect Audio OUT (L/R, white, red) from VCAP901G to the
Audio input port (L/R, white, red) on the HDTV
3.
Game console setting
Step 8: Xbox 360 Display Setting
1) turn on Xbox 360
2) go to “setting”
3) choose console setting”
4) choose “display” and make sure the setting is:
720p widescreen and component (HD)

ClimaxDigital
5
Step 9: PS3 Display setting
1) turn on PS3
2) go to “setting”
3) choose Display setting
4) choose “Video output setting”
5) choose “component/D-Terminal” setting
6) Select “standard (PAL), 720p
7) Then go to “set Audio output setting” and choose “Audio Input
Connector/SCART/AV Multi”
4.
Capture game playing in widescreen with PowerDirector 8
Software
Step 10: Install Cyberlink Powerlink 8 from the software CD
Please follow the instruction on screen to install it.
Step 11: Setting Project Aspect Ratio
Before you start working on your project, you should set your project's aspect
ratio. The default aspect ratio is 16:9, which fully utilizes a widescreen TV or
display device, as well as YouTube's full video window. You can also revert back
to 4:3 if required, just ensure that the aspect ratio of your media matches your
project. To modify the aspect ratio for your media, see Adjusting Video Clip
Aspect Ratio. To set the aspect ratio for your project, click > Edit > Aspect Ratio >
and choose 16:9.

ClimaxDigital
6
Step 12: Video device and video format setting
Click “Capture” to go to capture module. PowerDirector will automatically detect the
connected capture device and show the setting at the right side. Click “setting” then
click “video setup” and choose the following setting
1) Capture device: USB 28480p Device
2) Capture source: Video SerialDigital
3) Audio device: Line (USB capture device)
4) Click “TV setup” and set the Format “non-tuner” as follows
If you record from Xbox 360, please set the video format to NTSC 4.33
If you record from PS3/wii, please set the video format to PAL-I/PAL-B.

ClimaxDigital
7
Step 13: Create a new profile in capture mode and set video to widescreen
In capture mode, please go to "profile" -choose "MPEG2-video" and click "NEW" to
create a new profile for widescreen recording

ClimaxDigital
8
Step 14: set the custom defined profile as the profile you use to record any
new video
(you need to choose the custom profile rather than the default profile, for details,
please refer to the picture below)

ClimaxDigital
9
Step 15.
Record Video
Now you can click red “Record” button to record video. Just click the red “Record”
button again to stop recording. You can change where the captured video to be
saved.

ClimaxDigital
10
Step 16. Edit video and Set Aspect Ratio for the captured videos
1) As soon as the video is captured, please right click it and check it's properties if it
is 16:9. If not, you can go to edit module and drag the captured video to edit
area, right click video and choose "Set Aspect ratio"

ClimaxDigital
11
2) And select “the aspect ratio of the video is 16:9”. Please also select “Apply
to all video clips” (see picture below)
3) You can use the edit tools to edit the captured videos

ClimaxDigital
12
Once you have your video clips, audio files, and images in the editing
workspace/timeline you can start editing them. Editing is a broad term that
encompasses a number of different functions, including splitting, trimming,
applying fixes, and much more.
Step 17. Save, convert or upload videos to YouTube/Facebook
Click “Produce” ,you can convert files or upload captured/edited videos to
YouTube/FaceBook.
Select the file format you want to create, and click “Start” button to convert the
captured video to the format you need.
IMPORTANT:
1) The bundled software PowerDirector 8 is an OEM version for the game
capture. Only more advanced version can be used to convert the
captured video to MPEG4 or H2.64 format.
2) We have provide a professional video tool CyberLink MediaEspresso to
enable you to you quickly convert all of your media files into other formats so
you can watch/view them on a mobile phone, portable media player, or game
console. You can use it to convert the video to MPEG4 as well. For detailed
guide, please go to Step 20—how to use CyberLink MediaEspresso to
convert the video files to different formats

ClimaxDigital
13
.
Step 18. Upload videos to YouTube/Facebook
Click”YouTube” or “FaceBook” to upload the video to YouTube or Facebook.

ClimaxDigital
14
Step 19. Get help file
1) Please press F1 or go to menu->help to get online help.
2) Go to software CD\manual\PowerDirector to open the detailed user guide
in PDF

ClimaxDigital
15
Step 20. Convert video to different formats by using CyberLink
MediaEspresso
1) install CyberLink MediaEspresso
Click “CyberLink MediaEspresso” o ins all i
2) double click “Cyberlink MediaEspresso” icon to open it
3) Import video files
4) Choose the format you wish to convert to and click convert
5) You can also upload the video to YouTube/Facebook by clicking “upload”
6) Creating and Using Custom Profiles
When converting media files to other formats, you can completely customize your
own profiles. You can also edit existing custom profiles and then use them to convert
your media.
To create a custom profile for converting media, do this:
1) Select all of the imported media in the CyberLink MediaEspresso window that
you want to convert.
2) Click on the Convert button.
3) Click on the New button to open the Custom Profile window.
4) Enter a Profile name for the custom profile in the field provided.

ClimaxDigital
16
Step 21. For information only
We also provide a light version of our own capture software VCAP. It does not
have edit function. For detailed instruction on how to use VCAP software, please
refer to the software CD\manual \Vcap user manual.PDF
We recommend PowerDirector 8 for capturing game playing.
Thank you for your purchase. We appreciate your business. Please contact us
should you have any questions or comments
ClimaxDigital UK
Email: [email protected]
Website: http://www.climaxdigital.co.uk
Other ClimaxDigital Video Gaming Accessories manuals
Popular Video Gaming Accessories manuals by other brands
Diamond Multimedia
Diamond Multimedia HD Game Capture GC500 installation manual
Thrustmaster
Thrustmaster Formula Wheel Add-On Ferrari SF1000 Edition manual

Par-on GOLF
Par-on GOLF SWING PLUS SP1000 user guide

Harvil
Harvil AH60-3 Assembly instructions
Huffy
Huffy 211583 owner's manual
CapLab GmbH
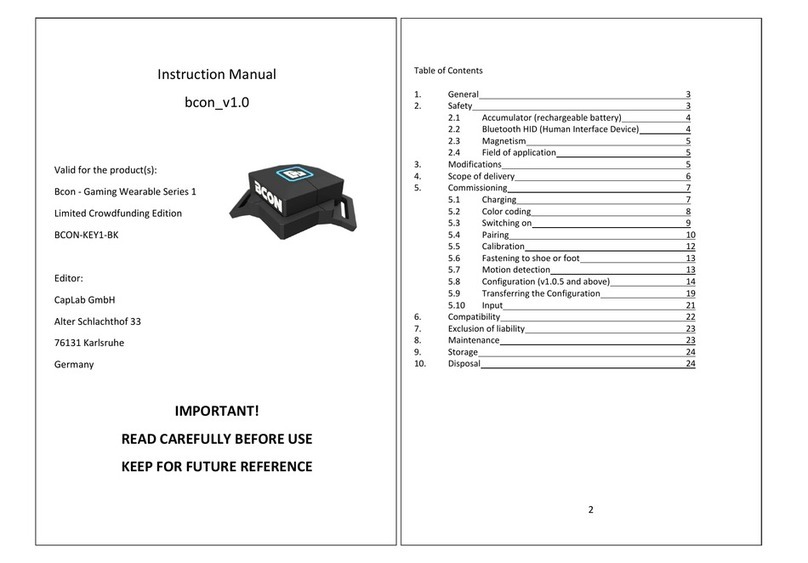
CapLab GmbH Bcon Gaming Wearable Series 1 instruction manual
