cobra crane BackPackerX User manual

!
BackPackerX
CCBPX v4
Installation Guide
2020
!

!
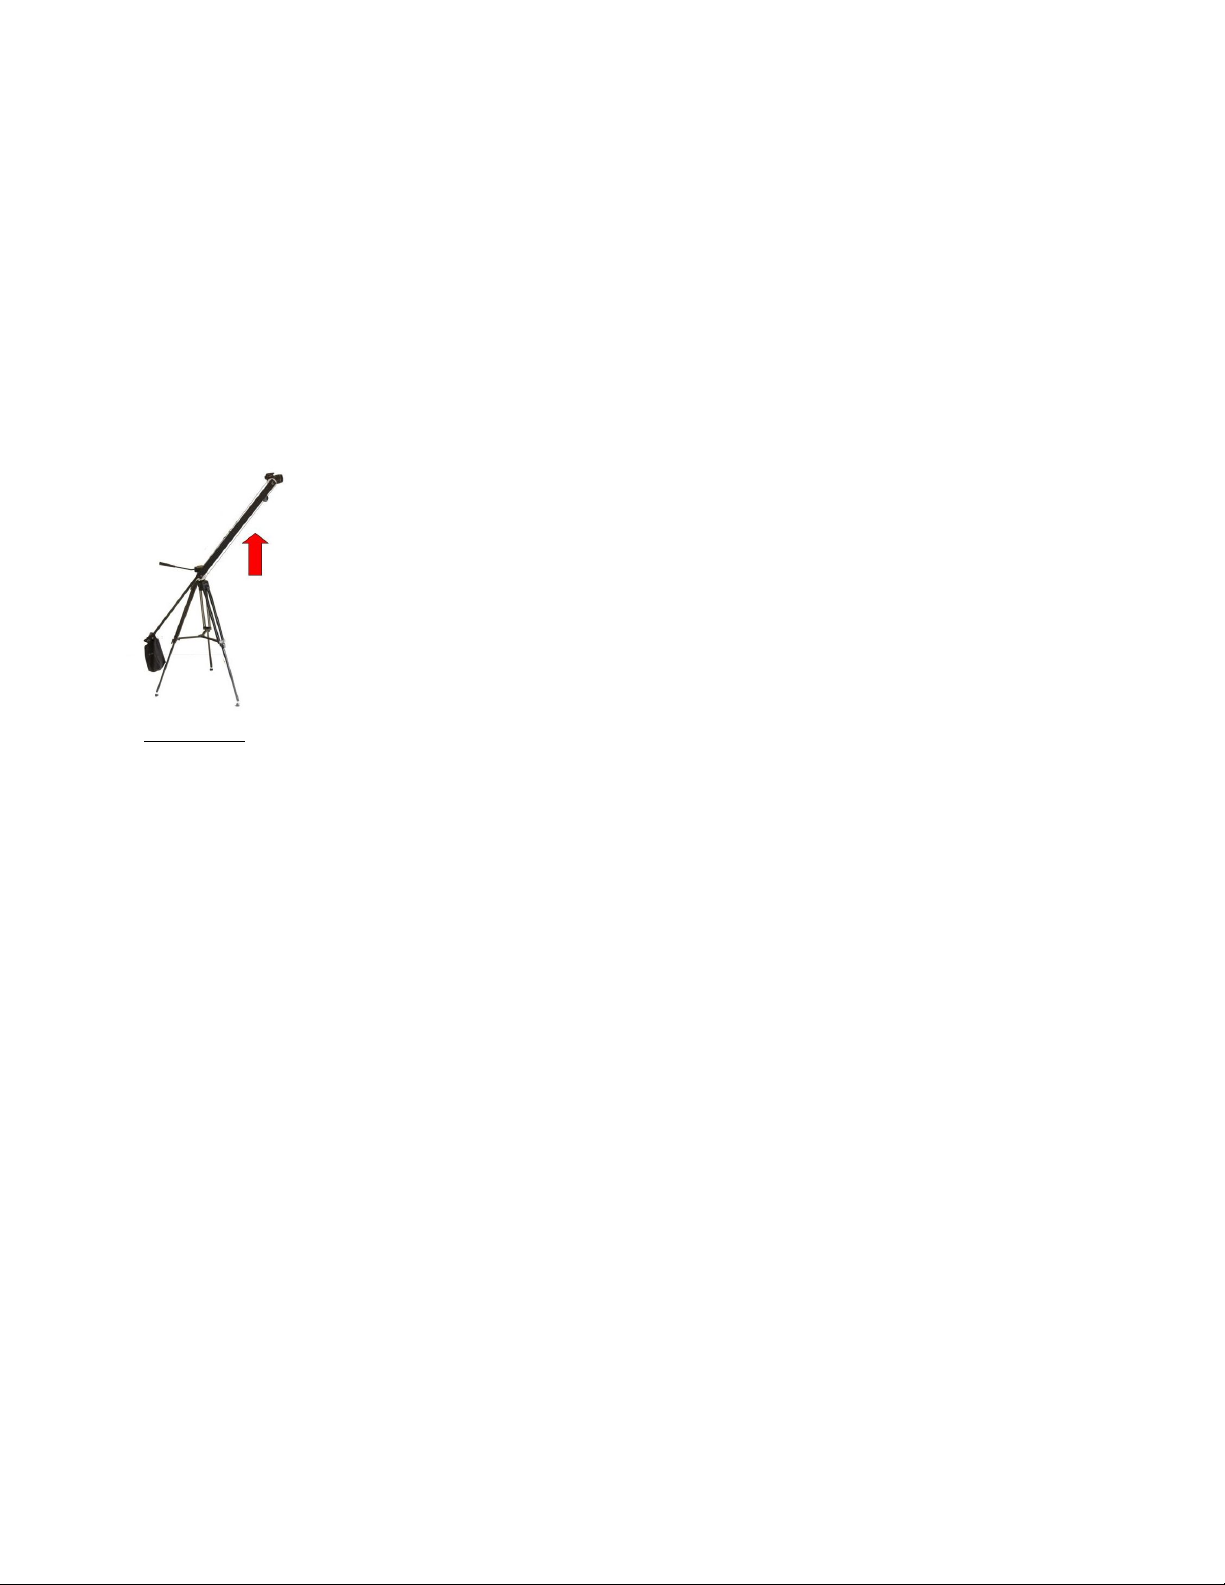
Step 1 - Release Weight Bar
Carefully unpack the BackPacker. Do not lift, push, pull, or carry by
the wire. Loosen the bottom Weight Bar Knob, thus allowing the Weight
Bar to be gently pulled from the chassis. Slide the bar out of the
chassis until it stops. Retighten the Knob back down securing the
camera bar and the weight bar into the chassis at it’s longest
length.
!
Step 2 - Mount your release plate to Tripod Bracket
The BackPacker’s tripod bracket has a number of bolt holes for
connecting to your tripod’s release plate. Whenever possible, use the
thickest available bolts. Remove the release plate from the tripod
head, secure two screws from the release plate through the plate and
onto the Tripod Bracket. (Release plates are NOT included. You must
use the release plate that came with your tripod, or purchase an
optional plate. Most tripods have their own, unique plate. We do
sell a version compatible with Manfrotto 501 and Benro KH25.)
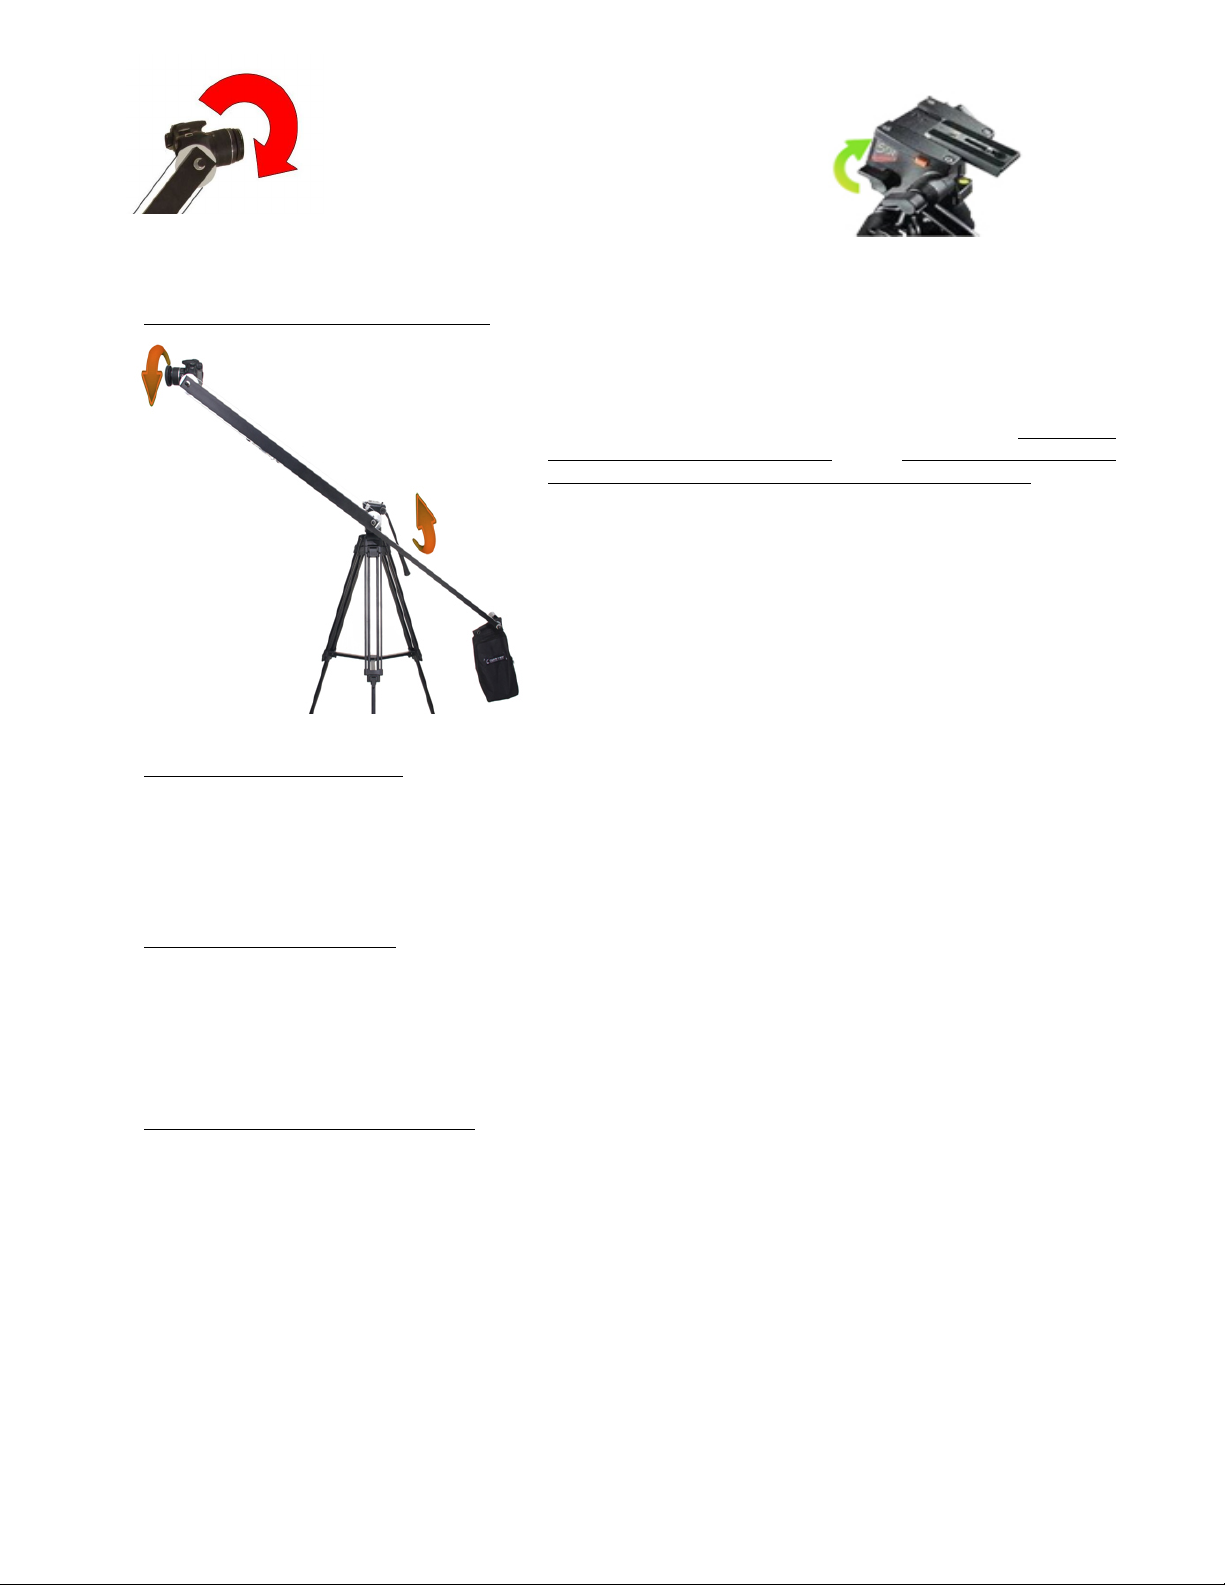
Step 3 - Mount on Tripod
Make sure your tripod is going to be able to hold the weight of the
camera, crane, weights and other devices you will have mounted.
Slide the release plate now connected to the crane into the tripod
head. Tighten the release plate tightening knob that secures the
plate into the tripod head. Make sure the plate is held in securely,
so the crane will not slip out. Test by tilting the head all the way
forward and back.
Step 4 - Mount Camera
Remove thumb screw from Camera Mount Bracket. Save the washers and
the wingnut for later. Insert thumb screw into camera’s tripod mount
hole with one of the washers, just a little so that there is space
between the washer and the camera. Slide camera into the camera
bracket. Carefully tighten thumb screw so camera will not move on
bracket. Set this end of the crane on a nearby chair or table.
Step 5 - Mount Weights (Approx: 1.5-2.5x camera weight)
Add some weights to the Weight bolt, until the camera just raises up
off the table. Use the washer and nut to hold weights safely. Run the
star knob against weight to lock it on. You can adjust the length of
the weight bar, by loosening the Weight Bar Wing Nut, and sliding the
weight bar forward and back until you get the unit balanced.
Step 6 – Install optional cables for remote and monitoring
If using wired remote control and/or external video, you should add
your optional remote control extension and video extension output
cables at this time. Use tape or tie wraps to secure the cable to
the Camera Bar and Chassis and connect to controller and or video
monitor. Avoid loose cables. Make sure the cable is free from wire
cable and pulley, and does not prevent free boom, sweep and tilt
motion. SteadyTracker Company offers a variety of extension cables
for your remote control and for your video and audio monitoring.

Adding the Extension
!
Step 1 Remove the camera bracket
Remove the Rubber End Cap from the chassis you have now. With two 14mm
wrenches or sockets, loosen the lock nut and remove the bolt that secures the
camera bracket. Remove the insert . Keep all those parts together. (each bearing
is sandwiched between two stainless steel washers).
Step 2 Add the extension
Remove the thumb screws (b2) from the extension and then slide extension into
ends of BackPacker . Replace the Thumb screws. Do not over-tighten.
Line up the insert you removed from the chassis and put into the end of the
extension, so the bolt will go back through the insert. You may have to push it in
there. This is there to keep us from tightening the bolt and warping the
aluminum.
Now reinstall the camera bracket exactly as you removed it. (bolt through pulley
first, then washer bearing washer, extension with insert, washer bearing washer,
Locknut. Tighten until just tight, then loosen about 1/8. Can not be too tight, and
you do not want it too loose.
Step 2 Attach Pulley Cable
Attach pulley cable (a2) around pulleys. When tightening the cable. Open the
turnbuckles most of the way. Do not let them come apart. When the cable is on
the pulley, tighten the cable at the wire clamp first, then use the turnbuckle to do
micro adjustment.
To loosen, tighten or reposition the wire clamp, Loosen the thumb screw, pull the
wire loop end of the cable, then retighten the Thumb Screw. Always keep the
cable terminator against the clamping cylinder. This allows you to easily adjust the
loop of the cable without concerning yourself with the end of the cable.
Now you can turn the turnbuckle to tighten the cable for your requirements. You
want the cables as tight as a guitar string, just taut and straight. This allows for
very smooth tilts.
!
Using the BackPacker
Still shooting - Photos
For shooting still photos, we highly recommend a remote monitor and shutter
controller for your camera. Most dealers also offer remote controls for focus
and shutter release. We offer a 6 or 12 foot extension cable for those
purchasing wired remote controls. An optional monitor is an excellent method
for remote framing of your stills before releasing the shutter. Without the
remote, you will have to press your shutter button manually, which may be a
challenge when the camera is at the high end of the crane’s arc, plus it will
cause the crane to move. Either way, Change from viewfinder to Live View so you
can see the image either on your camera’s LCD or on the optional external
monitor. Once the desired framing is set, simply press the shutter release on
the remote control to expose.
Shooting video
There are three basic moves of the BackPacker when shooting video
with your camera. These moves done in combination will meet
virtually any shooting requirement. The moves are Boom, Swing and
Tilt. A boom is when you change the elevation of the camera.
This is done to offer shots that show vertical up and down
movement. A swing, which happens when you move the crane left to
right or right to left, is done to show a panoramic landscape or
following talent as they move by the crane. Finally a tilt is
done to tilt the camera relative to the boom.
Booming
To boom the crane, stand behind or to the side and simply lift the weight bar to lower the camera.
Lower the weight bar to increase the height of the camera. If your tripod’s tilt is locked or you hold
the tilt handle stationary while booming, the camera will remain framed on the subject depending on
how far away from the focal point the camera is. To keep exactly framed, hold the tilt handle and
make minor adjustments as you are booming the crane. This move will allow you to show talent from
various height perspectives. With the tilt free, so that the camera tilts with the boom, you can boom the
crane while camera moves with the boom.
Boom from high to low. Station the crane so that the camera is in a
high position.
Slowly raise the weight bar as you hold the tilt
handle stationary. This will allow you to keep
the talent in frame.
Boom from low to high. Station the crane so that the camera is in a low
position.
Slowly lower the weight bar as you hold the tilt
handle stationary. This will allow you to keep
the talent in frame.
Showing high to low Loosen drag on tilt to least drag, so that it
tilts with the boom movement. Raise weight bar
slowly, allowing you to see talent head to toe.
Showing low to high Loosen drag on tilt to least drag, so that it
tilts with the boom movement. Lower weight bar
slowly, allowing you to see talent toe to head.

Boom with low perspective Station the crane so that the camera is in a
low position
Showing how big Position camera very close to talents legs, Tilt
camera, pointing up lower the weight bar slowly,
keeping camera tilted up
Boom High to Low Station the crane so that the camera is in a high
position.
See a coin, pick it up Set camera angle for almost straight ahead,
Tilt camera down framing coin in center of
Camera. Slowly raise the weight bar, keeping
the coin in center of the frame
Swinging
A Swing move is used to get a Panoramic shot, ideal for
an opening or title sequence. Also used to follow talent
as they go by. Swinging the BackPacker is very simple.
Loosen the Panning drag on your tripod, and then simply
move the weight bar left to right, or right to left.
Panoramic Swing Station Crane so that the arms are parallel to the ground
Swing right to left (or left to right). Initially point
camera all the way to end of the image
Dogs point of view Boom the camera low. Tilt camera up. Now perform swing move
Periscope Boom the camera high. Tilt camera down, slowly swing crane
NOTE: Be careful of hitting the tripod with the weights or end of crane.
Slider Move Set camera out of frame to the left or right of the subject.
Lock tripod head tilt, loosen pan.
Very slowly swing the crane bringing subject into frame and
then continue until subject drops back out of frame. Slow and
steady. Practice this shot shooting names on signs.
Tilting: Dynamic Tilting
Tilting the camera relative to the Boom offers
some interesting shots. Usually used in
combination with other moves, Tilting can also
be used on its own. Loosen the tilt drag on
your tripod head. To tilt the camera, hold the
weight bar in one hand and tilt the Pan/tilt
handle on the tripod with the other hand. This
allows you to change the tilt without changing
the boom.
Shoot from above Station the crane so that the
arms are parallel to the ground. While
holding the weight bar, push the pan/tilt
handle up, this will tilt the camera down.
This move allows you to shoot something like a
face, then Slowly tilt down, showing the rest
of the body
Tilt up from below Station the crane so that the camera is low to ground
pointing forward. While holding the weight bar, push the
pan/tilt handle down. This will tilt the camera up. This
move allows you to shoot something like a shoe, then slowly
tilt up, showing the rest of the body. Ideal for showing how
big something is, like a tree.
Tilting straight down Position crane about 45 degree angle. Point camera down.
This allows you to get shots from above. For example, looking
in the moon roof of a car. Showing food or products from
above shooting straight down. This is one of the best
methods to get the top down shot of a wedding cake.
Tilting: Static Tilting Used to keep camera pointed at the subject (or in
any angle), while booming the crane. Lock down the Tilt Drag
control by tightening down the tilt drag control of the Tripod.
Now Boom. While the drag is locked down, the camera will stay
pointed in the same direction, throughout the arc of the Boom.
Practice makes perfect. Use a combination of these moves to create beautiful
cinematic content of your own. Watch cool movies and TV shows to see how some
of the experts do these moves and then adjust to your liking.
Have fun – and be creative.
!
!

The SteadyTracker Company
Orange County, California
www.CobraCrane.com
The SteadyTracker is shipped from the factory in the most appropriate packaging available.
Please inspect the contents of the package and make sure to call or email us directly if there
is any shipping damage or missing components. We can be reached at 949-322-4226 or in Pacific Rim
containers. The SteadyTracker Company will not take responsibility for any products shipped to
us without original shipping material. Please make sure to keep the packaging safe for future
use.
The Conditions of The Warranty are as Follows:
The SteadyTracker Company reserves the right to determine if a repair is subject to the warranty
agreement. Damage caused by products being dropped or mishandled is not covered by the warranty.
Suitable packaging may be purchased from The SteadyTracker Company at a nominal cost. All
products are to be shipped prepaid to The SteadyTracker Company. For insurance reasons, The
SteadyTracker Company cannot accept any product that is returned via the U.S. Postal Service.
Returns will be accepted from UPS, Federal Express, or a comparable freight carrier. The
SteadyTracker Company will return the repaired product via a like carrier, in the continental
United States, only if the product is under warranty and subsequently found to be faulty. Out-
of-warranty repaired products are shipped at the customer’s expense. Turnaround time for
warranty repairs will not exceed 4 days (not including shipping time), unless extraordinary
fault conditions exist. For our international customers, please coordinate with your dealer for
repairs.
Limited Warranty:
Labor and defects are covered for one (1) year from the original date of purchase. Only the
original purchaser of the product is covered under this warranty. The warranty is not
transferable. If you discover a defect, please refer to our Return Merchandise Authority Policy.
The Warranty covers all SteadyTracker hardware defective in materials or workmanship. During
this warranty period, The SteadyTracker Company, at its option, will repair or replace product
or product components, which in its opinion prove defective. Parts and components used in the
repair process may be recycled or repaired, at The SteadyTracker Company’s discretion. This
warranty service will be performed at no charge to the registered owner, provided the product is
shipped prepaid to The SteadyTracker Company in the original packaging. The SteadyTracker
Company reserves the right to determine whether a needed repair is subject to the warranty as
per its provisions stated herein. Transit damage caused by inadequate packing invalidates this
warranty. This warranty will be void if, in the opinion of The SteadyTracker Company, the
product in question has been damaged through accident, misuse, misapplication, or as a result of
service or modification performed not authorized in writing by The SteadyTracker Company.
REPAIR OR REPLACEMENT AS PROVIDED UNDER THIS WARRANTY IS THE EXCLUSIVE REMEDY FOR THE
CONSUMER.THE STEADYTRACKER COMPANY SHALL NOT BE LIABLE FOR ANY INCIDENTAL OR
CONSEQUENTIAL DAMAGES FOR BREACH OF ANY EXPRESS OR IMPLIED WARRANTY ON THIS PRODUCT.
EXCEPT TO THE EXTENT PROHIBITED BY APPLICABLE LAW, ANY IMPLIED WARRANTY OF MERCHANTABILITY
OR FITNESS FOR A PARTICULAR PURPOSE ON THIS PRODUCT IS LIMITED TO THE DURATION OF THIS
WARRANTY.
Return Merchandise Authorization Policy:
Damaged or defective SteadyTracker Company products that are purchased from The SteadyTracker
Company or it’s authorized dealers may be returned for replacement only. The SteadyTracker
Company will not accept returns for any other reason. All eligible returns require a Return
RMA number. Items must be returned within 10 days of receiving your RMA number. Returned product
must be in its original packaging with all contents included and must have the RMA number
clearly marked on the outside of the package. Incomplete or unauthorized returns will be
refused. RMA numbers and the address to return product may be obtained from The SteadyTracker
This manual suits for next models
1
Table of contents
Other cobra crane Camera Accessories manuals

Popular Camera Accessories manuals by other brands


Bioenno Power
Bioenno Power BLP-20500M Instructions for use

Samsung
Samsung SHD-3000F installation manual

Belden
Belden GRASS VALLEY Eyecatcher EC 744/15 user guide

Gardena
Gardena BLi-40/100 Operator's manual

Ubertronix
Ubertronix Strike Finder Touch manual

Team Revel Design
Team Revel Design Beholder Lite Assembly manual