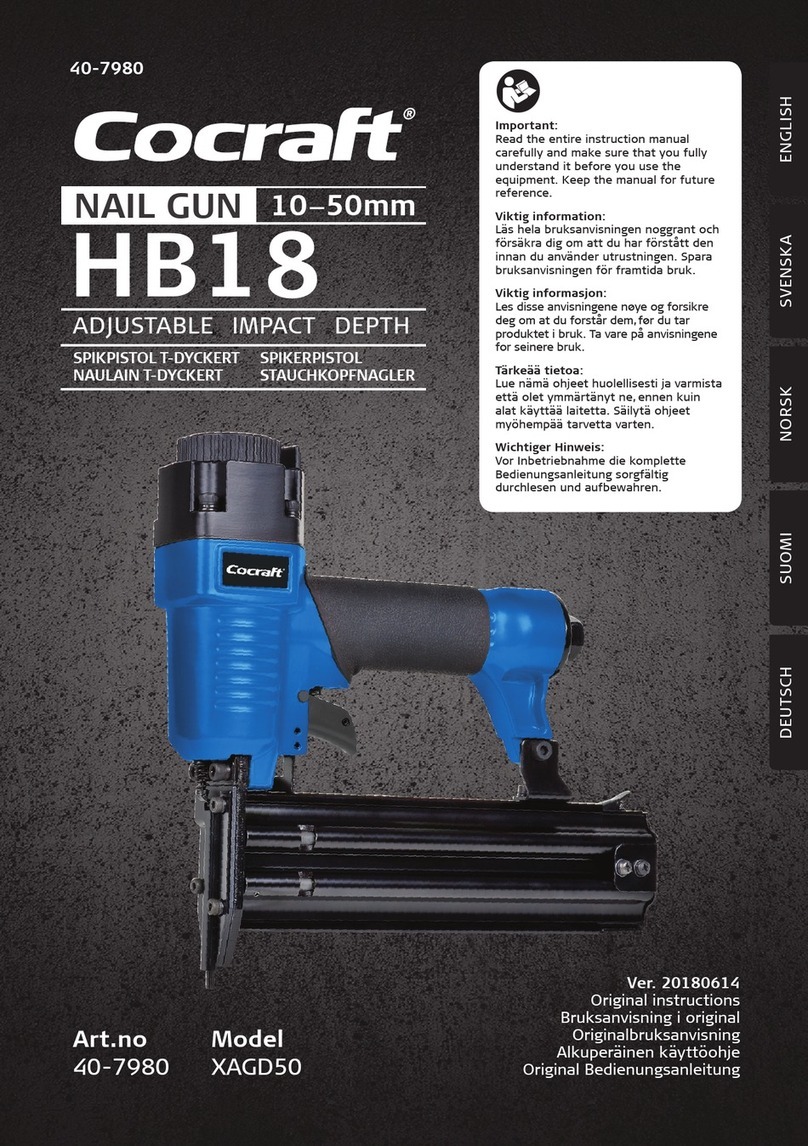
Cocraft HN 2190 User manual

ENGLISHSVENSKANORSKSUOMIDEUTSCH
Important!
Read the entire instruction manual
carefully and make sure that you fully
understand it before you use the
equipment. Keep the manual for future
reference.
Viktig information:
Läs hela bruksanvisningen noggrant och
försäkra dig om att du har förstått den
innan du använder utrustningen. Spara
bruksanvisningen för framtida bruk.
Viktig informasjon:
Les disse anvisningene nøye og forsikre
deg om at du forstår dem, før du tar
produktet i bruk. Ta vare på anvisningene
for seinere bruk.
Tärkeää tietoa:
Lue nämä ohjeet huolellisesti ja varmista
että olet ymmärtänyt ne, ennen kuin
alat käyttää laitetta. Säilytä ohjeet
myöhempää tarvetta varten.
Wichtiger Hinweis:
Vor Inbetriebnahme die komplette
Bedienungsanleitung sorgfältig
durchlesen und aufbewahren.
HN 2190
ADJUSTABLE IMPACT DEPTH
50-90MM
40-7982
NAIL GUN
SPIKPISTOL SPIKERPISTOL
NAULAIN DRUCKLUFTNAGLER
Ver. 20170411
Original instructions
Bruksanvisning i original
Originalbruksanvisning
Alkuperäinen käyttöohje
Original Bedienungsanleitung
Art.no Model
40-7982 XI2190II


ENGLISH
3
Nail Gun
Art.no 40-7982 Model XI2190II
Please read theentire instruction manual before use and save it for future reference. We reserve
theright for any errors in text or images and for making any necessary technical changes to this
document. If you should have any questions concerning technical problems please contact our
Customer Services.
Safety
General warnings
• Never hold your hand or any other part of thebody within thepointing area when thegun is
connected with thecompressed air hose.
• Never aim thetool at any person or animal.
• Do not play with thetool.
• Never depress thetrigger if thenose of thetool is not aimed at theworkpiece.
• Always handle thetool with care.
• Never depress thetrigger or release thesafety catch while you are loading thetool.
• Use thetool solely for thepurpose for which it is intended.
• Never use thetool in such away that it is aimed at yourself or someone else in thework area.
• Do not use thetool as ahammer.
• Carry thetool by thehandle, not by theair hose.
• Never carry thetool with thetrigger depressed.
• Never modify thetool from theoriginal design.
• Always keep in mind that misuse or faulty handling of this tool could injure yourself and others.
• Never fasten or tape thesafety catch and/or trigger in activated position.
• Never leave atool unattended when it is connected to theair line.
• Do not use this tool if it does not have alegible warning decal.
• Do not continue using atool that is leaking air or is not working properly. Contact our
Customer Service for servicing.
• When using thetool, hold it in such away that no injury to thehead or body could occur
should afall in pressure or hard spots on theworkpiece cause therecoil force to increase.
• Do not nail too close to theedge of aworkpiece. Thenail could pass through theworkpiece
and cause damage.
• Disconnect from thecompressed air for transporting.
• Check frequently that both thetrigger and thesafety catch are working properly.
• Do not take apart any part of thetool.
• Do not use thenail gun if any part of it is damaged or missing.
• Avoid weakening thecasing by engraving, scribing or scratching it, etc.
• Always make note of where theelectric cable enters walls, floors and ceilings before you
begin to use thenail gun.
• Thecompressed air fitting for thenail gun must be of thequick-coupling type.
Theconnecting bit on thetool may not have arear valve so that some air remains under
pressure when thenail gun has been disconnected.

ENGLISH
4
Compressed air feed and connections
Warning! To prevent accidents due to unintended firing, theoperator should always disconnect
thecompressed air:
• Before adjusting
• When cleaning thetool
• When removing ajammed nail
• When thetool is not being used
• When moving thetool to another work area
Warning!
• Use only compressed air in pneumatically driven tools. Never use acid or flammable gases to
drive thetool since themixture can explode and cause damage.
• Do not use gas in thecontainer or compressed air system when theair pressure could
exceed 8 bar as thetool could explode and cause damage.
• Thecompressor capacity must be sufficient to ensure anadequate air pressure and flow for
theintended use. Afall in pressure in thesystem can reduce thetool’s thrust.
See Technical data for setting theright pressure for thetool.
• Thecompressed air lines should be mounted on anincline, with thehighest point closest to
thecompressor. Aneasily accessed water separator should be installed at thelowest points.
Thewater separator should be emptied at least once aday or more often if needed. Dirt and
water in theair lines are themain cause of wear in pneumatically actuated tools.
• Thetool connecting bits should be equipped with areducing valve with water separator
directly at thepoint of connection. Afilter helps to achieve maximum effect at minimum wear.
Thefilter must have sufficient flow capacity for theintended mounting site or connecting
point. Thefilter must be kept clean if it is to be able to deliver clean compressed air to
thetool. See themanufacturer‘s instructions for proper filter care. Adirty or clogged filter will
cause afall in pressure, which reduces thetool’s effectiveness.
• Thepressure regulator must be adjustable from 0 to 8 bar.
• Theair hoses should tolerate at least 10.5 bar working pressure or 150 % of themaximum
pressure of which thesystem is capable. Themeter line should have aquick coupling so that
it can be loosened quickly from thenipple on thetool.
• Make sure that thecompressed air fed to thetool is unable to exceed themaximum
permitted working pressure (8 bar); install asafety valve if needed. Begin first with themeter
pressure set to thelowest recommended working pressure. See Technical data.
• Check that thetool is working properly by pressing thegun nose against apiece of wood
and pressing thetrigger one or two times.

ENGLISH
5
Lubrication
• Note: Lubricate with afew drops of oil in theair fitting
before using thetool for thefirst time.
• Regular but moderate lubrication is required for best
effect. Oil fed through theair fitting lubricates only
thetrigger valve; theother internal components
are oiled at thefactory and normally do not require
lubrication. Do not use flushing oil or additives since
such lubricants cause more rapid wear on thetool
packings and rubber cushion, which results in poorer
results and makes more care necessary.
• Pour some oil in thetool’s connecting nipple one
or two times daily. Only afew drops (1–2) of oil are
needed thefirst time. Too much oil merely clogs
thelines and is visible when air is released.
• Make sure that themagazine’s pusher moves
smoothly and not sluggishly by keeping it clean and
well-oiled. Also lubricate theimpact pin itself with
afew drops of oil at every use.
Using in the cold
In cold weather near or below 0 °C moisture may freeze in thelines and cause thetool not to work
well. We recommend using anair lubricant or permanent antifreeze (ethylene glycol) as lubricant.
Note! To prevent frost or ice forming in thetool’s valves and mechanisms, which can cause
thetool to malfunction, avoid storing thetool in acold place.
Warning!
To prevent serious eye injury from flying nails and/or slivers theoperator and others in theworking
area must be equipped with eye protection that covers both thefront and thesides when loading,
using or servicing thetool. Glasses without eye protection on theside and face masks do not
give adequate protection!
Warning symbols on tool
Read theinstructions
for use.
Theuser and other persons
in thework area must use
protective glasses and
hearing protection.
Thetool should not be used on
scaffolding or ladders. Do not use
thenail gun if thefastener could
shoot through something and hit
someone on theother side.
Thegun is equipped with
asafety trigger.

ENGLISH
6
1
2
3
4
5 6 7 8 9 10
Description of product
• Nail gun in arobust model for heavier nailing as, for example, building carpentries.
• Cast aluminium housings with adjustable exhaust 360°.
• Mechanism for single or repeated firing.
• Intended for 21° nail on plastic strip 50–90 mm, ø 2.8–3.3 mm.
• Magazine for 50 nails.
• Working pressure 5–8 bar.
• Delivered with aquick-coupling nipple and astorage box.
The package contains
• Nail gun with mounted quick-coupling nipple
• Allen key (6 mm)
• Two triggers, one orange for repeated firing and one black for
asingle firing (one loose and one mounted on thetool).
• Storage box
Designations
1. Security catch
2. Adjustment dial for impact depth
3. Trigger
4. Tool housing (casing)
5. Maneuverable exhaust
6. Handle
7. Nipple fitting
8. Magazine
9. Control lever for magazine pusher
10. Magazine lock

ENGLISH
7
Using the tool
1. Before using check that thetool is undamaged and that all parts are firmly in place and that
thewarning text on thenail gun is legible.
2. Always disconnect thetool from theair line when it is not being used. Empty themagazine
and press thetrigger several times to empty theair from thetool before loading, servicing or
trouble-shooting.
3. Select themethod of use. Check that you have theright trigger attached. Change trigger if needed.
4. Load magazine.
5. Connect thetool to acompressed air hose with quick-coupling hose (female).
6. Set asuitable pressure (5–8 bar) with thepressure regulator on thecompressed air line.
Preparations
Safety rules while loading
• Never hold your hand or other part of thebody within range of thetool’s pointing section.
• Never aim thetool at yourself or anyone else.
• Do not press thetrigger or push thesafety catch down since it could unintentionally be
activated with therisk of injury.
Loading
Use 21° nail on plastic strip.
1
2
1. Detach thetool from theair line.
2. Pull thecontrol lever of themagazine
pusher (9) backward until it locks in open
position.

ENGLISH
8
Methods of use
A. Single ring
Before using, check that theblack trigger (for single firing) is attached to thenail gun.
3
4
3. Themagazine is open at thetop. Load
thenails. Before loading, check that
thenails are clean and undamaged.
4. Pull themagazine back abit and
press themagazine lock (10) forward
until thepusher is released; then take
thecontrol lever (9) and carefully brake
theforward movement.
1. Hold thetool firmly (without holding down thetrigger). Press thetool against thework surface.
2. Press thetrigger (3) and release it after firing.
3. Move thetool to thenext spot and repeat.

ENGLISH
9
B. Repeated ring
Before using check that theorange trigger (for repeated firing) is attached to thenail gun.
1. Hold tool firmly and press thetrigger (3).
2. Press thetool against thework surface to depress thesafety catch thereby causing thetool to fire.
3. Hold in thetrigger (3), move to thenext spot and repeat from step 2.
Function and safety checks
Warning! Remove all nails from themagazine before doing afunction check.
1. Always detach thetool from theair line.
2. Empty themagazine and press thetrigger repeatedly to empty theair from thetool.
3. Connect theair hose but do not touch thetrigger. Press thesafety catch against thework surface.
Tool must not fire!
4. Hold tool free (do not press thetool nose against something), and press thetrigger (take care
not to point thetool toward yourself or any one else). Tool must not fire!
5. Press thesecurity catch against theworkpiece and depress thetrigger. Tool must fire!.
Setting the impact force
A. Adjust the impact force with pressure regulator on air hose
If thenail has not been driven deep enough first check whether theimpact depth adjusting dial (2)
is set at themaximum nail depth. If it is at themaximum raise theair pressure by 0.5 bar
increments bar and check with thenailing control after each increment. Do not exceed themax.
working pressure (8 bar).
If thenail has been driven in too deep, reduce theair pressure by 0.5 bar at atime, checking
theresult each time. Do not go below theminimum recommended working pressure (5 bar).
Always work with thelowest possible working pressure. This minimizes thenoise and vibration
levels and theinternal components of thenail gun will last longer.

ENGLISH
10
C
D
B. Adjusting the impact depth with adjusting dial
Turn theadjusting dial (2) clockwise to reduce theimpact depth or counter-clockwise to increase
theimpact depth.
Changing triggers
A A
B
C
D
Two triggers are supplied with thenail gun.
Thefiring mechanism consists of:
A. Trigger
B. Spring
C. O-ring
D. Pin
Remove the mounted trigger as follows
1. Remove thesmall O-ring (C) holding
thepin (D) in place.
2. Remove thepin in theother direction.
3. Save theO-ring, spring, trigger and thepin.

ENGLISH
11
D
Attach the trigger as follows
1. Hold thespring and thetrigger firmly and align
thehole for thepin with thehole in thenail gun.
2. Insert thepin (D) and tighten theO-ring.
3. Do afunction check.
Care and maintenance
Removing a jammed nail
1. Disconnect tool from air line.
2. Pull thepusher’s control lever (9) back as far as it goes and
remove thenails from magazine.
3. Carefully push achisel or punch against thejammed nail.
4. Strike thechisel or punch carefully to loosen thenail.
5. Use pliers to remove thenail from themechanism.
Cleaning and maintenance
1. Detach thetool from theair hose.
2. Never use astrong or extremely flammable solvent or detergent.
3. Remove any deposits on thetool nose with photogene or diesel oil.
Responsible disposal
This symbol indicates that this product should not be disposed of with general
household waste. This applies throughout theentire EU. In order to prevent
any harm to theenvironment or health hazards caused by incorrect waste
disposal, theproduct must be handed in for recycling so that thematerial can
be disposed of in aresponsible manner. When recycling your product, take it to
your local collection facility or contact theplace of purchase. They will ensure that
theproduct is disposed of in anenvironmentally sound manner.

ENGLISH
12
Technical data
Weight (without nails) 4.3 kg
Air fitting 1/4″
Max air pressure 8.0 bar (115 psi)
Air consumption 215 lit/min (25 nails/minute at 6.2 bar)
Recommended air pressure 5–8 bar
Noise level LpA 84.1 dB(A)
LwA 97.1 dB(A)
LpC 125.7 dB(C)
Vibration, acceleration 4.1 m/s² (uncertainty 15,88%) (as per ISO 8662–1199)
Lubrication Lubricating oil for pneumatic tools
Fastener Nail 21° on plastic strip, length 50–90 mm, Ø 2.8–3.3 mm
Magazine capacity 50 nails
Size 510 × 380 × 127 mm (L × H × B)

SVENSKA
13
Spikpistol
Art.nr 40-7982 Modell XI2190II
Läs igenom hela bruksanvisningen före användning och spara den sedan för framtida bruk.
Vi reserverar oss för ev. text- och bildfel samt ändringar av tekniska data. Vid tekniska problem
eller andra frågor, kontakta vår kundtjänst (se adressuppgifter på baksidan).
Säkerhet
Generella säkerhetsföreskrifter
• Håll aldrig en hand eller någon annan kroppsdel inom verktygets utskjutningsområde när det
är anslutet till tryckluftsledningen.
• Rikta aldrig verktyget mot någon annan person eller djur.
• Lek inte med verktyget.
• Tryck aldrig in avtryckaren om inte verktygsnosen är riktad mot arbetsstycket.
• Hantera alltid verktyget varsamt.
• Tryck aldrig in avtryckaren eller utlös aldrig säkerhetsbygeln under tiden som du laddar verktyget.
• Använd verktyget endast på avsett sätt.
• Använd aldrig verktyget på ett sådant sätt att det riktas mot dig själv eller någon annan inom
arbetsområdet.
• Använd inte verktyget som hammare.
• Bär verktyget med fattning om handtaget, inte i luftslangen.
• Bär aldrig verktyget med intryckt avtryckare.
• Ändra aldrig verktyget från originalutförande.
• Var alltid medveten om att missbruk och felaktig hantering av det här verktyget kan skada dig
själv och andra.
• Fixera/tejpa aldrig fast säkringsbygel och/eller avtryckare i aktiverat läge.
• Lämna aldrig ett verktyg, som är kopplat till luftslang, utan uppsikt.
• Använd inte det här verktyget om det inte är försett med läsbar varningsdekal.
• Fortsätt inte att använda ett verktyg som läcker luft eller inte fungerar riktigt. Kontakta vår
kundtjänst för eventuell service.
• Håll vid användning verktyget på ett sådant sätt att inga skador kan uppstå på huvud eller
kropp om verktygets rekyl ökar i styrka på grund av tryckfall eller hårda ställen i arbetsstycket.
• Spika inte för nära kanten på arbetsstycket. Spiken kan passera genom arbetsstycket och
vålla skador.
• Koppla från tryckluften före transport av verktyget.
• Kontrollera ofta att både avtryckare och säkerhetsbygel fungerar korrekt.
• Ta inte isär någon del av verktyget.
• Använd inte spikpistolen om någon del är skadad eller saknas.
• Undvik att försvaga kåpan genom gravering etc.
• Ta reda på var elledningar etc. går i väggar, golv och tak innan du börjar använda spikpistolen.
• Tryckluftsanslutningen för spikpistolen måste vara av typ snabbkoppling. Anslutningen på verktyget
får inte ha en backventil så att luft under tryck finns kvar när spikpistolen har kopplats loss.

SVENSKA
14
Tryckluftstillförsel och kopplingar
Varning! För att förhindra olycksfall på grund av oavsiktlig spikning ska användaren alltid koppla
från tryckluften:
• Före justering
• Vid vård av verktyg
• Vid borttagning av spik som har fastnat
• När verktyget inte används
• Vid förflyttning till annat arbetsområde
Varning!
• Använd endast komprimerad luft som drivkälla för pneumatiskt drivna verktyg. Använd inte syre
och brännbara gaser som drivkraft eftersom blandningen då kan explodera och vålla skador.
• Använd inte gaser i behållare eller tryckluftssystem där lufttrycket kan överstiga 8 bar
eftersom verktyget då kan explodera och vålla skador.
• Kompressorer måste ha tillräcklig kapacitet för att säkerställa tillräckligt tryckluft och luftflöde
för avsedd användning. Tryckfall i systemet kan minska verktygets drivkraft. Se Tekniska data
för inställning av korrekt tryck för verktyget.
• Tryckluftsledningar bör monteras med lutning med den högsta punkten närmast kompressorn.
Lättåtkomliga vattenavskiljare bör installeras på de lägst belägna punkterna. Vattenavskiljarna
bör tömmas minst en gång om dagen eller vid behov oftare. Smuts och vatten i
tryckluftsledningarna är de huvudsakliga orsakerna till slitage i pneumatiskt drivna verktyg.
• Anslutningarna för verktygen bör förses med en reduceringsventil med vattenavskiljare direkt
vid själva anslutningspunkten. Ett filter hjälper till med att ge max. effekt och minimera slitaget.
Filtret måste ha tillräcklig flödeskapacitet för avsedd monteringsplats för resp. anslutningspunkt.
Filtret måste hållas rent för att kunna leverera ren tryckluft för resp. verktyg. Se tillverkarens
instruktioner för korrekt filterskötsel. Ett smutsigt och igentäppt filter resulterar i tryckfall som
minskar verktygets effekt.
• Tryckregulatorn måste kunna ställas in från 0 till 8 bar.
• Luftslangarna bör tåla minst 10,5 bar arbetstryck eller 150 % av det maximala lufttryck
som systemet skulle kunna ge. Matarslangen bör ha snabbkoppling för snabb lossning från
nippeln på verktyget.
• Se till att den tryckluft som levereras till verktyget inte kan överskrida max. tillåtet arbetstryck
(8 bar), installera en säkerhetsventil vid behov. Börja först med matartrycket inställt på lägsta
rekommenderade arbetstryck, se Tekniska data.
• Kontrollera att verktyget fungerar korrekt genom att sätta pistolnosen mot en träbit och
trycka på avtryckaren en eller två gånger.

SVENSKA
15
Smörjning
• Obs! Smörj med några droppar olja i luftanslutningen
innan verktyget används första gången.
• För bästa effekt krävs regelbunden men måttlig
smörjning. Olja som tillförs via luftanslutningen smörjer
endast avtryckarventilen, övriga inre komponenter är
infettade från fabrik och behöver normalt inte smörjas.
Använd inte sköljolja eller tillsatser eftersom sådana
smörjmedel ger snabbare slitage på verktygets
packningar och gummikuddar, vilket i sin tur ger
sämre effekt och kräver mer skötsel.
• Fyll på olja i verktygets anslutningsnippel en eller två
gånger per dag. Det behövs bara några droppar olja,
1−2 st./gång. För mycket olja hopar sig bara inne
iledningen och syns när man släpper ut luft.
• Se till att magasinets påskjutare löper lätt och inte kärvar
genom att hålla den ren och smord. Smörj även
själva slagstiftet med några droppar olja vid varje
användningstillfälle.
Användning i kyla
Vid kall väderlek i närheten av eller under 0 °C kan fukten i ledningarna frysa och störa funktionen.
Vi rekommenderar användning av luftsmörjare eller permanent frostskydd (etylenglykol) som smörjmedel.
Obs! För att förhindra frost- eller isbildning på verktygets ventiler och mekanismer, vilket kan leda
till att verktyget fungerar felaktigt, bör man undvika att förvara verktyget på ett kallt ställe.
Varning!
För att förhindra svåra ögonskador av kringflygande spikar och/eller skräp bör användaren och
övriga inom arbetsområdet alltid bära skyddsglasögon som uppfyller Arbetsmiljöverkets krav,
med skydd både framifrån och på sidorna när man laddar, använder eller servar detta verktyg.
Glasögon utan ögonskydd på sidorna samt ansiktsskärmar ger inte tillräckligt skydd!
Varningssymboler på verktyget
Läs bruksanvisningen.
Användaren och övriga
personer inom arbets-
området måste använda
skyddsglasögon och
hörselskydd.
Verktyget får inte användas på
ställningar och stegar. Använd inte
spikpistolen om fästelementen kan
skjutas igenom något och träffa
någon på andra sidan.
Pistolen är utrustad
med säkerhetsspärr.

SVENSKA
16
1
2
3
4
5 6 7 8 9 10
Produktbeskrivning
• Spikpistol i kraftig modell för grövre spikning som t.ex. byggnadssnickerier.
• Gjutet aluminiumhus med ställbart utblås 360°.
• Mekanism för enkel eller upprepad spikning.
• Avsedd för 21° plastbandad spik 50–90 mm, ø 2,8–3,3 mm.
• Magasin för 50 spikar.
• Arbetstryck 5–8 bar.
• Levereras med snabbkopplingsnippel samt förvaringslåda.
Förpackningen innehåller
• Spikpistol med monterad snabbkopplingsnippel
• Insexnyckel (6 mm)
• Två avtryckare, en orange för upprepad spikning och en svart för enkel spikning
(en lös och en monterad på verktyget).
• Förvaringslåda
Benämningar
1. Säkerhetsbygel
2. Justeringsratt för slagdjup
3. Avtryckare
4. Verktygshus (kåpa)
5. Vridbart utblås
6. Handtag
7. Anslutningsnippel
8. Magasin
9. Manöverhandtag till magasinpåskjutare
10. Magasinspärr

SVENSKA
17
Användning
1. Kontrollera innan användning att verktyget är oskadat och att alla delar sitter fast samt att
varningstexten på spikpistolen är läsbar.
2. Koppla alltid bort verktyget från luftledningen när det inte används. Töm magasinet och tryck
på avtryckaren upprepade gånger för att tömma verktyget på luft innan laddning, service eller
felsökning.
3. Välj användningsmetod. Kontrollera att du har rätt avtryckare monterad, byt avtryckare vid behov.
4. Ladda magasinet.
5. Anslut verktyget till en tryckluftsslang med snabbkoppling (hona).
6. Ställ in lämpligt tryck (5–8 bar) med en tryckregulator på tryckluftsledningen.
Förberedelser
Säkerhetsföreskrifter vid laddning
• Håll aldrig en hand eller någon annan kroppsdel inom verktygets utskjutningsområde.
• Rikta aldrig verktyget mot dig själv eller någon annan person.
• Tryck inte in avtryckaren eller för inte säkerhetsbygeln nedåt eftersom verktyget då kan
aktiveras oavsiktligt med risk för skador.
Laddning
Använd plastbandad 21° spik.
1
2
1. Koppla bort verktyget från luftslangen.
2. Dra magasinpåskjutarens manöver-
handtag (9) bakåt tills det fastnar
i öppet läge.

SVENSKA
18
Användningsmetoder
A. Enkel spikning
Kontrollera innan användning att den svarta avtryckaren (för enkel spikning) är monterad på spikpistolen.
3
4
3. Magasinet är öppet på ovansidan.
Sätt in spikarna. Kontrollera innan
laddning att spikarna är rena och
oskadade.
4. Dra magasinet lite bakåt och tryck
magasinspärren (10) framåt tills
påskjutaren släpper. Håll i manöver-
handtaget (9) och bromsa försiktigt
rörelsen framåt.
1. Håll verktyget i ett stadigt grepp (utan att hålla in avtryckaren). Tryck verktyget mot arbetsytan.
2. Tryck in avtryckaren (3) och släpp den efter spikning.
3. Flytta verktyget till nästa ställe och upprepa.

SVENSKA
19
B. Upprepad spikning
Kontrollera innan användning att den orangea avtryckaren (för upprepad spikning) är monterad
på spikpistolen.
1. Håll verktyget i ett stadigt grepp och tryck in avtryckaren (3).
2. Tryck verktyget mot arbetsytan så att säkerhetsbygeln trycks in och utlöser en spikning.
3. Håll in avtryckaren (3), flytta till nästa ställe och upprepa från steg 2.
Funktions- och säkerhetsprov
Varning! Ta bort alla spikar ur magasinet innan du gör en funktionskontroll.
1. Koppla alltid bort verktyget från luftledningen.
2. Töm magasinet och tryck på avtryckaren upprepade gånger för att tömma verktyget på luft.
3. Anslut luftslangen men rör inte avtryckaren. Tryck säkerhetsbygeln mot arbetsytan.
Verktyget får inte spika!
4. Håll verktyget fritt (tryck inte verktygsnosen mot någonting) och tryck in avtryckaren utan att
rikta verktyget mot dig själv eller någon annan. Verktyget får inte spika!
5. Tryck säkerhetsbygeln mot arbetsstycket och tryck in avtryckaren. Verktyget ska spika!
Ställ in slagstyrkan
A. Justera slagstyrkan med tryckregulatorn på luftledningen
Om spiken inte har drivits in djupt nog, kontrollera först om justeringsratten (2) för slagdjup
är inställd på max. spikdjup. Om den står på max. spikdjup så öka lufttrycket med 0,5 bar åt
gången med spikningskontroll efter varje ökning. Överskrid inte tillåtet max. arbetstryck (8 bar).
Om spiken har drivits in för djupt så minskar du lufttrycket med 0,5 bar åt gången med kontroll av
resultatet efter varje gång. Underskrid inte tillåtet min. rekommenderat arbetstryck (5 bar).
Arbeta alltid med lägsta möjliga arbetstryck. Det minimerar buller- och vibrationsnivån och de inre
komponenterna i spikpistolen håller längre.

SVENSKA
20
C
D
B. Justera slagdjupet med justeringsratten
Vrid justeringsratten (2) motsols för att minska slagdjupet eller medsols för att öka slagdjupet.
Byt avtryckare
A A
B
C
D
Med spikpistolen levereras 2 st. avtryckare.
Avtryckarmekanismen består av:
A. Avtryckare (2 st.)
B. Fjäder
C. O-ring
D. Sprint
Ta bort den monterade avtryckaren så här
1. Ta bort den lilla O-ringen (C) som håller
fast sprinten (D).
2. Dra ur sprinten åt andra hållet.
3. Spara O-ringen, fjädern, avtryckaren
och sprinten.
This manual suits for next models
2
Table of contents
Languages:
Other Cocraft Nail Gun manuals
Popular Nail Gun manuals by other brands

Senco
Senco FinishPro 15 Specifications

Paslode
Paslode FN2265 operating instructions

Campbell Hausfeld
Campbell Hausfeld CHN70500 Easy setup guide

Max
Max SN890CH/34 Operating and maintenance manual

Paslode
Paslode Paslode 403606-10 Operating and maintenance manual

Metabo HPT
Metabo HPT NP 18DSALT Instruction and safety manual

Metabo HPT
Metabo HPT NV 65AN Instruction and safety manual

Metabo
Metabo KG 90/15 Original operating instructions

Makita
Makita DPT353ZJ instruction manual

Senco
Senco SJS operating instructions

Paslode
Paslode 2125-F18 Operation manual and schematic

Campbell Hausfeld
Campbell Hausfeld IronForce IFN2190 operating instructions