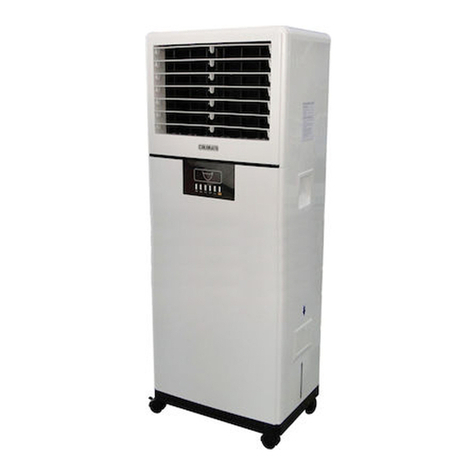
COLORATO CLAC-600N User manual

www.colorato.net
INSTRUCTION MANUAL
AIR COOLER
MODEL: CLAC-600N
Read carefully these instructions
before using the appliance

Precautions
Read this manual carefully before operation.
● Be sure to prevent the appliance from any source of fire.
Power lines and control lines should be connected correctly. Notice that earth line's section is at
least 1.5mm2,and do not share socket.
● Try to make voltage within±10V, as the air cooler will not start or will be on and off repeatedly
if the voltage is too low and it could easily be damaged if being used with wrong voltage.
Working Principle
The evaporative air cooler cools the air through water evaporation. Its working principle is:
circulating pump continuously suck water from the tank, and distribute water equably to cooling
pads by water distributor, then water on cooling pads effects with the outside air and evaporate to
drop the temperature. Thus we have fresh, cool and clean air.
Application Areas
● Living places such as the staff dormitory, drawing room, kitchen, dining room.
● Public places such as office, meeting room, class room, church, and auditorium.
● Business places such as opens type store, supermarket, restaurant.
● Outdoor activity places or, places that has heating equipment.
● Cafes, restaurants and other entertaining places.
Thank you for your trust and support for choosing our Evaporative Air Cooler.
The appearance of the air cooler you are using may not the
same as the one in this
manual, but this does not influence its operation and use.
In order to be able to use this appliance more efficiently
, please read this manual
carefully before using the appliance and keep it for future reference.

Guide for how to use the cooler
Instruction for using control system
Functions and operations
The cooler has functions: vent, cool, high-middle-low speed switch, swing, pre-cool when cooler
on, timer ON/OFF and water lack protection.
STANDBY STATE
The cooler will be in standby state when power on, with ON/OF icon light and buzzer “Bi” sound.
Note: when power on, the ON/OFF icon will keep light no matter cooler on or off.
ON/OFF
When in standby, press ON/OFF or , the cooler will run as previous mode and speed before
shutdown. When first power on, the cooler is default to run in cool mode and low speed. The
cooler will run 30s in low speed and then recover to previous running speed before shutdown.
When in running state, press ON/OFF or , the cooler will enter into standby state. When the
cooler is shutdown in cool mode, it will keep running 10s in vent mode with low speed before
cooler stops.
COOL MODE
When in vent mode, press COOL or , the cooler will enter into cool mode with vent icon off.
When in cool mode, will flash for water shortage with 5 buzzer “DiDi” sounds.
will disappear with 1 buzzer “DiDi” sound when water recovers to standard level.
VENT MODE
When in cool mode, press VENT or , the cooler will enter into vent mode with off.
SPEED SWITCH
Press SPEED or for speed switch.
SWING FUNCTION
Press SWING or to start or stop swing function.

TIMER ON/OFF
When cooler is running, press TIMER or for timer off function; when in standby, press TIMER
or for timer on function. Timer ON/OFF can be set between 0.5~7.5 hours with timer icon on.
Timer setting steps:
1. When cooler running or in standby, press TIMER or with timer icon flash;
2. Set timer between 0~7.5 hours. 0.5 hours will be increased when press TIMER or every
time. 0 means timer function is closed.
3. Timer setting will be saved automatically after 5s with timer icon on.
How to cancel timer:
a. Set the timer as 0;
b. Press ON/OFF when timer icon flashing;
c. Press ON/OFF twice (that is to restart) when timer icon on.
PRE-COOL WHEN COOLER ON
When pre-cool function is set, the cooler will start with pre-cool automatically (first power on or
previous shutdownwith cool mode). Pre-cool time can be set between 0~4mins.(.5 means 1min,1
means 2mins,1+.5 means 3mins,2 means 4mins)
How to set pre-cool function
1. When cooler in standby, press COOL 3s then loose with cool icon flash;
2. Press SPEED or to adjust pre-cool time (press one time to increase or decrease 1min);
SPEED button can be used to set pre-cool time circularly (0~4mins). can be used to increase
pre-cool time (max 4mins); can be used to decrease pre-cool time (min 0, that is, pre-cool
function stops)
3. Press COOL to save setting with cool icon off.
Note: the cooler will start with pre-cool function when in cool mode if pre-cool is set.

Circuit drawings
Technical parameters
Voltage/Frequency (V/Hz) 220-240 /50
Power of motor (W) 100
Speeds of fan 3
Type of fan Centrifugal
Air supply (m³/h) 3500
Controller LCD display + Remote control
Timer (h) 0.5-7.5
Water consumption (L/H) 3-5
Air delivery distance (m) 7-8
Pre-dust filter Available
Coverage of indoor areas (m²) 30-40*
Coverage of outdoor areas (m²) 15-25*
Inlet for auto water filling Available
Noise level (dB) <58
Capacity of water tank (L) 35
Weight of appliance (Kg) 42
Weight of appliance with water (Kg) 77
Dimensions of appliance (ΥxΜxΠ) (HxLxW) (mm) 1680x430x600
Packing dimensions (HxLxW) (mm) 1740x510x700
Gross weight (Kg) 45

Guide for adding water and draining
Guide for installing and dismantling of the
back panel
1)
Adding
water
:
Open the cover as picture and then add water, while watching the water gauge to make sure whether
the tank is full of water.
NOTE:
a. Please do not splash water to motor and other parts to avoid damage to electron components.
b. Adding water to MAX line is ok, if not, water may come out of the cooler.
c. Add clean water to the AIR COOLER.
2) Draining: Pull out the plug in the bottom.
1.
Discharge the screws at the back panel.
2. Press down the clips and pull out the panel.
3. Discharge the screws between the back and front panel.
4. Hold the back panel and pull it out.
5. Follow the above operation in reverse to install the back panel.

Trouble shooting
Problem Common cause Suggested remedy
Incorrect power connection Connect power correctly
Fuse burnt Reset circuit breaker or replace it
Air cooler does not
work
Loose electrical connections Check all electrical connections
The knob is broken Replace it
The capacitance is broken Replace it No airflow
The motor is broken Replace it
No water Add water
The knob is broken Replace it
No cooling
The pump is burnt Replace it
Unpleasant odor Dirty water Change water and clean the cooling pads
No draining Blocked Replace it
Matters that need attention
1.The Air Cooler must be installed in a place which is well ventilated and dry to ensure that it is bringing
100% fresh air into the room. This helps the cooler provide better cooling results.
2.Lock the wheels while the cooler is operating, in order to
avoid cooler sleeking.
3.The water pump will stop working when there is lack of
water in the water tank. Water should be added in time,
without exceeding the highest water line. The appliance
should be power off before adding water.
4.For safety, you should not take out the side panel while the
cooler is working.
5.Do not extend anything into the air diffuser while the cooler is working.
6.If the air cooler is used outdoors, you should power it off in case of rain or thunders.
7.The appliance should be power off during any maintenance.
8.We advice that the water should be drained everyday and the take should be cleaned, in order to keep
the air fresh.
9.The dustproof filter and the pads should be cleaned regularly, with clean water and a fluff brush.
10. In case of malfunction, do not try to repair it. Υou should call for the qualified service center to repair
it.
11. If the appliance is not going to be used for a long time, you should drain all the water for keeping it
clean and avoid ice over during the winter.
Table of contents
Other COLORATO Air Conditioner manuals
Popular Air Conditioner manuals by other brands

Mitsubishi Electric
Mitsubishi Electric PUHZ-RP35VHA2 Service manual

Ampair
Ampair ASYG09LMCA installation manual

Carrier
Carrier GAS FURNACE 58MXA Installation, start-up, and operating instructions

Wine Guardian
Wine Guardian SP25 Installation, operation and maintenance manual

Costway
Costway FP10234 instructions

HOMCOM
HOMCOM 823-046V80 manual