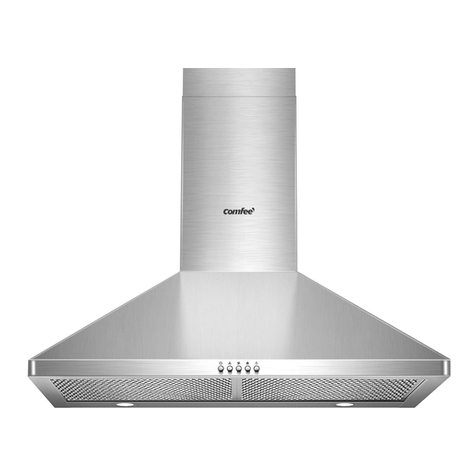
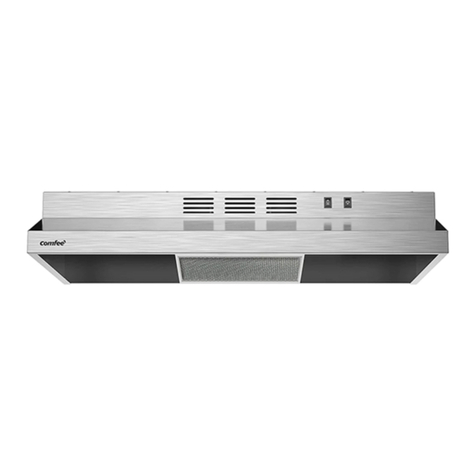
Comfee CVG30W8AST User manual

USER MANUAL
en
Power Supply: 120V
Rated Power: 323W
Frequency: 60Hz
Free 3 months
extension of the
original limited warranty
period!* Simply text a
picture of your proof of
purchase to:
1-844-224-1614
*The warranty extension is for the
three months immediately following
the completion of the product’s
original warranty period.
Comfee
30 /36 Inch
Hood
07 - 2021
Model Numbers
Glass Range
CVG

WARNING
TO REDUCE THE RISK OF INJURY TO PERSONS,
IN THE EVENT OF A RANGE TOP GREASE FIRE,
OBSERVE THE FOLLOWING:
a) SMOTHER FLAMES with a close - tting lid, cookie
sheet, or other metal tray, then turn off the gas
burner or the electric element. BE CAREFUL TO
PREVENT BURNS. If the ames do not go out
immediately, EVACUATE AND CALL THE FIRE
DEPARTMENT.
b) NEVER PICK UP A FLAMING PAN - you may be
burned.
c) DO NOT USE WATER, including wet dishcloths or
towels - a violent steam explosion will result.
Use an extinguisher ONLY if:
You know you have a class ABC extinguisher,
and you already know how to operate it.
The re is small and contained in the area
where it started.
The re department is being called.
You can ght the re with your back to an exit.
OPERATION
Always leave safety grills and lters in place.Without
these components, operating blowers could catch onto
hair, ngers and loose clothing.
The manufacturer declines all responsibility in the
event of failure to observe the instructions given here
for installation,maintenance and suitable use of the
product. The manufacturer further declines all respon-
sibility for injury due to negligence and the warranty of
the unit automatically expires due to improper mainte-
nance.
d)1)
2)
3)
4)
IMPORTANT SAFETY INSTRUCTIONS
WARNING
Unplug or disconnect the appliance from the
power supply before servicing.
WARNING
TO REDUCE THE RISK OF FIRE, ELECTRIC
SHOCK, OR INJURY TO PERSONS, OBSERVE THE
FOLLOWING:
Use this unit only in the manner intended by the
manufacturer. If you have questions, contact the
manufacturer
Before servicing or cleaning the unit, switch power
off at service panel and lock service panel
disconnecting means to prevent power from
being switched on accidentally. When the service
disconnecting means cannot be locked, securely
fasten a prominent warning device, such as a tag, to
the service panel.
Installation Work and Electrical Wiring Must Be Done
By Qualied Person(s) In Accordance With all
Aplicable Codes & Standards, Including Fire-rated
Construction.
When cutting or drilling into wall or ceiling, do not
damage electrical wiring and other hidden utilities.
Ducted systems must always be vented to the
outdoors.
A.
B.
C.
E.
F.
Sufcient air is needed for proper combustion and
burning equipment to prevent back- drafting. Follow
the heating equipment manufacturers guideline and
safety standards such as those published by the
National Fire Protection Association (NFPA), the
American Society for Heating, Refrigeration and Air
Conditioning Engineers (ASHRAE), and the local code
authorities.
D.exhausting of gases through the ue (Chimney) of fuel
WARNING
To Reduce The Risk Of Fire Or Electric Shock, Do
Not Use This Hood With Any External Solid State
Speed Control Device.
2

Save these instructions for future references
Approved for residential appliances
For residential use only
Do not attempt to install or operate your appliance until
you have read the safety precautions in this manual.
Safety items throughout this manual are labeled with a
WARNING or CAUTION based on the risk type.
This is the safety alert symbol. It is used to alert you to
potential personal injury hazards. Obey all safety messeges
that follow this symbol to avoid possible injury or deat'h.
WARNING
This symbol alerts you to situations that may
cause serious body harm, death or property
damage.
CAUTION
CAUTION indicates a potentially hazardous
situation which, if not avoided, may result in
minor or moderate injury.
IMPORTANT
IMPORTANT indicates installation, operation,
maintenance or valuable information that is not hazard
related.
IMPORTANT SAFETY INSTRUCTIONS
CAUTION
FOR GENERAL VENTILATING USE ONLY. DO NOT
USE TO EXHAUST HAZARDOUS OR EXPLOSIVE
MATERIALS OR VAPORS.
IMPORTANT SAFETY INSTRUCTIONS
Read all instructions before using this appliance.
WARNING
GROUNDING INSTRUCTIONS
This appliance must be grounded. In the event of an
electrical short circuit, grounding reduces the risk of
electric shock by providing an escape wire for the
electric current. This appliance is equipped with a cord
having a grounding wire with a grounding plug. The
plug must be plugged into an outlet that is properly
installed and grounded.
WARNING - IMPROPER GROUNDING CAN
RESULT IN A RISK OF ELECTRIC SHOCK.
Consult a qualified electrician if the grounding
instructions are not completely understood, or if doubt
exists as to whether the appliance is properly
grounded.
Do not use an extension cord. If the power supply
cord is too short, have a qualified electrician install an
outlet near the appliance.
CAUTION
To reduce risk of re and to properly exhaust
air, do not vent ex
walls, ceilings, attics, crawl spaces, or garages.
WARNING
TO REDUCE THE RISK OF FIRE, USE ONLY METAL
DUCT WORK.
Install this hood in accordance with all requirements
specied.
haust air into spaces within
WARNING
TO REDUCE THE RISK OF A RANGE TOP GREASE
FIRE.
Never leave surface units unattended at high
settings. Boilovers cause smoking and greasy
spillovers that may ignite. Heat oils slowly on low or
medium settings.
Always turn hood ON when cooking at high heat or
when ambeing food (l.e. Crepes Suzette, Cherries
Jubilee, Peppercorn Beef Flambe’).
Clean ventilating fans frequently. Grease should not
be allowed to accumulate on fan or lter.
Use proper pan size. Always use cookware
appropriate for the size of the surface element.
a)
b)
c)
d)
CAUTION
USE ONLY WITH RANGE HOOD CORD
CONNECTION KITS THAT HAVE BEEN
INVESTIGATED AND FOUND ACCEPTABLE FOR
USE WITH THIS MODEL RANGE HOOD.
3

3 4
5 6 7 8
9 10 11
RECOMMENDATIONS AND SUGGESTIONS
The instructions for Use apply to several versions of this appliance. Accordingly, you
may find descriptions of individual features that do not apply to your specific appliance.
INSTALLATION
The manufacturer will not be held liable for any damages resulting from incorrect or
improper installation.
The minimum distance between the supporting surface for the cooking vessels on the
gas appliance, this distance shall be at least 65 feet. If the instructions for installation for
the gas range hood specify a greater distance, this has to be taken into account. The distance of
65 feet can be reduced for:non-combustible parts of range hoods, and parts operating at
safety extra low voltage,Provided these parts do not give access to live parts if deformed ;)
Check that the mains voltage corresponds to that indicated on the rating plate fixed to
the hood.
For Class I appliances, check that the domestic power supply guarantees adequate
earthing.
Connect the extractor to the exhaust flue through a pipe of minimum diameter 120inch.
The route of the flue must be as short as possible.
The air must not be discharged into a flue that is used for exhausting fumes from
appliances burning gas or other fuels.
If the extractor is used in conjunction with non-electrical appliances (e.g. gas burning
appliances),a sufficient degree of aeration must be guaranteed in the room in order to
prevent the backflow of exhaust gas. The kitchen must have an opening
communicating directly with the open air in order to guarantee the entry of clean air.
When the each instance of cooker with range hood is used in conjunction with
appliances supplied with energy other than electric, the negative pressure in the
room must not exceed 0,04 mbar to prevent fumes being drawn back into the room
by the cooker hood.
Regulations concerning the discharge of air have to be fulfilled.
USE
The Range hood is only for home use, not suitable for barbecue, roast shop and other commercial purposes.
Never use the hood for purposes other than for which it has been designed.
Never leave high open flames under the hood when it is in operation.
Adjust the flame intensity to direct it onto the bottom of the pan only, making sure that
it does not engulf the sides.
Deep fat fryers must be continuously monitored during use: overheated oil can burst
into flames.
Do not flame under the range hood; risk of fire.
This appliance can be used by children aged from 8 years and above and persons
with reduced physical, sensory or mental capabilities or lack of experience and
knowledge if they have been given supervision or instruction concerning use of the
appliance in a safe way and understand the hazards involved.
Children should be supervised to ensure that they do not play with the appliance.
Cleaning and user maintenance shall not be made by children without supervision.
“CAUTION: Accessible parts may becom
e hot when used with cooking appliance
s”.
MAINTENANCE
Switch off or unplug the appliance from the mains supply before carrying out any
maintenance work.
Clean and/or replace the Filters after the specified period (Fire hazard).
Clean the hood using a damp cloth and a neutral liquid detergent.
The appliance uses 4 range hood elements at most.
The range hood and its filter should be cleaned regularly according to the instruction.
The symbol is packaging indicates that this product may not be treated as household
waste. Instead it shall be handed over to the applicable collection point for the recycling of
electrical and electronic equipment. By ensuring this product is disposed of correctly, you
will help prevent potential negative consequences for the environment and human health,
which could otherwise be caused by inappropriate waste handling of this product. For more
detailed information about recycling of this product, please contact your local city office,
your household waste disposal service or the shop where you purchased the product.
Rang hood and the lowest part of the range hood. ( When the range hood is located above a e
4

1
Ref. Qty.
1
2.1
Product Components
Hood Body,complete with:
Controls, Light, Blower and Filter.
1 Lower Decorative Chimney
2.2 1 Upper Decorative Chimney
3 1
4
Flange
1 Exhaust Pipe
5 2 The Activated Charcoal filter (2 pack) for
Ductless Recirculation installation
(Sold Separately on Amazon. search part
# CVP/CVG -CF)
1
2.1
2.2
3
4
5
1 Instruction Manual
11
12
10
20
21
COMPONENTS
Qty. Documentation
10
7
11
Hood fixing bracket
7
Wall Plugs
12
6
20 1
21 2 Chimney fixing bracket
Ref. Qty. Installation Components
6
2
6Grease filter (30'')
Grease filter (36'')
3
5
(Adjustable)
Screws 0.2" x 1.97" (0.5 x 5 cm)
Screws 0.17" x 0.37" (0.42 x 0.95 cm)

11.38”
19.69”
A
11.38”
Min. Min.
25.59” 25.59”
B
C
11.38”
MVG36W7AST MVG30W7AST
A
35.43”
30”
B
10.87” 10.87”
C
12.72” 11.5”
A
11.38”
19.69”
6
unit:inch

C
X
BY
Optio
n Chimney X Y
1"57.51+"57.51 5.19"
"18.03-"36.71
2"96.91+"96.91 9.13"
"96.83-"65.12
3"60.22+"60.22 11.5" "44.34-"49.32
21 11
D12
10 11
(3) 20
A
Vertical reference line
(1)
(2)
INSTALLATION
WALL DRILLING AND BRACKET FIXING
As a first step, proceed with thefollowing drawings:
Mark Points:
A veritcal line up to the ceiling or up to the upper limit, at the center of the area in which the
hood is to be fitted.
The cooker hood should be placed A ) up from the cooking
plane for safe and a good effect.
A horizontal line B at a minimumabove the cooker top.
inch above the B.
A horizontal line D at
Mark a point (1) on the horizontal line D, to the vertical reference line.
Repeat this operation on the other side, checking that the three marks are leveled.
Mark a point (2) on the horizontal line C, to the vertical reference line.
Repeat this operation on the other side, checking that the three marks are leveled.
Mark a point (3) on the horizontal line B,
Repeat this operation on the other side, checking that the three marks are leveled.
( horizontal line
to the vertical reference line.
above the cooker hood.
A horizontal line C at a
5.19
7
3.13"
2.38"
2.38"
25.63" - 29.5"
36.63" - 40.56"
17.63" - 30.81"
3.15" 3.15"
2.36" 2.36"
2.36" 2.36"
36.61" - 40.55"
25.59" - 29.53"

12
21
21
Fixlower decorative chimney
Hook the hood body
20.
21 10
C
12.
21
12.
Right Wrong
Fix the brackets:
11
20 10
B.
21 10
D.
3
4
5.9" 4.72"
4.72"
8

CHIMNEY ASSEMBLY
Upper Decorative Chimney
Insert the upper decorative chimney 2.2 into the lower decorative chimney 2.1 and drag it up
to the horizontal line D.
Connect upper decorative chimney 2.2 and chimney fixing bracket 21 with 2 screws 12.
12
D
2.2
2.1
USE
Speed adjustment.
2 3 4
5 6 8
9 10 11
9
ON/OFF LIGHTING BUTTON: Press
the lights on, press it again to turn lights off.
OFF MOTOR BUTTON: Press this button to stop the motor
operation.
LOW SPEED : Press
speed setting.
MEDIUM SPEED: Press
HIGH SPEED: Press
this button to operate the unit on the LOW
this button to operate the unit on the
MEDIUM speed setting.
this button to operate the unit on the HIGH
speed setting.
this button to turn on

MAINTENANCE
CLEANING METAL SELF-SUPPORTING GREASE FILTERS
The filters must be cleaned every 2 months of operation, or
more frequently for particularly heavy usage, and can be
washed in a dishwasher.
Pull the comfort panels to open them.
Remove the filters one by one pushing them towards the back
side of the hood unit and simultaneously pulling downwards.
Any kind of bending of the filters has to be avoided when washing
them. Before fitting them again into the hood make sure that they
are completely dry. (The color of the filter surface may change
throughout the time but this has no influence to the filter efficiency).
When fitting the filters into the hood pay attention that they are
mounted in correct position the handle facing outwards.
REPLACING THE ACTIVATED CHARCOAL FILTER
Sept1: Remove the metal grease filters.
If you choose Recirculation Ductless Installation, Activated Charcoal Filters are required for
operation. Please visit Amazon.com and search for Model # CVP/CVG-CF to purchase the 2 Pack
of Charcoal Filters. These filters are not washable and must be replaced every 4 months of
operation, or more frequently with heavy usage.
BAFFLE FILTER
10
ACTIVATED CHARCOAL FILTER (RECIRCULATION DUCTLESS INSTALLATION)
Sept2: Locate the motor inside of the range
hood unit, underneath the baffle filters.
Step3: Take the recirculating filter and twist and
lock it into place on the right side of the motor
Close
Step4: Repeat step 3 on the left side of the motor
Step5: Reinstall the arc-flow baffle filters back into
place.

1.
2.
You cannot replace individual light bulbs, the entire light module has to be removed. Again
When changing the light modules, the contacts are live.
Before changing the light module(s), unplug the appliance from the mains or switch off the
circuit breaker in the fuse box.
Remove the grease filter and carefully remove the 4 screws from each side on the opening
(a Phillips head screwdriver will be needed to remove the screws).
Lower the control panel at the front by carefully pulling it downwards. You can now access
the light module and terminals.Replace the lamp ( commercially available LED lamp
(max.1.5w).
LIGHTING
LIGHT REPLACEMENT
Replacing the light modules
2 3 4
5 6 7 8
911
DISPOSAL OF OLD ELECTRICAL APPLIANCES
The European directive 2012/19/EU on Waste Electrical and Electronic Equipment (WEEE), requires that old
household electrical appliances must not be disposed of in the normal unsorted municipal waste stream. Old
appliances must be collected separately in order to optimize the recovery and recycling of the materials they
contain, and reduce the impact on human health and the environment.
The crossed out “wheeled bin” symbol on the product reminds you of your obligation, that when you dispose of
the appliance, it must be separately collected.
Consumers should contact their local authority or retailer for information concerning the correct disposal of
their old appliance.
Max Power Voltage Picture Lamp Cap ILCOS D code
1.5W DC 12 V —— DSR-1.5-S-70
Round/ Diameter:
2-3/4"
11
need to add info for recommended replace light modules.

TROUBLES SHOOTING
2 3 4
5 6 7 8
9 10
Fault Cause Solution
Light on, but
motor does not
work
The blades are blocked.
The capacitor is damaged.
The motor is damaged.
The internal wiring of motor is cut off/
disconnected. An unpleasant smell
may be produced.
Both light and
motor do not
work
Apart from the above mentioned, check the following:
Light damaged. Replace lights.
Power cord loose. Connect
Oil leakage
Outlet and the air ventilation entrance
are not tightly sealed. Take down the outlet and seal with glue
Vibration
The blade, if damaged, can cause
vibrating.
The motor is not tightly fastened.
The range hood is not tightly fixed. Fixed the range hood tightly.
Insufficient
suction
The distance between the cooker
hood and the cooker top is too large.
Readjust the distance.
Too much ventilation from open doors
or windows.
Choose a new place to install the
appliance or close some doors / windows.
The
machine
inclines
The fixing screws are not tight
enough.
Tighten the fixing screw and make it
horizontal.
The hanging screws are not tight
enough
Tighten the hanging screw and make it
horizontal.
Call Consumer Service
power cord
or clean grease filters.
Call Consumer Service
Fasten the motor tightly or Call
Consumer Service.
Comfee
Comfee
Comfee
Comfee
Comfee
Comfee
12

Customer Service:
Phone: 8666464332
1 YEAR LIMITED WARRANTY
This is the only express warranty for this product and is in lieu of any other warranty or
condition.
This product is warranted to be free from defects in material and workmanship for a
period of one (1) year from the date of original purchase. During this period, your
exclusive remedy is repair or replacement of this product or any component found to be
defective, at our option; however, you are responsible for all costs associated with
returning the product to us and our returning the product or component under this
warranty to you. If the product or component is no longer available, we will replace with
a similar one of equal or greater value.
We exclude all claims for special, incidental, and consequential damages by breach of
express or implied warranty. All liability is limited to amount of the purchase price.
Every implied warranty, including any statutory warranty or condition of merchantability
RU¿WQHVVIRUSDUWLFXODUSXUSRVHLVGLVFODLPHGH[FHSWWRWKHH[WHQWSURKLELWHGE\ODZLQ
ZKLFKFDVHVXFKZDUUDQW\RUFRQGLWLRQLV limited to the duration of this written warranty.
7KLVZDUUDQW\JLYHV\RXVSHFL¿FOHJDOULJKWV<RXPD\KDYHRWKHUOHJDOULJKWVWKDWYDU\G
HSHQGLQJRQZKHUH\RXOLYH6RPHVWDWHVRU provinces do not allow limitations on
implied warranties or special, incidental consequential damages, so the foregoing
limitations may not apply to you.
13
This warranty does not cover wear from normal use or operation that does not comply
with the instruction manual or damages to the product resulting from accident, alteration,
abuse, or misuse. This warranty extends only to the original consumer purchaser or gift
recipient. Keep the original sales receipt, as proof of purchase is required to make a
warranty claim. This warranty is void if product is used for other than single-family
household use or subjected to any voltage and waveform other than as specified on
the label.

2 3 4
5 6 7 8
9 10 11

2 3 4
5 6 7 8
9 10 11

2 3 4
5 6 7 8
9 10 11
This manual suits for next models
1
Table of contents
Other Comfee Ventilation Hood manuals
Popular Ventilation Hood manuals by other brands

Zephyr
Zephyr Verona Island ZVN-M90AG Use, care and installation guide

Hearth and Home Technologies
Hearth and Home Technologies Termination Cap ST1175 installation instructions

John Lewis
John Lewis JLHDA101 user guide

Electrolux
Electrolux DGB3850M instruction manual

Euromaid
Euromaid ICF9BLS Installation and operation manual

Gunter & Hauer
Gunter & Hauer BRITA 60 manual