manuals.online logo
Brands
  1. Home
  2. •
  3. Brands
  4. •
  5. Comfort Zone
  6. •
  7. Fan
  8. •
  9. Comfort Zone CZHVP30CN User manual

Comfort Zone CZHVP30CN User manual

Owner’s Manual
Please Read & Save These Instructions
www.comfortzoneproducts.com
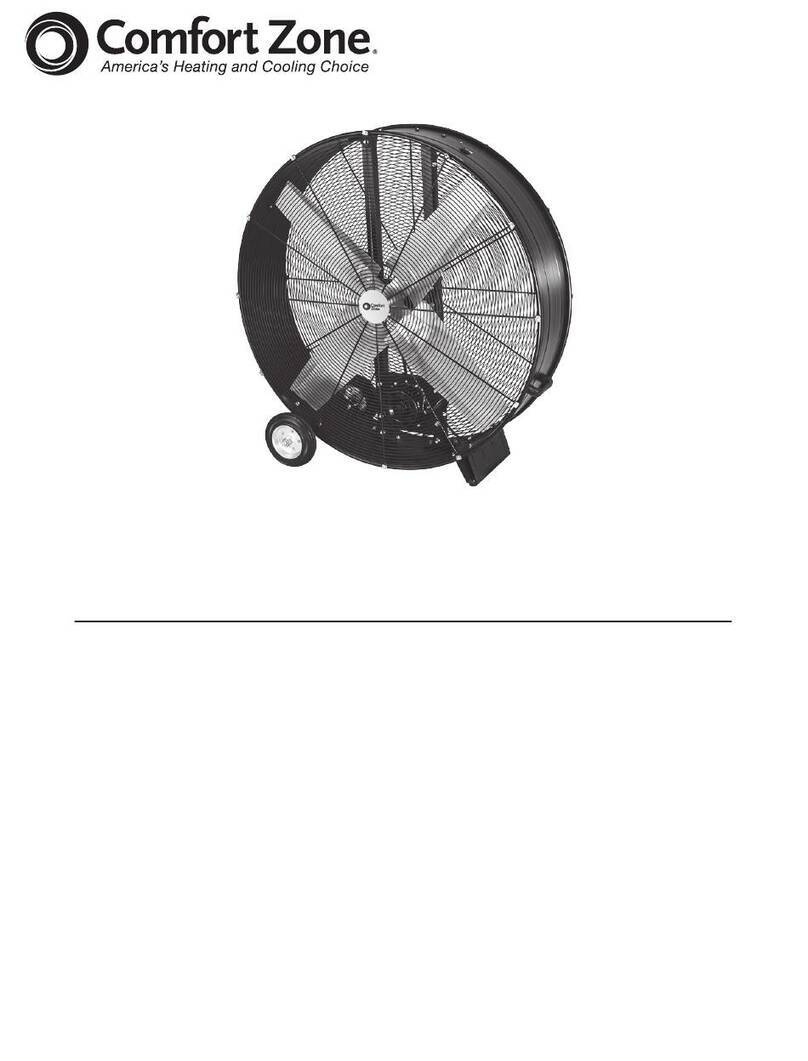
3 Speed Industrial
Ultra-Power Fan
CZHVP30CN
Features:
• 3 Powerful Fan Speeds
• Powerful Ventilation
for Large Areas
• High-Velocity
Aluminum Fan Blades
• All Metal Construction
with Metal Safety Grille
• Height Adjustable
from 56in to 76in
• Adjustable Tilt Angle
• Meets OSHA
Standards
2
2CZHVP30CN
www.comfortzoneproducts.com
Intended Use:
This product is intended for indoor residential, office, industrial,
or other commercial applications. Use only with electrical wiring
that is in good working order and that meets applicable codes
and ordinances. If you have any questions whether your wiring is
adequate, consult a qualified electrician.
While using your fan, you should follow the IMPORTANT
INSTRUCTIONS listed below. As part of those instructions, we
have used the word "WARNING" to indicate the level of hazard:
WARNING indicates a hazard which, if not avoided, could result
in injury or death.
IMPORTANT INSTRUCTIONS
As with all electrical appliances, basic safety precautions should
always be followed to reduce the risk of electric shock, fire, or
injury to persons, including the following precautions:
• Read all the instructions before using this fan.
• Use this fan only as described in this manual. Any other use not
recommended by the manufacturer may cause electrical shock,
fire or injury to persons.
• Do not operate the fan with a damaged power cord or after the
fan malfunctions or has been dropped in any manner.
• Use of extreme caution is necessary when any fan is used by or
near children, disabled persons or pets and whenever the fan is
left operating unattended.
• Do not place the fan on a small, unlevel, uneven or any surface
which might allow fan to tip or fall.
• For proper operation, fan should be placed on a smooth,
non‑combustible, level surface.
• Always unplug fan when not in use, when moving from place
to place, when assembling or disassembling parts, and before
cleaning.
• The use of attachments, not recommended or sold by the
manufacturer, may cause hazards.
• Do not use outdoors.
• Do not use fan in window. Rain may cause electrical hazard
(for non‑window models).
• Do not operate the fan with blade guards or any safety device
removed.
• Avoid the use of extension cords due to risk of fire. If an
extension cord must be used, the cord must be minimum
14 AWG and rated not less then 1875 watts.
• Do not run power cord under carpeting. Do not cover cord with
throw rugs, runners or the like. Arrange cord away from traffic
area where it will not be tripped over.
• Do not insert or allow any object to enter any openings on the
fan. Doing so may cause electric shock and/or fire hazard.
Avoid contact with moving parts.
• This appliance is not intended for use by persons (including
children) with reduced physical, sensory or mental capabilities
or lack of experience and knowledge, unless they have
been given supervision or instruction concerning use of the
appliance by a person responsible for their safety.
• Children should be supervised to ensure they do not play with
the appliance.
READ & SAVE THESE
INSTRUCTIONS
m WARNING: Shock Hazard
Use your fan only in dry environments. This fan is not intended
for use in a bathroom, laundry area, or similar locations, or near
sinks, washing machines, swimming pools or other sources of
water. Never locate fan where it may fall into a bathtub or other
water receptacle. Do not use in damp environments such as
flooded basements.
mWARNING: Hot Surfaces
Do not touch fan motor when in use. This motor is hot when in
use, to avoid burns, do not let bare skin touch hot surfaces.
mWARNING: Fire Hazard
Fans have arcing or sparking parts inside. Do not use near
combustible materials or flammable gases or sources of heat.
DO NOT USE in areas where gasoline, paint or flammable
materials are used or stored. To prevent a possible fire, do not
block air intakes or exhaust in any manner. Do not insert or allow
foreign objects to enter any ventilation or exhaust opening as this
may cause an electric shock, fire, or damage the fan.
mWARNING: Electrical Shock Hazard
Do not use with damaged cord or plug. Use with adequate
electrical system that is up to code.
m CAUTION: to Prevent Electric Shock, this product
has a three prong grounded plug that must be inserted into a
matching properly grounded outlet to reduce the risk of electrical
shock. Do not attempt to defeat this safety feature.
mWARNING: to Reduce the Risk of Fire or Electric
Shock, do not use this product with any solid‑state speed
control device.
DO NOT operate any fan with a damaged cord or plug or after
fan malfunctions, has been dropped or damaged in any manner.
Do not operate fan with a broken blade, safety cage or any visual
imperfections. Disconnect power before servicing. For repairs
covered under warranty, see warranty statement. For all other
repairs contact World and Main Customer Service by telephone
or mail for information and assistance.
DO NOT run power cord under carpeting. DO NOT cover cord
with throw rugs, runners or the like. Arrange cord away from
traffic area where it will not be tripped over. Avoid the use of
extension cords due to risk of fire. If an extension cord must
be used, the cord must be minimum 14 AWG and rated not
less then 1875 watts. Do not use an extension cord unless the
plug can be completely inserted into its receptacle. Unplug
the fan when not in use. Do not operate fan with its ventilation
obstructed.
3
3
CZHVP30CN
www.comfortzoneproducts.com
NOTE: This fan is equipped with thermal cutoff switch. If fan
overheats for any reason, this switch will stop the fan. The switch
will reset automatically after the fan cools.
Operating Instructions:
Plug power cord into any properly grounded, 3‑prong, 120 volt
wall outlet. The fan speed is controlled by a 3‑speed rotary
switch. Turn the rotary switch to change the speed or turn the
fan off. Height of fan can be adjusted by loosening cap screw
(19). Make sure collar is tight before operating fan. The angle
can be adjusted by loosening the knob screw (16) which holds
the motor to the column. Once you have the desired angle, be
sure to tighten the knob screw. Do not attempt to relocate fan by
dragging the base. The fan can be moved to its next location by
tilting it on the edge of the base and rolling it, or by carrying it.
Assembly Instructions
Tools Required:
Phillips Screwdriver and Adjustable Wrench.
Head Assembly Fig 1
1. Mount motor assembly (9) to extension column (14) with
1/2" x 1" hex bolt (15) one lock washer (10) and hex nut (11)
and 1/4" x 1" knob screw (16) one lock washer (13) and hex
nut (12). Ensure that the knob on the 1/4" knob screw and the
head of the 1/2" bolt are on the same side. (See figure 1)
2. Tilt motor slightly up and tighten motor mounting nut.
3. Place the rear guard (8) on motor studs. Place four additional
flat washers (7), over grille onto motor studs. Secure using four
hex nuts (5).
4. Slide fan blade (4) on motor shaft with hub pointing towards
the motor. Tighten set screw (3) against flat on shaft with 5/32
hex key wrench provided.
5. Mount the front guard to the rear guard using grille clips (17).
Pedestal Assembly Fig 2
1. Place the spring (30) inside painted column (22).
2. Mount the painted column (22) to the base using four carriage
bolts 5/16" x 3/4" (23) lock washers (25) and nuts (26).
3. Adjust the extension column (14) to the proper height, then
tighten the plastic collar (18) using a 1/4‑20 x 1/4" cap screw
(19) and a 1/4"‑20 nut (12).
Fig 1
#Description Qty
1Nameplate 1
2Front Guard 1
3
Set Screw
5/16"‑ 24 x .250 1
4Fan Blade 1
5Nut #8‑32 4
6Dome Cover 1
7Flat Washer #10 4
8Rear Guard 1
9Motor 1
10 Lock Washer 1/2" 2
11 Nut 1/2"‑13 2
12 Nut 1/4"‑20 2
13 Lock Washer 1/4" 1
14 Extension Column 1
15 Bolt 1/2" – 13 x 1 1
16
Knob Screw
1/4" – 20 x 1" 1
17 Grille Clip 6
18 Collar 1
19
Cap Screw
1/4 ‑ 20 x 1‑1/4" 1
20
Power Cord
9ft/274cm 1
21 Screw #8 – 32 x 1/4" 1
22 Painted Column 1
23
Carriage Bolt
5/16" – 18 x .750 5
24 Base Plate 1
25 Lock Washer 5/16" 4
26 Nut 5/16" – 18 5
27 Rotary Switch 1
28 Plastic Spacer 1
29 Screw #8 – 18 x 5/16" 2
30 Spring 1
Fig 2
30
4
4CZHVP30CN
www.comfortzoneproducts.com
Limited Warranty
This unit is guaranteed to the original retail purchaser against defects in quality or workmanship for a period of one year from the date
of original purchase. If this unit fails because of a manufacturing defect within 30 days of purchase, return the unit, with your receipt,
to the retailer. After 30 days, but within the warranty period, if the unit was purchased within the continental United States, return it,
freight prepaid, to World and Main for repair or replacement. If the unit was purchased outside the continental United States, return
the unit to the place of purchase. This warranty does not cover damage caused by misuse, abuse, overheating or alteration. Repairs
made by anyone other than World and Main are not covered in this warranty. World and Main will not be held liable for any losses due
to neglectful operation. All implied warranties, including the warranties of merchantability and of fitness of purpose, if applicable, are
hereby limited in duration to the period of one year from the date of original retail purchase. Some states do not allow limitations on
how long an implied warranty lasts, so the above limitations may not apply to you. Incidental or consequential damages arising from a
breach of either express or implied warranties are hereby disclaimed and excluded. Some states do not allow the exclusion of limitation
of incidental or consequential damages, so this limitation or exclusion may not apply to you. Upon the expiration of this warranty all
such liability will terminate. No other warranties are expressed or implied.
This warranty gives you specific legal rights, and you may also have other rights which vary from state to state. No informal dispute
settlement mechanisms are available. This limited warranty is given in lieu of all other warranties.
Manufactured for:
World and Main (Cranbury), LLC
324A Half Acre Rd.
Cranbury, NJ 08512 USA
800‑221‑6895
www.comfortzoneproducts.com
Rev. 10/29/19
Maintenance
Warning: ALWAYS UNPLUG THE UNIT BEFORE ATTEMPTING TO PERFORM ANY SERVICE FUNCTION.
Cleaning: Remove front guard by removing screws and nuts from opposing guards with a screw driver. To clean the fan blade, be
sure to use a soft cloth moistened with a mild soap solution. Use a soft brush and soap solution to clean the grilles. DO NOT use
gasoline, benzene or thinner or other hazardous liquids or abrasives.
Lubrication: The motor is pre‑lubricated at the factory and requires no additional oil.
Symptom Possible Causes Corrective Action
Fan fails to operate 1. Cord not plugged in
2. Fuse blown or circuit breaker open
3. Low voltage
4. Defective switch
5. Motor winding open
6. Motor bearings dry
7. Limit control
1. Plug cord into outlet
2. Replace fuse or reset breaker
3. Ensure that there is proper voltage at outlet
4. Replace switch
5. Replace motor
6. Replace motor
7. Vacuum air blockage on fan guards; Clear air
obstruction; wait for motor to cool down
Fan operates noisily 1. Motor bearings dry
2. Fan blade loose
1. Replace motor
2. Tighten fan blade
Fan vibrates 1. Fan sitting on uneven or inclined surface
2. Fan blade dirty
3. Fan blade broken or bent
1. Place fan on level surface
2. Clean fan blade (see Maintenance)
3. Replace fan blade
Troubleshooting Chart
Work Should be Done by a Factory Authorized Service Center

Other Comfort Zone Fan manuals

Comfort Zone CZHV201BS-EU User manual

Comfort Zone

Comfort Zone CZHV201BS-EU User manual

Comfort Zone CZST180BS-EU User manual

Comfort Zone

Comfort Zone CZST180BS-EU User manual

Comfort Zone CZ319WT User manual

Comfort Zone

Comfort Zone CZ319WT User manual

Comfort Zone CZHVW30EX Series User manual

Comfort Zone

Comfort Zone CZHVW30EX Series User manual

Comfort Zone CZHV82T Series User manual

Comfort Zone

Comfort Zone CZHV82T Series User manual

Comfort Zone CZ5USBAS User manual

Comfort Zone

Comfort Zone CZ5USBAS User manual

Comfort Zone Powr Curve CZHV201 Series User manual

Comfort Zone

Comfort Zone Powr Curve CZHV201 Series User manual

Comfort Zone CZ6XMWT User manual

Comfort Zone

Comfort Zone CZ6XMWT User manual

Comfort Zone CZST162BTE Series User manual

Comfort Zone

Comfort Zone CZST162BTE Series User manual

Comfort Zone CZBT4AS User manual

Comfort Zone

Comfort Zone CZBT4AS User manual

Comfort Zone CZ112 Series User manual

Comfort Zone

Comfort Zone CZ112 Series User manual

Comfort Zone CZ310R Series User manual

Comfort Zone

Comfort Zone CZ310R Series User manual

Comfort Zone CZST181R Series User manual

Comfort Zone

Comfort Zone CZST181R Series User manual

Comfort Zone CZ16W Series User manual

Comfort Zone

Comfort Zone CZ16W Series User manual

Comfort Zone CZMC48B Series User manual

Comfort Zone

Comfort Zone CZMC48B Series User manual

Comfort Zone CZPF402AS2-EC User manual

Comfort Zone

Comfort Zone CZPF402AS2-EC User manual

Comfort Zone CZ700T User manual

Comfort Zone

Comfort Zone CZ700T User manual

Comfort Zone CZHVP18EX User manual

Comfort Zone

Comfort Zone CZHVP18EX User manual

Comfort Zone CZ161 User manual

Comfort Zone

Comfort Zone CZ161 User manual

Comfort Zone CZHV18BK User manual

Comfort Zone

Comfort Zone CZHV18BK User manual

Comfort Zone CZ200A User manual

Comfort Zone

Comfort Zone CZ200A User manual

Comfort Zone CZMC36 Series User manual

Comfort Zone

Comfort Zone CZMC36 Series User manual

Comfort Zone CZST185 Series User manual

Comfort Zone

Comfort Zone CZST185 Series User manual

Comfort Zone CZHV12B Series User manual

Comfort Zone

Comfort Zone CZHV12B Series User manual

Popular Fan manuals by other brands

Hoffman nVent A4AXFN instruction sheet

Hoffman

Hoffman nVent A4AXFN instruction sheet

Ryobi ONE+ R18MF-0 Original instructions

Ryobi

Ryobi ONE+ R18MF-0 Original instructions

Team Kalorik TKG VT 1018 operating instructions

Team Kalorik

Team Kalorik TKG VT 1018 operating instructions

Vent-Axia 496575 Installation and wiring instructions

Vent-Axia

Vent-Axia 496575 Installation and wiring instructions

Gree 3VIR09HP115V1A Service manual

Gree

Gree 3VIR09HP115V1A Service manual

UltimateAir ER80M manual

UltimateAir

UltimateAir ER80M manual

ProKlima FN-111453.1 instruction manual

ProKlima

ProKlima FN-111453.1 instruction manual

Lfans L4 manual

Lfans

Lfans L4 manual

Fanimation ARCHIVE LP3071 Series quick start guide

Fanimation

Fanimation ARCHIVE LP3071 Series quick start guide

NuTone HEAT-A-VENT 9905 installation instructions

NuTone

NuTone HEAT-A-VENT 9905 installation instructions

Melissa Tower Ventilator 671-117 manual

Melissa

Melissa Tower Ventilator 671-117 manual

Greenheck SFB Installation, operation and maintenance manual

Greenheck

Greenheck SFB Installation, operation and maintenance manual

EVOAQ Summer Upgrade Kit instructions

EVOAQ

EVOAQ Summer Upgrade Kit instructions

Panasonic FV-05VFL1 Notice de montage

Panasonic

Panasonic FV-05VFL1 Notice de montage

YUHAO 1053A installation instructions

YUHAO

YUHAO 1053A installation instructions

American Aldes AIRLET 100 Installation operation & maintenance

American Aldes

American Aldes AIRLET 100 Installation operation & maintenance

Hunter 23902 Parts guide

Hunter

Hunter 23902 Parts guide

aerauliqa MHS manual

aerauliqa

aerauliqa MHS manual

manuals.online logo
manuals.online logoBrands
  • About & Mission
  • Contact us
  • Privacy Policy
  • Terms and Conditions

Copyright 2025 Manuals.Online. All Rights Reserved.