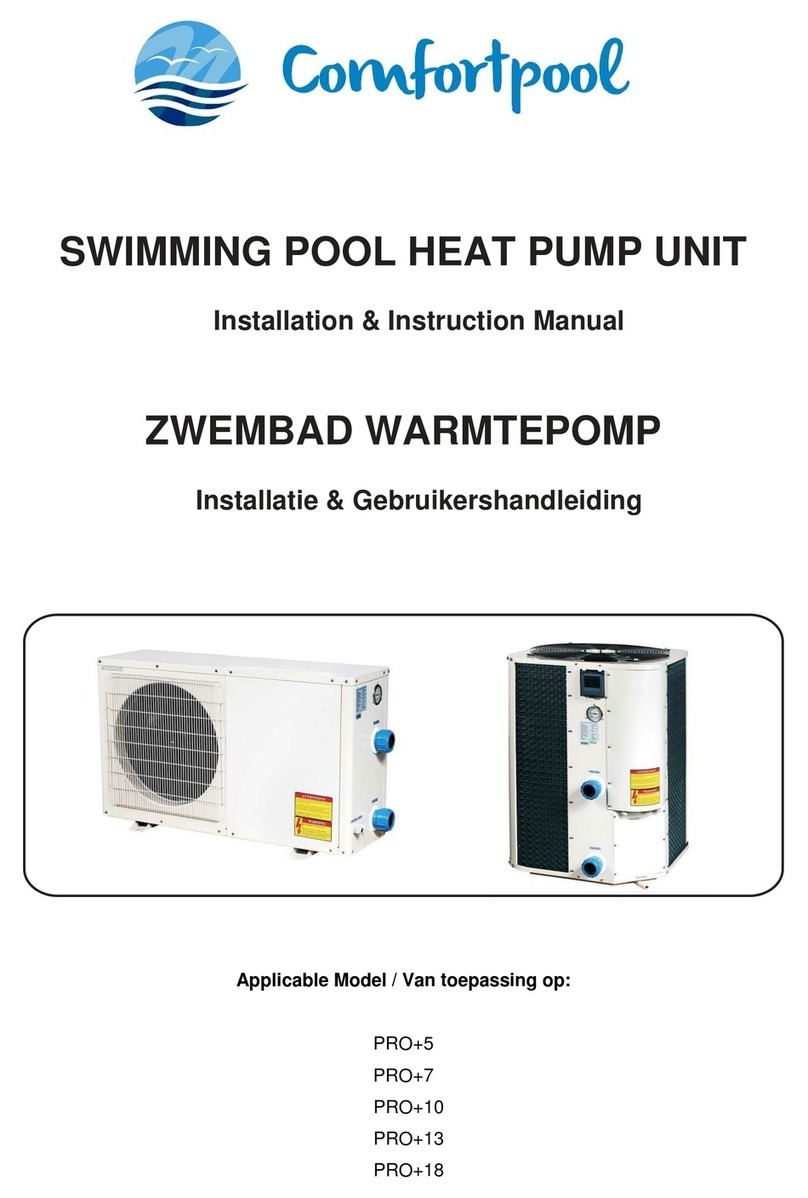
COMFORTPOOL ECO+3 Service manual

SWIMMING POOL HEAT PUMP UNIT
Installation & Instruction Manual
ZWEMBAD WARMTEPOMP
Installatie & Gebruikershandleiding
POOL-WÄRMEPUMPE
Installations- & Benutzerhandbuch
Applicable Model / Van toepassing op / Für folgende Modelle:
ECO+3
ECO+5
ECO+8
ECO+10
ECO+12

2
Contents
CONTENTS ___________________________________________________________________________ 2
1. PREFACE _________________________________________________________________________ 5
2. SPECIFICATIONS ____________________________________________________________________ 10
2.1 Performance data of ECO Swimming Pool Heat Pump Unit ___________________________________________________ 10
2.2 Dimensions of swimming pool heat pump unit _____________________________________________________________ 11
3. INSTALLATION OF THE HEAT PUMP UNIT_________________________________________________ 12
3.1 Heat pump location ___________________________________________________________________________________ 13
3.2 Distance to the pool ___________________________________________________________________________________ 14
3.3 Connecting the bypass _________________________________________________________________________________ 14
3.4 Electrical wiring_______________________________________________________________________________________ 15
3.5 Initial start-up________________________________________________________________________________________ 15
3.6 Condensation ________________________________________________________________________________________ 16
4. GUIDELINES _______________________________________________________________________ 16
4.1 Water chemistry ______________________________________________________________________________________ 16
4.2 Winterizing __________________________________________________________________________________________ 16
4.3 Spring start-up________________________________________________________________________________________ 17
4.4 Owner inspection _____________________________________________________________________________________ 17
5. CHECKUP AND MAINTENANCE_________________________________________________________ 18
5.1 Maintenance _________________________________________________________________________________________ 18
5.2 Trouble shooting guide ________________________________________________________________________________ 18
5.3 Microcontroller ______________________________________________________________________________________ 19
6. DETAILED SPECIFICATIONS ____________________________________________________________ 20
6.1 Electrical wiring diagram of the heat pump ________________________________________________________________ 20
7. WARRANTY ______________________________________________________________________ 21

3
Inhoud
1. INLEIDING_________________________________________________________________________ 22
2. SPECIFICATIES______________________________________________________________________ 27
2.1 Technische gegevens van de zwembad warmtepomp________________________________________________________ 27
2.2 Afmetingen van de zwembad warmtepomp _______________________________________________________________ 28
3. INSTALLATIE VAN DE WARMTEPOMP __________________________________________________ 29
3.1 Locatie van de warmtepomp ____________________________________________________________________________ 30
3.2 Afstand tot het zwembad_______________________________________________________________________________ 31
3.3 Aansluiting van de bypass ______________________________________________________________________________ 31
3.4 Elektrische bedrading __________________________________________________________________________________ 32
3.5 Eerste gebruik________________________________________________________________________________________ 32
3.6 Condensatie _________________________________________________________________________________________ 33
4. RICHTLIJNEN_______________________________________________________________________ 33
4.1 Waterchemie_________________________________________________________________________________________ 33
4.2 Winterklaar maken ____________________________________________________________________________________ 33
4.3 Voorjaarsopstart ______________________________________________________________________________________ 34
4.4 Inspectie ____________________________________________________________________________________________ 34
5. CONTROLE EN ONDERHOUD_________________________________________________________ 35
5.1 Onderhoud __________________________________________________________________________________________ 35
5.2 Probleemoplossing ____________________________________________________________________________________ 35
5.3 Microcontroller ______________________________________________________________________________________ 36
6. GEDETAILLEERDE SPECIFICATIES _______________________________________________________ 37
6.1 Elektrisch bedradingsdiagram van de warmtepomp _________________________________________________________ 37
7. GARANTIE_________________________________________________________________________ 38

4
Inhalt
1. VORWORT ________________________________________________________________________ 39
2. SPEZIFIKATIONEN ___________________________________________________________________ 44
2.1 Technische Daten der Pool-Wärmepumpe _________________________________________________________________ 44
2.2 Maße der Pool-Wärmepumpe ___________________________________________________________________________ 45
3. INSTALLATION DER WÄRMEPUMPE ___________________________________________________ 46
3.1 Standort der Wärmepumpe _____________________________________________________________________________ 47
3.2 Entfernung / Abstand zum Pool__________________________________________________________________________ 48
3.3 Anschluss des Bypasses ________________________________________________________________________________ 48
3.4 Elektrische Verdrahtung________________________________________________________________________________ 48
3.5 Die Inbetriebnahme ___________________________________________________________________________________ 49
3.6 Kondenswasserbildung ________________________________________________________________________________ 49
4. RICHTLINIEN_______________________________________________________________________ 50
4.1 Wasserchemie________________________________________________________________________________________ 50
4.2 Winterfest machen ____________________________________________________________________________________ 50
4.3 Frühlingsstart ________________________________________________________________________________________ 50
4.4 Überprüfung _________________________________________________________________________________________ 51
5. KONTROLLE UND WARTUNGSAUFGABEN _______________________________________________ 52
5.1 Wartung_____________________________________________________________________________________________ 52
5.2 Fehlerbehebung ______________________________________________________________________________________ 52
5.3 Mikrocontroller_______________________________________________________________________________________ 53
6. DETAILLIERTE SPEZIFIKATIONEN________________________________________________________ 54
6.1 Elektrisches Anschlussschema der Wärmepumpe ___________________________________________________________ 54
7. GARANTIE_________________________________________________________________________ 55

5
SWIMMING POOL HEAT PUMP UNIT
Installation & Instruction Manual
1.Preface
* In order to provide our customers with quality, reliability and versatility, this product has been made
to strict producing standards. This manual includes all necessary information about installation,
debugging, discharging and maintenance. Please read this manual carefully before you open or
maintain the unit. The manufacturer of this product will not be held responsible if someone is injured
or if the unit is damaged, as a result of improper installation or use, debugging or unnecessary
maintenance. It is vital that the instructions within this manual are adhered to at all times. Only
qualified persons should install the unit.
* Only a qualified installer, center, personnel or an authorized dealer are allowed to repair the unit.
* Maintenance and operation must be carried out at the recommended time and frequency, as stated
in this manual.
* Use genuine standard spare parts only.
* Failure to comply with these recommendations will void the warranty.
* The swimming pool heat pump unit heats the swimming pool water and keeps the temperature
constant.
Our heat pump has following characteristics:
Durable
The heating exchanger is made of PVC and titanium tubes, which can withstand prolonged exposure to
(salt) swimming pool water.
Easy operation
The unit is very easy to operate: switch it on and set the desired pool water temperature.
Quiet operation
The unit comprises an efficient rotary compressor and a low-noise fan motor, which guarantees its quiet
operation. The unit can heat your swimming pool water when the air temperature is 10°C or higher.
Low cost
The operational costs are very low due to its high performance.

6
Safety warnings & instructions
Read and follow all instructions in this manual and on the equipment. Failure to do so could result in severe
or fatal injuries, or damage the heat pump.
Meaning of symbols displayed on heat pump unit
WARNING
This unit uses a flammable refrigerant (R32).
If refrigerant leaks and comes in contact with fire or heating part, it will
create harmful gas and there is risk of fire.
Read the OPERATING INSTRUCTIONS carefully before operation.
Service personnel are reguired to carefully read the OPERATING INSTRUCTIONS and
INSTALLATION MANUAL before operation.
Further information is available in the OPERATING INSTRUCTIONS, INSTALLATION MANUAL,
and the like.
* Since rotating parts and parts which could cause an electric shock are used in this product, be sure
to read these “Safety Precautions” before use.
* Since the cautionary items shown here are important for safety, be sure to observe them.
* After reading this manual, keep it together with the installation manual in a handy place for easy
reference.
* Be sure to receive a guarantee card from your dealer and check that the purchased data and shop
name, etc. are entered correctly.
Symbols and their meaning
WARNING
Incorrect handling could cause serious hazard, such as death, serious
injury, etc. with a high probability.
CAUTION
Incorrect handling could cause serious hazard depending on the
conditions.
Meaning of symbols used in this manual
Be sure not to do this.
Be sure to follow the instructions.
Never insert your finger or a stick, etc.
Never step onto the indoor/outdoor unit and do not put anything on them.
Danger of electric shock. Be careful.

7
Be sure to disconnect the power supply plug from the power outlet.
Be sure to shut off the power.
Risk of fire.
WARNING
Do not connect the power cord to an intermediate point, use an extension cord, or connect
multiple devices to heat pump. This may cause overheating, fire, or electric shock.
Make sure the power plug is free of dirt and insert it securely into the outlet. A dirty plug may
cause fire or electric shock.
Do not bundle, pull, damage, or modify the power cord, and do not apply heat or place
heavy objects on it. This may cause fire or electric shock.
Do not turn the breaker OFF/ON or disconnect/connect the power plug during operation.
This may create sparks, which can cause fire.
Do not expose your body directly to cool air for a prolonged length of time. This could be
detrimental to your health.
The unit should not be installed, relocated, disassembled, altered, or repaired by the user.
An improperly handled heat pump may cause fire, electric shock, injury, or water leakage,
etc. Consult your dealer.
If the power supply cord is damaged, it must be replaced by the manufacturer or its service
agent in order to avoid a hazard.
When installing, relocating, or servicing the unit, make sure that no substance other than the
specified refrigerant (R32) enters the refrigerant circuit.
Any presence of foreign substance such as air can cause abnormal pressure rise and may
result in explosion or injury.
The use of any refrigerant other than that specified for the system will cause mechanical
failure, system malfunction, or unit breakdown. In the worst case, this could lead to a serious
impediment to securing product safety.
This appliance is not intended for use by persons (including children) with reduced physical,
sensory or mental capabilities, or lack of experience and knowledge, unless they have been
given supervision or instruction concerning use of the appliance by a person responsible for
their safety.
Children should be supervised to ensure that they do not play with the appliance.
The appliance shall be stored in a room without continuously operating ignition sources (for
example: open flames, an operating gas appliance or an operating electric heater).
Do not insert your finger, a stick, or other objects into the air inlet or outlet. This may cause
injury, since the fan inside rotates at high speeds during operation.

8
In case of an abnormal condition (such as a burning smell), stop the heat pump and
disconnect the power plug or turn the breaker OFF. • A continued operation in the abnormal
state may cause a malfunction, fire, or electric shock. In this case, consult your dealer.
When the heat pump does not cool or heat, there is a possibility of refrigerant leakage. If any
refrigerant leakage is found, stop operations and ventilate the room well and consult your
dealer immediately. If a repair involves recharging the unit with refrigerant, ask the service
technician for details. The refrigerant used in the heat pump is not harmful. Normally, it does
not leak. However, if refrigerant leaks and comes in contact with fire or heating part of such
a fan heater, kerosene heater, or cooking stove, it will create harmful gas and there is risk of
fire.
The user should never attempt to wash the inside of the indoor unit. Should the inside of the
unit require cleaning, contact your dealer. • Unsuitable detergent may cause damage to
plastic material inside the unit, which may result in water leakage. Should detergent come in
contact with electrical parts or the motor, it will result in a malfunction, smoke, or fire.
The appliance shall be stored in a room without continuously operating ignition sources (for
example: open flames, an operating gas appliance or an operating electric heater). Be
aware that refrigerants may not contain an odour. Do not use means to accelerate the
defrosting process or to clean the appliance, other than those recommended by the
manufacturer. Do not pierce or burn.
This unit should be installed outdoor or in rooms which exceed the floor space specified
below. GL50 : 2.2 m2 or larger
GL60 : 2.3 m2 or larger
GL71/80: 3.1 m2 or larger
CAUTION
Do not touch the air inlet or the aluminum fins of the heat pump unit • This may cause injury.
Do not use insecticides or flammable sprays on the unit. This may cause a fire or deformation
of the unit.
Do not expose pets or houseplants to direct airflow. This may cause injury to the pets or
plants.
Do not place other electric appliances or furniture under the heat pump unit. Water may drip
down from the unit, which may cause damage or malfunction.
Do not leave the unit on a damaged installation stand. The unit may fall and cause injury.
Do not step on an unstable bench to operate or clean the unit. This may cause injury if you fall
down.
Do not pull the power cord. This may cause a portion of the core wire to break, which may
cause overheating or fire.
Do not charge or disassemble the batteries, and do not throw them into a fire. This may cause
the batteries to leak, or cause a fire or explosion.

9
Do not use the unit for special purposes, such as storing food, raising animals, growing plants,
or preserving precision devices or art objects. This may cause deterioration of quality, or harm
to animals and plants.
Do not expose combustion appliances to direct airflow. This may cause incomplete
combustion.
Before cleaning the unit, switch it OFF and disconnect the power plug or turn the breaker
OFF. This may cause injury, since the fan inside rotates at high speeds during operation.
When the unit will be unused for a long time, disconnect the power plug or turn the breaker
OFF. The unit may accumulate dirt, which may cause overheating or fire.
Ensure that the area is well-ventilated when the unit is operated together with a combustion
appliance. Inadequate ventilation may cause oxygen starvation.
After the heat pump is used for several seasons, perform inspection and maintenance in
addition to normal cleaning. Dirt or dust in the unit may create an unpleasant odor, contribute
to growth of fungi, such as mold, or clog the drain passage, and cause water to leak from the
indoor unit. Consult your dealer for inspection and maintenance, which require specialized
knowledge and skills.
Do not operate switches with wet hands. This may cause electric shock.
Do not clean the heat pump with water or place an object that contains water, such as a flower
vase, on it. This may cause fire or electric shock.
Do not step on or place any object on the unit. This may cause injury if you or the object falls
down.
IMPORTANT
Dirty pool filters cause condensation in the heat pump which will contribute to the growth of fungi such as
mold. It is therefore recommended to clean or change the filters every 2 weeks.
Above warnings and cautions are not intended to incorporate all possible instances for risks and/or severe
injuries. Owners and users of the heat pump should always exercise caution and common sense when
utilizing the product.
Note: This manual can be modified without notice if the unit is altered in any way.

10
2. Specifications
2.1 Performance data of ECO Swimming Pool Heat Pump Unit
MODEL
ECO+3
ECO+5
ECO+8
ECO+10
ECO+12
Heating Capacity in
A27/W27°C
W
3700
5500
6200
8900
11500
Heating Capacity in
A15/W26°C
W
3000
4000
4500
6100
8200
Heating Capacity
W
3000
4500
5300
7800
9500
Heating Input Power
W
729
1050
1250
1650
2230
Heating Running Current
A
3.3
5
5.7
7.5
10.6
Power Supply
220V/1Ph/50Hz
Controller
Mechancial Controller
Condenser
PVC With Titanium
Quantity of Compressor
1
1
1
1
1
Compressor Type
Rotary
Noise
dB(A)
51
54
55
55
57
Water Connection
mm
50
50
50
50
50
Water Flow Volume
m³/h
3-5
4-6
4-6
4-7
4-7
Water Pressure Drop
kpa
10
10
12
12
15
Dimension (L)
mm
770
936
936
936
1010
(W)
mm
300
360
360
360
370
(H)
mm
490
550
550
550
615
Packing Size(L)
mm
820
1090
1090
1090
1170
(W)
mm
315
390
390
390
415
(H)
mm
525
580
580
580
645
Net Weight / Gross Weight
kg
29/32
36/39
39/42
54/57
63/67
Measurement conditions:
Dry bulb 24° C, wet bulb 19° C, water inlet temp. 27° C.

11
2.2 Dimensions of swimming pool heat pump unit
A
B
C
D
E
F
G
H
ECO+3
213
295
720
760
80
200
455
490
ECO+5
280
365
906
940
80
200
521
550
ECO+10
280
365
906
940
80
200
521
550
ECO+12
301
375
975
1015
83
270
585
615

12
3. Installation of the heat pump unit
WARNING
Consult your dealer for installing the heat pump. It should not be installed by the user since
installation requires specialized knowledge and skills. An improperly installed heat pump may
cause water leakage, fire, or electric shock.
Provide a dedicated power supply for the heat pump. A non-dedicated power supply may cause
overheating or fire.
Do not install the unit where flammable gas could leak. If gas leaks and accumulates around the
unit, it may cause an explosion.
Ground the unit correctly. Do not connect the ground wire to a gas pipe, water pipe, lightning
rod, or a telephone ground wire. Improper earthing may cause electric shock.
CAUTION
Install a RCD depending on the installation location of the heat pump (such as highly humid
areas).If a RCD is not installed, it may cause electric shock.
Ensure that the drain water is properly drained. If the drain passage is improper, water may drip
down from the unit, wetting and damaging the furniture.
Please prepare the professional tools for R32 refrigerant heat pump before you do maintenance.
R32
leak
detector
Explosion-
proof
vacuum
pump
Antistatic
gloves
The factory only provides the heat pump unit. Other items, including an eventual bypass, that are
necessary for the water system, are to be provided by users or installers.
Attention! Please follow these steps when installing the heat pump:
1. All feeding of chemicals to the pool water must be done downstream of the heat pump.
2. Install a bypass when the flow of the pool pump is more than 20% above the rated flow of the heat
exchanger of the heat pump.
3. Install the heat pump on a solid foundation and use the damping rubbers to eliminate vibrations and
noise.
4. Always keep the unit straight up. If the unit has been tilted or put on its side, allow 24h before
starting the unit.

13
3.1 Heat pump location
The unit may be installed virtually anywhere outdoors. If you wish to place the heat pump inside, make sure
there is enough room and ventilation around the pump.
DO NOT put the unit in an enclosed area with a limited air volume where the discharge air will be re-
circulated. DO NOT put the unit next to shrubs, which can block the air inlet. Such locations deny a
continuous source of fresh air, which reduce its efficiency and may prevent adequate heat delivery. Install
the heat pump where you have the best access to warm air during the swimming season.

14
The picture below illustrates the minimum required distances from each side of the heat pump.
3.2 Distance to the pool
Install the heat pump as close to the swimming pool as possible to minimize heat loss through the piping.
3.3 Connecting the bypass
With the bypass set correctly, your heat pump will deliver its best performance. The bypass has to be built
as shown below:
VALVE1 –Slightly closed
(water pressure increased from 10 to 20 bar)
VALVE2 –Completely open
VALVE3 –Half way open
Setting the valve of the bypass:
1. Open all 3 valves entirely
2. Slightly close valve 1
3. Close valve 3 about half way to adjust the
refrigerant pressure

15
3.4 Electrical wiring
Note: Verify the local power supply and the operating voltage of the heat pump. It is recommended to use
the included separate circuit breaker for the heat pump, together with the proper wiring characteristics (see
wiring diagram). The current to the heat pump should only be applied when the filter pump is running.
Further connect the electrical supply to the junction box inside the unit. All ECO heat pumps require single-
phase connection.
Grounding: The circuit breaker protects you against electrical shock caused by a possible short circuit
inside the unit. The heat pump in itself is unable to provide a water flow. Therefore, the heat pump must be
wired electrically together with the filter pump to ensure a water flow while the heat pump is running.
MODEL
POWER SUPPLY (VOLT)
CIRCUIT BREAKER (A)
RUNNING CURRENT (A)
CABLE DIAMETER (mm2)
cable length max. 15m
ECO+3
220-240
16
3,3
1,5
ECO+5
220-240
16
4,8
1,5
ECO+10
220-240
20
7,5
2,5
ECO+12
220-240
20
10
2,5
* Values in this table are only guidelines. Please check your local regulations.
3.5Initial start-up
Startup procedure
After the installation is completed, you should follow these steps:
1. Open bypass valve 1 entirely. Turn on your filter pump, check for water leaks and verify the flow to
and from the pool.
2. Turn on the electrical power supply to the unit, then turn the unit ON with the switch. Slightly close
valve 1 until the heat pump starts.
3. After a few minutes, check if the air leaving the unit is cooler.
4. Allow the unit and filter pump to run 24 hours a day until the desired pool water temperature is
reached. When the set temperature is reached, the unit shuts off. The unit will now automatically
restart (as long as your pool pump is running) when the temperature of the pool water drops more
than 1°C below set temperature.
Several days are needed to bring the temperature of your swimming pool water to its required value.
Covering the pool or the use of ground insulation can drastically reduce this period.
Time delay
The unit is equipped with a built in 3-minute start delay to protect the control circuit components and to
eliminate restart cycling an contactor chatter. This time delay will automatically restart the unit aproximately
3 minutes after each circuit interruption. Even a brief power interruption of the power supply will activate
this delay and prevent the unit from starting until the 3-minute countdown is completed.

16
3.6Condensation
Since the heat pump cools down the air about 8°C –12 °C, water may condense on the fins of the
evaporator. If the relative humidity is very high, this could be as much as several liters an hour. Sometimes
this condensation water is wrongly considered as swimming pool water.
4. Guidelines
4.1 Water chemistry
Special care should be taken to keep the chemical balance of your swimming pool within limits:
pH
7,0 –7,4
Free chlorine (mg/l)
0,5 –1,2
TAC (mg/l)
80 –120
Salt (g/l)
max. 3
Important: failure to keep the swimming pool water between above limits will void the warranty.
Note: when the concentration of one or more products mentioned above becomes too high, irrevocable
damage to your heat pump may occur. Make sure that you always install water treatment equipment after
the heat pump. When an automatic chemical feeder is installed in the plumbing, it must be installed
downstream of the heat pump. A check valve must be installed between the heat pump and the chemical
feeder to prevent back-siphoning of chemically saturated water into the heat pump where it will damage the
components.
4.2 Winterizing
Important: failure to winterize could damage the heat pump and will void the warranty
In areas where freezing temperatures occur, you should protect your pump, filter, and heat pump from the
elements. Perform the following steps to completely drain the heat pump:
1. Turn off the electrical power to the heat pump at the main breaker panel.
2. Shut off the water supply to the heat pump: completely close valve 2 and 3 on the bypass.
3. Disconnect the water inlet and outlet and let the water drain from the heat pump.
4. Re-connect the water inlet and outlet loosely to prevent debris entering the connections.

17
4.3 Spring start-up
If your heat pump has been winterized, perform the following steps when starting the system in the spring:
1. Inspect the system for any debris or structural problems.
2. Connect the water inlet and outlet couplers firmly.
3. Turn on the filter pump to supply water to the heat pump. Adjust the bypass to allow water flow
through the heat pump.
4. Turn on the electrical power to the heat pump at the main breaker panel.
4.4 Owner inspection
The ECO heat pumps are designed and constructed to provide long performance life when installed and
operated properly and under normal conditions. Periodic inspection is important to keep your heat pump
running safe and efficiently. The following basic guidelines are suggested for your inspection:
1. Make sure the front of the unit is accessible for future service.
2. Keep the surrounding areas of the heat pump clear of all debris.
3. Keep all plants and shrubs trimmed and away from the heat pump.
4. Keep lawn sprinkler heads from spraying on the heat pump to prevent corrosion and damage.
5. If the unit is installed under a very sharp roof pitch or under a roof without a gutter, a gutter or
diverter should be fitted to prevent excessive water from pouring down onto the unit.
6. Do not use the heat pump if any part has been under water. Immediately call a qualified professional
technician to inspect the heat pump and replace any part of the control system that has been
submerged.
The heat pump will produce condensation(water) while in operation. The heat pump base is designed to
allow the condensation to exit through the bottom drain port. The condensation will increase as the outdoor
air humidity level increases. Check the following at regular intervals to ensure proper condensate drainage:
1. Visually inspect and clear the bottom drain port of any debris that could clog the port.
2. Keep the air intake area and discharge area clear of debris so the airflow through the heat pump is
not restricted. The cooler discharge air should not accumulate and be drawn into the side air intake
coils.
During normal operation, the heat pump produces ten to twenty liters of condensate per hour. If condensate
drainage is above this range during operation, or if water continues to drain from the base when the heat
pump is not in operation for more than an hour, a leak in the internal plumbing may have occurred. Call a
qualified heat pump technician to investigate the problem.
Note: A quick way to verify if the water running through the drain is condensation water is to shut off the
unit and keep the pool pump running. If the water stops running out of the base pan, it is condensation
water. An even quicker way is to test the drain water for chlorine. If there is no chlorine present, then it’s
condensation.

18
5. Checkup and maintenance
5.1 Maintenance
•Check the water supply to the unit often. Low water flow or air entering the system should be
avoided, as this will diminish the unit’s performance and reliability. You should clean the pool/spa
filter regularly to avoid damage to the heat pump as a result of dirty or clogged filter.
•The area around the unit should be dry, clean and well ventilated. Clean the side heating exchanger
regularly to maintain good heat exchange and to save energy.
•Only a certified technician should service the operation pressure of the refrigerant system.
•Check the power supply and cable connection often. Should the unit begin to operate abnormally,
switch it off and contact a qualified technician.
•In winter, discharge all water from the heat pump and other systems to prevent damage from
freezing.
•You should discharge the water at the bottom of the heat pump if the unit will not work for an
extended period of time. You should check the unit thoroughly and fill the system with water fully
before using it for the first time after a prolonged period of no usage.
5.2 Trouble shooting guide
Improper installation will create an electrical hazard, which could result in death or serious injury to pool
users, installers, or others due to electrical shock, and my also cause damage to property. DO NOT attempt
any internal adjustments inside the heat pump.
WARNING:
1. Keep your hands and hair clear of the fan blades to avoid injury.
2. If you are not familiar with your pool filtering system and heat pump:
a. DO NOT attempt to adjust or service without consulting your dealer or professional pool
technician.
b. Read the entire installation and users guide before attempting to use, service of adjust
the heater of pool filtering system.
NOTE: Turn off the power to the unit prior to attempt service or repair.

19
PROBLEM
CAUSE
SOLUTION
Heat pump not running
1. No electricity
1. Switch on the electrical power
2. Heat pump not turned on
2. Switch on the heat pump
3. Water pump not running
3. Switch on the water pump
4. Wrong temperature setting
4. Adjust the temperature setting
5. Bypass wrongly adjusted
5. Adjust bypass as shown in manual
6. No gass pressure
6. Call a qualified technician
7. Time delayed operation
7. Wait 3 min for heat pump to start
8. Air temperature below 10°C
8. Wait until temperature has risen
No sufficient heating
1. Obstacles blocking air flow
1. Increase access of fresh air
2. Ice on the evaporator
2. Turn heat pump off (air too cold)
3. Bypass wrongly adjusted
3. Re-adjust the bypass
4. Too much water flow
4. Adjust the bypass
5.3 Microcontroller
The ECO+ heat pumps are equipped with a microcontroller on which it is possible to read error codes.
These error codes are formulated by LED lights on the circuit board. To access the circuit board, remove
the 4 screws of the service cover (with “ECO+” on it). At the top of heat pump you will find the PCB
containing the LED lights.
Compare which LEDs are lit to the following error code table
ERROR CODE
LED 1
LED 2
LED 3
LED 4
TROUBLE SHOOTING
000 Standby mode
⚫
⚫
⚫
☆
Standard mode
001 Running mode
⚫
⚫
☆
⚫
Standard mode
002 Air ambient
temp. sensor error
⚫
☆
⚫
⚫
Check the cable connection of the ambient temp. sensor
/ replace the sensor
003 High pressure
protection
☆
⚫
⚫
⚫
Refrigerant system pressure is high, check pressure
gauge, increase the water volume
004 Low pressure
protection
⚫
⚫
☆
☆
Refrigerant system pressure is low, check pressure
gauge, refeed refrigerant
005 Water flow
protection
⚫
☆
⚫
☆
Check if the water inlet/outlet connection is correct of not,
increase the water volume
006 Stop running in
limited air temp.
(8°C)
☆
⚫
⚫
☆
Air temp. is lower than 8°C, stop the heat pump until
temp. over 8°C

20
6. Detailed specifications
6.1 Electrical wiring diagram of the heat pump
This manual suits for next models
4
Table of contents
Languages:
Other COMFORTPOOL Heat Pump manuals

