COMFORTPOOL PRO+5 Service manual

SWIMMING POOL HEAT PUMP UNIT
Installation & Instruction Manual
ZWEMBAD WARMTEPOMP
Installatie & Gebruikershandleiding
Applicable Model / Van toepassing op:
PRO+5
PRO+7
PRO+10
PRO+13
PRO+18

2
Contents
1. PREFACE ____________________________________________________________________________4
2. SPECIFICATIONS_______________________________________________________________________6
2.1 Parameters of Swimming Pool Heat Pump Unit_______________________________________________________________ 6
2.2 Dimensions of swimming pool heat pump unit _______________________________________________________________ 7
3. INSTALLATION ________________________________________________________________________8
3.1 Heat pump location _____________________________________________________________________________________ 8
3.2 Distance to the pool ____________________________________________________________________________________ 9
3.3 Connecting the by-pass __________________________________________________________________________________ 9
3.4 Electrical wiring _______________________________________________________________________________________ 10
3.5 Initial start-up ________________________________________________________________________________________ 10
3.6 Condensation ________________________________________________________________________________________ 11
4. GUIDELINES _________________________________________________________________________11
4.1 Water chemistry ______________________________________________________________________________________ 11
4.2 Winterizing___________________________________________________________________________________________ 11
4.3 Spring start-up ________________________________________________________________________________________ 12
4.4 Owner inspection______________________________________________________________________________________ 12
5. LCD CONTROLLER DISPLAY _____________________________________________________________13
5.1 Setting step __________________________________________________________________________________________ 13
5.2 The functions of controller display ________________________________________________________________________ 14
5.3 Operation data setting table:____________________________________________________________________________ 17
6. MAINTENANCE AND INSPECTION________________________________________________________18
6.1 Maintenance _________________________________________________________________________________________ 18
6.2 Trouble shooting guide_________________________________________________________________________________ 18
7. WIRING DIAGRAM ____________________________________________________________________20
8. WARRANTY _________________________________________________________________________22

3
Inhoud
1. INLEIDING __________________________________________________________________________23
2. SPECIFICATIES _______________________________________________________________________25
2.1 Technische gegevens van de zwembad warmtepomp_________________________________________________________ 25
2.2 Afmetingen van de zwembad warmtepomp ________________________________________________________________ 26
3. INSTALLATIE _______________________________________________________________________27
3.1 Locatie van de warmtepomp_____________________________________________________________________________ 27
3.2 Afstand tot het zwembad _______________________________________________________________________________ 28
3.3 Aansluiting van de bypass _______________________________________________________________________________ 28
3.5 Elektrische bedrading __________________________________________________________________________________ 29
3.6 Eerste gebruik ________________________________________________________________________________________ 29
3.7 Condensatie _________________________________________________________________________________________ 30
4. RICHTLIJNEN ________________________________________________________________________30
4.1 Waterchemie _________________________________________________________________________________________ 30
4.2 Winterklaar maken ____________________________________________________________________________________ 30
4.3 Voorjaarsopstart ______________________________________________________________________________________ 31
4.4 Inspectie_____________________________________________________________________________________________ 31
5. LCD CONTROLLER DISPLAY _____________________________________________________________32
5.1 Instellen _____________________________________________________________________________________________ 32
5.2 De functies van het bedieningsdisplay _____________________________________________________________________ 34
5.3 Tabel gebruiksinstellingen:______________________________________________________________________________ 37
6. ONDERHOUD AND INSPECTIE___________________________________________________________38
6.1 Onderhoud___________________________________________________________________________________________ 38
6.2 Overzicht probleemoplossing____________________________________________________________________________ 38
7. BEDRADINGSDIAGRAM ________________________________________________________________40
8. GARANTIE __________________________________________________________________________42

4
SWIMMING POOL HEAT PUMP UNIT
Installation & Instruction Manual
1.Preface
* In order to provide our customers with quality, reliability and versatility, this product has been made
to strict producing standards. This manual includes all necessary information about installation,
debugging, discharging and maintenance. Please read this manual carefully before you open or
maintain the unit. The manufacturer of this product will not be held responsible if someone is injured
or if the unit is damaged, as a result of improper installation or use, debugging or unnecessary
maintenance. It is vital that the instructions within this manual are adhered to at all times. Only
qualified persons should install the unit.
* Only a qualified installer, center, personnel or an authorized dealer are allowed to repair the unit.
* Maintenance and operation must be carried out at the recommended time and frequency, as stated
in this manual.
* Use genuine standard spare parts only.
* Failure to comply with these recommendations will void the warranty.
* The swimming pool heat pump unit heats the swimming pool water and keeps the temperature
constant.
Our heat pump has following characteristics:
Durable
The heating exchanger is made of PVC and titanium tubes, which can withstand prolonged exposure to
(salt) swimming pool water.
Easy operation
The unit is very easy to operate: switch it on and set the desired pool water temperature.
Quiet operation
The unit comprises an efficient rotary compressor and a low-noise fan motor, which guarantees its quiet
operation. The unit can heat your swimming pool water when the air temperature is -5°C or higher.
Low cost
The operational costs are very low due to its high performance.

5
Safety warnings & instructions
Read and follow all instructions in this manual and on the equipment. Failure to do so could result in severe
or fatal injuries, or damage the heat pump.
* The heat pump should be installed in accordance with local regulations, and the requirements in this manual.
* This is not a TOY. Do not leave children alone and unsupervised around the heat pump.
* Children are not allowed to operate the heat pump.
* This heat pump is not intended for use by someone with reduced physical, sensory or mental capabilities, or a
lack of experience and knowledge, unless they have been given instructions concerning the appliance and are
under supervision of the person responsible for their safety.
* Failure to follow the safety instructions may result in electric shock, water leaks, fire, damage to the heat
pump or other products, serious injuries or death.
* Before the installation, and again before using the heat pump for the first time, the entire product must be
inspected before start-up.
* Only qualified personnel should install the heat pump.
* The heat pump must be equipped with proper electrical connections and grounding, and secured with a
proper fuse. If in doubt, consult a qualified electrician.
* DO NOT use the heat pump if any damage is detected. If you notice that the pump does not operate normally,
or emits a strange odor, immediately shut off the power and contact a qualified heat pump technician.
* Only a qualified technician should move the heat pump.
* DO NOT attempt to repair the heat pump, this will void the warranty.
* DO NOT attempt to disassemble the heat pump, this will void the warranty.
* Always turn off the power to the heat pump before cleaning of performing maintenance on the heat pump or
water system.
* DO NOT use flammable cleaning materials to clean the heat pump.
* DO NOT use or place the heat pump near toxic substances, flammable or combustible liquids such as
gasoline, or in the presence of explosive or flammable fumes.
* Never insert body parts, (loose) clothing or other objects into the openings and moving parts of the pool
vacuum.
* Always place the heat pump on a stable surface to prevent it from tilting or falling.
Above warnings and cautions are not intended to incorporate all possible instances for risks and/or severe
injuries. Owners and users of the heat pump should always exercise caution and common sense when
utilizing the product.
Note: This manual can be modified without notice if the unit is altered in any way.

6
2. Specifications
2.1 Parameters of Swimming Pool Heat Pump Unit
MODEL
PRO+5
PRO+7
PRO+10
PRO+13
PRO+18
PRO+24
Heating Capacity in
A27/W27°C
W
4300
6100
8900
11500
13700
15500
Heating Capacity in
A15/W26°C
W
3000
4500
6500
8000
9200
11000
Heating Capacity
W
3800
5300
7800
9500
12500
14000
Heating Input Power
W
791
1083
1625
1938
2400
2880
Heating Running Current
A
3.6
5.0
7.5
9.2
11
13.3
Cooling Capacity
W
2300
3200
4800
5900
7700
8600
Cooling Input Power
W
750
1030
1550
1910
2650
2980
Cooling Running Current
A
3.4
4.7
7.4
9.1
12.5
13.8
Power Supply
V/Ph/Hz
220V/1Ph/50Hz
Quantity of Compressor
1
1
1
1
1
1
Compressor Type
Rotary
Scroll
Noise
dB(A)
48
48
48
48
48
48
Water Connection
mm
50
50
50
50
50
50
Water Flow Volume
m³/h
2-4
2-4
3-5
4-7
5-8
5-8
Water Pressure Drop
kpa
10
12
12
15
15
15
Dimension (L*w*h)
mm
936*360*550
936*360*550
936*360*550
1010*370*615
1100*440*700
1100*440*700
Packing Size (L*w*h)
mm
1090*390*580
1090*390*580
1090*390*580
1170*415*645
1260*500*730
1260*500*730
Weight (Net / Gross)
kg
37 / 40
53 / 56
54 / 57
63 / 67
70/78
80/88
Above parameters are only for reference, exact details please as per nameplate.
Measurement conditions:
Heating: Dry bulb 24° C, wet bulb 19° C, inlet water temp. 27° C.
Cooling: Dry bulb 35° C, wet bulb 24° C, inlet water temp. 27° C.
32

7
2.2 Dimensions of swimming pool heat pump unit
Model
Size (mm)
PRO+ 5
PRO+ 7
PRO+ 10
PRO+ 13
PRO+ 18
A
330
340
B
680
650
C
300
300
D
360
370
440
E
950
1010
1100
F
200
270
G
110
110
H
600
670
700

8
3. Installation
The factory only provides the heat pump unit. Other items, including an eventual bypass, that are
necessary for the water system, are to be provided by users or installers.
Attention! Please follow these steps when installing the heat pump:
1. All feeding of chemicals to the pool water must be done downstream of the heat pump.
2. Install a bypass when the flow of the pool pump is more than 20% above the rated flow of the heat
exchanger of the heat pump.
3. Install the heat pump on a solid foundation and use the damping rubbers to eliminate vibrations and
noise.
4. Always keep the unit straight up. If the unit has been tilted or put on its side, allow 24h before
starting the unit.
3.1 Heat pump location
The unit may be installed virtually anywhere outdoors. If you wish to place the heat pump inside, make sure
there is enough room and ventilation around the pump.
DO NOT put the unit in an enclosed area with a limited air volume where the unit discharge air will be re-
circulated. DO NOT put the unit next to shrubs, which can block the air inlet. Such locations deny a
continuous source of fresh air, which reduce its efficiency and may prevent adequate heat delivery.

9
The picture below illustrates the minimum required distances from each side of the heat pump.
3.2 Distance to the pool
Install the heat pump as close to the swimming pool as possible to minimize heat loss through the piping.
Normally, the pool heat pump is installed within a 7.5-meter radius of the pool. The greater the distance
from the pool, the greater the heat loss from the piping. If the piping is buried, heat loss will be minimal for
distances of up to 30 meters (15 meters to and from the pump = 30 meters total), unless the soil is wet or
the water level is high. Heat loss per 30 meters can be roughly be estimated at 0.6kw-hour (2000 BTU) for
every 5 ℃temperature difference between the pool water and the soil surrounding the pipe,which
translates to an operation time increase of 3-5%.
3.3 Connecting the by-pass
VALVE1 –Slightly closed
(water pressure increased from 10 to 20 bar)
VALVE2 –Completely open
VALVE3 –Half way open
Setting the valve of the by-pass:
1. Open all 3 valves entirely
2. Slightly close valve 1
3. Close valve 3 about half way to adjust the
refrigerant pressure

10
3.4 Electrical wiring
Note: Verify the local power supply and the operating voltage of the heat pump. It is recommended to use
the included separate circuit breaker for the heat pump, together with the proper wiring characteristics (see
wiring diagram). The current to the heat pump should only be applied when the filter pump is running.
Further connect the electrical supply to the junction box inside the unit. All PRO heat pumps require single-
phase connection.
Grounding: The circuit breaker protects you against electrical shock caused by an eventual short circuit
inside the unit. The heat pump in itself is unable to provide a water flow. Therefore, the heat pump must be
wired electrically together with the filter pump to ensure a water flow while the heat pump is running.
3.5Initial start-up
Startup procedure
After the installation is completed, you should follow these steps:
1. Turn on the filter pump, check for leaks and verify the flow to and from the pool.
2. Turn on the electrical power supply to the unit, then press the ON/ OFF key on the electronic control
panel. The unit should start after the time delay period has lapsed.
3. When the unit has been running for a couple of minutes, check if the air leaving the unit is cooler.
4. Check the performance of the flow switch as follows: with the unit running, turn the filter pump off.
The unit should also switch off automatically. If not, the flow switch needs readjusting. In that case,
please contact the supplier.
5. Allow the unit and filter pump to run 24 hours a day until the desired pool water temperature is
reached. When the set temperature is reached, the unit switches itself off. The unit will now
automatically restart (if the filter pump is running) when the temperature of the pool water drops
more than 1°C below set temperature.
Depending on the starting temperature of the pool water and the air temperature, it can take several days
for the water to reach the desired temperature. Covering the pool of the use of ground insulation can
drastically reduce this period.
Water flow switch
The unit is equipped with a flow switch that is switched on when enough water flows through the unit and
that is switched off when the water flow becomes too low. (E.g. when the filter pump is switched off).
Time delay
The unit is equipped with a built in 3-minute start delay to protect the electrical components and contacts.
After this time delay, the unit will automatically be restarted. Even a brief interruption of the power supply
will activate the start delay and prevent the unit from starting immediately. Additional interruptions of the
power supply during the delay period will have no effect on the 3-minute countdown.

11
3.6Condensation
When the swimming pool water is being heated by the heat pump, the incoming air is cooled down quite a
bit, which can cause condensation on the fins of the evaporator. Condensed volumes can attain several
liters per hour under high atmospheric humidity. Sometimes, this is wrongfully interpreted as a water leak.
37
4. Guidelines
4.1 Water chemistry
Special attention should be paid to the chemical balance of the pool water. The pool water values should
always stay within the following limits:
MIN
MAX
pH
7.0
7.4
Free chlorine (mg/1)
0.5
1.2
TAC (mg/1)
80
120
Salt (g/1)
3
Important: failure to comply with these limits will void the warranty.
Note: Exceeding one or several limits can damage the heat pump beyond repair. Always install water
treatment equipment past the heat pump’s water outlet, especially if the chemicals are automatically added
to the water.
Check: A valve should also be installed between the outlet of the heat pump and this equipment, in order to
prevent products from flowing back into the heat pump if the filter pump stops.
4.2 Winterizing
Important: failure to winterize could damage the heat pump and will void the warranty
The heat pump, filter pump, filter and pipes must be protected in areas where the temperature can drop
below the freezing point. Evacuate all water from the heat pump as follows:
1. Turn off the electrical power supply to the heat pump.
2. Close the water supply to the heat pump: completely close valves 2 and 3 of the by-pass.
3. Disconnect the water inlet and outlet coupler fittings of the heat pump and let the water drain out of
the unit.

12
4.3 Spring start-up
If your heat pump has been winterized, perform the following steps when starting the system in the spring:
1. Inspect the system for any debris or structural problems.
2. Connect the water inlet and outlet couplers firmly.
3. Turn on the filter pump to supply water to the heat pump. Adjust the by-pass to allow water flow
through the heat pump.
4. Turn on the electrical power to the heat pump at the main breaker panel.
4.4 Owner inspection
The heat pumps are designed and constructed to provide long performance life when installed and
operated properly under normal conditions. Periodic inspection is important to keep your heat pump
running safe and efficiently.
The following basic guidelines are suggested for your inspection:
1. Make sure the front of the unit is accessible for future service.
2. Keep the surrounding areas of the heat pump clear of all debris.
3. Keep all plants and shrubs trimmed and away from the heat pump.
4. Keep lawn sprinkler heads from spraying on the heat pump to prevent corrosion and damage.
5. If the unit is installed under a very sharp roof pitch or under a roof without a gutter, a gutter or
diverter should be fitted to prevent excessive water from pouring down onto the unit.
6. Do not use the heat pump if any part has been under water. Immediately call a qualified professional
technician to inspect the heat pump and replace any part of the control system that has been
submerged.
The heat pump will produce condensation(water) while in operation. The heat pump base is designed to
allow the condensation to exit through the bottom drain port. The condensation will increase as the outdoor
air humidity level increases. Check the following at regular intervals to ensure proper condensate drainage:
1. Visually inspect and clear the bottom drain port of any debris that could clog the port.
2. Keep the air intake area and discharge area clear of debris so the airflow through the heat pump is
not restricted. The cooler discharge air should not accumulate and be drawn into the side air intake
coils.
During normal operation, the heat pump produces ten to twenty liters of condensate per hour. If condensate
drainage is above this range during operation, or if water continues to drain from the base when the heat
pump is not in operation for more than an hour, a leak in the internal plumbing may have occurred. Call a
qualified heat pump technician to investigate the problem.
Note: A quick way to verify if the water running through the drain is condensation water is to shut off the
unit and keep the pool pump running. If the water stops running out of the base pan, it is condensation
water. An even quicker way is to test the drain water for chlorine. If there is no chlorine present, then it’s
condensation.

13
5. LCD Controller Display
5.1 Setting step
1. Under running status, press to adjust the temperature.
2. Press “Mode” to choose the mode:
3. Press “Mode” again cooling
4. Press “Mode” again heating
5. Standby status:
Warning! These default settings are correctly preset. Only allow a qualified heat pump technician to change them.
- Press “Mode” 5 seconds, get a sound “B”, LCD display will show “0” “27”. Press “SET” to enter Cooling temp. setting.
Press to alter cooling temp. Press “SET” again to confirm.
- Press “Mode” again “1” “27”. Press “SET” to enter Heating temp. setting. Press to alter heating temp. Press
“SET” again to confirm.
- Press “Mode” again “2” “40”. Press “SET” to enter Defrosting time setting. Press to alter defrosting time. Press
“SET” again to confirm.
- Press “Mode” again “3” “-7”. Press “SET” to enter Defrosting temp. setting. Press to alter defrosting temp. Press
“SET” again to confirm.
- Press “Mode” again “4” “13”. Press “SET” to enter Exit defrosting temp. setting. Press to alter exit defrosting
temp. Press “SET” again to confirm.
- Press “Mode” again “5” “8”. Press “SET” to enter Exit defrosting time setting. Press to alter exit defrosting time.
Press “SET” again to confirm.
Press “Mode” again “6” “1”. Press “SET” to enter System quantity setting. Press to alter system quantity. Press
“SET” again to confirm.
- Press “Mode” again “7” “1”. Press “SET” to enter Automatic setting. Press to alter. Press “SET” again to
confirm.
- Press “Mode” again “8” “1”. Press “SET” to enter Mode setting. Press to alter. Press “SET” again to confirm.
- Press “Mode” again “9” “0”. Press “SET” to enter Water pump setting. Press to alter. Press “SET” again to
confirm.
- Press “Mode” again “A” “40”. Press “SET” to enter Return water temp. setting. Press to alter. Press “SET” again
to confirm.
- Press “Mode” again “B” “5”. Press “SET” to enter Overheat protection (heating mode) setting. Press to alter.
Press “SET” again to confirm.
- Press “Mode” again “C” “35”. Press “SET” to enter Electronic expansion valve setting. Press to alter. Press
“SET” again to confirm.
- Press “Mode” again “D” “5”. Press “SET” to enter Overheat protection (cooling mode) setting. Press to alter.
Press “SET” again to confirm.

14
- Press “Mode” again “E”“40”. Press “SET” to enter Max. temp. setting. Press to alter. Press “SET” again to
confirm.
- Press “Mode” again “F” “2”. Press “SET” to enter Split temp. setting. Press to alter. Press “SET” again to
confirm.
- Press “Mode” again “G” “-10”. Press “SET” to enter Ambient temp. protection setting. Press to alter. Press
“SET” again to confirm.
Further explanation of PCB connections.
4. Clock setting
Under running or standby status, press “SET” for 5 seconds, get a sound “B”. Press to alter hour. Press “SET”
again to alter minute. Press “SET” again to confirm.
5.Timer setting
Under running or standby status, press for 5 seconds, get a sound “B”. Press to alter hour of timer ON. Press
again to alter minute of timer ON. Press again to alter timer OFF. 103
5.2 The functions of controller display
Setting operation parameter
Under standby status, press “Mode” button 5 sec. to enter Operation Parameter setting interface;
Press “Mode” again to start setting (parameter from 00-D, see the Operation Parameter Table);
Under parameter setting. Press or to set data;
Note: If no motion is detected on the display for 10 sec, the LCD will display water-in/water-out temp.
(under running) or ambient temp. (under standby status).
Under running status, you can press “Mode” 5 sec to check current parameter, but you cannot change data
of parameter!
Remarks: Standby status means the unit is connected to electricity, but is not running.

15

16
To choose Mode
How to check the current status
Under running status, press “Mode” for 5 seconds to check the current status of the unit! You can check
water-in/water-out temp, condenser temp and ambient temp. Note: If no motion is detected on the display
for 10s, the LCD will display water-in/water-out temp (under running) or ambient temp. (unit stops)
C
Ambient temp.

17
5.3 Operation data setting table:
DIGIT
MEANING
RANGE
DEFAULT
ADJUST (YES/NO)
00
Return water temp. setting (cooling
mode)
8°C –28°C
27°C
yes
01
Return water temp. setting (heating
mode)
15°C –40°C
27°C
yes
02
Total working time of compressor after
frosting
30 –90 min
40 min
To be adjusted by
technicians
03
Setting initialization temp. for
defrosting
-30°C –0°C
-7°C
To be adjusted by
technicians
04
Temp. of exit defrost under heating
model
2°C –30°C
13°C
To be adjusted by
technicians
05
Max. time of defrost under heating
mode
1 –12 min
8 min
To be adjusted by
technicians
06
Electronic expansion valve mode
0 (manual) /
1 (auto)
1
To be adjusted by
technicians
07
Automatic restarting after power off
0 –1
1 (record)
To be adjusted by
technicians
08
Mode (cooling only/heat
pump/auxiliary electrical heating/hot
water)
0 –3
1 (warmtepomp)
To be adjusted by
technicians
09
Heat pump keeps running or stops
after compressor stop for 30s
0 (keeps running) /
1 (stops)
0
To be adjusted by
technicians
A
Auto mode (return water temp.)
8°C –60°C
40°C
To be adjusted by
technicians
B
Setting of EEV. (heating mode)
-F(-15°C) ~F (-
15°C)
5°C
To be adjusted by
technicians
C
Electronic expansion valve manual
steps
10 ~ 50
35
To be adjusted by
technicians
D
Setting of EEV. (cooling mode)
-F(-15°C) ~F (-
15°C)
5°C
To be adjusted by
technicians
E
Maximum temperature setting
30°C –70°C
40°C
To be adjusted by
technicians
F
DeltaT setting
1°C –20°C
2°C
To be adjusted by
technicians
G
Ambient temp. protection(Min.)
-15°C –15°C
-10°C
To be adjusted by
technicians

18
6. Maintenance and Inspection
6.1 Maintenance
•Check the water supply device and the releaser often. There should always be water entering the
system. The condition air entering the system should be avoided, or it will influence unit's
performance and reliability. You should clear the water filter regularly to avoid damage to the unit
because of a jammed filter.
•The area around the unit should be dry, sanitary and ventilated. Clean the side of the heating
exchanger regularly to allow proper heating exchange and save energy.
•Check the operation of every process in the unit, and the pressure of the refrigerant system. You
should maintain it and change it in time.
•Check the power supply and cable connections often, if there is any abnormal action or a bad smell
coming of the electrical component, please maintain it or change it in time.
•Please discharge all water in the heat pump and water system to avoid freezing of the heat pump or
water system. You should discharge the water at the bottom of the heat pump if the unit will not be
used for a long time. Check the units thoroughly and fill the entire system with water before
powering the units on again.
6.2 Trouble shooting guide
MALFUNCTION
CONTROLLER
DISPLAY
REASON
RESOLUTION
Water in temp. Sensor
failure
PP 01
The sensor is open or short
circuit
Check or replace a new sensor
Water out temp. Sensor
failure
PP 02
The sensor is open or short
circuit
Check or replace a new sensor
Coil sensor failure
(Heating mode)
PP 03
The sensor is open or short
circuit
Check or replace a new sensor
Gas return sensor
failure
PP 04
The sensor is open or short
circuit
Check or replace the sensor
Ambient sensor failure
PP 05
The sensor is open or short
circuit
Check or replace the sensor
Temp. is too much
different between water-
in and water-out
PP 06
Water volume isn’t enough
Increase water volume
Anti-freezing under
cooling mode
PP 07
Ambient temp. too low

19
The first time freezing
protection in winter
PP 07
Ambient temp. too low
The second time
freezing protection in
winter
PP 07
Ambient temp. too low
Coil sensor failure
(Cooling mode)
PP 08
The sensor is open or short
circuit
Check or change the sensor
High pressure protection
EE 01
Refrigerant system pressure
is high
Check pressure gauge, increase
the water volume
Low pressure protection
E E02
Refrigerant system pressure
is low
Check pressure gauge, refeed
refrigerant
Flow switch failure
EE 03
No water/little water in water
system.
- Check the water flow volume
- Clean filter
- Execute backwash of filter
pump
Power supply
connections wrong (for
3phase unit)
EE 04
Wrong phase or
lack of phase power
connection
Check connections of power
cable
3times display PP06
(Temp. is too much
different between water-
in&out) in 30minutes
EE 05
Water flow volume not
enough, water pressure
difference is too low
Check the water flow volume, or
water system is jammed or not
Defrosting
Defrost code
display
Communication failure
EE 08
Wire controller and The PCB
connection failure
Check the wire connection

20
7. Wiring diagram
Model: PRO+5 PRO+7 PRO+10 PRO+13
This manual suits for next models
5
Table of contents
Languages:
Other COMFORTPOOL Heat Pump manuals
Popular Heat Pump manuals by other brands
Bard
Bard Q24H1D installation instructions
Enertech
Enertech BS018 Installation & operation manual
Trane Technologies
Trane Technologies 4TWA4036A3000A Installer's guide
GE
GE NS18HMA installation instructions
Kingspan
Kingspan Aeromax Plus Homeowner's guide
Cornelius
Cornelius UC-40 Installation and service manual
Toshiba
Toshiba HWS-804H-E installation manual

ECOFOREST
ECOFOREST ecogeo hp Installation and operating manual

Galmet
Galmet Small Installation and operation manual

Lennox
Lennox HP25 Series installation instructions
Amana
Amana Asure ASH13 Product specifications
Carrier
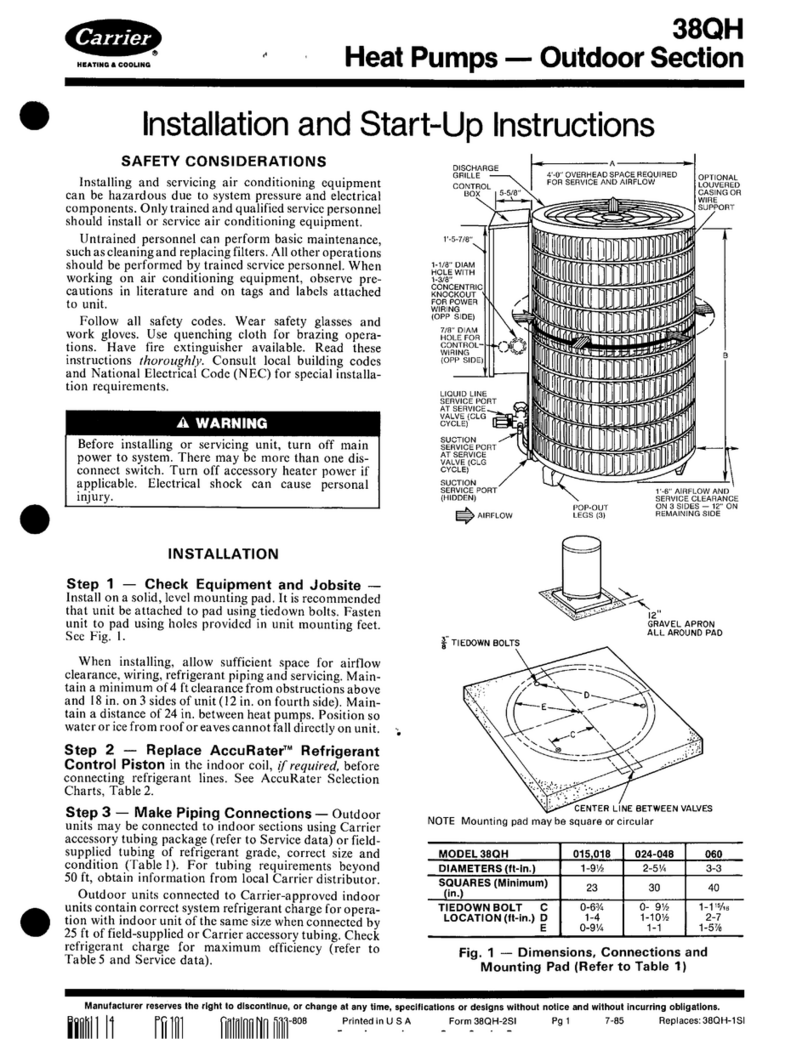
Carrier 38QH Installation and start-up instructions
