Commando COMMANDO-PRO User manual

MADE IN U.S.A.
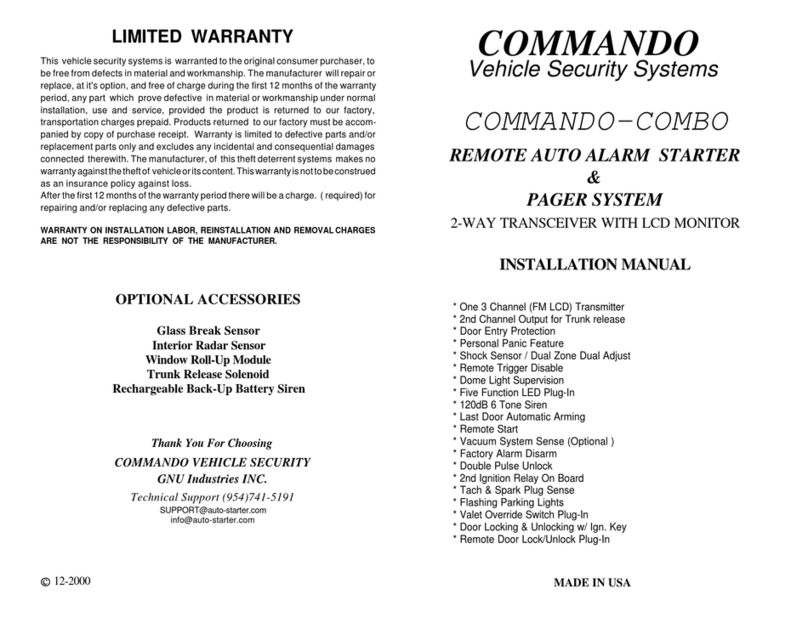
3 CHANNEL ALARM SYSTEMS
Plug-In Design
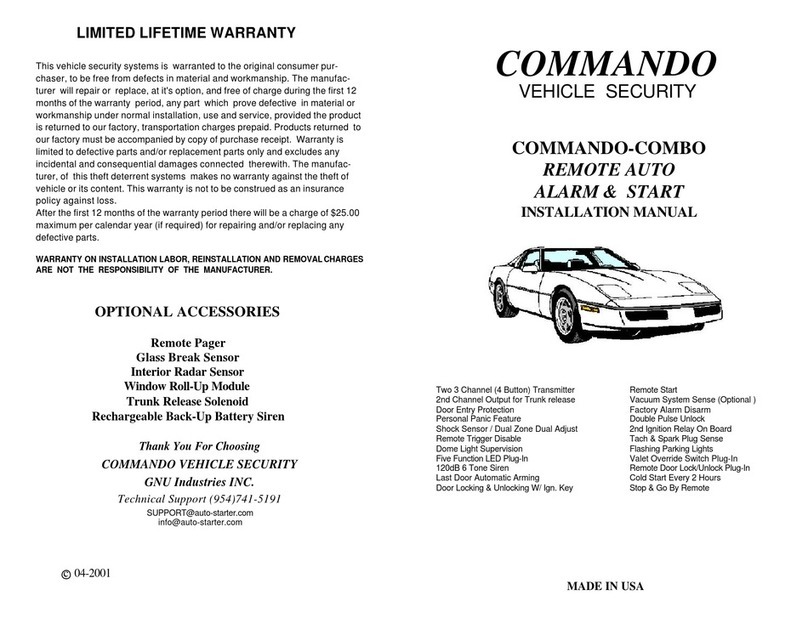
OPTIONAL ACCESSORIES
Remote Pager
Remote Car Starter
Glass Break Sensor
Interior Radar Sensor
Window Roll-Up Module
Trunk Release Solenoid
Rechargeable Back-Up Battery
Rechargeable Back-Up Battery Siren
VEHICLE SECURITY
LIMITED LIFETIME WARRANTY
Thisvehiclesecuritysystemsis warrantedtotheoriginalconsumerpurchaser,to
be free from defects in material and workmanship. The manufacturer will repair
or replace,atit'soption,andfreeofchargeduringthefirst12monthsofthewarranty
period,any part which provedefective in materialor workmanshipunder normal
installation, use and service, provided the product is returned to our factory,
transportationcharges prepaid.Products returned toour factorymust beaccom-
panied by copy of purchase receipt. Warranty is limited to defective parts and/or
replacementpartsonlyandexcludesanyincidentalandconsequentialdamages
connected therewith.Themanufacturer,of thistheftdeterrentsystems makesno
warranty against the theft of vehicle or its content. This warranty is not to be
construed as an insurance policy against loss.
After the first 12 months of the warranty period there will be a charge of $25.00
maximumpercalendaryear(ifrequired)forrepairingand/orreplacinganydefective
parts.
WARRANTY ON INSTALLATION LABOR, REINSTALLATION AND REMOVALCHARGES
ARE NOT THE RESPONSIBILITY OF THE MANUFACTURER.
COMMANDO
COMMANDO-PRO
Thank You For Choosing
COMMANDO VEHICLE SECURITY
GNU Industries INC.
Technical Support (954)475-1486

SYSTEM CONTENTS OPERATING INSTRUCTIONS CON'T.
FAULTY ZONE ALERT:
Ifuponarming(activeorpassive),thealarmsystemarmswith4sirenchirpsand4lightflashes.
This indicates that a faulty zone has been detected and has been automatically bypassed.
AUTOMATIC FAULTY ZONE ELIMINATION:
If while armed, a faulty zone is detected and triggers the alarm, the siren will sound and the
lightswillflashfor4cyclesof60secondsdurationeach. Total4minutes. Afterthese4cycles,
the alarm will automatically reset and bypass the defective zone. Upon disarming the alarm
system,3 chirpswill beaudible and3 lightflashes willbe visible. Thisindicates thatthe alarm
has been triggered. Upon rearming, the system will arm with 1 chirp and then follow up with
4additionalsirenchirpsand4lightflashes. Thisindicatesthatafaultyzonehasbeendetected,
and has been automatically bypassed.
VALET MODE: 2-step procedure
This feature is designed to temporarily disable the alarm for valet parking. While the alarm is
in the disarmed state, insert the ignition key and turn to the ignition "ON" accessory position.
Press & hold the valet switch for 5 seconds, the system will chirp, remove the key from the
ignition. The alarm will now be in the valet mode, and the LED will be ON solid.
NOTE: Youcannot armor disarmthe alarmwhilethe systemis invalet mode. However,you
can still use the transmitter to lock and unlock the doors, while the alarm is in valet mode.
EMERGENCY OVERRIDE SWITCH:
In the event that you lose your transmitter and cannot disarm the alarm:
Openthedoor,thealarmwillsound. Inserttheignitionkeyandturntotheignition"ON"accessory
position. Press & Hold the valet switch for 5 seconds. The alarm will chirp & disarm, the LED
will be solid, the starter disable feature will be deactivated and you will now be able to start
your car.
NOTE
Each System contains the following components:
1- Alarm Module
2- Transmitters
1- 6 Tone Siren
1- Dual Stage Dual Adjust Shock Sensor
1- 10 pin wiring harness
1- 3 pin wiring harness
1- 5 Pin door lock harness
1- Red Status L.E.D.
1- Push Button Valet Switch
Note:Read this instruction manual thoroughly.
Important: This unit is designed for a professional
installation only.
Any installation performed by an unqualified installer,
will void the warranty.
110

FEATURESOPERATING INSTRUCTIONS
9 2
Two 4 Channel Transmitters
Code Learning
2nd Channel Output for Trunk release
3rd Channel Output
Door Entry Protection
Personal/Panic Feature
Shock Sensor / Dual Zone Dual Adjust (Plug-In)
Shock Sensor Warn Away Feature
Remote Trigger Disable
Dome Light Supervision
Remote Shock Sensor Disable
Five Function LED Plug-In
Intrusion Event Memory
120dB 6 Tone Siren
Last Door Automatic Arming
Flashing Parking Lights
Anti Car jack (Programmable)
Starter Disable Built-in Relay
R.F. Lock-Out Safety Feature
Valet Override Switch Plug-In
Faulty Zone By-Pass
Audible/Visual Intrusion Alert
Door Locking & Unlocking with Ignition Key
Remote Door Lock/Unlock Plug-In
Double Unlock Pulse
Transmitter Programmable Features
Automatic Safety Re-Arm
Active/Passive Arming
Disarm Alarm With 2nd Channel
Parking Lights Stay ON or OFF After Disarm
Permanent Chirp Disable
Auto Door Lock With Ignition Key
Car Jack By Remote or Door
Installer Programmable Features: (Dip Switch)
Door Locking (1sec. or 3.5sec.)
Anti Car Jack
Doors Not To lock In Passive
Double Unlock Pulse
TRANSMITTER BUTTON OPERATION:
IMPORTANT: The microprocessor alarm system has been designed so that upon arming,
a 10 second arming delay will be effected. This is to give the electronics in the vehicle, a
chance to stabilize. ( window roll-up, shock sensor)
ACTIVE ARMING MODE:
Arm the alarm system by pressing the transmitter button 1, once momentarily. The alarm
will arm and will confirm with 1 siren arming chirp, LED will be solid and start to flash slow
after 10 seconds
PASSIVE ARMING MODE:
In passive arming mode, upon closing the last door there will be a 30 second arming delay.
TheLEDwill beflashingrapidlyindicatingthat the systemisinpassive arming phase. After
30 seconds, the alarm will arm by itself.(Programmable)
ARMING WITH DEFECTIVE ZONE ALERT:
If after arming the alarm, a defective zone has been detected. The alarm will confirm the
detection of the defective zone by chirping the siren and flashing the lights 4 times, (2-3
seconds after the arming confirmation).
DISARMING THE SYSTEM:
Disarmthe alarmsystemby pressingtransmitterbutton #1, onceagainmomentarily. Alarm
disarmsand willconfirm with2 disarmingsiren chirps,Lights willflash twice,LED willturn
off.Optionalstarterdisablefeature will bedeactivated,Doorlockswillunlockautomatically
Domelightwillbeilluminated for 30secondsoruntilignitionkeyisturned to accessory"ON"
position.
PANIC MODE:
Foremergency situations,press andhold button#1, ofthe transmitterfor 3seconds. This
will activate the panic mode. The alarm siren will sound and the parking lights will flash for
60 seconds (or until the transmitter button #1 is pressed again for 1 second).
ALARM TRIGGERED:
Ifaviolationofthevehicleistakingplace,thesirenwillsoundandtheparkinglightswillflash
for60seconds. Afterthis60secondsduration,thealarmwillautomaticallyresetandresume
protecting the vehicle.
INTRUSION ALERT:
Ifasensorinput(doorswitch,shocksensor)hasbeenviolatedwhilethesystemwasarmed,
the LED will be flashing rapidly and upon disarming the alarm system, the siren will confirm
with3disarmingsirenchirpsand3lightflashes. Checkthevehicleanditscontentstoverify
if any violation has taken place.

3
SPECIAL FEATURES
8
PROGRAM LOCATION
*PANIC
BUTTON #1
BUTTON #3
PTX-4
BUTTON #2
BUTTON #4
LOCK / ARM UNLOCK / DISARM
Hold 2 Sec. For TRUNK
Silend Arming & Disarming Car Jack w/Ign.ON
Button #1
Hold 2 Sec. For 3rd Channel
OPERATING THE REMOTE
ON =
OFF=
ON =
OFF=
PASSIVE
ACTIVE
PARKING LIGHTS STAYS ON AFTER DISARM
ON =
OFF=
#2
#3 PARKING LIGHTS FLASHES TWO TIMES
ON =
OFF=
#4
#5 ON =
OFF=CHIRP ENABLED
PERMENANT CHIRP DISABLE
ON =
OFF=
#6
#7 ON =
OFF=
#1
PROGRAM LOCATION
DISARM ALARM WTHE 2nd CHANNEL
DOSN'T DISARM ALARM WITH 2nd CHANNEL
AUTO LOCK WITH IGNITION KEY
NO LOCK WITH IGNITION KEY
AUTO ARMING (ACCIDENTAL DISARM)
NO AUTO ARMING
CAR JACK BY REMOTE
CAR JACK BY DOOR
1- CODE TEACHING
Turn the ignition key 3 times on/off, on/off, on, the siren will chirp.
Leave the ignition key in on position, press the valet switch for 5 seconds until the siren
chirps 3 times, Then press button # 1 on the remote transmitter. The siren will chirp once,
if you want to teach another transmitter with different code press # 1 on the second
transmitter the siren will chirp once. You can teach up to 3 different codes. After 10
seconds the LED starts flashing, now the alarm has learned the code of the transmitters.
2- WARN-AWAY
When using the dual zone shock sensor, the valet wire provides a Warn-Away Input.
Whenthealarmisarmed,thefirstzonewillchirpthesiren5times and flash theparkinglights
once, and the second zone will trigger the alarm.
3- VALET MODE:
Togetinto Valetmode,Disarm thealarm,turnthe IgnitionON,holdthe pushbuttonswitch for
5secondsuntiltheLEDcomesONsolid.ThesystemwillbeinVALET.Onlythedoorlock/unlock
system will work on Valet (Keyless Entry).
To get out of Valet mode, turn the ignition ON and hold the switch down for 5 seconds, the
alarm will chirp and the LED goes out.
In an Emergency, When the alarm system has been triggered and the transmitters do not
respondtoturnthealarmoff.GetintothecarturntheIgnitionON,holdtheswitchbuttondown
for5seconds,thealarmwillshutoffandtheLEDwillbeonsolid,thiswilloverridethesystem
and it will be in Valet Mode.
4- SHOCK SENSOR DISABLE FEATURE:
To disable the SHOCK SENSOR after arming the system. Press the 1st button once,
immediatelyafterwithin3secondspressthe2ndbuttonandthealarmwillchirponemoretime,
that will eliminate all trigger wires.
5-AUTO REARM:
When the alarm has been disarmed with the transmitter by mistake. It will automatically
rearmed itself within 30 seconds, unless you open one of the doors. This feature will
be always active no matter if the alarm is in active or passive mode.
6A-ANTI - CAR JACKING W/ DOOR
To activate the Car Jacking feature, Ignition should be (ON)If Door is opened 90 seconds
later the siren will chirp for 10 seconds to remind you that the system will be in car jacking
mode. After the reminder, the parking lights will flash & the siren will sound for 5 minutes,
and the (-) Gray wire (Starter kill) will be activated.
To turn the car jacking mode OFF, Ignition should be (ON) and press VALET
switch to reset the system.
6B-ANTI - CAR JACKING W/ REMOTE
To activate the Car Jacking feature, Ignition should be (ON)If The Remote Baton # 4 is
Preset 90 seconds later the siren will chirp for 10 seconds to remind you that the system
will be in car jacking mode. After the reminder, the parking lights will flash & the siren will
sound for 5 minutes, and the (-) Gray wire (Starter kill) will be activated.
To turn the car jacking mode OFF, Ignition should be (ON) and press REMOTER
BATON # 4 to reset the system.

Door Lock Wire
Door Unlock Wire
WHITE X
X
3 Wire Positive Door Lock System
Factory
Door Lock Switch
3 Wire Negative Door Lock System
PROGRAMMING THE UNIT DOOR LOCK WIRING DIAGRAM
GREEN
BLUE
BROWN
VIOLET Existing Power door lock system
Door Lock Wire
Door Unlock Wire
WHITE X
X
Factory
Door Lock Switch
GREEN
BLUE
BROWN
VIOLET Existing Power door lock system
12V Power (+)
12V Power (+)
Aftermarket Power door lock Actuator
WHITE
GREEN
BLUE
BROWN
VIOLET 12V Power (+)
GROUND
GROUND
5 Wire "Ground at rest" Door Lock System
WHITE
GREEN
BLUE
BROWN
VIOLET
5 WIRE
FACTORY
SWITCH
12V Power (+) Lock
X
CUT
X
CUT
DRIVER SIDE
ACTUATOR
Unlock
WHITE
GREEN
BROWN
VIOLET
MERCEDES Vacuum Door Lock System
12V Power (+)
xCUT
BLUE x
CUT
pump
GROUND
Door actuator GENESIS-PRO
DOOR LOCK
ACTUATOR
74
*
PTX-4
BUTTON # 3
RESET TO FACTORY DEFAULT SETTING:
ENTER PROGRAM MODE (SEE ABOVE)
PRESS AND RELEASE CHANNEL 3 FOR 5
SECONDS LIGHT WILL FLASH 3 TIMES .AND
ALL PROGRAMMABLE FEATURES BACK TO
FACTORY DEFAULT SETTINGS. (WHICH IS
ALL ON)
BUTTON # 2 =OFFBUTTON # 1=ON
Remote Programmable Features:
To enter program mode:
1- Turn Ignition key ON
2- Within 10 seconds pressOVERRIDE switch 5 times. Siren will Sound with
Long Chirp then Release switch. Now in program mode.
To access feature change:
1.- Press program switch the number of times that corresponds with the
feature you desire to change.
Example: If you whant to turn feature #4 off, then press program switch 4
times.
2- Siren and LED will flash each time switch is pushed.
3- Press button #1 on remote to turn featureON - SIREN will chrip 1 time.
4- Press button #2 on remote to turn featureOFF - SIREN will chrip 2 times.
5- System will automatically exit program mode.
6- Once a programmable feature has been entered, the LED will flash the
number of times corresponding with the program feature that was chosen.
BUTTON # 4

BLUE
GRAY
BLACK
BROWN
ORANGE
1
2
3
4
5
6
7
8
9
10
GREEN
YELLOW
WHITE
VIOLET
RED
STARTER
GREEN/BLACK DOME LIGHT (-)
RED HORN OUTPUT ( -)
YELLOW 3RD CHANNEL OUTPUT
(+) PARKING LIGHTS
(+) POWER
(+) SIREN OUTPUT
(-) GROUND
(-) OUTPUT
(-) 2nd CHANNEL
(-) TRIGGER
(-) DOOR TRIGGER
(+) DOOR TRIGGER
IGNITION 12V.+
WHITE Lock Switch (87a)
GREEN Lock Motor (30)
Unlock Motor (30)
BLUE
Unlock Switch (87a)
BROWN
VIOLET Polarity Select (87)
11
12
13
14
15
ALARM WIRING DIAGRAM
87
86 87A
30 12V(+)POWER
BROWN WIRE
OF ALARM
TRUNK SWITCH
TRUNK RELASE RELAY
85
5 6
1- ON= 1 Sec. Door lock Pulse OFF= 3.5 Sec. Lock Pulse
2- ON= Anti Car Jack Is Disabled OFF= Enabled
3- ON= Door Lock in Passive Mode OFF= Disabled
4- ON=
Dip Switch Settings:
1 Pulse for Unlock OFF= 2 Pulse for Unlock
RED BLUE WHITE RED
Single Shock
Sensor Plug
L.E.D.
Plug Dual Shock
Sensor Plug
Valet Switch
Plug
Table of contents
Other Commando Car Alarm manuals
Popular Car Alarm manuals by other brands

Drake Systems
Drake Systems DTH-3002R user manual

Audiovox
Audiovox Prestige APS-15CL installation manual

Gorgon
Gorgon G303 Operation manual

Carbine
Carbine PLUS-4700 owner's manual

CrimeStopper
CrimeStopper Gargoyle CS-2001FC II Series Installation & operating instructions

Code Alarm
Code Alarm CATX110 Programming guide

Audiovox
Audiovox Prestige APS-15CH owner's manual

Code Alarm
Code Alarm ca 1151 installation guide

ETLOC
ETLOC ETLOC-50 SECURITY installation manual

MEGATRONIX
MEGATRONIX MEGALARM MEGA 462 Installation and operation manual

Mongoose
Mongoose EMS 1.9R user manual

Directed Electronics
Directed Electronics Viper 211HV owner's guide