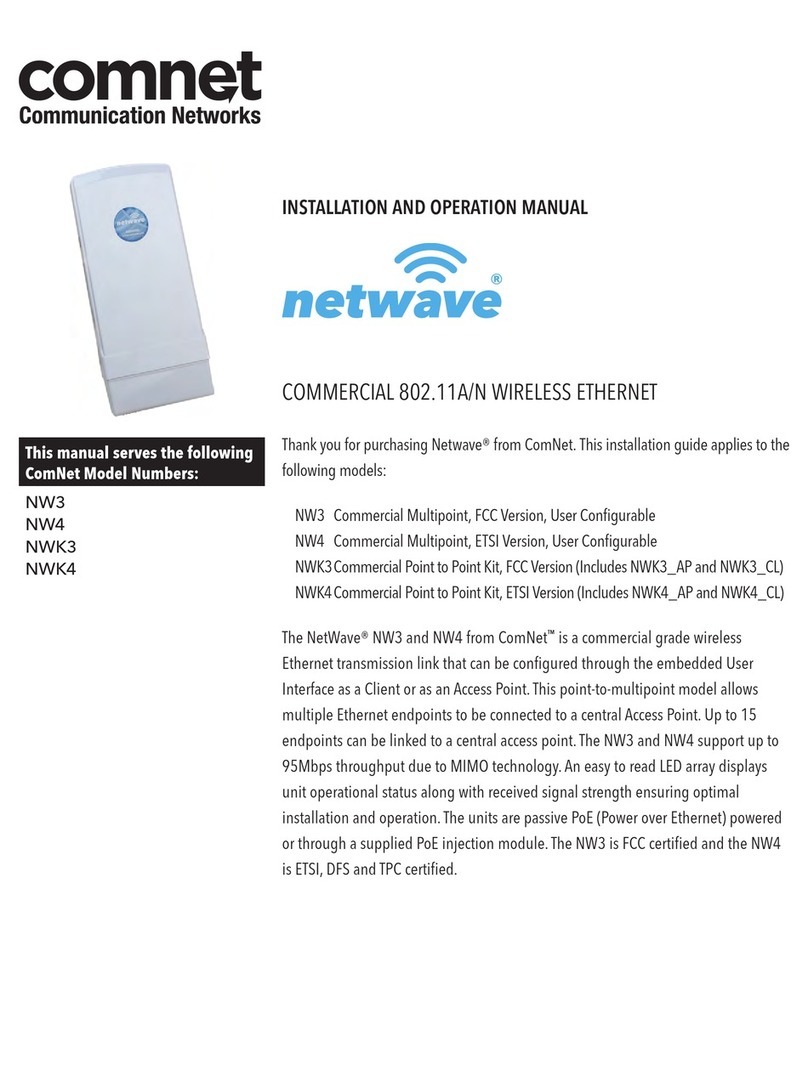
Comnet netwave NW1 User manual

INSTALLATION AND OPERATION MANUAL
INDUSTRIAL OUTDOOR ULTRA-HIGH THROUGHPUT,
IMPACT RESISTANT HARDENED 802.11AC
WIRELESS ETHERNET DEVICE
Thank you for purchasing NetWave from ComNet. This installation guide applies to
all Generation 4 NetWave Radios. NW1 Shown in examples.
The NetWave® NW(1,2)[IC] Industrial Grade high performance wireless radio is
ideal for high capacity and scalable deployments where channel overlapping and
interference typically cause our discounted competitors radios to become unstable.
The wide range of channel spectrum widths available on the NW(1,2)[IC] series of
radios gives you the option of narrowing channel bandwidths as your network grows
which will increase the number of non-overlapping channels and improve stability.
The NW(1,2)[IC] comes standard with an integrated antenna and an IP67 rated
impact resistant polycarbonate enclosure that is designed to survive the most
extreme conditions.
The NW1 is FCC certified for use in the United States. The NW2 is ETSI, DFS and TPC
certified for use in the European Union. The NW1IC is certified for use in Canada.
This manual serves the following
ComNet Series:
NW1[IC]
NW2
NWK1[IC]
NWK2
NWK11/M[IC]

INS_NetWave_REV– Rev. 09/23/21 PAGE 2
INSTALLATION AND OPERATION MANUAL NETWAvE
TECH SUPPORT: 1.888.678.9427
About This Guide
This guide is intended for different users such as engineers, integrators, developers, IT managers,
and technicians.
It assumes that users have some PC competence and are familiar with Microsoft Windows
operating systems and web browsers such as Windows Internet Explorer and Mozilla Firefox, as
well as have knowledge of the following:
»Installation of electronic equipment
»Electrical regulations and guidelines
»Knowledge of Local Area Network technology
Related Documentation
The following documentation is also available:
»NW(1,2) Series (Gen 4) Datasheet
»NW(1,2) Series (Gen 4) Quick Start Guide
Website
For information on ComNet’s entire product line, please visit the ComNet website at
http://www.comnet.net
Support
For any questions or technical assistance, please contact your sales person (sales@comnet.net) or
the customer service support center (techsupport@comnet.net)
Safety
»Only ComNet service personnel can service the equipment. Please contact ComNet Technical
Support.
»The equipment should be installed in locations with controlled access, or other means of
security, and controlled by persons of authority.

INS_NetWave_REV– Rev. 09/23/21 PAGE 3
INSTALLATION AND OPERATION MANUAL NETWAvE
TECH SUPPORT: 1.888.678.9427
Contents
About This Guide 2
Related Documentation 2
Website 2
Safety 2
Overview 5
Regulatory Compliance Statement 5
Warranty 5
Disclaimer 5
Legal Information 5
1.0 Introduction 6
System Requirements 6
2.0 Deployments 7
Point to Multi-Point 7
Point to Point Topology Utilizing
Dual Ports for Passthrough PoE 8
4.0 Cabling Requirements 9
5.0 Hardware Installation 9
Outdoor Ethernet Gland Installation 9
NetWave Indicating LED Details 11
Outdoor Standard Mounting Hardware 11
6.0 Key Default Settings 13
IP Address 13
Login Credentials 13
Default Wireless Settings 13
7.0 Quick Configuration 14
8.0 Detailed Configuration 15
Logging Into a Radio 15
Operating Modes 16
Reset and Save Settings 16
Logout 16
Reset Button 16
Web GUI 17

INS_NetWave_REV– Rev. 09/23/21 PAGE 4
INSTALLATION AND OPERATION MANUAL NETWAvE
TECH SUPPORT: 1.888.678.9427
Navigation Tabs 17
Status – Routes 18
Status – Kernel Log 18
Status – Realtime Graphs 19
System 22
Network 30
Network – Wifi 35
WiFi Configuration 36
Agency Compliance 43
GPL (General Public License) Statement 45

INS_NetWave_REV– Rev. 09/23/21 PAGE 5
INSTALLATION AND OPERATION MANUAL NETWAvE
TECH SUPPORT: 1.888.678.9427
Overview
Regulatory Compliance Statement
Product(s) associated with this publication complies/comply with all applicable regulations. Please
refer to the Technical Specification section for more details.
Warranty
ComNet warrants that all ComNet products are free from defects in material and workmanship
for a specified warranty period from the invoice date for the life of the installation. ComNet will
repair or replace products found by ComNet to be defective within this warranty period, with
shipment expenses apportioned by ComNet and the distributor. This warranty does not cover
product modifications or repairs done by persons other than ComNet-approved personnel, and
this warranty does not apply to ComNet products that are misused, abused, improperly installed,
or damaged by accidents.
Please refer to the Technical Specifications section for the actual warranty period(s) of the
product(s) associated with this publication.
Disclaimer
Information in this publication is intended to be accurate. ComNet shall not be responsible for its
use or infringements on third parties as a result of its use. There may occasionally be unintentional
errors on this publication. ComNet reserves the right to revise the contents of this publication
without notice.
Legal Information
No part of this document may be reproduced or transmitted in any form or by any means,
electronic and mechanical, for any purpose, without the express written permission of ComNet.
Copyright
Copyright © 2020 Communication Networks, LLC (dba ComNet). All rights reserved.

INS_NetWave_REV– Rev. 09/23/21 PAGE 6
INSTALLATION AND OPERATION MANUAL NETWAvE
TECH SUPPORT: 1.888.678.9427
1.0 Introduction
The NetWave® ultra-high throughput, impact-resistant hardened wireless Ethernet transmission
device can be configured through the embedded User Interface as a Client or as an Access
Point. This single radio model was designed for high throughput point-to-point or multipoint
applications and comes with an integrated 19dBi, 17º beamwidth antenna. The NetWave Radios
supports up to 500 Mbps throughput using 802.11ac MIMO technology. The units can be powered
by an 02.3af/at PoE compliant device or through a sold-separately PoE injector with the second
Ethernet port serving as an IEEE802.3af power source. NW1 is FCC certified for use in North
America, NW1IC is certified for use in Canada, and the NW2 is ETSI, DFS and TPC certified for use
in the European Union.
This user manual is a guide for the NetWave Generation 4 wireless Ethernet devices as well as
the preconfigured kits. ComNet NetWave Wireless offers OpenWRT with the most advanced
Qualcomm Atheros wireless drivers. NetWave now includes a new user-friendly LuCI web interface
for configuring the device. OpenWRT is an extensible GNU/Linux distribution for embedded
devices. It is built from the ground up to be a full featured, easily modifiable operating system.
It is powered by a Linux kernel that's more recent than most other distributions. LuCI is a free,
clean, extensible and easily maintainable web user interface for embedded devices. It has high
performance, small installation size, fast runtimes, and good maintainability. The units come
configured for either point to point or point to multipoint applications. This manual contains
detailed operational and configuration information not covered in the quick start guides.
System Requirements
Web Browser:
Mozilla Firefox, Google Chrome, Apple Safari, or Microsoft Internet Explorer 8 or above.

INS_NetWave_REV– Rev. 09/23/21 PAGE 7
INSTALLATION AND OPERATION MANUAL NETWAvE
TECH SUPPORT: 1.888.678.9427
2.0 Deployments
Point to Multi-Point
These individual units allow the user to configure for either multipoint access point or client operation.
There is a MAC address lock feature that can be enabled through the user interface but is not enabled
by default. The NW(1,2)[IC] radios includes a 19dBi 17° internal antenna. See the ComNet website for
the latest information regarding antenna support. Preconfigured NWK kits do not support point-to
multipoint topologies out of the box. They will need to add the additional clients to a whitelist on the
access point.
PC NVR ComNet Gigabit
Managed Switch
with 30W PoE+
NW1
(Recommended
Access Point)
PoE
WIRELESS
CAT5
POWER
ETHERNET DATA
LEGEND
10/100/1000 Mbps
Ethernet
NW1 (Client)
PoE
PIM or other
PSE device
Power
IP Camera
Ethernet Ethernet
NW1 (Client)
PoE
PIM or other
PSE device
Power
IP Camera
Ethernet Ethernet
NW1 (Client)
PoE
PIM or other
PSE device
Power
IP Camera
Ethernet Ethernet
Image 1

INS_NetWave_REV– Rev. 09/23/21 PAGE 8
INSTALLATION AND OPERATION MANUAL NETWAvE
TECH SUPPORT: 1.888.678.9427
Point to Point Topology Utilizing Dual Ports for Passthrough PoE
NW1
(Client)
NW1
(Access Point)
ComNet Managed
Switch with 30W PoE
Connected to Network
CNGE1IPS or
any PSE device
IP Camera
PoE Camera
Power
P1
P2
PoE
1Gbps
Ethernet
PoE
Ethernet Ethernet
PoE
Ethernet
Image 2

INS_NetWave_REV– Rev. 09/23/21 PAGE 9
INSTALLATION AND OPERATION MANUAL NETWAvE
TECH SUPPORT: 1.888.678.9427
4.0 Cabling Requirements
Shielded CAT 5 or better should be used for all out of plant Ethernet connection and should
be properly grounded through the PoE AC ground. Industrial grade shielded Ethernet cable is
recommended to help prevent ESD damage commonly experienced with outdoor installations.
Visit www.comnet.net/comnet-products/cables
5.0 Hardware Installation
Outdoor Ethernet Gland Installation
There will be at least one cable gland included with each outdoor enclosure. Below is an image of
the individual parts of the gland with an Ethernet cable routed through.
Note: The split rubber washer allows a pre-terminated Ethernet cable to be used.
Once the cable has been routed through the weather connection, and the RJ45 connection has
been made, screw in the gland into the housing making sure it is tight enough for a water tight
seal. Push the split rubber gasket into place and loosely screw the cap that goes over the rubber
washer.
Image 3
Once the gland is tight in the housing, tighten the outer nut/cap making sure the rubber seal
squeezes and seals the Ethernet cable to the gland as shown.

INS_NetWave_REV– Rev. 09/23/21 PAGE 10
INSTALLATION AND OPERATION MANUAL NETWAvE
TECH SUPPORT: 1.888.678.9427
Connect one end of an RJ-45 Ethernet cable to the LAN OUT port of the Power Injection
Module (PIM) and the other end to LAN of the access point – as sown below.
Note: Maximum length of the RJ-45 CAT5 cable is 90 meters.
Connect the RJ-45 Ethernet cable attached to the PIM to a network device, such as a switch or
to the configuration PC. Then plug the power adaptor to an AC power outlet and power plug
into the socket of the PIM – as shown in the diagram below.
Note: DC PoE input for the NW(1,2,9) and NWK(1,2,9) is 48 VDC.
A
D
D
D
B
Ethernet
Network
C
Network
Edge Device
P1 P2
A. Connect one end of an RJ-45 Ethernet cable to the OUT
port of the Power Injection Module (PIM) and the other end
to LAN of the access point.
Maximum length of the RJ-45 CAT5 cable is 100 meters.*
B. Connect the RJ-45 Ethernet cable attached to the PIM to a
network device, such as to a switch or to the PC you will use
to configure the access point.
C. Connect the power adaptor to the main electrical supply
and the power plug into the socket of the PIM. PoE power
input: Passive PoE (range 36 to 48 VDC). The unit can also
be powered by a suitable IEEE 802.3af/at PSE device such
as a PoE switch or injector.
D. A Drip Loop is recommended as additional precaution
against moisture entering the Access Point housing.
* Up to 200mW radio. For higher power radio upgrade to higher rating
power adapter.
Image 5
IMPORTANT: Only plug PoE power to Port 1.
Connecting a PoE power source to the PSE Port (#2) will
cause a major device malfunction and void the warranty.

INS_NetWave_REV– Rev. 09/23/21 PAGE 11
INSTALLATION AND OPERATION MANUAL NETWAvE
TECH SUPPORT: 1.888.678.9427
NetWave Indicating LED Details
WEAK SIGNAL EXCELLENT SIGNAL
LED VISUAL CUE INDICATION
POWER SOLID GREEN Power is supplied to the unit
OFF No power is supplied to the unit or the unit is in reset.
LAN SOLID GREEN LAN Connected
OFF No Connectivity
RSSI1 SOLID RED Weak Connection
RSSI2 SOLID ORANGE Moderate Connection
RSSI3 SOLID GREEN Solid Connection
RSSI4 SOLID GREEN Excellent Connection
(Advisable to check Status Page to confirm RSSI is > -55)
SIGNAL STRENGTH:
RSSI1POWER
RSSI2LAN
RSSI3
RSSI4
Image 6
Outdoor Standard Mounting Hardware
This mounting hardware will support pole diameters up to 2 in (5.8 cm). Below are the parts
contained in the standard mounting hardware.
Image 7

INS_NetWave_REV– Rev. 09/23/21 PAGE 12
INSTALLATION AND OPERATION MANUAL NETWAvE
TECH SUPPORT: 1.888.678.9427
Here is the mounting hardware assembled shown with a NW1/M in a +30° and -30°vertical position
Image 8

INS_NetWave_REV– Rev. 09/23/21 PAGE 13
INSTALLATION AND OPERATION MANUAL NETWAvE
TECH SUPPORT: 1.888.678.9427
6.0 Key Default Settings
IP Address
Defaulted Radio 192.168.10.101
IP Address of Web Server 192.168.10.100 (AP)
192.168.10.101 (CL)
Login Credentials
Username root
Password root
Default Wireless Settings
SSID NetWave-1
WPA Pre-shared Key 12345678
Channel-Frequency (AP) Auto
Channel Spectrum Width Auto
Note: A Reset to defaults will erase the user config and reset the radio to a 192.168.10.101
address and set the wireless card to Client mode.

INS_NetWave_REV– Rev. 09/23/21 PAGE 14
INSTALLATION AND OPERATION MANUAL NETWAvE
TECH SUPPORT: 1.888.678.9427
7.0 Quick Configuration
1. Connect an Ethernet cable from the port labelled as IN on the power Injection Module to
either a laptop or a PC LAN port.
2. Connect the second Ethernet cable from the OUT port on the Power Injection Module to the
NetWave LAN port.
3. Apply 48 VDC to the Power Injection Module with the provided power supply. You should
notice the green LED illuminate in the Power Injection Module and the power LED on the
NetWave unit.
4. Set the IP address of the laptop being used to configure NetWave to static and the subnet to
192.168.10.x /24 subnet.
5. Point the browser to 192.168.10.101. This is the default address.
For preconfigured kits (NWKX_AP and NWKX_CL) point the Browser to 192.168.10.100 for the
Access Point or 192.168.10.101 for the Client.
6. A login prompt will pop up. Enter:
Username root
Password root
7. Select the NETWORK » WIFI tab and set the desired network settings.
Select Apply & Save.
Note: This will be the network address for the NetWave web server. It is not necessary to set to
the same subnet as the operating network, but it is recommended.
8. Select the NETWORK -> WIFI tab and set:
• Wireless mode – Set to AP or Client
• Country code – Only required if setting up the NW2 (ETSI) model
Note: It is the user’s responsibility to ensure that the correct country is chosen. ComNet
accepts no liability for incorrect equipment set up.
• Output RF power – if received signal strength is greater than 80, it is recommended to reduce
RF TX power
• Set SSID – if changing from the default setting
• Channel Spectrum Width – May want to reduce to 20M from the default 20/40/80MHz if the
5GHz spectrum is crowded
• Wireless Security – if changing from default settings
• Select Apply Settings
• Select Save
Note: Multipoint nodes will need to have the Wireless Mode set to either AP or Client (default is
Client). And the IP addresses will need to be all set to different addresses (default address
is 192.168.10.101). Once this is done, all the clients will connect to the multipoint AP with
all other setting kept at default.

INS_NetWave_REV– Rev. 09/23/21 PAGE 15
INSTALLATION AND OPERATION MANUAL NETWAvE
TECH SUPPORT: 1.888.678.9427
8.0 Detailed Configuration
Logging Into a Radio
To access the NetWave configuration interface, perform the following steps:
1. Connect an Ethernet cable from the Data In port on the Midspan Injector or Port 2 on the radio
directly to your laptop.
2. If you are using a Midspan Power Injector, connect the power cable to an outlet and turn on
power.
3. Assign the Ethernet adapter on your computer with a static IP address on the 192.168.1.x
network, e.g. 192.168.10.10 and with a subnet mask 255.255.255.0.
4. Launch a web browser and enter the default IP address of the device, 192.168.10.101, into the
address bar.
The login page will look like the following image:
Image 9
The default authorization details are:
Username: root
Password: root

INS_NetWave_REV– Rev. 09/23/21 PAGE 16
INSTALLATION AND OPERATION MANUAL NETWAvE
TECH SUPPORT: 1.888.678.9427
Operating Modes
The Netwave Radio can operate in the following modes:
1. Access Point WDS
2. Client WDS
An Access Point can have multiple clients.
A Client Radio can only link to one access point.
Reset and Save Settings
The buttons are described here.
Image 10
Reset Undo the changes.
Save Saves the changes but does not take effect till settings are applied
Save & Apply Saves and applies the changes.
Please use this button so that the changes are applied immediately.
Note: At the top right corner of the NetWave configuration web page, there may be either of the
following texts displayed:
Changes: 0: Means that all changes on the configuration web page have been applied to
the Wireless Device.
Unsaved Changes: Shows the number of changes that have not yet been Save & Apply.
Logout
There are two ways to logout of the radio, most will simply close the browser or browser tab.
There is also a logout button on the navigation bar.
Reset Button
The reset button is a physical hardware button on the enclosure of the radio. Depending on how
long the button is pressed, you can reboot the board or reset it to factory default. First make
sure, that the power is on and wait a minute for the board to finish starting up. The following table
shows the duration of the button press and the corresponding action.
Button Press Duration Effect
0 - 3 Seconds Power cycles the radio
5 – 20 Seconds Reset to factory default

INS_NetWave_REV– Rev. 09/23/21 PAGE 17
INSTALLATION AND OPERATION MANUAL NETWAvE
TECH SUPPORT: 1.888.678.9427
Web GUI
After login, the browser will display the Status – Overview page. This is the default information
page that shows your connected stations and their connection quality.
Image 11
Navigation Tabs
The navigation tabs assist with locating the specific settings that need to checked or updated.
Image 12
The Status – Overview Page is the default page and is divided into the following sections.
Wireless Displays the wireless settings for the Ath0 wireless card
Associated Stations Shows connected stations
System Displays host name, Firmware, and Kernel versions
Memory Displays total and free onboard memory
Network Shows WAN configurations if configured
DHCP Leases Shows IPv4 DHCP Leases
DHCPv6 Leases Shows IPv6 DHCP Leases

INS_NetWave_REV– Rev. 09/23/21 PAGE 18
INSTALLATION AND OPERATION MANUAL NETWAvE
TECH SUPPORT: 1.888.678.9427
Status – Routes
The Routes page will display current ARP Table, IPv4, and IPv6 Routes.
Image 13
Status – Kernel Log
The Kernel Log displays operational messages from the processor.
Image 14

INS_NetWave_REV– Rev. 09/23/21 PAGE 19
INSTALLATION AND OPERATION MANUAL NETWAvE
TECH SUPPORT: 1.888.678.9427
Status – Realtime Graphs
Realtime graphs has the 4 following categories: Load, Traffic, Wireless, and Connections.
Load
Realtime Load displays current CPU usae. 1.00 would be considered 100% utilization.
Image 15
Traffic
The Traffic tab displays throughput load for each of the interfaces.
Ath0 is the wireless interface.
Eth0 is port 1.
Eth1 is port 2.
Image 16

INS_NetWave_REV– Rev. 09/23/21 PAGE 20
INSTALLATION AND OPERATION MANUAL NETWAvE
TECH SUPPORT: 1.888.678.9427
Wireless
The Wireless tab has 2 sections. The upper section displays the Signal Strength and Noise Levels
in dBm.
»The Signal Strength is shown as a negative number that ranges from -95 (Weakest) to 0
(Strongest).
»The Noise Level is also rated from -95 to 0 with -95 being the noise floor (No interference).
»The Signal to Noise Ratio is also shown and is rated from 0 to 100 with 100 being the strongest
signal possible.
The lower section displays the data rate of the wireless connection and varies greatly depending
on throughput demand and processor load.
Image 17
Other manuals for netwave NW1
4
This manual suits for next models
7
Table of contents
Other Comnet Network Hardware manuals
Popular Network Hardware manuals by other brands

AAON
AAON FWS-2350 manual

Ventev
Ventev TerraWave Rapid Deployment Kit with Battery Backup... Assembly instructions

Nice
Nice HubNetworklink quick start guide

Ubiquiti
Ubiquiti airFiber 60 quick start guide

Altronix
Altronix NetWay G Series installation guide

ADTRAN
ADTRAN IQ Probe 1200214L1 Specification sheet

Austin Hughes
Austin Hughes Infra Power PPS-03-S user manual

DJM Electronics
DJM Electronics GigaFOILv4-INLINE user guide

Edgewater Networks
Edgewater Networks EdgeProtect 7300 Hardware guide

INSYS
INSYS Powerline GP 1.1 Quick installation guide

FreeNAS
FreeNAS Mini E Basic Setup Guide

Exinda
Exinda 4062 Series Hardware installation guide