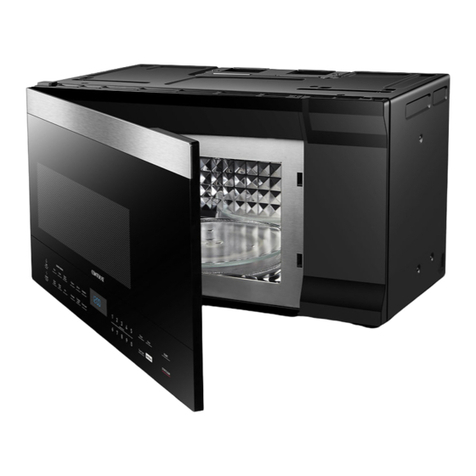
contoure RV-933BK User manual

MID-SIZE 0.9 / 1.0 CU.FT.
BUILT IN BLACK
MICROWAVE OVEN
INSTRUCTION MANUAL MODEL(S):
.
Pictured with optional trim kit


VISIT WWW.CONTOUREUSA.COM FOR MORE 3
EN
TABLE OF CONTENT
Table of Content
�������������������������������������������������������������������������������������������������������������������������������������������������� 4
������������������������������������������������������������������������������������������������������������������������������������������5
�������������������������������������������������������������������������������������������������������������������������������������������������������������� 10
��������������������������������������������������������������������������������������������������������������������������������������������������������������������� 14
18
21
22
���������������������������������������������������������������������������������������������������������������������������������������������������������������������
��������������������������������������������������������������������������������������������������������������������������������������������������������������
�����������������������������������������������������������������������������������������������������������������������������������������������������������������������������

4
SAVE THESE INSTRUCTIONS
EN
WELCOME & CONGRATULATIONS
Welcome & Congratulations
Thank you for purchasing this quality
CONTOURE®Built-in Microwave Oven.
Congratulations on your new deluxe cooking
appliance.
For your safety and full enjoyment of this
product, always read the instruction book
carefully before using.
Don’t forget to register your product at
www.contoureusa.com for updates and
other relevant information.
This manual contains important information on
the installation, use, and care of your appliance.
Please read this manual carefully before
installation and operation of this machine to
prevent injury and property damage and to
take full advantage of your new microwave
oven’s benets and features.

VISIT WWW.CONTOUREUSA.COM FOR MORE 5
EN
WARNING
What you need to know about Safety
Instructions:
Warnings and Important Safety Instructions in
this manual DO NOT cover all possible
conditions and situations that may occur. It is
your responsibility to use common sense,
caution and care when installing, maintaining
and operating this appliance.
Important Safety Symbols &
Precaution Warnings:
WARNING
This symbol indicates that hazards or unsafe
practices may cause serious personal injury or
death. To reduce the risk of re, explosion,
electric shock, or personal injury when using
your appliance, these basic safety precautions
MUST be followed. These warnings are to
prevent injury to you and to others, please
follow them explicitly. After reading this section,
keep it in a safe place for future reference.
State of California Proposition 65
Warnings:
WARNING
The California Safe Drinking Water and Toxic
Enforcement Act requires the Governor of
California to publish a list of substances known
to the State of California to cause cancer, birth
defects, or other reproductive harm, and
requires the business to warn of potential
exposure to such substances. This product
contains a chemical known to the State of
California to cause cancer, birth defects, or
other reproductive harm. This appliance can
cause low-level exposure to some of the
substances listed, including benzene,
formaldehyde, and carbon monoxide.
IMPORTANT SAFETY & PRECAUTIONS
Important Safety &
Precautions
Risk of re or electric shock
To reduce the risk of re, electrical
shock, burns or injury or exposure to
excessive microwave energy when
using this appliance follow basic
precautions.

6
SAVE THESE INSTRUCTIONS
EN
IMPORTANT SAFETY & PRECAUTIONS
WARNING
Read all instructions before using this
appliance.
Read and follow the specic warning:
PRECAUTIONS TO AVOID POSSIBLE
EXPOSURE TO EXCESSIVE MICROWAVE
ENERGY
This appliance must be grounded. Connect
only to properly grounded outlet. See
Grounding Instructions.
Some products such as whole eggs and
sealed containers (for example, closed glass
jars) can explode and should NOT be heated
in this appliance.
DO NOT use corrosive chemicals or vapors in
this appliance.
Use this appliance only for its intended use as
described in this manual.
This oven is specically designed to heat or
cook food. It is not designed for industrial or
laboratory use.
As with any appliance, close supervision is
necessary and required when it is used by
children.
DO NOT operate this appliance if it has a
damaged cord or plug, if it is not working
properly or if it has been damaged or
dropped.
This appliance should be serviced only by
qualied service technicians.
DO NOT cover or block any openings on the
appliance
DO NOT store or use this appliance outdoors.
DO NOT use this product near water, for
example, near a kitchen sink, in a wet
basement, near a swimming pool, or similar
location.
DO NOT immerse cord or plug in water.
Keep cord away from heated surfaces.
DO NOT let cord hang over edge(s) of tables,
or countertops.
When cleaning surfaces of door and oven that
come together on closing the door, only use
mild, nonabrasive soaps or detergents applied
with a sponge or soft cloth.
WARNING
WARNING
Important Safety &
Precautions

VISIT WWW.CONTOUREUSA.COM FOR MORE 7
EN
IMPORTANT SAFETY & PRECAUTIONS
WARNING
WARNING
DO NOT overcook food.
Carefully attend to the appliance when paper,
plastic or other combustible materials are
placed inside the oven to facilitate cooking.
Remove the wire twist-ties from paper or
plastic bags before placing bag in oven.
If materials inside the oven ignite, keep oven
door closed, turn oven off, and disconnect the
power cord, or shut off power at the fuse or
circuit breaker panel.
DO NOT use the interior for storage purposes.
DO NOT leave paper products, cooking
utensils or food in the oven when not in use.
Visible bubbling or boiling when the container
is removed from the microwave is not always
present. This could result in very hot liquids
suddenly boiling over when the container is
disturbed or a utensil is inserted into the
liquid.
WARNING
DO NOT use straight-sided containers with
narrow necks. Use wide-mouth containers.
Stir liquid both before and halfway through
heating it.
DO NOT overheat liquid.
Use extreme care when inserting a spoon or
other utensils into the container. This may also
cause delayed eruptive boiling.
After heating, allow the container to stand in
the microwave oven for at least 20-seconds
before removing the container.
Touching some of the internal components
can cause serious personal injury or death.
DO NOT disassemble this appliance.
DO NOT use an extension cord with this
appliance. If the power cord is too short, have
a qualied electrician install an outlet near
the appliance. Use of an extension cord can
negatively affect the unit’s performance.
WARNING
WARNING
WARNING

8
SAVE THESE INSTRUCTIONS
EN
IMPORTANT SAFETY & PRECAUTIONS
WARNING
Important Safeguards about your
Microwave Oven.
NEVER use the microwave oven without the
turntable and support.
NEVER turn the turntable over so that a large
dish can be placed inside the microwave
oven.
The turntable turns clockwise and
counterclockwise.
ALWAYS have food in the microwave oven
when it is turned on to absorb the microwave
energy.
DO NOT test the microwave oven without
food. Operating with no food or food that is
low in moisture can cause re, charring or
sparking.
It is normal for the microwave oven’s exterior
to be warm to the touch when cooking or
reheating.
The microwave oven is for food preparation
ONLY.
Handle glass turntable carefully and place
cookware on it gently to avoid possible
breakage.
Use only the correctly specied bag size when
using the present popcorn program.
The oven has several built-in safety switches to
ensure that the power remains off when the
door is open. DO NOT tamper with these
switches.
DO NOT cook bacon directly on the turntable.
Excessive local heating of the turntable may
cuase the turntable to break.
DO NOT heat baby bottles or baby food in the
microwave oven. Uneven heating / hotspots
may occur and cause injury.
DO NOT attempt to deep-fry in your
microwave oven.
DO NOT attempt home canning in this
microwave oven. It is impossible to be sure all
contents of the jar have reached boiling
temperature.
Failure to maintain the oven in a clean
condition could lead to deterioration that
could adversely affect the life of the appliance
and possibly result in a hazardous situation.
DO NOT use the oven for anything other than
food prepartion.
.DO NOT use the oven to dry clothes or
newspapers.
Understanding Your Oven:
When using the oven at power levels below
100% you might hear the magnetron cycling
on and off.
Condensation is a normal part of microwave
cooking. The humidity in a room and the
moisture in food will inuence the amount of
moisture that condenses in the oven. Usually,
covered foods will not cause as much
condensation as uncovered foods.
When using your own recipes or package
directions please check the food a minute or
two before the minimum time and add time
accordingly (if needed).
Important Safety &
Precautions

VISIT WWW.CONTOUREUSA.COM FOR MORE 9
EN
IMPORTANT SAFETY & PRECAUTIONS
WARNING
Materials You CANNOT Use in a
Microwave:
Arcing is a spark or electrical ash that
crackels and/or pops. Acring can produce
heat that is very intense and can damage the
interior of the microwave or container(s) used.
Arcing can also cause re. Arcing occurs when
metal containers are used in the microwave.
Arcing can also occur when the use of metal
skewers, metal clamps, or twist ties from
plastic bags used for food items such as
bread are not removed.
Remove the wire twist-ties from paper or
plastic bags before placing bag in oven.
To prevent arcing, use materials that are
microwave safe and follow instructions from
the container manufacturers.
Plastic cookware designed for microwave
cooking should be used carefully. Some
plastic containers advertised as “microwave
safe” plastic containers may not be as tolerant
of overcooking conditions like their glass or
ceramic counterparts. These containers may
soften or char if subjected to short periods of
overcooking. In longer exposures to
overcooking, the food and cookware may
ignite.
Use “microwave safe” plastics only in strict
compliance with the recommendations
provided by the cookware manufacturer.
DO NOT microwave empty cups or containers.
DO NOT permit children to use plastic
cookware unsupervised.
Materials You CAN Use in a Microwave:
It is not required to buy all new cookware
after purchasing your microwave oven.
Many of the cookware pieces you already own
can be used successfully in your new
microwave oven.
Caution Personal Injury Hazard:
Tightly closed containers may explode.
Closed containers should be opened and
plastic pouches should be pierced before
cooking.
Some non-metallic materials are not safe to
use for microwaving. If in doubt, you can test
the material in question using the following
procedure, Material / Container Test:
1. Fill a “microwave-safe” container with 1 cup
of cold water (250 ml) along with the
material you’re testing.
2. Cook on maximum power for 3-seconds.
3. Carefully feel the material or container. If the
material or container is warm, DO NOT use it
for microwave cooking.
4. DO NOT exceed a 1-minute cooking time for
this test.
5. Please take precautions when testing all
“microwave-safe” materials and or containers.
6. DO NOT allow children to conduct this test.
Cookware and Cooking Materials:
Cookware and other materials MUST t on
the turntable.
Always use oven mitts or pot holders because
cookware can become hot.

10
SAVE THESE INSTRUCTIONS
EN
INSTALLATION INSTRUCTIONS
WARNING
Critical Installation Warnings:
The installation of this appliance MUST be
performed by a qualied technician or service
company.
Failing to have a qualied technician or service
company install the oven may result in electric
shock, re, an explosion, problems with the
product or injury.
Keep all packaging materials out of the reach of
children. DO NOT allow children to use them for
play.
The electrical requirements are 120-volt, AC, 60
Hz, 15 AMP or more protected electrical supply.
It is recommended that a separate circuit
serving only the microwave oven be provided.
Radio Interference:
Operation of your micrwoave oven may cause
interference to your radio, TV or similar
equipment.
If there is interference, it may be reduced or
eliminated by using the following steps:
(1) Clean the door of the microwave and seal
the surface of the oven.
(2) Change the orientation of the receiving
antenna used by the radio or TV.
(3) Relocate the microwave oven with respect
to the receiver.
(4) Plug the microwave oven into a different
outlet so that the microwave and receiver are
on different branch circuits.
WARNING
Precautions to Avoid Possible
Exposure to Excessive Microwave
Energy:
DO NOT attempt to operate this oven with
the door open, this can result in harmful
exposure to microwave energy. It is important
not to break or tamper with the safety
interlocks.
DO NOT place any object between the oven
front face and the door or allow soil or cleaner
residue to accumulate on sealing surfaces.
DO NOT operate the oven if it is damaged.
It is very important that the oven door closes
properly and that there is no damage to the
door (for example, make sure that the door is
not bent).
It is very important that the oven door closes
properly and there is no damage to hinges,
latches and door seals (for example, make
sure that the highest, latches or door seals are
not broken or loosened).
The oven should never be adjusted or
repaired by anyone except properly qualied
service personnel.
If the microwave unit is not kept clean, its
surface may be degraded and lead to a
hazardous situation.
Danger Precautions to Avoid Possible
Electrical Shock Hazard:
Touching some of the internal components
can cause serious personal injury or death.
DO NOT disassemble this appliance.
Installation Instructions

VISIT WWW.CONTOUREUSA.COM FOR MORE 11
EN
INSTALLATION INSTRUCTIONS
WARNING
Electrical Shock Hazard
Improper use of the grounding can result in
electric shock.
DO NOT plug into an outlet until appliance is
properly installed and grounded.
This microwave should be properly grounded
for your safety. In the event of electrical short
circuit, grounding reduces the risk of electric
shock by providing an escape wire for the
electric current. This appliance is equipped
with a cord having a grounding wire with a
grounding plug. The plug must be plugged
into an outlet that is properly installed and
grounded. Consult a qualied electrician or
serviceman if the grounding instructions are
not completely understood or if doubt exists
as to whether the appliance is properly
grounded. CONTOURE does not accept any
liability for damage to the microwave oven or
personal injury resulting from failure to
observe the correct electrical connection
procedures.
This microwave oven is equipped with a
3-prong grounding plug. It must be plugged
into a wall receptacle that is properly installed
and grounded.
DO NOT, under any circumstances, cut or
remove the third ground prong from the
power cord supplied.
DO NOT use an extension cord with this
appliance. If the power cord is too short, have
a qualied electrician or service technician
install an outlet near the appliance. Use of an
extension cord can negatively affect the
performance of the unit.
If the power supply cord is too short, only have
a qualied electrician or serviceman install an
outlet near the appliance.
The power supply cord and plug must be
connected to a separate 120 Volt, 60 Hz, 15
AMP or more branch circuit, single grounded
receptacle. The receptacle should be located
inside the cabinet directly above the
microwave oven mounting location as shown
below.
If it is necessary to use an extension cord, use
only a 3-wire extension cord that has a
3-pronged gounding plug, and a 3-slot
receptacle that will accept the plug on the
appliance.
WARNING
Electrical Shock Hazard
Plug into a grounded 3 prong outlet.
Do not remove ground prong.
Do not use an adapter.
Do not use an extension cord.
Failure to follow these instructions can
result in death, re or electrical shock.
Grounding
Prong
Circuit Grounding
Conductor Connected
Properly
A.
B.
C.
Cover Mounting
Screw
Adapter
Grounding
Lug
Cover of Grounded
Oulet Box

12
SAVE THESE INSTRUCTIONS
EN
INSTALLATION INSTRUCTIONS
Setting Up Your Oven:
Remove all packaging materials and
accessories from the carton and oven cavity.
Examine your new oven for any damage, like
dents, or a broken door. DO NOT continue with
installation if the oven is damaged.
NEVER place the glass tray upside down. The
glass tray should NEVER be restricted.
Both glass tray and turntable ring assembly
must always be used during cooking.
All food and containers of food should always
be placed on the glass tray for cooking.
If you are missing your glass tray or turntable
ring assembly or it cracks or breaks, please
reach out to customer service (see the warranty
section for further information).
Please reference the diagram below to help
during installation.
(1) Place the turntable ring in the round
depression in the bottom of the microwave
oven so that it turns freely.
(2) Place the glass turntable (at side up) on the
turntable ring so that the hub engages the
turntable shaft in the bottom of the oven.
When correctly installed, the glass turntable
should not turn freely.
Parts & Accessories:
Your new oven comes with the following
accessories:
This oven also includes a BONUS easy-to-clean
baking tray to use while your favorite foods; like
pizza, cookies and more! The grill rack provided
cannot be used when the microwave function
is operating and must be placed on the glass
tray.
Installation Instructions
F.
Door Assembly
G.
Safety Interlock
System
A.
Control Panel
C.
Turntable
Ring Assembly
B.
Turntable
Shaft
E.
Observation Window
D.
Glass
Tray
Turntable ShaftTurntable Ring Assembly
Glass Tray
Hub (Underside) of Glass Tray

VISIT WWW.CONTOUREUSA.COM FOR MORE 13
EN
INSTALLATION INSTRUCTIONS
Control Panel & Features:
Please reference the diagram below to
help understand the features and
functions on the control.
1. Time Cook
2. Time Defrost
3. Power
4. Clock
5. Auto Menus:
• Popcorn
• Potato
• Pizza
• Fresh Vegetable
• Beverage
• Dinner Plate
6. Number Buttons: 0-9
7. Weight Defrost
8. Kitchen TImer Function
9. Stop / Cancel
10. Memory Function
11. Start / +30Sec.

14
SAVE THESE INSTRUCTIONS
EN
OPERATING YOUR OVEN
Setting the Display Clock:
After the microwave is plugged in the LED
display on the oven will display “0:00” and a
buzzer will beep once.
For Example: To set 10:30 AM or PM
1. Press CLOCK and the buzzer will beep once.
2. Press the number keys, “1, 0, 3, 0.”
3. Press CLOCK to nish this setting.
*This is a 12-hour clock from 1:00 to 12:59. If the
time set is not appropriate, your selection will
be invalid. A buzzer will sound twice and return
to a waiting state.
If the electrical power supply to your oven is
interrupted during cooking, the program will
be erased. When the power is restored, press
CLOCK and reset the clock for the correct time
of day.
Microwave Cooking:
For best results while using your oven, please
note the following:
Foods taken from the freezer or refrigerator
will take longer to cook than the same foods
would if at room temperature.
Small pieces of foods will cook more quickly
than larger ones. Foods of similar size and
shape will cook more evenly when cooked
together. For more even cooking results,
reduce the power levels when cooking larger
pieces of food.
Foods that have more moisture will cook
more evenly
Operating Your Oven
While constant stiring is not necessary, if you
stir foods (casseroles, vegetables, etc) from
the outside to the center heat will distribute
more evenly and the foods will cook faster.
Place delicate areas of food toward the center
of the turntable tray
Arrange unevenly shaped foods with thicker
or fatter parts towards the outside of the
turntable tray.
To help cook food more evenly, some foods
may need to be turned over halfway through
cooking.
After food has been removed from the
microwave, cover the food with foil or a
casserole lid and let it stand to nish cooking.
The length of stand time will depend on the
density and surface area of the food item
you’re cooking.
Letting food stand will help the food nish
cooking in the center and avoid overcooking
the outer edges.
Foods, like sandwiches, that contain
prebaked bread should be wrapped prior to
placing them in the microwave. Wrapping
these foods will help prevent the food items
from drying out as they heat.
Begin Microwave Cooking:
1. Press “TIME/COOK” to select microwave
cooking. “0:00” will ash to remind you to input
the cooking time.
2. Press the number keys to adjust the desired
cooking time. For example, to cook for 10
minutes: Select “1,0,0,0” in turn.
3. The maximum cooking time is 99 minutes
and 99 seconds.

VISIT WWW.CONTOUREUSA.COM FOR MORE 15
EN
OPERATING YOUR OVEN
Microwave Cooking / Power Levels:
1. Press “POWER” to adjust the different power
levels.
2. Press the number keyes to select the desired
power level.
3. Press “START/PAUSE” to begin cooking (The
cooking time will automatically count down).
There are 10 different power levels available:
Stop / Clear:
Touch the STOP/CLEAR pad if you would like to:
1. Erase your selection if you made a mistake
during program selection.
2. Cancel the kitchen timer set or return the
time to the display.
3. Touch once to temporarily stop the oven
druing cooking or twice to cancel a program.
Multiple Stage Cooking:
Two stages of cooking can be used at once.
One stage is defrosting, one stage is
microwave cooking. If one stage is defrosting,
it will automatically be put on the rst stage.
Below is an example to defrost food for 5
minutes, then cook using 100% microwave
power for 5 minutes.
1. Press DEFROST twice to set the time.
2. Press the number keys, “5, 0, 0” to set the
desired defrost time.
3. Press POWER once, PL10 will show on the
display.
4. Press the number keys “5, 0, 0” to set the
desired cooking time.
5. Press START/ +30 SEC to begin Multi-Stage
Cooking.
Microwave cooking can be set as two
stages only. The Defrost program and Auto
Menu cannot work in multi-stage cooking.
When the rst stage nishes, a buzzer will
sound once and the second stage begins
cooking.
During cooking, each time the “ADD 30 SEC”
button is selected, 30 seconds will be
added to the cooking time (up to
99-minutes and 99-seconds).
If you want to use Multi-Stage cooking
together with the grill feature, press the
BROIL/GRILL key once, G-1 will show on the
display. Press START/+30 SEC to begin
Multiple Stage Cooking with the grill
(browner).
Press Power
to Select Desired
Power Level
Approx %
of Power
Word for
Power Levels
PL 10 100% High
PL 9 90%
PL 8 80%
PL 7 70% Medium/Hight
PL 6 60%
PL 5 50% Medium
PL 4 40%
PL 3 30% Medium/Low
PL 2 20%
PL 1 10% Low

16
SAVE THESE INSTRUCTIONS
EN
OPERATING YOUR OVEN
Operating Your Oven
Speed Cooking:
If you would like to instantly begin cooking,
press a number on the number pad to begin.
For example, to cook for ve minutes, press 5.
From standby mode, press “ADD30SEC” to
instantly begin cooking for 30-seconds.
To increase cooktime in 30-second
increments (this does not apply to auto cook
or defrost), press “ADD30SEC.”
To check or select a power level while cooking,
press “POWER” and the current power level
will be displayed. Then press the number key
to select the desired power level.
Defrost and Auto Menus will not work during
speed cooking functions.
Using Express Cooking:
Since your ovens power level is preset to
100%, EXPRESS COOKING is a short cut to
oven programming.
You can select cooking times in increments of
1 to 6 minutes or 30-seconds.
1. Press EXPRESS COOK to select a cooking
time in increments of 1 to 6 minutes by
preseeing the numbers on the number pad
(1-6).
2. Your oven will start right away once the
number pad is pressed.
Press START/+30SEC to increase cooking time
by 30-second increments OR press
START/+30SEC to cook for 30-seconds only.
Defrosting with Your Microwave:
This is the perfect feature if you want to defrost
foods. For best results, use food directly from
the freezer.
Defrost by Time:
1. Press DEFROST twice so the oven displays
dEF2. Micr. and indicators will light.
2. Use the number keys to set defrosting time.
3. Press START/+30SEC to begin defrosting.
Once half of the defrost time passes, the buzzer
will sound twice to remind you to turn over the
food.
Defrost by Weight:
1. Press DEFROST once so the oven displays
dEF1. Micr. and indicators will light.
2. Use the number keys to set defrosting
weight within the range of 4-1000 ounces.
3. Press START/+30SEC to begin defrosting.
Turning on the Oven Light:
1. Press “SURFACE LIGHT ON/OFF” once to turn
on the light.
2. Press “SURFACE LIGHT ON/OFF” twice to
turn off the light.
Setting the Timer:
1. Press “TIMER” and the timer indicator will
light.
2. Use the number keys to input the desired
cooking time. The maximum cooking time
is 99-minutes and 99-seconds.
3. Press “TIMER” again and the timer will begin
to count down. The buzzer will sound when
the cooking time has nished.

VISIT WWW.CONTOUREUSA.COM FOR MORE 17
EN
Popcorn Menu:
The popcorn setting is designed to make
popcorn based on the popcorn’s bag weight.
Press “POPCORN” repeatedly to select your
popcorn bag’s weight. Once the correct weight
is selected press “START” to begin.
1. For 3.3 Oz / Press Once
2. For 3.0 Oz / Press Twice
3. For 1.75 Oz / Press Three Times
Only use popcorn packaged for Microwave
Oven use.
DO NOT try to pop un-popped kernels.
Beverage Menu:
The beverage setting heats one to three cups of
a beverage at a time. Use the below
recommendations to determine the setting to
use.
Press “BEVERAGE” repeatedly to select the
correct number of servings. Once the correct
serving size is selected press “START” to begin.
1. 1 Cup / Press Once
2. 2 Cups / Press Twice
3. 3 Cups / Press Three Times
Carefully test for desired temperature after
heating. Re-heat if necessary.
Potato:
Pierce potato and place directly on turntable.
We recommend lining potato with a paper
towel.
Using the Child Lock:
1. To lock the microwave oven, press and hold
“STOP/CLEAR” for three seconds.
2. The microwave beeps and a lock indicator
will appear on the display.
To unlock the microwave, press and hold “STOP/
CLEAR” until the lock indicator disappears
(around 3 seconds).
Dinner Plate (Re-Heat):
This setting allows you to reheat precooked
foods from the refrigerator, making cooking
leftovers quick and easy.
We recommend keeping larger portions and
vegetables towards the outside of the plate or
cutting large items into smaller pieces. Dense
foods, like mashed potatoes reheat better if
attened.
Only use microwave-safe lids or microwave-safe
plastic wrap to cover foods.
Only reheat ONE plate at a time.
Fresh / Frozen Vegetables:
We receommend adding 1 tablespoon of water
power serving size (1-cup) of corn, peas, carrots
or most beans.
When cooking cruciferous vegetables do not
add additional water, cook immediately after
washing.
For softer or more tender vegetables we
recommend using a microwave-safe lid.
After cooking and removing vegetables from
oven, stir, cover with a microwave-safe lid and
let stand for at least 5 minutes prior to serving.
OPERATING YOUR OVEN

18
SAVE THESE INSTRUCTIONS
EN
CARE & MAINTENANCE
Care & Maintenance
Cleaning:
For hygienic reasons the appliance interior,
including accessories, should be cleaned
regularly.
WARNING
CAUTION:
For best performance and for safety reasons,
keep the oven clean inside and outside. Take
special care to keep the inner door panel and
oven free from food and grease build-up.
DO NOT use any abrasive cleaners on the
microwave. Wipe the microwave oven inside
and out with a soft cloth and warm (not hot)
mild detergent solution. Then rinse and wipe
completely dry.
Wipe splatters immediately with a wet paper
towel, especially after cooking greasy foods
like chicken or bacon.
Clean your microwave oven weekly or more
often, if needed.
Keep the inside (cavity) of the oven clean.
Food particles and spilled liquids can stick to
the oven walls, causing the oven to work less
efciently.
Wipe up spills immediately. Use a damp,
clean cloth and mild soap. DO NOT use harsh
detergents or abrasive cleaners.
To help loosen baked-on food particles or
liquids, heat 2-cups of water (add the juice of 1
lemon if you desire to keep the oven fresh
smelling) in a 4-cup measuring glass at High
power for 5-minutes or until boiling. Let stand
in oven cavity for 1 to 2 minutes.
Remove the glass turntable tray from the
oven when cleaning the oven cavity or tray. To
prevent the glass turntable from breaking,
handle with care and do not put it in water
immediately after cooking. Wash the
turntable tray in warm sudsy water or in the
dishwasher.
Clean the outside surface of the micrwoave
with soap and a clean damp cloth. Dry with a
clean soft cloth. To prevent damage to the
operating parts of the oven, do not let water
seep into any vents or openings.
If children are around, use extreme caution,
this unit should NOT be accessible to child’s
play.
Wash the oven door window with very mild
soap an water. Be sure to use a soft clean
cloth to avoid scratching.
If steam accumulates inside or outside the
oven door, wipe with a soft cloth. Steam can
accumulate when operating the oven in high
humidity and in no way indicates microwave
leakage.
Never operate the oven without food in the
oven cavity; this can damage the magnetron
tube or glass tray. You may wish to leave a cup
of water standing inside the oven when it is
not in use to prevent damage if the oven is
accidentally turned on.

VISIT WWW.CONTOUREUSA.COM FOR MORE 19
EN
CARE&MAINTENANCE
Keep Your Oven Clean:
Your oven was designed with an easy to sanitize
stainless-steel interior.
ONLY use mild, non-abrasive soaps or
detergents with a soft cloth or sponge to
clean the oven’s surface and oven walls.
DO NOT clean any part of this oven without
unplugging the cord.
DO NOT use commercial oven cleaner on any
part of your microwave.
DO NOT clean any part of this oven without
unplugging the cord.
DO NOT wash turntable immediately after
cooking. Let it cool prior to placing it in water
to prevent risk of breakage.
DO NOT drop turntable and shaft or it can
break.
Make sure you carefully put the turntable and
shaft back in the oven after cleaning.
DO NOT operate the oven without the
turntable, turntable shaft and the ring
assembly properly in place.
We recommend wiping down the control
panel with a damp cloth and drying it
thoroughly.

20
SAVE THESE INSTRUCTIONS
EN
TROUBLESHOOTING GUIDE
Troubleshooting Guide
First try the solutions suggested here prior to a service call.
Symptom Possible Cause and/or
Recommended Solutions
Unevenly Cooked
Foods
Materials to be avoided in micrwoave oven were used.
Use microwave-safe cookware only.
Food is not defrosted completely. Completely defrost
food.
Cooking time or power level is not suitable. Adjust the
cooking time or power level and use the correct time/
power level.
Food is not turned or stirred. Turn or stir food while
cooking for best results.
Food is overcooked. The cooking time or power level
was not optimal for the food. Use the correct cooking
time or power level.
Undercooked Foods
Materials to be avoided in microwave oven were used.
Use microwave-safe cookware only.
Oven ventilation ports are restricted. Check to see that
oven ventilation ports are not restricted.
Food is not defrosted completely. Completely defrost
food before attempting to cook it.
Cooking time or power level is not suitable. Adjust the
cooking time or power level and use the correct time/
power level.
This manual suits for next models
1
Table of contents
Other contoure Microwave Oven manuals