0
150
75
0
150
75
graphic 2
graphic 3
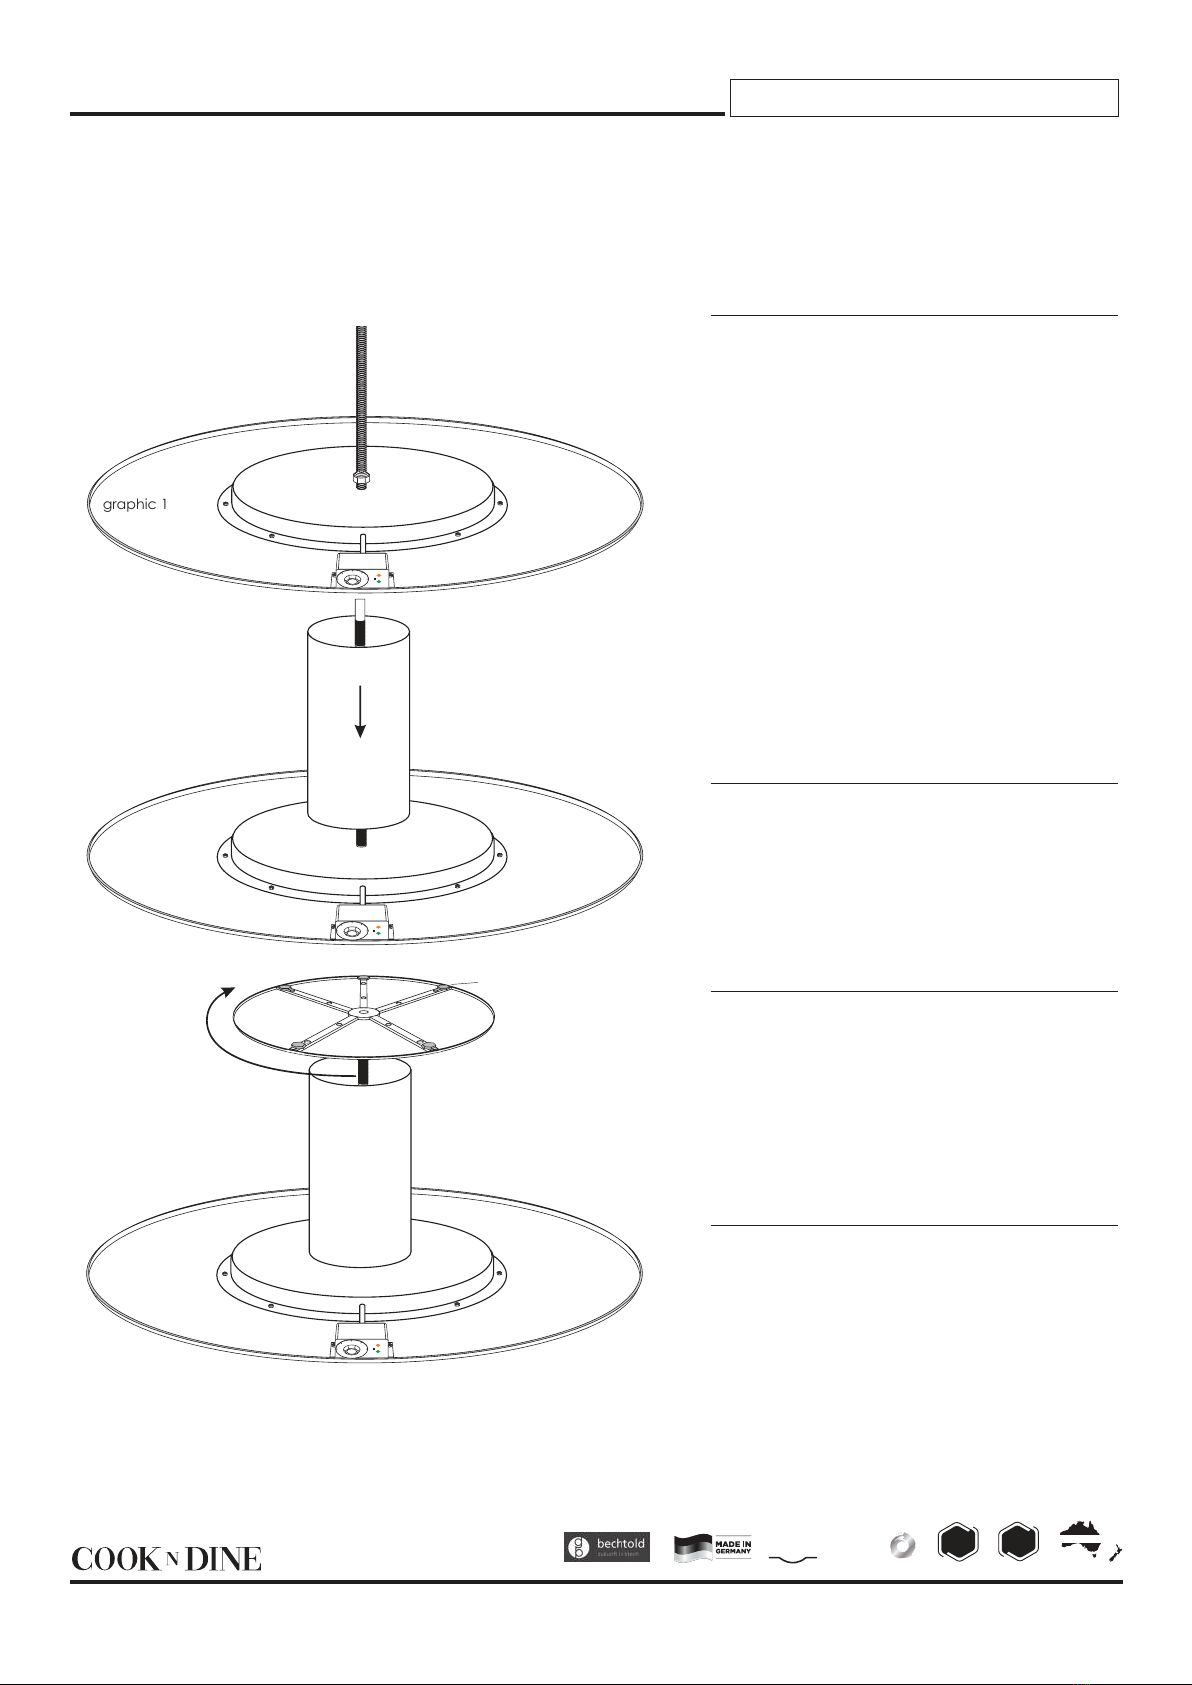
graphic 1
Adjustment nut
0
150
75
ULTRADINE TABLE COOKTOP
Install Sheet 1 of 2
Page 2
2 year
warranty
home
1 year
warranty
commercial
Phone: 1300 655 031 • 27 Tatura Ave, Gosford NSW 2250 • www.cook-n-dine.com.au Manufacturer reserves right to change, alter, update or discontinue
any model without notice. Shown accessories not included.
SILK BRUSHED
HAND FINISHED
stainless steel
Australia/new zealand sales &
support
MODELS #TS-90 #TS-120 #TS-150
STEP 1
Open the box/remove lid. Tabletop is laying
bottom up in the box. Remove packaging from
threaded rod (packed seperately).
Leave tabletop in the box to protect the surface
from scratching during assembly.
If provided, place metal plate on top of the
heating element enclosure and align the
holes. Insert the threaded rod (nut down) into
the designated centered hole. Turn the rod
clockwise until hand-light and nut is ush with
the heating element. Do not use power tools!
(Graphic 1)
STEP 2
Slide the stand (tube) over the threaded
rod, guiding the rod carefully through the
designated holes in each inner brackets at
either end of the stand/tube. (Graphic 2)
STEP 3
Turn the pedestal disk upside down, position
the designated hole on top of the threaded
rod. Turn pedestal clockwise while supporting
it with your hands until it is rmly connected
with the stand and the top of the table.
STEP 4
Turn the now fully assembled table to its
upright position and level it by rising or
lowering the respective adjustment nuts at the
underside of the pedestal disk. Check voltage
label. Now connect the power cord to table
and then to respective three prong grounded
power outlet.
ASSEMBLY DIRECTIONS


