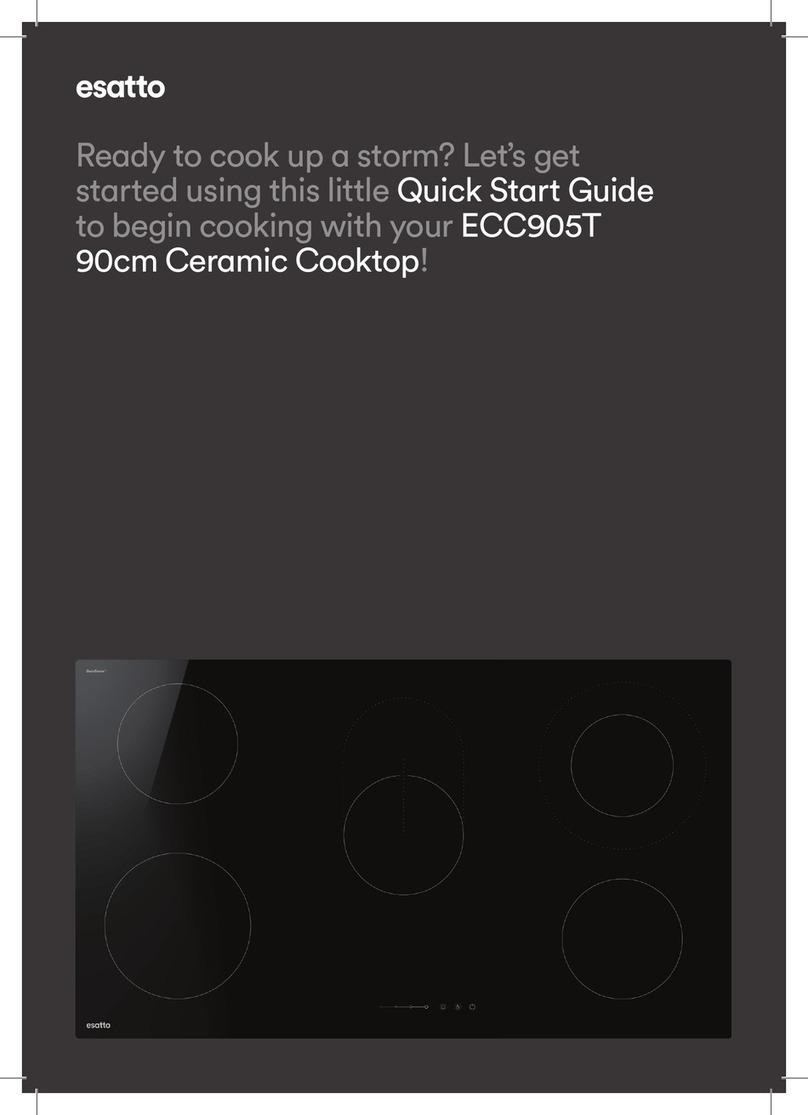
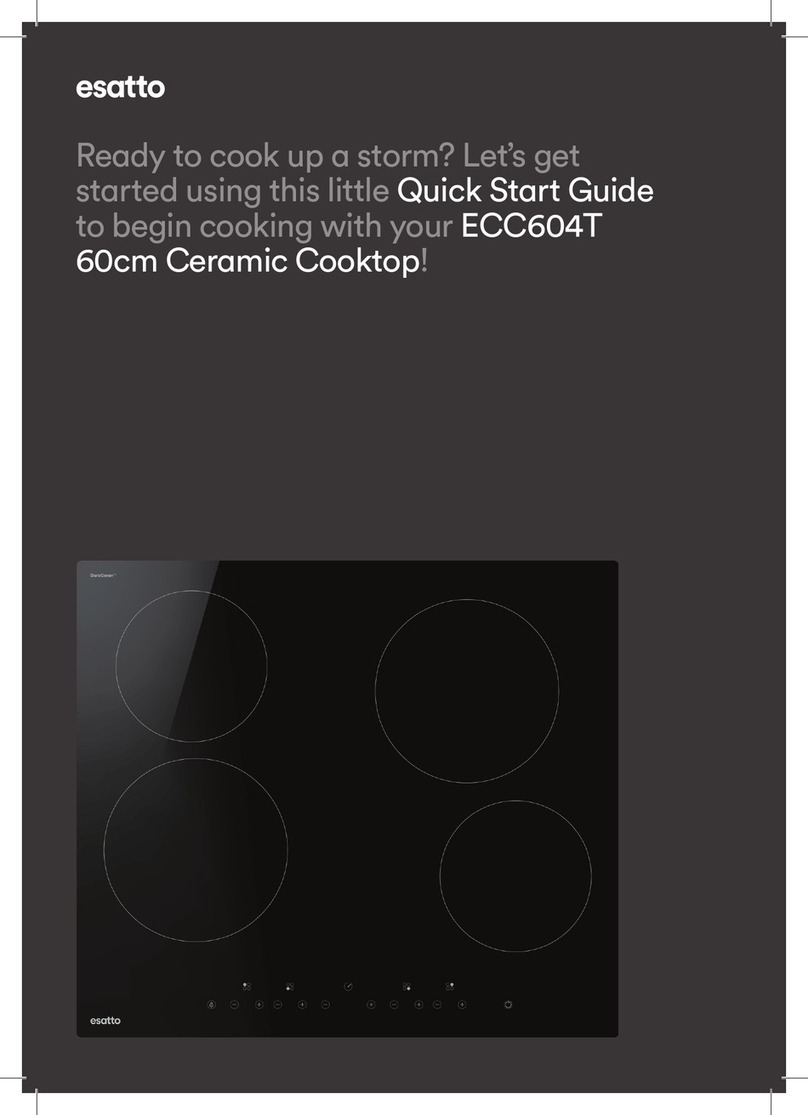
Esatto ECC905T User manual

1
Version
V 1.0 | 0822
Everything you need
for your 90cm Cermic
Cooktop is in this
User Mnul
Model/s
ECC905T

Welcome
Congrtultions on purchsing your new Cermic Cooktop. The Estto
brnd is proudly distributed within Austrli by Residenti Group Pty Ltd.
Plese refer to the wrrnty crd t the rer of this mnul for
informtion regrding your product’s prts nd lbour wrrnty, or visit
us online t: www.residenti.group
At Residenti Group, we re customer obsessed nd our Support Tem
re there to ensure you get the most out of your pplince. Should you
wnt to lern more bout your new cooktop, it's fetures or importntly
tking cre of the pplince, our Support Tem re here to help.
You cn use our online Support Centre t nytime by visiting:
http://support.residentigroup.com.u
Or you cn contct us vi phone by diling: 1300 11 HELP (4357).
It is importnt tht you red through the following use nd cre mnul
thoroughly to fmilirise yourself with the instlltion nd opertion
requirements of your pplince to ensure optimum performnce.
Agin, thnk you for choosing n Estto pplince nd we look forwrd
to being of service to you.
Kind Regrds,
The Residenti Tem
Residenti roup
—
Head Office
165 Brkly Avenue
Burnley, Victori
Austrli 3121
—
ACN
600 546 656
—
Online
residenti.group
www.estto.house
@estto.house
—
Postage
PO Box 5177
Burnley, Victori
Austrli 3121
—
Telephone
1300 11 4357
www.estto.house

Pge 2
Welcome
Pge 4
Sfety
Instructions
Pge 7
You Estto
Cooktop
Pge 7
Technicl
Specictions
Pge 8
Before First Use
Pge 9
Opertion
Instructions
Pge 12
Instlltion
Instructions
Pge 17
Clening
Mintennce
Contents
Pge 18
Troubleshooting
Pge 19
Your Receipt
Pge 19
Purchse Detils
Pge 20
Wrrnty
Informtion

User Manual
4
IMPORTANT INFORMATION
The following sttements you will see in this booklet hve
these menings:
WARNING!
Indicting informtion concerning your personl sfety.
CAUTION
Indicting informtion on how to void dmging
the pplince or cbinetry.
IMPORTANT
Indicting tips nd informtion bout use of
the cooktop.
CONDITIONS OF USE
This pplince is intended to be used in domestic
environments (i.e. households) nd similr pplictions
such s:
• St kitchen res in shops, oces nd other working
environments
• By clients in hotels, motels nd other residentil
type environments
• Frm houses
• Bed nd brekfst type environments
• Ctering nd similr non-retil pplictions
BEFORE USING YOUR APPLIANCE
Before you use the pplince, we recommend tht
you red through the relevnt sections of this mnul,
which provides the description of your pplince nd
its functions.
To void the risks tht re lwys present when you use
n pplince, it is importnt tht the pplince is instlled
correctly nd tht you red the sfety instructions
crefully to void misuse nd hzrds.
We recommend tht you keep this instruction booklet for
future reference nd pss it on to ny future owners.
This pplince complies with requirements of Austrlin
Stndrd AS/NZS 60335.2.6
INSTALLATION
Electricl Shock Hzrd
• Disconnect the pplince from the mins
electricity supply before crrying out ny work or
mintennce on it.
• Connection to good erth wiring system is essentil
nd mndtory.
• Altertions to the domestic wiring system must only
be mde by qulied electricin.
• Filure to follow this dvice my result in electricl
shock or deth.
Cut Hzrd
• Tke cre - pnel edges re shrp.
• Filure to use cution could result in injury or cuts.
Importnt sfety instructions
• Red these instructions crefully before instlling or
using this pplince.
• No combustible mteril or products should be plced
on this pplince t ny time.
• Plese mke this informtion vilble to the person
responsible for instlling the pplince s it could
reduce your instlltion costs.
• In order to void hzrd, this pplince
must be instlled ccording to these instructions
for instlltion.
• This pplince is to be properly instlled nd erthed
only by suitbly qulied person.
• This pplince should be connected to circuit
which incorportes n isolting switch providing full
disconnection from the power supply.
• Filure to instll the pplince correctly could
invlidte ny wrrnty or libility clims.
• This pplince cn be used by children ged from 8
yers nd bove nd persons with reduced physicl,
sensory or mentl cpbilities or lck of experience
nd knowledge if they hve been given supervision or
instruction concerning use of the pplince in sfe
wy nd understnd the hzrds involved.
• Children shll not ply with the pplince. Clening
nd user mintennce shll not be mde by children
without supervision.
• If the supply cord is dmged, it must be replced
by the mnufcturer, its service gent or similrly
qulied persons in order to void hzrd.
• Wrning: If the surfce is crcked, switch o the
pplince to void the possibility of electric shock, for
cooktop surfces of glss-cermic or similr mteril
which protect live prts.
Sfety Instructions

esatto.house
5
• Metllic objects such s knives, forks, spoons nd lids
should not be plced on the cooktop surfce since
they cn get hot.
• A stem clener is not to be used.
• Do not use stem clener to clen your cooktop.
• The pplince is not intended to be operted by
mens of n externl timer or seprte remote-control
system.
• WARNING Dnger of re: do not store items on the
cooking surfces.
• The cooking process hs to be supervised.
A short term cooking process hs to be supervised
continuously.
• WARNING Unttended cooking on cooktop with ft
or oil cn be dngerous nd my result in re. NEVER
try to extinguish re with wter, but switch o the
pplince nd then cover me e.g. with lid or re
blnket.
OPERATION AND MAINTENANCE
Electricl Shock Hzrd
• Do not cook on broken or crcked cooktop. If the
cooktop surfce should brek or crck, switch the
pplince o immeditely t the mins power supply
(wll switch) nd contct qulied technicin.
• Switch the cooktop o t the wll before clening
or mintennce.
• Filure to follow this dvice my result in electricl
shock or deth.
Helth Hzrd
• This pplince complies with electromgnetic
sfety stndrds.
• However, persons with crdic pcemkers or
other electricl implnts (such s insulin pumps) must
consult with their doctor or implnt mnufcturer
before using this pplince to mke sure tht their
implnts will not be ected by the electromgnetic
eld.
• Filure to follow this dvice my result in deth.
Cut Hzrd
• The rzor-shrp blde of cooktop scrper is
exposed when the sfety cover is retrcted. Use with
extreme cre nd lwys store sfely nd out of rech
of children.
• Filure to use cution could result in injury or cuts.
Hot Surfce Hzrd
• During use, ccessible prts of this pplince will
become hot enough to cuse burns.
• Do not let your body, clothing or ny item other
thn suitble cookwre contct the cermic glss
until the surfce is cool.
• Keep children wy.
• Hndles of sucepns my be hot to touch.
Check sucepn hndles do not overhng other
cooking zones tht re on. Keep hndles out of
rech of children.
• Filure to follow this dvice could result in
burns nd sclds.
Importnt sfety instructions
• Never leve the pplince unttended when in use.
Boil over cuses smoking nd gresy spillovers tht
my ignite.
• Never use your pplince s work or storge
surfce.
• Never leve ny objects or utensils on the pplince.
• Do not plce or leve ny mgnetic objects (e.g.
credit crds, memory crds) or electronic devices (e.g.
computers, MP3 plyers) ner the pplince, s they
my be ected by its electromgnetic eld.
• Never use your pplince for wrming or heting
the room.
• After use, lwys turn o the cooking zones nd the
cooktop s described in this mnul (i.e. by using the
controls). Do not rely on the pn detection feture to
turn o the cooking zones when you remove the pns.
• Do not llow children to ply with the pplince or sit,
stnd, or climb on it.
• Do not store items of interest to children in cbinets
bove the pplince. Children climbing on the
cooktop could be seriously injured.
• Do not leve children lone or unttended in the re
where the pplince is in use.
• Children or persons with disbility which limits their
bility to use the pplince should hve responsible
nd competent person to instruct them in its use.
The instructor should be stised tht they cn use
the pplince without dnger to themselves or their
surroundings.
• Do not repir or replce ny prt of the pplince
unless speciclly recommended in the mnul. All
other servicing should be done by
qulied technicin.
• Do not plce or drop hevy objects on your cooktop.
• Do not stnd on your cooktop.

User Manual
6
• Do not use pns with jgged edges or drg pns
cross the cermic glss surfce s this cn scrtch
the glss.
• Do not use scourers or ny other hrsh brsive
clening gents to clen your cooktop, s these cn
scrtch the cermic glss.
• WARNING The pplince nd its ccessible prts
become hot during use.
• Cre should be tken to void touching
heting elements.
• Children less thn 8 yers of ge shll be kept wy
unless continuously supervised
IMPORTANT Check for ny dmge or mrks. If you
nd the pplince is dmged or mrked, you must
report it within 7 dys if you wish to clim for dmge/
mrks under the mnufcturer’s wrrnty. This does not
ect your sttutory rights. A dmged cooktop should
never be instlled.
INFORMATION ON DISPOSAL FOR USERS
• Most of the pckging mterils re recyclble.
Plese dispose of these mterils through your locl
recycling depot or by plcing them in pproprite
collection continers.
• If you wish to discrd this product, plese contct
your locl uthorities nd sk for the correct method
of disposl.
WARNING! Red the following crefully to void
dmge or injury.
• Do not llow pots to boil dry, s dmge to both pn
nd cooktop my result.
• Do not operte the cooktop for n extended period
without pot or pn on the burner.
• Do not llow lrge cookwre to overhng the cooktop
onto djcent benchtop. This will cuse scorching to
the benchtop surfce.
• Do not llow cooking pots or pns to intrude into the
re which is close to the controls.
• In the event of fults with the pplince or dmge
to the glss cermic (crcks, scrtches or splits), the
pplince must be switched o nd disconnected
from the electricl supply, to prevent the possibility of
n electric shock.
• Repirs to the pplince must only be crried out by
trined registered service engineers.
CAUTION:
Red the following crefully to void n electric shock
or re.
It is importnt to use your cooktop sfely. Check these
sfety points before using your cooktop.
• This pplince is not intended for use by persons
(including children) with reduced physicl, sensory
or mentl cpbilities, or lck of experience nd
knowledge,unless they hve been given supervision
or instruction concerning use of the pplince by
person responsible for their sfety.
• Children should be supervised to ensure they do not
ply with this pplince.
• During use, this pplince becomes hot. Cre should
be tken to void touching hot surfces. To void
burns, young children should be kept wy.
• Do not leve the pplince unttended
during opertion.
• This pplince should be used only for norml
domestic cooking nd frying of food.
• The pplince must not be used s work surfce or
s storge surfce.
• Additions or modictions to the pplince re
not permitted.
• Do not plce or store mmble liquids, highly
inmmble mterils or fusible objects (e.g. plstic
lm, plstic, luminium) on or ner the pplince.
• Keep vents cler of obstructions.
• In order to void re, this pplince must
be kept clen.
• Do not spry erosols in the vicinity of this pplince
while it is in opertion.
• Do not plce nything, e.g. sbestos mt between
pn nd trivet s serious dmge to the cooktop my
occur.
• Hndles should be turned wy from the front of the
bench to void ccidents.
• Do not modify this pplince.
• Other thn the connection point in the terminl
block, do not let the electricl supply cord touch the
pplince or hot cookwre. Ensure electricl supply
cord is not tngled.
Sfety Instructions (Continued)

esatto.house
7
Your Estto Cooktop
PRODUCT
LEGEND
A. Toughened Blck Glss
B. Mx. 1800W zone
C. Mx. 1200W zone
D. Mx. 1100/2000W zone
E. Mx. 1000/2200W zone
F. Mx. 1200W zone
G. Touch Control Pnel
CONTROL PANEL
LEGEND
1. Timer control
2. Power Timer slider touch control
3. Dul zone control
4. Child lock control
5. Power button
6. Zone selection controls
NOTE: The images above are indicative only. Your control panel may appear dierently.
A
1 3 4 5
C
2
6
DE
BF
G
MODEL ECC905T
RATED VOLTAGE 220-240V~ 50Hz or 60Hz
INSTALLED ELECTRIC POWER 7600-9200W
PRODUCT SIZE (W × D × H mm) 900 × 520 × 55mm
BUILT IN DIMENSIONS (W × D mm) 875 × 495mm
Technicl Specictions

User Manual
8
Before First Use
BEFORE FIRST USE
• Before using this pplince red this mnul, tking
specil note of the ‘Sfety Instructions’ section.
IMPORTANT! You should clen the cermic cooktop
surfce (refer to the “Clening Mintennce” section).
• Before using the pplince, ensure tht ll pcking
mterils re removed from the pplince.
• You should switch on one cooking zone t time, for
5 minutes t the mximum setting. This will help to
eliminte ny new smell tht exists nd evporte
ny humidity tht hs formed on the heting elements
during trnsit.
• Do not burn o more thn one zone t once.
• You must plce sucepn lled hlf full with cold
wter on ech cooking zone s you burn it o.
INSTALLATION
• In order to void ny potentil hzrd, the instlltion
instructions in this booklet, nd ny lbels on the
pplince must be followed.
• Instlltion my only be crried out by qulied
electricin. The minimum distnces to other
pplinces nd units re to be observed.
• The lws, ordinnces, directives nd stndrds in
force in the country of use re to be followed (sfety
regultions, proper recycling in ccordnce with the
regultions, etc.)
• Ensure tht ll specied vents, openings nd ir
spces re not blocked.
• Anti-shock protection must be provided by the
instlltion, for exmple drwers my only be
instlled with protective oor directly underneth
the pplince.
• The cut surfces of the worktop re to be protected
ginst moisture using suitble selnt. The selnt
sels the pplince to the work top with no gp. Do
not use silicon selnt between the pplince nd the
work top.
• Avoid instlling the pplince next to doors nd under
windows. Otherwise hot cookwre my be knocked
o the cooktop when doors nd windows re opened.
• Where the pplince is built into benchtop,
the benchtop mteril must be cpble of
withstnding 85°C.
SERVICING
• Servicing MUST only be crried out by uthorised
personnel.
• To mintin sfe opertion, it is recommended tht
the product be inspected every ve yers by n
uthorised service person.
• If the supply cord is dmged, it must be replced
by the mnufcturer, its service gent or similrly
qulied persons in order to void hzrd.
WARNING! Never instll cooktop tht hs been
dmged. Plese contct our Customer Cre tem for
further ssistnce.
CLEANING
• Alwys ensure the pplince is turned o before
clening nd llowed to cool.
• Do not use stem cleners s this my cuse moisture
build up on electricl components.
• Alwys clen the pplince immeditely fter ny
food spillge.
• Refer to the “Clening Mintennce” section of
this user mnul for instructions on clening nd
mintining your cermic glss cooktop.

esatto.house
9
GENERAL USE INSTRUCTIONS
• Do not use cookwre with jgged edges or curved
bse.
• Mke sure tht the bse of your pn is smooth, sits
t ginst the glss, nd is the sme size s the
cooking zone. Alwys centre your pn on the cooking
zone.
• Alwys lift pns o the cermic cooktop – do not
slide, or they my scrtch the glss.
TOUCH CONTROLS
All opertions re performed by mens of the touch
controls tht cn be found on the control pnel.
USING THE TOUCH CONTROLS
• The controls respond to touch, so you don’t need to
pply ny pressure.
• Use the bll of your nger, not its tip.
• You will her beep ech time touch is registered.
Mke sure the controls re lwys clen, dry, nd tht
there is no object (e.g. utensil or cloth) covering them.
Even thin lm of wter my mke the controls dicult
to operte.
TO START COOKING
IMPORTANT! Do not use cookwre with jgged edges or
curved bse.
• After powering on, the buzzer beeps once, ll the
indictors light up for 1 second then go out, indicting
tht the cermic cooktop hs entered the stte of
stndby mode.
1. Touch the Power button, ll the indictors
show “-”.
2. Plce suitble pn on the cooking zone tht you
wish to use. Mke sure the bottom of the pn nd the
surfce of the cooking zone re clen nd dry.
3. Touch the heting zone selection control of your
desired zone, n indictor next to the key will sh
4. Adjust het setting by touching the slider control.
• If you don’t choose het setting within 1 minute,
the cermic cooktop will utomticlly switch o
for your sfety. You will need to restrt gin t step
1 if you wnt to continue cooking.
• You cn modify the het setting t ny time during
cooking.
• You cn modify the power level from 0 to 9 by the
slide control.
Opertion Instructions
POWER UP
POWER DOWN

User Manual
10
WHEN YOU HAVE FINISHED COOKING
1. Touching the heting zone selection control tht you
wish to switch o.
2. Turn the cooking zone o by touching the slider down
until the disply shows ”0”
3. Turn the whole cooktop o by touching the Power
button.
• After zone is switched o, the corresponding
cooking zone will show n “H” in the control pnel.
This mens tht the temperture of the zone still high
enough to cuse injury.
• The residul het indictor will go out when the
surfce hs cooled down to sfe temperture.
• The residul het lso cn be used s n energy
sving function if you wnt to het further pns,use
the hotplte tht is still hot.
IMPORTANT! The residul het indictor will dispper if
the mins supply to the product is cut.
WARNING! It is still possible to burn yourself on
cooktop zone, even when the residul het indictor hs
gone o. Alwys use cution when using the cooktop.
LOCKING THE CONTROLS
• You cn lock the controls to prevent unintended use
(for exmple children ccidentlly turning the cooking
zones on).
• When the controls re locked, ll the controls except
the Power button is disbled.
To lock the controls
• Touch the lock symbol. The timer indictor
will show “Lo“.
To unlock the controls
• Mke sure the cermic cooktop is turned on.
• Touch nd hold the lock symbol for few seconds.
• The cooktop will unlock nd you cn now strt using
your cermic hob.
WARNING! When the cooktop is in the lock mode, ll
the controls re disble except the Power button, you
cn lwys turn the cermic cooktop o with the Power
button in n emergency, but you shll unlock the cooktop
rst in the next opertion.
OVER TEMPERATURE PROTECTION
A temperture sensor equipped cn monitor the
temperture inside the cermic hob. When n excessive
temperture is monitored, the cermic hob will stop
opertion utomticlly.
OVER TEMPERATURE PROTECTION
A temperture sensor equipped cn monitor the
temperture inside the cermic hob. When n excessive
temperture is monitored, the cermic hob will stop
opertion utomticlly.
AUTOMATIC SHUTOFF
Your cermic cooktop fetures sfety feture for
utomtic power-o occurring whenever you forget to
switch o cooking zone.
The defult shutdown times re shown in the
tble below:
USING THE EXTENDABLE ZONE FUNCTION
• This function is only relevnt for zone D
(centrl zone) nd zone E (upper right zone) indicted
on pge 7.
• The extendble cooking zone hs two cooking
res tht you cn use, centrl section nd
n outer section. You cn use the centrl
section (A) independently or both sections
(A) nd (B) together.
To ctivte the extendble zone
• Press the heting zone selection control of the
extendble heting zone.
• The power level indictor sh, then press “ ”.
• After 5 seconds, the indictor stop sh, the
extendble zone function is ctivte, nd power level
shows “6” nd “=” lterntely.
To dectivte the double zone
• Press the heting zone selection control of
the extendble zone heting zone, the power level
indictor sh.
• Press “ ”, the extendble zone function will be
cncelled, nd power level return to “6” .
ZONE E
A B
ZONE D
A B
Opertion Instructions (Continued)

esatto.house
11
USING THE TIMER
You cn use the timer in two dierent wys:
• You cn use it s minute minder. In this cse, the
timer will not turn ny cooking zone o when the set
time is up.
• You cn set it to turn one or more cooking zones o
fter the set time is up.
Note: You cn set the timer up to 99 minutes.
Using the timer s minute minder timer.
If you re not selecting ny cooking zone:
• Mke sure the cooktop is turned on.
Note: you cn use the minute minder even if you’re not
selecting ny cooking zone.
• Touch the timer control. “10” will show in the timer
disply nd the “0” shes
• Set the second number of your desired time by
touching the slider control. (e.g. 5)
• Touch timer control gin, the “1” will now sh.
• Set the rst number of your desired time by touching
the slider control (e.g. 9).
Now the timer you set is 95 minutes.
• When the time is set, it will begin to count
down immeditely. The disply will show the
remining time.
• The buzzer will beep for 30 seconds nd the timer
indictor shows “- -” when the setting time nished.
Setting timer for more thn one zone
• Touch the heting zone selection control tht you
wnt to set the timer for.
• Mke sure the cooktop is turned on.
Note: you cn use the minute minder even if you’re not
selecting ny cooking zone.
• Touch the timer control. “10” will show in the timer
disply nd the “0” shes
• Set the second number of your desired time by
touching the slider control. (e.g. 5)
• Touch timer control gin, the “1” will now sh.
• Set the rst number of your desired time by touching
the slider control (e.g. 9).
Now the timer you set is 95 minutes.
• When the time is set, it will begin to count down
immeditely. The disply will show the remining
time.
• When the cooking timer expires, the corresponding
cooking zone will be switched o utomticlly.
• The residul het indictor will disply “H” which
mens hot.
Setting timer for more thn one zone
• Use the sme steps bove to set timers ginst
multiple zones.
• When you set the time for severl cooking zones
simultneously, red dot will illuminte next to the
power level indictor for ech relevnt zone.
• When setting or djusting timer ginst zone, the
red dot indicting the zone being djusted, will sh
intermittently.
• If more thn one heting zone uses this function, the
timer indictor will show the lowest time.
(e.g. zone #1 remining time of 5 minutes, zone #2
remining time of 15 minutes, the timer indictor
shows “5”.)
• Once the countdown timer expires, the corresponding
zone will switch o. Then it will show the new min.
timer nd the dot of corresponding zone will sh.
• If you wnt to chnge the time fter the timer is set,
you hve to strt from step 1.

User Manual
12
Instlltion Instructions
WARNING This user mnul must be red! The lws,
ordinnces, directives nd stndrds in force in the
country of use re to be followed (sfety regultions,
proper recycling in ccordnce with the regultions, etc.)
IMPORTANT!
• Instlltion my only be crried out by qulied
electricin. The minimum distnces to other
pplinces nd units re to be observed.
• Anti-shock protection must be provided by the
instlltion, for exmple drwers my only be
instlled with protective oor directly underneth
the pplince.
• The cut surfces of the worktop re to be protected
ginst moisture using suitble selnt. The selnt
sels the pplince to the work top with no gp.
Do not use silicon selnt between the pplince
nd the work top.
• Avoid instlling the pplince next to doors nd under
windows. Otherwise hot cookwre my be knocked
o the rings when doors nd windows re opened.
WARNING! Risk of injury from electricl current.
• The electricl mins terminl is live.
• Mke electricl mins terminl free of voltge.
• Follow connection schemtic.
• Observe electricl sfety rules.
• Ensure nti-shock protection by instlling correctly.
• The pplince must be connected to the electricl
supply by qulied electricin.
• Loose nd inpproprite plug nd socket connections
cn mke the terminl overhet.
• Hve the clmping connections correctly instlled by
qulied electricin.
• Use strin relief clmp on cble.
WARNING! The surfce temperture exceeds 90° C.
To void hzrd, under bench ccess must be restricted.
• Be wre tht the glue tht join the plstic or wooden
mteril to the furniture, hs to resist to tempertures
of up to 150° C, to prevent pnelling from unsticking.
• The rer wll, djcent nd surrounding surfces
must therefore be ble to withstnd temperture
of 90° C.
WARNING! Once connected to the mins supply
check tht ll cooking zones re redy for use by briey
switching ech on in turn t the mximum setting.
• A duplicte rting lbel is supplied with this unit.
For esy identiction of this unit fter instlltion,
stick it to redily vilble surfce djcent to the
cooktop.
APPLYING THE SEAL
• Clen the worktop round the cutout re.
• Stick the single-sided dhesive seling tpe provided
on the underside of the cooktop round the outside
edge ensuring tht it is not stretched. The two ends
of the tpe should join in the middle of one side. After
trimming the tpe (llow it to overlp by 2-3 mm),
press the two ends together.

esatto.house
13
INSTALLATION
Cut out the work surfce ccording to the sizes shown in the drwing.
For the purpose of instlltion nd use, minimum of 5cm spce shll be preserved round the hole.
Be sure the thickness of the work surfce is t lest 30mm. Plese select het-resistnt nd insulted work surfce
mteril (wood nd similr brous or hygroscopic mteril shll not be used s work surfce mteril unless
impregnted) to void the electricl shock nd lrger deformtion cused by the het rdition from the hotplte.
As shown below: (FIG. 1)
FIG. 1
NOTE:
The sfety distnce between the sides of the cooktop nd the inner surfces of the worktop should be t lest 3mm.
L: 900mm W: 520mm
H: 55mm D: 51mm
A: 875+4mm B: 495+4mm
X: 50mm minimum F: 3mm minimum

User Manual
14
CLEARANCES
Under any circumstances, make sure the ceramic cooktop is well ventilated and the air inlet and outlet are not blocked.
Ensure the ceramic cooktop is in good working state as shown below.
A (mm) B (mm) C (mm) D (mm) E (mm)
Refer to your
rngehood
instlltion
guidelines*
50 minimum 50 minimum Air intke Air ventiltion 5mm
*Plese refer to your rngehood’s user mnul for minimum clernces from the top of the cooktop surfce
to your rngehood.
WARNING Ensuring Adequte Ventiltion
Mke sure the cermic cooktop is well ventilted nd tht ir inlet nd outlet re not blocked. In order to void
ccidentl touch with the overheting bottom of the cooktop, or getting unexpected electric shock during working, it is
necessry to put wooden insert, xed by screws, t minimum distnce of 50mm from the bottom of the cooktop.
Follow the requirements below:
• Be wre tht the glue tht join the plstic or wooden mteril to the furniture, hs to resist tempertures bove
150°C, to void the pnelling becoming unstuck.
• The rer wll, djcent nd surrounding surfces must therefore be ble to withstnd n temperture of 90°C.
A
Wll
Min. 50mm
Mx. 5mmMx. 5mm
Instlltion Instructions (Continued)
Min. 30mm

esatto.house
15
LOCATING THE FIXING BRACKETS
The unit should be plced on stble, smooth surfce (use the pckging or towel). Do not pply
force onto the controls protruding from the cooktop.
Fix the cooktop on the work surfce by screw four brckets on the bottom of cooktop(see picture)
fter instlltion.
A B C D
Screw Brcket Screw Hole Bse
Adjust the brcket position to suit for dierent work surfce thickness’.
Under ny circumstnces, the brckets cnnot touch with the inner surfces of the worktop fter instlltion
(see digrm bove).
CAUTIONS
• The cermic cooktop must be instlled by qulied personnel or technicins:
Plese never conduct the opertion by yourself.
• The cermic cooktop shll not be mounted to cooling equipment, dishwshers nd rotry dryers.
• The cermic cooktop shll be instlled such tht better het rdition cn be ensured to enhnce its relibility.
• The wll nd induced heting zone bove the work surfce shll withstnd het.
• To void ny dmge, the sndwich lyer nd dhesive must be resistnt to het.
• A stem clener is not to be used.

User Manual
16
ELECTRICAL CONNECTION
IMPORTANT The cooktop must NOT be connected to the mins supply by mens of 10A or 15A plug nd socket.
The power supply should be connected in complince with the relevnt stndrd, or single-pole circuit
breker. The method of connection is shown in the gures below.
Wiring Digrm
If the totl number of heting units of the pplince is no less thn 4, the pplince cn be connected directly to the
mins by single-phse electric connection, s shown below.
Notes: The bottom surfce nd the power cord of the cooktop re not ccessible fter instlltion.
• If the cble is dmged or needs replcing, this should be done by n fter-sles technicin using the proper tools,
so s to void ny ccidents.
• If the pplince is being connected directly to the mins supply, n omnipolr circuit breker must be instlled with
minimum gp of 3mm between the contcts.
• The instller must ensure tht the correct electricl connection hs been mde nd tht it complies
with sfety regultions.
• The cble must not be bent or compressed.
• The cble must be checked regulrly nd only replced by properly qulied person.
• The instller must to use the H05GG-F power cord.
Instlltion Instructions (Continued)

esatto.house
17
By ensuring proper clening nd mintennce of your
Estto cooktop, you cn ensure tht it will hve long
nd fult free opertion.
GENERAL CLEANING INSTRUCTIONS
WARNING Do not strt clening the cooktop until it hs
completely cooled.
WARNING Shrp objects nd brsive clening mterils
will dmge the pplince. Clen with wter nd
wshing up liquid.
• Any residues tht re left on the cooktop surfce from
clening gents will dmge it. You should remove
ny residues with wrm wter mixed with little
wshing up liquid.
• Abrsive cleners or shrp objects will dmge the
cooktop surfce; you should clen it using wrm
wter mixed with little wshing up liquid.
• Although it is esier to clen some deposits whilst the
cooktop surfce is still wrm, you should tke cre
not to burn yourself if clening the cooktop surfce
when it is still wrm.
After ech use:
• Wipe the cooktop over with dmp cloth.
• Dry the cooktop by rubbing the surfce with clen
cloth.
TYPES OF SPILLS
Everydy soiling on glss (ngerprints, mrks, stins left
by food or non-sugry spillovers on the glss)
1. Switch the power to the cooktop o.
2. Apply cooktop clener while the glss is still
wrm (but not hot!)
3. Rinse nd wipe dry with clen cloth
or pper towel.
4. Switch the power to the cooktop bck on.
• When the power to the cooktop is switched o, there
will be no ‘hot surfce’ indiction but the cooking zone
my still be hot! Tke extreme cre.
• Hevy-duty scourers, some nylon scourers nd hrsh/
brsive clening gents my scrtch the glss.
Alwys red the lbel to check if your clener or
scourer is suitble.
• Never leve clening residue on the cooktop: the
glss my become stined.
• Boil overs, melts, nd hot sugry spills on the glss
Remove these immeditely with sh slice, plette
knife or rzor blde scrper suitble for cermic glss
cooktops, but bewre of hot cooking zone surfces:
1. Switch the power to the cooktop o t the wll.
2. Hold the blde or utensil t 30° ngle nd scrpe
the soiling or spill to cool re of the cooktop.
3. Clen the soiling or spill up with dish cloth or
pper towel.
4. Follow steps 2 to 4 for ‘Everydy soiling on glss’
bove.
• Remove stins left by melts nd sugry food or
spillovers s soon s possible. If left to cool on
the glss, they my be dicult to remove or even
permnently dmge the glss surfce.
• Cut hzrd: when the sfety cove is retrcted, the
blde in scrper is rzor-shrp. Use with extreme
cre nd lwys store sfely nd out of rech of
children.
• Spillovers on the touch controls
1. Switch the power to the cooktop o.
2. Sok up the spill
3. Wipe the touch control re with clen dmp
sponge or cloth.
4. Wipe the re completely dry with pper towel.
5. Switch the power to the cooktop bck on.
• The cooktop my beep nd turn itself o, nd the
touch controls my not function while there is liquid
on them. Mke sure you wipe the touch control re
dry before turning the cooktop bck on.
USING A SPECIALIST CERAMIC COOKTOP CLEANER
It is possible to purchse specilist cermic cooktop
clener/conditioner. You should follow the instructions
given by the mnufcturer of the clener nd ensure tht
it is suitble for use on your pplince.
NOTE Scrtches or drk stins on the glss cermic tht
cnnot be removed will not ect the functioning
of the pplince.
IMPORTANT Residues from clening gents will dmge
the pplince. Remove residues with wter nd
wshing up liquid.
Clening Mintennce

User Manual
18
Troubleshooting
Some minor fults cn be xed by referring to the instructions given below. Plese do not disssemble the unit by
yourself to void ny dngers nd dmges to the cermic cooktop. Insted contct our customer cre tem on
1300 11 4357 or visit our self help portl online www.support.residentigroup.com.u.
Problem Possible Cuse Remedy
The cooking zones re not
functioning or will not switch on
The mins electricl connection my
be incorrect or lose.
The pplince ws left inctive for
too long fter switching on nd hs
since powered o.
Hve your instller check their
connection. Check the mins fuse box
to ensure fuse hs not been tripped
or blown.
Try powering the cooktop on once
more.
A humming sound is herd when
cooking zone is selected
This is norml for ll cermic
cooktops.
The sound should dispper when the
zone hs heted up.
Pitting of cermic glss surfce. Spill-overs of liquid with high sugr
content.
These types of spills must be
removed immeditely with specil
scrper for the glss. If not permnent
dmge to the cooktop glss cn
occur which is not covered under
wrrnty.
Red rings, Limescle, wter rings,
shiny metllic or other discolourtion,
scrtches, shdows, bubbles, or other
mrks or stins hve ppered on the
cermic glss surfce
Cooktop surfce hs not been
clened correctly. Clening/
mintennce of the cooktop surfce
is not covered under wrrnty. If
service cll is plced to clen the
cooktop surfce, you will be chrged
for the visit.
Use cermic glss clener such s
Cerpol vilble from most
supermrkets or for purchse from our
Customer Cre tem.
The residul het indictor is not
displying nything.
The cooking zone ws only on for
short time nd is therefore not hot.
If the cooking zone is hot nd hs been
in opertion for t lest 30 seconds
nd still no residul het indictor
ctive, cll the Customer Service
Deprtment.
The touch controls re unresponsive. The controls re locked. Unlock the controls. See section
‘Using your cermic cooktop’ for
instructions.
The touch controls re dicult to
operte.
There my be slight lm of wter
over the controls or you my be using
the tip of your nger when touching
the controls.
Mke sure the touch control re is
dry nd use the bll of your nger
when touching the controls.

esatto.house
19
For future reference, plese record the following informtion in the form below. The product detils cn be found on
the rting plte, nd purchse detils which cn be found on your sles invoice.
Purchse Detils
STORE DETAILS
STORE NAME
|
ADDRESS
|
TELEPHONE
|
PURCHASE DATE
|
PRODUCT DETAILS
MODEL NO.
|
SERIAL NO.*
|
Attch your receipt to this pge

User Manual
20
Wrrnty Informtion (AU)
AUSTRALIAN WARRANTY TERMS CONDITIONS
COOKING APPLIANCES
This document sets out the terms and conditions of the
product warranties for Residentia Group Appliances. It is
an important document. Please keep it with your proof of
purchase documents in a safe place for future reference
should you require service for your Appliance.
1. IN THIS WARRANTY
(a) ‘acceptable quality’ as referred to in clause 10 of
this warranty has the same meaning referred to in
the ACL;
(b) ‘ACL’ means Trade Practices Amendment
(Australian Consumer Law) Act (No.2) 2010;
(c) ‘Appliance’ means any Residentia Group product
purchased by you accompanied by this document;
(d) ‘ASR’ means Residentia Group authorised service
representative;
(e) ‘Residentia Group’ means Residentia Group Pty Ltd
of 165 Barkly Avenue Burnley VIC, ACN 600 546 656
in respect of Appliances purchased in Australia;
(f ) ‘major failure’ as referred to in clause 10 of this
warranty has the same meaning referred to in the
ACL and includes a situation when an Appliance
cannot be repaired or it is uneconomic for
Residentia Group, at its discretion, to repair an
Appliance during the Warranty Period;
(g) ‘Warranty Period’ means:
(i) where the Appliance is used for personal,
domestic or household use (i.e. normal
single family use) as set out in the instruction
manual, the Appliance is warranted against
manufacturing defects for 24 months (or 36
months where a valid extended warranty
registration has occurred), following the date
of original purchase of the Appliance;
(h) ‘you’ means the purchaser of the Appliance not
having purchased the Appliance for re-sale, and
‘your’ has a corresponding meaning.
2. This warranty only applies to Appliances purchased
and used in Australia and is in addition to (and does
not exclude, restrict, or modify in any way) any non-
excludable statutory warranties in Australia.
3. During the Warranty Period Residentia Group or its
ASR will, at no extra charge if your Appliance is readily
accessible for service, without special equipment and
subject to these terms and conditions, repair or replace
any parts which it considers to be defective. Residentia
Group or its ASR may use remanufactured parts to
repair your Appliance. You agree that any replaced
Appliances or parts become the property of Residentia
Group. This warranty does not apply to light globes,
batteries, seals, lters or similar perishable parts.
4. Parts and Appliances not supplied by Residentia Group
are not covered by this warranty.
5. You will bear the cost of transportation, travel and
delivery of the Appliance to and from Residentia Group
or its ASR. If you reside outside of the service area, you
will bear the cost of:
(a) travel of an authorised representative;
(b) transportation and delivery of the Appliance to and
from Residentia Group or its ASR, in all instances,
unless the Appliance is transported by Residentia
Group or its ASR, the Appliance is transported at
the owner’s cost and risk while in transit to and
from Residentia Group or its ASR.
6. Proof of purchase is required before you can make a
claim under this warranty.
7. You may not make a claim under this warranty unless
the defect claimed is due to faulty or defective parts
or workmanship. Residentia Group is not liable in the
following situations (which are not exhaustive):
— THIS WARRANTY IS VALID IN AUSTRALIA ONLY —
Other manuals for ECC905T
1
Other Esatto Cooktop manuals

Esatto
Esatto ECGG905W User manual

Esatto
Esatto ECG6F User manual

Esatto
Esatto ECC604T User manual

Esatto
Esatto ECC604T User manual

Esatto
Esatto ECC905T User manual

Esatto
Esatto ECG604WS User manual

Esatto
Esatto ECGG604W User manual

Esatto
Esatto ECGW60S User manual

Esatto
Esatto EE60T User manual

Esatto
Esatto ECC604T.1 User manual
Popular Cooktop manuals by other brands

Jenn-Air
Jenn-Air CCG2422 installation instructions

Electrolux
Electrolux EW30IC60I S Specifications

GE
GE PGP989 Owner's Manual & Installation Instructions

Whirlpool
Whirlpool RM978BXV Use & care guide

BANTE inststruments
BANTE inststruments MS200 instruction manual

Frigidaire
Frigidaire FGC30S8HB Specifications