Cleaning your keg:
Copper Tun Cold Water Cleaner / Detergent
is a powerful cleaner, removing dirt, stains and
undesirable micro-organisms, restoring surfaces
to original condition.
• Release any pressure in the keg by operating
the pressure relief valve. Remove the lid and
rinse out any remaining beer from the previous
batch.
• Fill the keg with 5L of cold water and add a
sachet of Cleaner Detergent. Use this solution
to thoroughly wash the inside of the keg. For
stubborn stains use a brush..
• Top the keg up until it’s full and leave to stand
for 10 minutes.
• Empty the keg and rinse with cold water to
remove detergent residue.
Sterilizing your keg:
Copper Tun No Rinse Sterilizer effectively
sterilizes your equipment with active oxygen
and breaks down to leave only oxygen, water
and minerals found naturally in water. No Rinse
Sterilizer is different to conventional alkaline
powdered sterilizers as it requires no rinsing off
after sterilizing.
• Fill the keg with 5L of Water and add a sachet
of No Rinse Sterilizer. Stir thoroughly to ensure
all dissolved. Top up with water to within 25 mm
of the gas inlet tube (approximately 19 litres).
Let stand for 10 minutes.
• Fit the hatch cover and connect up the gas
connect to the IN post and the tap to the OUT
post.
• Adjust the pressure to 70kpa (10psi) and open
the tap to run some sterilizer through the beer
line and out the tap.
• Let stand for 5 minutes and repeat process to
sterilize the inside of the beer line. Disconnect
the gas inlet and release the pressure from
inside the keg.
• Disconnect the gas and empty out the keg.
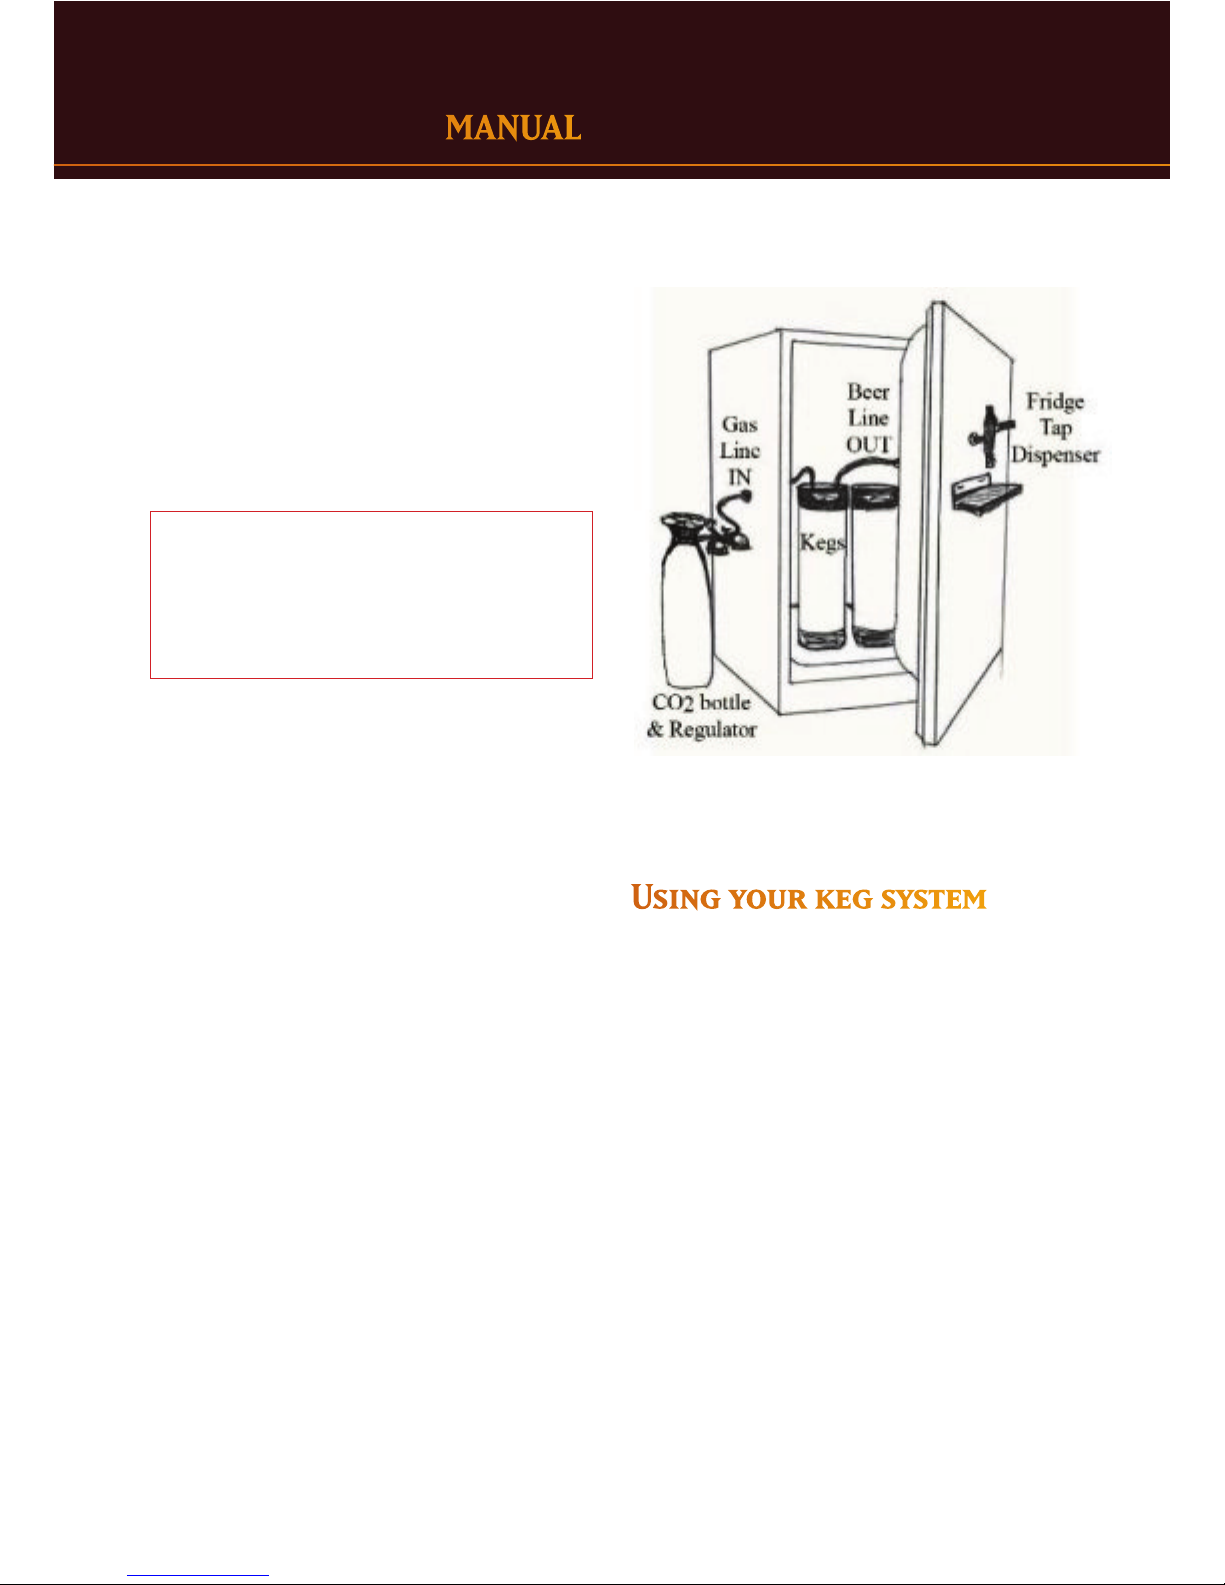
TRANSFERRING YOUR BEER TO THE KEG:
Fit a length of sterilised tubing to your fermenter
tap. This tubing should be long enough to reach
the bottom of the keg so that you ll the keg
from the bottom without splashing the beer.
You will notice that there is a tube in the keg
running from the top of the keg to the centre
at the bottom. This is called the Dip Tube and
is used to draw the beer from the keg. There is
also another tube that is quite short in length.
This is the CO2 inlet, where the CO2 is injected
into the beer.
Your keg should be lled to approximately 12-
25 mm (1/2 to 1 inch) from the bottom of this
tube. Any remaining beer can be bottled using
2 Brewcraft Carbonation Drops for each 750 ml
bottle, making sure to seal the bottle securely.
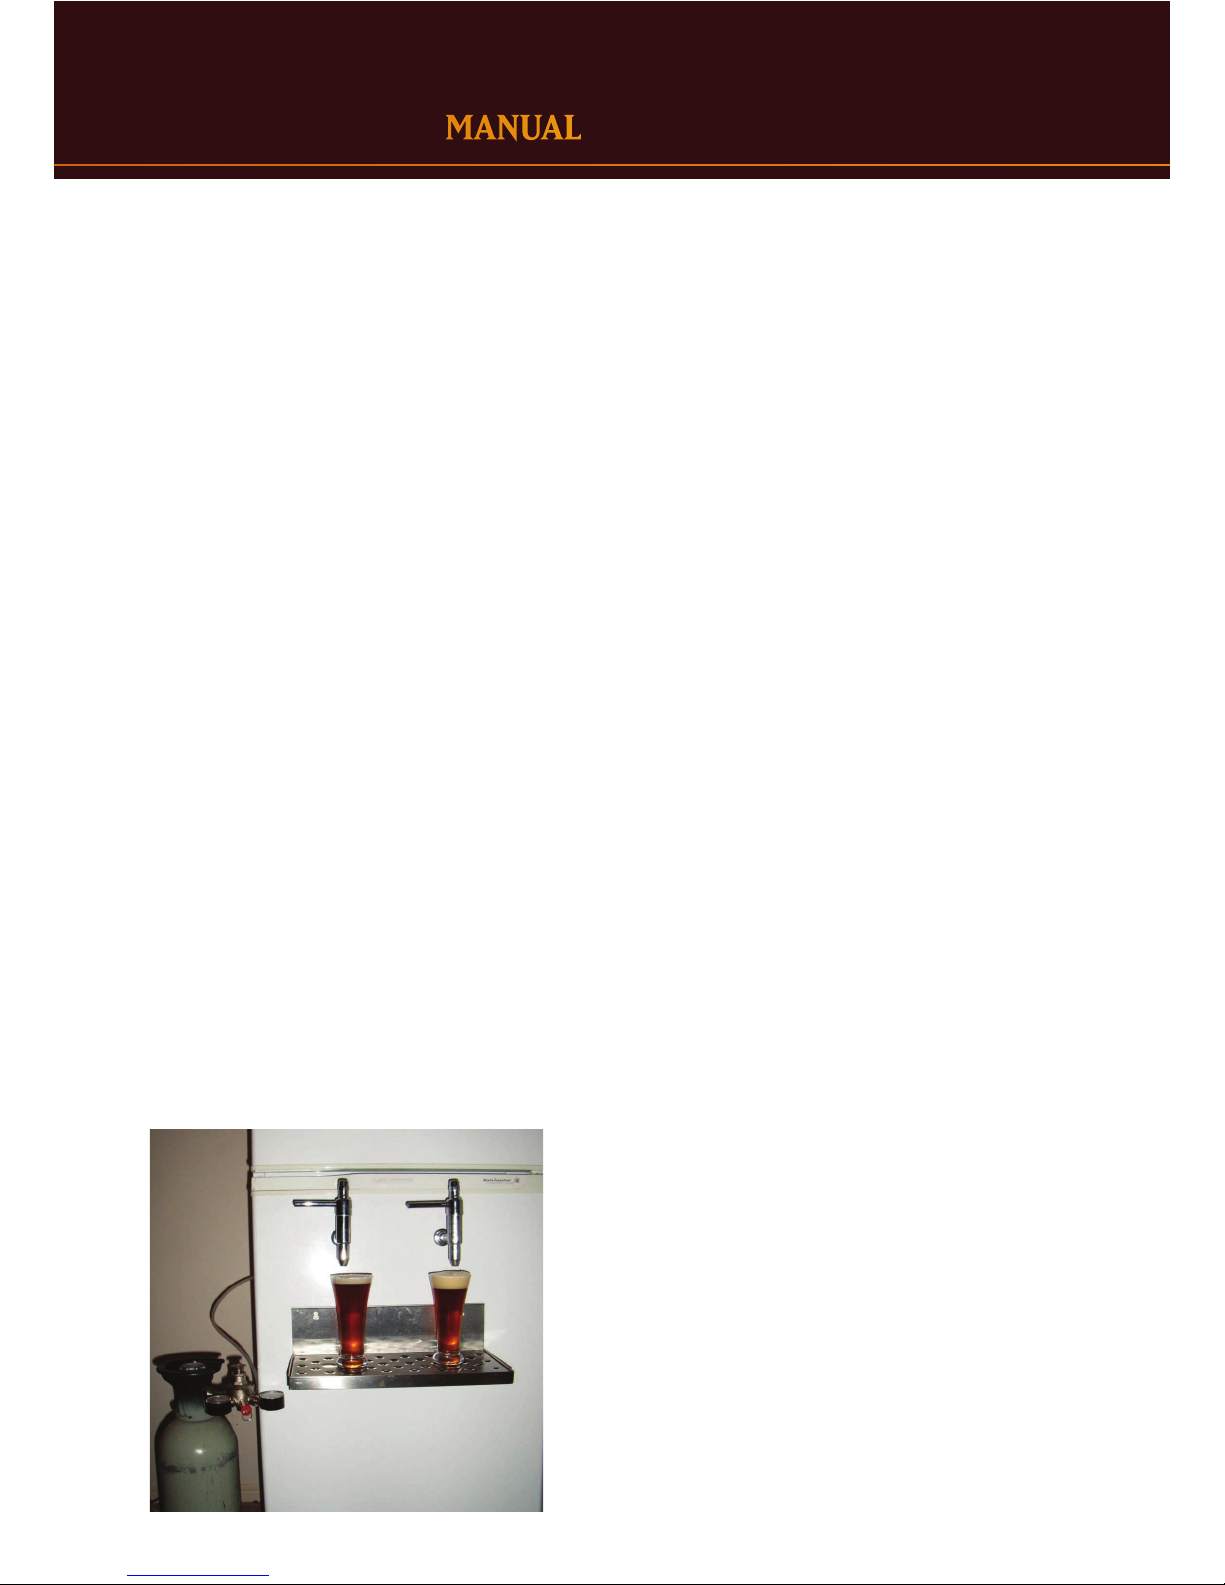
Once the keg is full, replace the hatch cover and
move keg to the prepared fridge. Assuming
your gas line was cut to length it should be
long enough to reach outside the fridge so you
can connect it to the gas bottle. Turn the gas
bottle on and set the pressure on the regulator
to between 70 and 100 kpa (10 - 15 psi) and
connect the gas line to the keg.
PRIMING THE KEG WITH CO2:
You need to purge the headspace of the keg of
any oxygen to protect the beer from oxidisation.
By releasing the pressure release valve, the
CO2 will ow into the keg and the air will ow
out through this valve. This is called burping the
keg and is best done in three short bursts.
CARBONATING:
The absorption of the CO2 into your beer can
depend on many things, most particularly the
temperature of the beer, the pressure at which
it is applied and the length of time pressure is
applied.
The CO2 will be absorbed at a faster rate when
the beer is cold (the beer will not absorb gas
at room temperature) so if you apply 230kpa