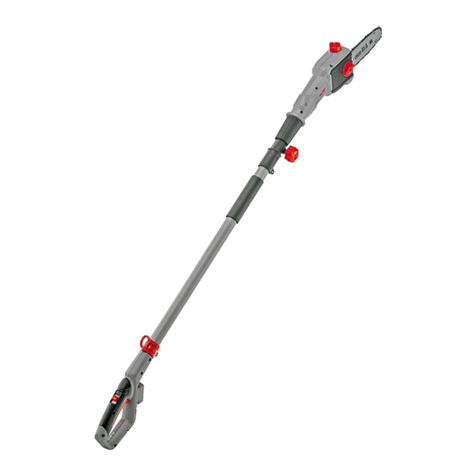
Costway ULTIMATE FORCE GT3535US User manual

THIS INSTRUCTION BOOKLET CONTAINS IMPORTANT SAFETY INFORMATION. PLEASE READ AND KEEP FOR FUTURE REFERENCE.
USER’S MANUAL
20V CORDLESS POLE CHAIN SAW
GT3535US

02 03

THANK YOU FOR BUYING THE PRODUCT.
To ensure your safety and satisfaction, carefully read through this OWNER'S MANUAL
before using the product.
General Power Tool Safety Warnings
WARNING! Read all safety warnings and all instructions.
Failure to follow the warnings and instructions may result in electric shock, fire and/or
serious injury.
Save all warnings and Instructions for future reference.
The term 'power tool" in the warnings refers to your mains-operated (corded) power tool
or battery-operated (cordless) power tool.
1) Work area safety
a) Keep work area clean and well lit. Cluttered or dark areas invite accidents.
b) Do not operate power tools in explosive atmospheres, such as in the presence of
flammable liquids, gases or dust. Power tools create sparks which may ignite the dust or
fumes.
c) Keep children and bystanders away while operating a power tool. Distractions can
cause you to lose control.
04 05
23

2) Electrical safety
a) Charger plug must match the correct outlet. Never modify the charger plug in any
way.
b) Avoid body contact with earthed or grounded surfaces such as pipes, radiators,
ranges and refrigerators. There is an increased risk of electric shock if your body is
earthed or grounded.
c) Do not expose power tools to rain or wet conditions. Water entering a power tool will
increase the risk of electric shock.
d) Do not abuse the charger cord. Never use the cord for carrying, pulling or
unplugging the power tool. Keep cord away from heat, oil, sharp edges or moving parts.
Damaged or entangled cords increase the risk of electric shock.
e) When operating a power tool outdoors, please make sure the battery pack with full
power.
3) Personal safety
a) Stay alert, watch what you are doing and use common sense when operating a power
tool. Do not use a power tool while you are tired or under the influence of drugs,
alcohol or medication. Amoment of inattention while operating power tools may result
in serious personal injury.
b) Use personal protective equipment. Always wear eye protection. Protective
equipment such as dust mask, nonskid safety shoes, hard hat, or hearing protection used
for appropriate conditions will reduce personal injuries.
c) Prevent unintentional starting. Ensure the switch is in the off-position before
connecting to power source and/or battery pack, picking up or carrying the tool.
Carrying power tools with your finger on the switch or energising power tools that have
the switch on invites accidents.
d) Remove any adjusting key or wrench before turning the power tool on. Awrench or a
key left attached to a rotating part of the power tool may result in personal injury.
e) Do not overreach. Keep proper footing and balance at all times. This enables better
control of the power tool in unexpected situations.
f) Dress properly. Do not wear loose clothing or jewellery. Keep your hair, clothing and
gloves away from moving parts. Loose clothes, jewellery or long hair can be caught in
moving parts.
g) If devices are provided for the connection of dust extraction and collection facilities,
ensure these are connected and properly used. Use of dust collection can reduce
dust-related hazards.
4) Power tool use and care
a) Do not force the power tool. Use the correct power tool for your application. The
correct power tool will do the job better and safer at the rate for which it was designed.
b) Do not use the power tool if the switch does not turn it on and off. Any power tool
that cannot be controlled with the switch is dangerous and must be repaired.
c) Remove the battery pack from the power tool before making any adjustments,
changing accessories, or storing power tools. Such preventive safety measures reduce
the risk of starting the power tool accidentally.
d) Store idle power tools out of the reach of children and do not allow persons
unfamiliar with the power tool or these instructions to operate the power tool. Power
tools are dangerous in the hands of untrained users.
e) Maintain power tools. Check for misalignment or binding of moving parts, breakage
of parts and any other condition that may affect the power tool’s operation. If damaged,
have the power tool repaired before use. Many accidents are caused by poorly
maintained power tools.
f) Keep cutting tools sharp and clean. Properly maintained cutting tools with sharp
cutting edges are less likely to bind and are easier to control.
g) Use the power tool, accessories and tool bits etc. in accordance with these
instructions, taking into account the working conditions and the work to be performed.
Use of the power tool for operations different from those intended could result in a
hazardous situation.
5) Battery tool use and care
a) Recharge only with the charger specified by the manufacturer. A charger that is
suitable for one type of battery pack may create a risk of fire when used with another
battery pack.
b) Use power tools only with specifically designated battery packs. Use of any other
battery packs may create a risk of injury and fire.
c) When battery pack is not in use, keep it away from other metal objects, like paper
clips, coins, keys, nails, screws or other small metal objects, that can make a connection
from one terminal to another. Shorting the battery terminals together may cause burns
or a fire.
d) Under abusive conditions, liquid may be ejected from the battery; avoid contact. If
contact accidentally occurs, flush with water. If liquid contacts eyes, additionally seek
medical help. Liquid ejected from the battery may cause irritation or burns.
6) Service
a) Have your power tool serviced by a qualified repair person using only Identical
replacement parts. This will ensure that the safety of the power tool is maintained.
06 07

INSTRUCTIONS FOR SAFE HANDLING
1. Make sure that the tool is only connected to the voltage marked on the name plate.
2. Never use the tool if its cover or any bolts are missing. If the cover or bolts have been
removed, replace them prior to use. Maintain all parts in good working order.
3. Always secure the tool when working in elevated positions.
4. Never touch the blade, drill bit, grinding wheel or other moving parts during use.
5. Never start the tool when its rotating component is in contact with the work piece.
6. Never lay the tool down before its moving parts have come to a complete stop.
7. ACCESSORIES:
The use of accessories or attachments other than those recommended in this manual
might present a hazard.
8. REPLACEMENT RARTS:
When servicing use only identical replacement parts.
ADDITIONAL SAFETY INSTRUCTIONS FOR POLE CHAIN SAW
This appliance is not intended for use by persons (including children) with reduced
physical, sensory or mental capabilities, or lack of experience and knowledge, unless
they have been given supervision or instruction concerning use of the appliance by a
person responsible for their safety.
Young children should be supervised to ensure that they do not play with the
appliance.
1. Keep all parts of the body away from the saw chain when the chain saw is operating.
Before you start the chain saw, make sure the saw chain is not contacting anything. A
moment of inattention while operating chain saws may cause entanglement of your
clothing or body with the saw chain.
2. Always hold the chain saw with your right hand on the rear handle and your left hand
on the front handle. Holding the chain saw with a reversed hand configuration increases
the risk of personal injury and should never be done.
3. Wear safety glasses and hearing protection. Further protective equipment for head,
hands, legs and feet is recommended. Adequate protective clothing will reduce personal
injury by flying debris or accidental contact with the saw chain.
4. Do not operate a chain saw in a tree. Operation of a chain saw while up in a tree may
result in personal injury.
5. Always keep proper footing and operate the chain saw only when standing on fixed,
secure and level surface. Slippery or unstable surfaces such as ladders may cause a loss
of balance or control of the chain saw.
6. When cutting a limb that is under tension be alert for spring back. When the tension
in the wood fibres is released the spring loaded limb may strike the operator and/or
throw the chain saw out of control.
7. Use extreme caution when cutting brush and saplings. The slender material may
catch the saw chain and be whipped toward you or pull you off balance.
8. Carry the chain saw by the front handle with the chain saw switched off and away
from your body. When transporting or storing the chain saw always fit the guide bar
cover. Proper handling of the chain saw will reduce the likelihood of accidental contact
with the moving saw chain.
9. Follow instructions for lubricating, chain tensioning and changing accessories.
Improperly tensioned or lubricated chain may either break or increase the chance for
kickback.
10. Keep handles dry, clean, and free from oil and grease. Greasy, oily handles are
slippery causing loss of control.
11. Cut wood only. Do not use chain saw for purposes not intended. For example: do
not use chain saw for cutting plastic, masonry or non-wood building materials. Use of
the chain saw for operations different than intended could result in a hazardous
situation.
KICKBACK
Kickback may occur when the nose or tip of the guide bar touches an object, or when
the wood closes in and pinches the saw chain in the cut.
Tip contact in some cases may cause a sudden reverse reaction, kicking the guide bar up
and back towards the operator.
Pinching the saw chain along the top of the guide bar may push the guide bar rapidly
back towards the operator.
Either of these reactions may cause you to lose control of the saw which could result in
serious personal injury. Do not rely exclusively upon the safety devices built into your
saw. As a chain saw user, you should take several steps to keep your cutting jobs free
from accident or injury.
Kickback is the result of tool misuse and/or incorrect operating procedures or
conditions and can be avoided by taking proper precautions as given below:
1. Maintain a firm grip, with thumbs and fingers encircling the chain saw handles, with
both hands on the saw and position your body and arm to allow you to resist kickback
forces. Kickback forces can be controlled by the operator, if proper precautions are
taken. Do not let go of the chain saw.
2. Do not overreach and do not cut above shoulder height. This helps prevent
unintended tip contact and enables better control of the chain saw in unexpected
situations.
3. Only use replacement bars and chains specified by the manufacturer. Incorrect
replacement bars and chains may cause chain breakage and/or kickback.
4. Follow the manufacturer's sharpening and maintenance instructions for the saw
chain. Decreasing the depth gauge height can lead to increased kickback.
08 09

DISPOSAL OF THE EXHAUSTED BATTERY
Li-ion batteries must be recycled.
Take the battery to the shop from which it was purchased as soon as the post-charging
battery life becomes too short for practical use.
Do not discard the exhausted battery.
DESCRIPTION
1. Saw chain 2. Guide bar 3. Mounting bolt (not visible)
4. Tension wheel 5. Locking wheel 6. Chain sprocket cover
7. Saw head 8. Angle adjusting button 9. Shaft coupling
10. Telescopic tube 11. Telescoping collar 12. Clamp lever
13. Front handle 14. Shoulder strap buckle 15. Battery pack
16. Battery clip 17. Safety lock button 18. On/off trigger switch
19. Rear handle 20. Oil filler cap 21. Oil level inspection window
22. Shoulder strap 23. Scabbard 24. Charger (slow)
SPECIFICATIONS
ASSEMBLY
WARNING!
Turn off the appliance and, before doing any servicing, remove the battery.
If the tubes of the device are not fitted into each other or screwed correctly, the device
cannot be switched on. A safety switch prevents the operation!
ASSEMBLE DEVICE (Fig. 1)
1. Interlock the end of the hexagonal aluminium pipe of the telescopic tube (10) and the
end of the tube below the saw head (7) up to the stop. Whilst interlocking the two,
ensure that the nose (10a) of the hexagonal aluminium pipe fits into the nut (7a) at the
end of the tube.
2. Fasten both parts using the shaft coupling (9).
FITTING THE GUIDE BAR AND SAW CHAIN (Fig. 2-4)
WARNINGI
Turn off the appliance and. before doing any servicing, remove the battery.
1. Unscrew the locking wheel (5) indirection and remove the chain sprocket cover (6)
(Fig. 2).
2. Spread out the saw chain (1) in a loop in a way that the angled cutting edges of the
chain links are aligned clockwise.
3. Place the saw chain (1) into the blade groove.
4. Please make sure the tension wheel (4) is in the position as picture shown or else
rotate it anticlockwise to make on the chain sprocket cover (6) be aligned with the mark
on the tension wheel (4). (Fig. 3)
5. Refit the cover (6), fit the rear of cover then front,ensure pin is located in position,
Slightly tighten the locking wheel (5). Do not tighten the locking wheel (5) completely,
saw chain tensioning is required first. (Fig. 4)
TENSIONING THE CHAIN (Fig. 5)
WARNING!
Turn off the appliance and, before doing any servicing, remove the battery.
The tension of saw chain (1) is important both for your safety and for the function of
the cordless pruner. A correctly tensioned saw chain will increase the lifetime of your
equipment.
Check the chain tension before each use of the cordless tool.
Always check the saw chain tension before use, after the first cuts and regularly during
use, approx, every five cuts. Upon initial operation, new chains can lengthen
considerably. This is normal during the break-in period and the interval between future
adjustments will lengthen quickly.
1. Place the product on a suitable flat surface with the chain sprocket cover (6) facing
upwards.
Cordless pole pruner CYCPCS01B
Chain speed 4.5m/s
Guide bar length 8 inch
Charger XH2100-0450w
Input power 100-240VAC 50/60Hz 0.5A
Output power 21.0V 0.45A
Battery (Li-lon) CYBAT05-18
Nominal voltage 20V
Capacity 2.0Ah
Charging time Approx.3-5h
10 11

2. Check the chain tension using one hand to lift the saw chain (1) against the weight of
the product. The correct chain tension is achieved when the saw chain can be lifted by
approximately 2-4 mm from the guide bar (2) in the centre.
NOTE: The chain tension in new saw chains must be readjusted after a short operating
period.
CHAIN LUBRICATION
WARNING!
Always switch off the device and allow the motor to cool before filling with chain oil.
There is a risk of fire if chain oil overflows.
NOTE: Guide bar and saw chain must always be oiled. Nonobservance of this will
result in increased wear on the blade and saw chain.
A full tank will last for approx. 15 minutes of continuous operation. Check the oil level
in good time.
The cordless pruner is equipped with an oil automatic system. As soon as the motor is
speeded up, the oil also flows faster to the guide bar (2).
Before starting work, check the oil level in the oil tank.
FILLING UP WITH CHAIN OIL (Fig. 6)
Check the oil fill level in the oil level inspection window (21) and regularly top up with
chain oil.
WARNING!
Only use oil that is expressly labelled "chain bar oil"
1. Unscrew the oil fill cap (20) and fill up with chain oil.
2. Wipe off any spilled chain oil and close the cap again.
ATTACHING/SETTING THE SHOULDER STRAP(Fig. 7)
1. Attach the carabiner hook (22a) of the shoulder strap (22) to the shoulder strap buckle
(23).
2. Quick release can press the buckle (22b) on shoulder strap (22).
OPERATION
WARNING!
When working with the device wear suitable clothing, work gloves, protective headgear
and hearing protection and firm work boots. Prior to each use it must be ensured that
the device is operative. The on/off switch and the safety switch must not be locked. The
motor must be switched off when the switch has been released. Do not use the device if
a switch is damaged.
ADJUSTING THE TELESCOPIC TUBE (Fig. 8)
The telescopic tube (10) can be infinitely adjusted using telescoping collar (11).
1. Open the clamp lever (12)
2. Hold the device, adjust the rod length by pushing or pulling.
3. Close the clamp lever.
ADJUSTING THE SAW HEAD (Fig. 9)
The saw head can be tilted in 4 positions in order to be able to cut crooked branches.
Press the angle adjusting button (8) and simultaneously tilt the saw head (7). It locks
into the desired position when the button is released.
SWITCHING ON AND OFF
WARNING!
Ensure that you are standing in a firm position with both hands gripping the hedge
trimmer away from the body. Ensure that the trimmer is in contact with no other objects
before switching on.
1. Turn the switch on, pull the on/off trigger switch (18) while depressing the safety
lock button (17).
2. The equipment will switch off again when you release on/off trigger switch (18)
CHARGING BATTERY PACK
Charger indications
Connect the charger to the power outlet socket
1).GT3535 ready to charge
2).Solid red: charging
3).Solid green: charged
4).Solid green and red: battery or charger damaged
Battery capacity indicator
There are battery capacity indicators on the battery pack, you can check the capacity
status of the battery if you squeeze the button (15a). Before using the machine, please
press switch trigger to check if the battery is full enough for properly working.
Those 3 LED might show the status of the capacity level of the battery:
1). 3 LED’s are lit: Battery fully charged
2). 2 LED’s are lit: Battery 60% charged
3). 1 LED is lit: Battery almost discharged
12 13

INSTALLING AND REMOVING BATTERY PACK (Fig. 10)
To install battery pack (15), lock the trigger switch by placing the forward/reverse
switch in the center position. Align the body with the groove in the battery pack and
push in the direction of the arrow until the battery pack is secured on the tool.
To remove the battery pack from the tool, push the battery clip (16) on and remove the
battery pack in the direction of the arrow.
Always remove battery pack from your tool when you are assembling parts, making
adjustments, cleaning, or when not in use. Removing battery pack will prevent
accidental starting that could cause serious personal injury.
TRANSPORT
Put on scabbard (23). Ensure that you do not switch on the equipment when carrying it.
SAWING TECHNIQUES
Be thoroughly aware of the danger of rebounding branches.
SAWING OFF SMALL BRANCHES
Set your saw cut of smaller branches (0 0-8 cm) from top to bottom, as illustrated. Be
aware of easily breaking of the branch if you have underestimated the size and weight.
Be completely aware of the falling cut material.
SAWING OFF PARTS (Fig. 11)
For large/long branches, sawing off in parts is recommended. This is the only way to
safely ensure the point of impact of the cut material.
Clear away from the area in which you are standing any parts that have already been cut
and are lying on the ground.
SAWING OFF LARGER BRANCHES (Fig. 12)
For controlled sawing of larger branches (08-2Ocm), first select a relief cut (see cutting
a).
This is made from below. Saw a notch in the lower third of the branch.
The actual length cut (see cutting b) is again made from the top, as far as possible in
line with the first cut so that the two cuts meet.
MAINTENANCE
Ask our service centre to carry out any work that is not described in these instructions.
Use only original parts.
Turn off the appliance and remove the battery, before doing any servicing,.
When handling the cutting equipment, wear safety gloves. In this way, you avoid
cutting damages.
Leave the resharpening of a saw chain to a specialist or proceed according to the
instructions for your saw chain sharpener. Resharpening a saw chain takes practice. If in
doubt, it is preferable to replace the saw chain
CLEANING
WARNING!
Do not use cleaning agents or solvents. You may otherwise irreparably damage the
appliance.
• Keep clean the ventilation slots, motor housing and handles of the appliance. Use a
damp cloth or a brush.
• Only dry wipe the saw chain. After cleaning, lightly oil the saw chain with chain oil.
Apply individual drops of oil to the joints and the points of the teeth on the individual
chain links.
STORAGE
• Clean the equipment before putting it away.
• Put on blade cover.
• Always empty the oil tank before pauses in operation lasting several weeks because
the biological chain oil can become resinous and block the oil outlet channel. Dispose
of used oil in an environmentally correct manner.
• Store the device in a dry, frost-free, and dust-protected place and out of reach of
children.
• Store the battery only in a partially charged state. The state of charge should be 40 -
60% over a longer storage period.
• During a longer storage period, check the state of charge of the battery and recharge if
necessary roughly every 3 months.
• In order to keep the battery well charged, avoid exposing the appliance to extreme
heat or cold in storage.
• Store the equipment between 10°C and 25°C. During storage, avoid extreme cold or
heat so the battery does not lose power.
14 15

16
Table of contents
Other Costway Pole Saw manuals
Popular Pole Saw manuals by other brands

Stihl
Stihl FS 100 RX instruction manual

CAMPAGNOLA
CAMPAGNOLA LASER quick guide

Black & Decker
Black & Decker Alligator 90520380 instruction manual

Remington
Remington Pole Saw Assembly 104317 owner's manual

TrimmerPlus
TrimmerPlus PS720r Operator's manual

CAMPAGNOLA
CAMPAGNOLA PUMA Use and maintenance manual

Grizzly Tools
Grizzly Tools AKS 1820 T Lion-Set Instructions for use

Echo
Echo PPT-260 - PARTS CATALOG SERIAL NUMBERS... parts catalog

Stihl
Stihl HLE 71 instruction manual

EarthWise
EarthWise PS40008 Operator's manual

FLORABEST
FLORABEST FAHE 18 A1 translation of original operation manual

Yard Works
Yard Works 054-0367-0 instruction manual