CP Plus CP-DBP-H20-PGW User manual

CP-DBP-H20-PGW USER MANUAL

1.Product introduction
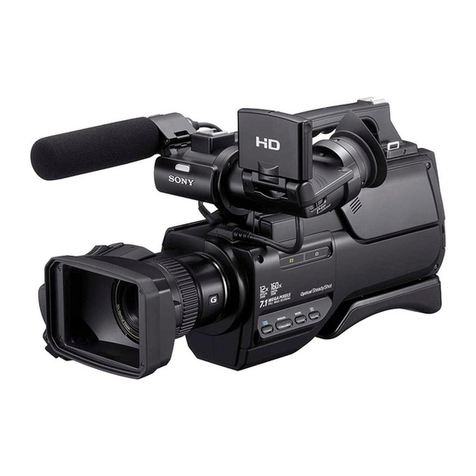
The 4G HD single police law enforcement video-audio recorder is a highly integrated equipment designed for police, armed
police, industrial and commercial and other law enforcement departments. The equipment supports photography, video
recording, recording, local storage, infrared night vision, laser positioning and 3G/4G wireless transmission, The video can be
uploaded directly to the background through 4G or 3G or WIFI or AP network environments, and users can watch the video
through the PC client. The product has the advantages of small size, light weight, easy to carry, one button operation with one
hand, it is a good helper for field of law enforcement.
Statement
Thank you for purchasing our products, please read the manual carefully before use. If the product in
the use of the process of failure, please contact our after-sales staff in time. The product will be updated in real
time according to the market demand, and the manual and system procedures will be updated in time. If there is
any upgrade, no further notice will be given. Product upgrades may lead to partial functionality of the product
and manual do not match, please in kind prevail, or contact our customer service staff. If you do not follow the
manual to operate, any losses thus caused shall be borne by the user. The final interpretation of this manual is
owned by the company.
Attention:
1.The installation and maintenance of this product by professionals, please do not privately disassemble and
repair etc.
2. The product should be avoided in the strong electromagnetic radiation environment, so as not to cause
interference to the image signal.
3.The product should be avoided in the direct intense light source and light source unstable environment, so as
not to affect the life of photosensitive devices.
4.In order to protect the safety of the product, be sure to use the standard power adapter, away from the fire
source.

2.Product function
2.1 Button description
Button
name
Icon
Usage
Function
Power
Short
press
OFF state:No response
ON state:ON/OFF LCD screen
Long
press
OFF state:3 seconds:power on;
ON state:3 seconds:power off;
PTT
Loosen:listen
Press:speak
Video
recording
Short
press
ON state:Start/Stop video recording;
When the screen is off, you can turn on the screen and start video recording
OFF state:Boot up and start video recording directly(One-button video recording);
Alarm
Long
press
When the 4G is opened, send the alarm to the software background
Recording
Short
press
ON state:Start/Stop recording;
When the screen is off, you can turn on the screen and start recording
Move the keyboard cursor to the left
Shutter
Short
press
ON state:Take a picture
When the screen is off, you can turn on the screen and take a picture
Move the keyboard cursor to the right
White lamp
Long
press
ON state:Turn on/off white lamp
Laser
Short
press
Turn on/off Laser lamp;
Infrared
Long
press
Turn on/off Infrared lamp,switch the filter,the image is switched to black and white or
colored at the same time;
Multifunctio
nal
interface
Connect headset
Menu/OK
Short
press
In the live interface,short press to enter the menu;When the screen is off, you can turn
on the screen
In the menu interface and playback interface, short press to confirm;
Mark
Long
press
When you record the video, press it long enough to mark the video as a key document.
Up
Short
press
In the menu interface, short press to move up
When the screen is off, you can turn on the screen
FF
When playing back video, short press to fast forward
Zoom in
Short press zooms in
Long
press
Long press continues to zoom in
Down
Short
press
In the menu interface, short press to move down
When the screen is off, you can turn on the screen
Zoom out
Short press zooms out
Long
press
Long press continues to zoom out
Return
Short
press
In the menu interface, short press to return to the previous menu or exit menu
When the screen is off, you can turn on the screen
Playback
In the live interface,short press to enter the playback interface,you can choose to play

back video、recording and photos(During the video recording, short press can also be
played back);
SIM
Insert SIM, can be transmitted in real time
USB
Data transmission and charging
Reset
Short
press
ON state,short press can restart;
Long
press
ON state,long press for 10 seconds,restore factory settings
2.2 Indicator lamp description
Indicator
lamp name
Description
Charging
indicator lamp
Red lamp
The charging indicator lamp is on when charging, and the charging indicator lamp flashes
when it is fully charged.
Status
indicator lamp
1. The lamp turns green when the device is in standby mode, not recording videos and
audios, and not taking photos.
2. The lamp turns red when users are recording videos and taking photos.
3. The lamp turns yellow when users are recording audios.
4. The lamp turns flashing green when the battery is low.
Laser lamp
Under standby mode, users can enable or disable the laser lamp by pressing the “Laser
Lamp” button momentarily. Laser lamp allows users to do positioning recording.
Photo Sensitivity
lamp
The lamp evaluates how much light is in the surroundings. When it goes dark, the lamp will
enable infrared laps, and vice versa.
Infrared lamp
There is one infrared lamp on both sides of the device. The lamps will work when there is
low light, and the video will turn to black and white.
White lamp
When the device is open, long press “Camera” button to enable/disable white lamp. Users
can replace floodlights and fill lights with the white lamp.
2.3 Interface Icon Description
Icon Name
Description
When you record the video, press menu button long enough to mark the video as a key
document.
When GPS is on, this icon represents that the device has received GPS signal and
positioned successfully.
When 4G is on, this icon represents that the device has received 4G signal and shows
signal strength, with level four as the strongest level.
When WIFI is on, this icon represents that the device has connected to WIFI successfully
and shows signal strength, with level three as the strongest level.
When WIFI AP is on, this icon represents the device successfully becomes a WIFI hotspot
which external devices can connect to.
It shows how much battery is remaining. When it turns to flashing red, the device is about

to shut off due to too low battery.
It represents the device is charging.
It represents video recording is on.
It represents the device has connected to the platform.
12.3G/14.9G
It represents available capacity out of all capacity. The device is actually full when available
capacity is 1.4G.
2017/02/01
08:10:32
It represents the current time of the device.
D1000758_35
6214
It represents “Device ID”_ ”Security ID”
1920×1080
It represents the resolution of current recording. Resolution can be changed in the menu.
2.4 Function Introduction
2.4.1 Power On/Off
When the device is powered off, press the power button for three seconds to start and device and go to image preview main interface.
When the device is powered off, users can also short press record button to start and device and directly start recording.
When the device is powered on, press the power button for three seconds to shut down the device.
2.4.2 Image Preview
The device will go to image preview interface immediately after launching, and images shot by the device can be shown on the LCD screen. Users can set
video parameters via Live Setting in the main menu to have the best display quality.
2.4.3 Voice Intercom
Users can send voice messages when pressing the PTT button, otherwise can only receive voice messages.
2.4.4 Video Recording
When the device is powered on and the LCD screen shows preview, short press the record button. Then, video recording starts
accompanied with an audio cue and vibration, and the status lamp turns red.
When recording videos, the LCD screen displays real-time preview. The flashing red dot in the left top corner of the screen means
the device is recording, and the time in red is the length of the recorded video. While recording, short press the record button to
stop recording, accompanied with an audio cue and vibration. The recorded video file will be saved automatically, and the status
lamb turns green.
When the device is powered off, users can short press record button to start and device and directly start recording.
While recording, users can long press the menu button to star important video files, and the file name will be marked with IMP.
Users can also select prerecord or delayed recording in the menu.
Videos will be saved as MP4 files, and users can playback.
2.4.5 Recording
When the device is powered on and the LCD screen shows preview interface, short press the record button to start audio
recording, accompanied with an audio cue and vibration, and the status lamp turns yellow. While recording, the LCD screen shows
audio recording interface with “Recording” and the length of recorded audio. Short press the audio record button while recording to

stop recording, accompanied with an audio cue and vibration. Audios will be saved automatically as WAV files and the LCD screen
shows real-time preview interface, and the status lamp turns green. Users can playback recorded audio files.
2.4.6 Photograph
When the device is powered on and the LCD screen shows preview main interface, short press and record button to take a snapshot, accompanied with
an audio cue and vibration, and the status lamp turns red. While taking snapshots, the LCD screen shows photograph interface and turn back to preview
interface when finish taking photos, and the status lamp turns green.
Photos will be saved as JPG files, and users can check the photos using playback.
2.4.7 Playback
Press back button in the real-time preview interface to directly enter playback interface. Playback interface includes three folders, videos, photos, and
audios. Select a folder to check relevant content.
2.4.7.1 Video Playback
●Press the back button in the real-time video interface or while recording to enter the playback interface. Select “Video” to
enter the video folder.
●Video files are saved to folders by hour. Select a folder and press “Sure” to enter the folder.
●Select a video file and press “Sure” to start playback. SPK has corresponding audio sound and the LCD screen shows
playback.
●While playback, press “Up” button to speed up.
●While playback, press back button to stop playing.
2.4.7.2 Photo Playback
●Press the back button in the real-time video interface or while recording to enter the playback interface. Select “Photo” to
enter the photo folder.
●Photo files are saved to folders by hour. Select a folder and press “Sure” to enter the folder.
●Select a photo file and press “Sure” to start playback. The LCD screen shows playback.
●While playback, press back button to stop playing.
2.4.7.3 Audio Playback
●Press the back button in the real-time video interface or while recording to enter the playback interface. Select “Audio” to
enter the audio folder.
●Audio files are saved to folders by hour. Select a folder and press “Sure” to enter the folder.
●Select an audio file and press “Sure” to start playback. The LCD screen shows playback.
●While playback, press back button to stop playing.
2.4.8 Light Compensation
While the device is powered on, short press “Laser lamp” button to enable/disable the laser lamp. Users can locate the place that the device is recording
about by checking the destination of the laser.
While the device is powered on, long press “Taking a Photo” button to enable/disable the white lamp. When the lights in the surrounding is low, the white
lamp can be used as floodlights or fill lights.
2.4.9 Infrared Switch
When the device is powered on, infrared lamp is in auto mode, and the device will sense how much light is in the surroundings. When the light is low,
infrared lamp will be opened and video will turn into black and white, and vice versa.
2.4.10 Digital Zoom
In the real-time video interface, press the “Up” button to zoom in. Users can zoom in the center area up to 8 times. Vice versa.

2.5 Menu Introduction
2.5.1 Main Menu
In the real-time video interface, press menu button to enter the main menu. The main menu includes Video Setting,
Platform Configuration, Function Setting, System Configuration, Wireless Network, Equipment Information.
In the menu interface, the menu button is the sure button, the up button is selecting previous, and the down button
is selecting latter.
2.5.2 Video Setting
Users can set video parameters. The higher the relevant parameter is, the clearer and smoother the video is.
Following are video settings:
●Resolution: 2688×1512, 1920×1080
(1080P is set as default. The higher the resolution, the clearer the video.)
●Video Frame Rate: 1/5/10/15/20/25/30
(1/30 is set as default. The higher the frame rate, the clearer the video.)
●Video Bit Rate: low/medium/high
(High is set as default. The higher the bit rate, the clearer the video.)
●Recording Mode: auto/manual
(Auto is set as default when the device is opened. Users have to manually enable the manual mode.)
●File Length: 5min/10min (Ten minutes are set as default.)
●Record Delay: Off/5s/10s/20s/30s (Five seconds are set as default.)
●Record Cover: on/off.
(Off is set as default. After enabling record cover, old video files will be automatically covered by newer ones when the capacity is full, while files that are
marked important will not be covered.)
2.5.3 Platform Configuration
Configure the platform. The better the configuration, the clearer and smoother the video.
●Live Resolution: 1280*720, 720*480, 352*288 (The higher the resolution, the clearer the video.)
●Live Frame Rate: 1/5/10/15/20/25/30 (The higher the frame rate, the clearer the video.)
●Live Bit Rate: low/medium/high. (The higher the frame rate, the clearer the video.)
Setting References:
Platform Server: enable
Device ID: (default ID)
Server IP: IP address of the server
Server Port: port number of the server
After setting the platform, the device can connect to the platform automatically when connecting to the network.
2.5.4 Wireless Network
Select network type to connect.
●Network Type: WIFI/4G (Enable WIFI/4G function.)
USB Network (When connecting the device to PC via USB, users can use network adapter to visit the web client of the
device using PC. See the appendix for USB settings.)
USB Series Port: (for program copying)
●WIFI: Enter
First select WIFI/4G as the network type and enter the WIFI configuration page. Enable WIFI and the device will
search signal and strength of WIFI that surrounds the device. Users can use up and down buttons to select a WIFI and
press “Enter” to eject the keyboard. (User Up/Down/Record/Photo buttons to move the cursor.) Enter the WIFI password
to connect the WIFI. Return to the real-time video interface to check if the WIFI icon is on. When WIFI works, the device
can directly connect to the platform after configuring the platform.
●WIFI AP: Enter
Select WIFI AP to enter the setting interface, press “Enter” button to enable the function. Enter SSID number and
password and click OK to save changes. Return to the real-time video interface to check if the WIFI AP icon is white.
When a 4G card is inserted to the device, configure the WIFI AP hotspot to let other devices connect to the network
by connecting WIFI AP.

●4G: On/Off (Off is set as default.)
When the device is powered off, insert a Micro-SIM 4G Data Card and start the device. Enable 4G function in the menu
and return to the real-time video interface. When 4G icon is white, 4G is ready. See the appendix for instructions of inserting
the 4G card.
Enable 4G, and the device can directly connect to the platform after configuring the platform. Long press the Record
button to send alarm messages to the software background.
●GPS: On/Off
When the device is powered on, enable GPS in the GPS configuration interface. Then a list shows the number of
searched satellites and signal strength. Return to the real-time video interface to see if the GPS icon is white and if the
device has received GPS position information.
2.5.5 Function Setting
●Infrared Switch: Auto (Auto is set as default. The device decides whether to enable infrared lamp according to how much light is in the surroundings.
Video is in black and white in infrared mode, and color in normal mode.)
Color (Compulsively set video to color.)
Black and White (Compulsively set video to black and white.)
●Image Quality: 4M/8M/16M/32M (4M is set as default.)
●Mic Volume: 0/1/2/3/4/5/6/7/8/9 (5 is set as default.)
●Speaker Volume: 0/1/2/3/4/5/6/7/8/9 (5 is set as default.)
●Sound: On/Off
●Vibration: On/Off
●Auto Screen Sleep: Off/30s/1min/3min/5min (30s is set as default.)
2.5.6 System Configuration
●Time: 00:00:00 (Time: Hour:Minute:Second)
●Date: 2018-01-01 (Date: Year-Month-Day)
●Language: English
●Color Theme: Dark/Green/Blue
●Font Size: Large/Medium/Small
●Reset: Yes/No
Installation Instruction of 4G Data Card
When the device is powered off, open the slot with a logo. SIM card slot is located beside the USB interface. Follow the direction on the SIM
card slot to insert the “Micro-SIM 4G Data Card”. While installing, face up the side with a chip of the 4G card, press the card with the gap outwards until there
is a crack sound. Then the card is inserted successfully. When removing the card, press and 4G card and the card will pop up automatically.
THANK YOU FOR CHOOSING CPPLUS.
Table of contents
