cramZ 900-R User manual

900-R (remote) Installation Manual
Distributed by cramZ marketing services, Inc. -[email protected] -(770) 529-1040

WARNING!!!
Clear line of sight between the Radio Frequency equipment is
mandatory. This means that both antennas must be visible to
each other in order to achieve the distances advertised. If
installed with floors or walls between the antennas, distances will
be significantly reduced.
Basic RF and Data installation rules MUST be adhered to:
- Common DC ground must be installed between all low
voltage power supplies. Isolate this ground to ensure NO
earth ground contact is made.
- Supplied DC voltage must be from a well-filtered, approved
power supply. This power supply should meet all FCC and
UL requirements. AVOID REVERSE POLARITY!
- No metal shrouding should place near or around the
antenna or the antenna base. Such shrouding will diminish
the antennas output and the advertised distances will be
affected.
- Shielded wire with a drain wire should be used in all cases
with the drain wire only being connected at the power
supply end to earth ground.
- Wiring methods should be completed in a manner consistent
with local electrical standards.

Content
900-R Installation Manual
1 General.................................................................................................................................... 1
2 Indicators................................................................................................................................. 3
2.1 Power LED (Green)........................................................................................................ 3
2.2 Offline LED .................................................................................................................... 3
2.3 Relay Status .................................................................................................................... 3
2.4 Field Strength Indicator (Receive Signal Strength Indicator)........................................ 3
2.5 Data Communication Indicator....................................................................................... 3
2.6 MC LED........................................................................................................................ . 3
3 Power to the 900-R ................................................................................................................. 4
4 900-R Setting .......................................................................................................................... 5
4.1 RF Channel Setting......................................................................................................... 5
4.2 RF VID Setting ............................................................................................................... 5
4.3 RF Power Setting............................................................................................................ 5
4.4 RF Address Setting ......................................................................................................... 6
4.5 Input Setting.................................................................................................................... 6
4.6 Reader Power Setting...................................................................................................... 6
4.7 Offline Mode Setting ...................................................................................................... 7
4.7.1 Facility Code Only - 5 Second....................................................................................7
4.7.2 Facility Code Only - 10 Seconds ................................................................................7
4.7.3 Lock Down Mode....................................................................................................... 7
4.7.4 Door Unlock Mode ..................................................................................................... 7
4.8 Facility Code Setting....................................................................................................... 8
5 900-R Wiring .......................................................................................................................... 9
5.1 Input/Output Corresponding .......................................................................................... 9
5.2 Output Wiring............................................................................................................... 10
5.3 Input Wiring.................................................................................................................. 11
5.4 Reader Interface Wiring................................................................................................ 11
6 900-R Reconfiguration.......................................................................................................... 12
6.1 900-R Reset................................................................................................................... 12
6.2 Configuration and Reconfiguration of the System ....................................................... 12
7 Specification ......................................................................................................................... 13
8 RF Communication Link ...................................................................................................... 14
8.1 Installation Location ..................................................................................................... 14
8.2 Antenna Orientation...................................................................................................... 14
8.3 Signal Degradation........................................................................................................ 14
8.4 Minimum Separation Distance ..................................................................................... 14
9 FCC Compliance................................................................................................................... 15
10 UL Compliance..................................................................................................................... 15
11 Warnings............................................................................................................................... 15
12 Warranty ............................................................................................................................... 16
13 Liability................................................................................................................................. 16

900-R Installation Manual
List of figure
Figure 1-1 900-R Overview............................................................................................................ 1
Figure 1-2 Typical System Diagram of 900 Series......................................................................... 1
Figure 1-3 900-R Board Diagram................................................................................................... 2
Figure 3-1 Power to 900-R ............................................................................................................. 4
Figure 4-1 RF Channel Setting ....................................................................................................... 5
Figure 4-2 RF VID Setting ............................................................................................................. 5
Figure 4-3 RF Power Setting .......................................................................................................... 5
Figure 4-4 RF Address Setting ....................................................................................................... 6
Figure 4-5 (Un) Supervised Input Selection ................................................................................... 6
Figure 4-6 Reader Power Setting.................................................................................................... 6
Figure 4-7 Offline Mode Setting..................................................................................................... 7
Figure 4-8 SW2 Description ........................................................................................................... 8
Figure 4-9 Facility Code Setting..................................................................................................... 8
Figure 5-1 I/O Table ....................................................................................................................... 9
Figure 5-2 900-R Output Wiring .................................................................................................. 10
Figure 5-3 900-R Input Wiring..................................................................................................... 11
Figure 5-4 Reader Interface Wiring.............................................................................................. 11
Figure 6-1 900-R Reset................................................................................................................. 12
Figure 8-1 Minimum Separation Distance.................................................................................... 14

Information subjects to change without notice.
1 General
900-R Installation Manual
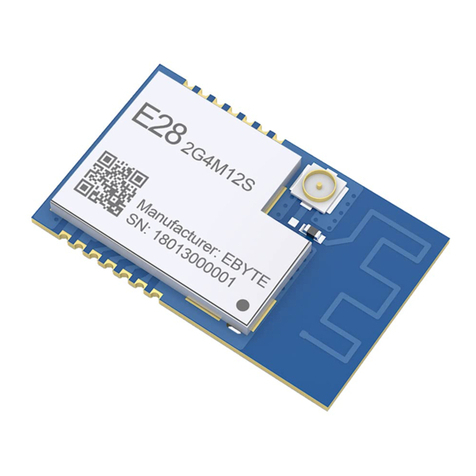
The 900-R is a 900MHz wireless module which is compatible to OEM systems that use
Weigand type readers and door hardware. The 900-R connects spatially separated access
control modules without the use of wires.
Figure 1-1 900-R Overview
900-R functions as a pair with a 900-PRIME. It wirelessly connects a reader, request to exit
button, door contact, door strike etc. to a host reader interface (HRI). It is compatible with up
to a 50-bit Wiegand signal. Customized Wiegand formats are available.
900-R supports 1 card reader interface with 5V or 12Vdc power supply, 3 supervised or 3
unsupervised inputs, 3 selectable form-C relay output, and 1 fixed normally open offline
alarm relay output.
Figure 1-2 Typical System Diagram of 900 Series

Information subjects to change without notice.
Information subjects to change without notice.
900-R Installation Manual
Figure 1-3 900-R Board Diagram
900-R Installation Manual

2 Indicators
900-R provides indicators to display its status conveniently. These LED’s allow the user to
monitor the status of the 900-R.
2.1 Power LED (Green)
This LED indicates if the 900-R unit has power. LED lit indicates power. If the LED is not
on, check the power source.
2.2 Offline LED
This LED indicates the 900-R’s RF link status. The LED is off when the module is in the
normal status, or it will be on to show the offline as the relay was triggered and the OUTA
has changed its state.
2.3 Relay Status
There are 3 LED’s to display the relay’s statuses. The LED lit indicates that the relay is
triggered.
2.4 Field Strength Indicator (Receive Signal Strength Indicator)
These LED’s display the RECEIVE signal strength. From left to right, it indicates:
1 LED (Yellow) - Consider an antenna upgrade
2 LEDs (Yellow + 1 Green) - Satisfactory
3 LEDs (Yellow + 2 Green) - Satisfactory
4 LEDs (Yellow + 3 Green) - Excellent
2.5 Data Communication Indicator
These two LED’s should be flashing throughout operation.
RX (Green) – RF module receives the signal.
TX (Yellow) – RF module transmits the signal.
2.6 MC LED
For factory use only.
3

Information subjects to change without notice.
900-R Installation Manual
3 Power to the 900-R
The module accepts 24Vdc for power. Locate the power source as close to the module as
possible. Make power connections with a minimum of 18AWG (Belden 9740 or equivalent)
wire.
Figure 3-1 Power to 900-R
4

Information subjects to change without notice.
4 900-R Setting
4.1 RF Channel Setting
900-R Installation Manual
900-R supports 10 different hopping schemes (CH0 ~ CH9), which MUST be set to the same
number as the 900-PRIME that communicates with this module. DIP switch SW1 is used to
set the channel.
SW1-S3
SW1-S4
SW1-S5
SW1-S6
CHANNEL
OFF
OFF
OFF
OFF
CH0
ON
OFF
OFF
OFF
CH1
OFF
ON
OFF
OFF
CH2
ON
ON
OFF
OFF
CH3
OFF
OFF
ON
OFF
CH4
ON
OFF
ON
OFF
CH5
OFF
ON
ON
OFF
CH6
ON
ON
ON
OFF
CH7
OFF
OFF
OFF
ON
CH8
ON
OFF
OFF
ON
CH9
4.2 RF VID Setting
Figure 4-1 RF Channel Setting
The RF module MUST be set to the VID number that is the same as the 900-PRIME that it
communicated with. This setting is done by S5 of DIP switch SW3.
SW3-S5
VID
OFF
0
ON
1
Figure 4-2 RF VID Setting
4.3 RF Power Setting
To get an effective transmit range, 2 power levels (500mW or 1W) are selectable for the RF.
The 1W power setting will result in longer ranges.
S8 of SW3 is to setting RF power level.
SW3-S8
Power Level
OFF
500mW
ON
1W
Figure 4-3 RF Power Setting
5

Information subjects to change without notice.
900-R Installation Manual
4.4 RF Address Setting
The host end module 900-PRIME can work with one or two 900-Rs. Unit 1 and unit
2 MUST be set to different address from each other. This setting is done by DIP
setting switch SW3.
SW3-S1
SW3-S2
SW3-S3
ADDRESS
OFF
OFF
OFF
#0
ON
OFF
OFF
#1
4.5 Input Setting
Figure 4-4 RF Address Setting
Factory default of these units are Unsupervised. This selection can be changed to Supervised
by setting S7 of SW3 to “ON”.
SW3-S7
Input type
OFF
Unsupervised
ON
Supervised
4.6 Reader Power Setting
Figure 4-5 (Un) Supervised Input Selection
A built in reader interface on 900-R can support 5Vdc (100mA) or 12Vdc (100mA) reader.
Jumper S3 is for reader power selection.
Setting
Description
Function
ON / Closed
5Vdc to Reader
OFF / Open
12Vdc to Reader
Figure 4-6 Reader Power Setting
6

Information subjects to change without notice.
4.7 Offline Mode Setting
There are four modes which can be set for when communication is lost
among the modules. The mode is set by S1 and S2 of the SW1 settings.
4.7.1 Facility Code Only - 5 Second
900-R Installation Manual
In this mode, the cardholder will be granted access with a card with the correct facility code.
The facility code is set by SW2. When access is granted, the door will remain unlocked for 5
seconds. Use of the request to exit will also be granted.
4.7.2 Facility Code Only - 10 Seconds
This mode is the same as above with the exception of the unlock time being increased to 10
seconds.
4.7.3 No Action Mode
All cardholders will be denied. Use of the request to exit will be granted, unlocking the door
for 5 seconds.
4.7.4 Door Unlock Mode
The door will remain unlocked until normal communication is restored.
SW1-S1
SW1-S2
Selection
OFF
OFF
Facility Code Only (5S)
OFF
ON
Facility Code Only (10S)
ON
OFF
No-Action
ON
ON
Door Unlock
Figure 4-7 Offline Mode Setting
7

Information subjects to change without notice.
900-R Installation Manual
4.8 Facility Code Setting
The facility code MUST be set on SW2 as per Figure 4-9.
The facility code is established by the card manufacturer or installer. This code is designed
to be unique to each building. Every card user will have this facility code along with their
user ID. 900-R supports facility codes from 0 to 255.
SW2-
S1
SW2-
S2
SW2-
S3
SW2-
S4
SW2-
S5
SW2-
S6
SW2-
S7
SW2-
S8
Switch
set ON
1
2
4
8
16
32
64
128
Value
Figure 4-8 SW2 Description
When a switch is set, the corresponding value is added to the facility code value.
The facility code is composed of the total switch value. For example:
239 (facility code) =1+2+4+8+32+64+128. In the above example S1-4 and S6-8 are
switched. S5 is not.
SW2-
S1
SW2-
S2
SW2-
S3
SW2-
S4
SW2-
S5
SW2-
S6
SW2-
S7
SW2-
S8
Facility
Code
OFF
OFF
OFF
OFF
OFF
OFF
OFF
OFF
0
ON
OFF
OFF
OFF
OFF
OFF
OFF
OFF
1
OFF
ON
OFF
OFF
OFF
OFF
OFF
OFF
2
ON
ON
OFF
OFF
OFF
OFF
OFF
OFF
3
…
…
…
…
…
…
…
…
…
ON
OFF
OFF
ON
OFF
OFF
OFF
OFF
9
…
…
…
…
…
…
…
…
…
ON
OFF
OFF
OFF
OFF
ON
ON
OFF
99
OFF
OFF
ON
OFF
OFF
ON
ON
OFF
100
…
…
…
…
…
…
…
…
…
ON
ON
ON
ON
OFF
ON
ON
ON
239
…
…
…
…
…
…
…
…
…
ON
ON
ON
ON
ON
ON
ON
ON
255
Figure 4-9 Facility Code Setting
Note: All unused DIP switches MUST remain in the “OFF” position.
8

Information subjects to change without notice.
5 900-R Wiring
5.1 Input/Output Corresponding
900-R Installation Manual
Here is the corresponding list of the input/output table for the 900-R and 900-PRIME. This
table will work for both 1-1(one 900-R and one 900-PRIME) and 1-2 (one 900-PRIME and
two 900-Rs).
900-R
(#0)
900-R
(#1) 900-PRIME
IN1
Æ
OUT1
IN2
Æ
OUT2
IN3
Æ
OUT3
D0
Æ
D0
D1
Æ
D1
IN1
Æ
OUT4
IN2
Æ
OUT5
IN3
Æ
OUT6
D0
Æ
D0-2
D1
Æ
D1-2
OUT1
Å
IN1
OUT2
Å
IN2
OUT3
Å
IN3
OUT1
Å
IN4
OUT2
Å
IN5
OUT3
Å
IN6
ACK1
Å
ACK1
ACK1
Å
ACK2
Figure 5-1 I/O Table
9

Information subjects to change without notice.
900-R Installation Manual
5.2 Output Wiring
There are 3 outputs. These outputs are triggered by the 900-PRIME’s inputs. In a typical
access control setup, OUT1 is used for the door strike.
All output contacts can be selectable as normally open or normally closed by jumpers S6-S8.
The following diagram is an example of a typical wiring of DC and AC source application to
outputs including an example of the NO/NC selection by jumper settings.
Factory default output settings are Normally Open.
Use minimum 18AWG (Belden 9740 or equivalent) for the connection.
Figure 5-2 900-R Output Wiring
Diode selection:
Diode current rating > 1X normal current
Diode break down voltage: 4X load operation voltage
Mov selection:
Clamp voltage > 1.5X Vac RMS
10

Information subjects to change without notice.
5.3 Input Wiring
900-R Installation Manual
IN1 and IN2 are dedicated as a Door Contact and a Request to Exit button when 900-R is
used in an access control system.
When using Supervised input they must satisfy the requirements of supervising Host access
control systems.
Figure 5-3 900-R Input Wiring
In Supervised mode, any input terminals that are not used MUST be CLOSED.
One twisted pair per input is required, 30 ohms max, 24AWG (Belden8740 or equivalent).
Note: The resistor value specified is for example value.
5.4 Reader Interface Wiring
The 900-R provides a reader interface connection for a Wiegand style reader. To fully utilize
each reader port, a 5-conductor cable (18AWG) is required. For reader power selection, see
per Figure 4-6.
Figure 5-4 Reader Interface Wiring
11

Information subjects to change without notice.
900-R Installation Manual
6 900-R Reconfiguration
6.1 900-R Reset
The jumper S1 (RESET) is to hold the processor in reset mode. This operation could cause
all outputs non-normal state, it is recommended strongly to disconnect all inputs and outputs
before it is reset.
Keep jumper S1 open for normal state.
Jumper Setting
Description
Function
OFF / Open
Normal state
ON / Closed
Reset
Figure 6-1 900-R Reset
6.2 Configuration and Reconfiguration of the System
After changing the setting on the SIP switches the radio requires reprogramming. This is
done automatically through the microprocessor; however it is vital that the microprocessor
completes its work prior to connecting inputs and outputs or modifications to the system.
This can be visually observed when MC LED changes from solid on to normal status (blink
faster and weakly). Any interference during this operation could cause the radio to be
programmed incorrectly which will result in the permanent failure of the radio.
Any incorrect setting of Channel, Address or VID will be reported by the MC LED. It’ll be
appeared by the pulsed on.
12

Information subjects to change without notice.
7 Specification
The module is for use at low voltage, class 2 circuits only.
900-R Installation Manual
Primary power
Communication
DC input: 24Vdc, 600mA
RF OEM Module
Frequency range:
ISM 902M ~ 928MHz
Channel
Capacity:
10 hop sequences share 50 frequencies
Indoor/Urban Range(w/ 2.1 dB dipole antenna): up to 1500’ (450 m)
Outdoor RF line-of-sight Range(w/ 2.1 dB dipole antenna): up to 2 miles (4 km)
Outdoor RF line-of-sight Range(w/ high-gain antenna): up to 40 miles (64 km)
Reader Interface
Wiegand:
Clock/Data or D0/D1, 26 – 50 bit
Power:
12Vdc, 100mA or 5Vdc, 100mA selectable
Input
3 (Un)Supervised inputs
Output
Relay Output:
3 selectable form-C relay outputs, 30Vdc, 3A
Wire requirement
Power:
1 twisted pair, 18AWG (Belden 9740 or equivalent)
Input:
1 twisted pair, 30 ohms max, 24 AWG (Belden 8740 or
equivalent).
Outputs:
As required for load
Reader:
5 connectors, 18AWG, 500 feet (150m) max.
Environmental Temperature: 0 to 49 °C, operating
-55 to +85 °C, storage
Humidity: 0 to 85% RHNC
Mechanical Dimension
(board): 5.90” (150mm) W x 6.88” (175mm) L x 1.20” (30mm)
13

Information subjects to change without notice.
900-R Installation Manual
8 RF Communication Link
Because wireless technology is being used for the linkage, there are maximum limitations in
which these devices can function. Many factors can contribute to the effectiveness of the
communication.
8.1 Installation Location
For optimum installation, a 900MHz Tester should be used to final location selection. The
TK900F is a device that can test your linkage capabilities for the installation site. Please
contact cramZ marketing for information on obtaining a TK900F tester kit.
8.2 Antenna Orientation
900-R has been designed with a swivel antenna for RF transmission. This is an omni
directional antenna. This type of antenna will allow the user to orientate the antenna to
obtain the maximum desired transmission and reception of signal.
8.3 Signal Degradation
Many factors can contribute to signal degradation. The 900-R can penetrate concrete. The
thickness of the concrete and the number of layers will contribute to the degradation of the
signal. For optimum signal strength, it is suggested that a minimum amount of obstruction
be placed in the path of transmission between 900-R and 900-PRIME.
8.4 Minimum Separation Distance
In order to comply with RF Exposure requirements, the RF module must be installed and
operated in such a way so as to maintain a minimum separation distance between the
antennas during normal operation.
Power Output
Separation Distance
500mW
3 feet
1W
7 feet
Figure 8-1 Minimum Separation Distance
14

Information subjects to change without notice.
9 FCC Compliance
900-R Installation Manual
•
This device has been authorized by the FCC Rules and Industry Canada.
•
This device complies with the limits for a Class B digital and Class B intentional radiator,
pursuant to Part 15 of FCC Rules and with RSS-210 of Industry Canada. Operation is
subject to the following two conditions: (1) This device may not cause harmful
interference, and (2) This device must accept any interference received, including
interference that may cause undesired operation.
•
The Alertco RF / RFID wireless component must be installed by qualified
professional or contractors in accordance with FCC part 15.023, Antenna Requirements.
•
Do not use any antenna other than an approved antenna, such as the one provided with
the unit. For a complete list of approved antennas, contact RF Wireless Solutions
10 UL Compliance
•
This device is tested to UL 294 standards with the Mercury Security access control
system but is not exclusive to that system.
•
This device is tested to UL 294 standards with the HID reader.
11 Warnings
RFWireless/cramZ marketing is in no way liable for incorrect installations of the RFID
products which may cause damage to equipment or persons. End users, installers, purchasers
or anyone using, buying, selling or using this product must follow the exact installation
instructions as outlined in the instruction manual. Correctly installed equipment including
approved enclosures and wiring must be used as outlined in the installation or user
manual. Failure to follow instructions outlined in this instruction manual will void the listed
approvals and any warranty.
Any changes or modifications not expressly approved by RFWireless/cramZ marketing
will void the approvals by all governing bodies and void any product warranty.
Installation must be carried out by a trained authorized access control installation technician
to all local or municipal governmental electrical codes.
15

Information subjects to change without notice.
900-R Installation Manual
12 Warranty
RFWireless/cramZ marketing warrants the product to be free from defects in material and
workmanship under normal use and service with proper maintenance for one year from the
date of factory shipment. Alertco RF / RFID assumes no responsibility for products
damaged by improper handling or installation, including blown power supplies or damage
done from "HOT SWAPPING" card readers. RFWireless/cramZ marketing shall not be
held responsible for any liabilities which might arise from the use of this equipment. There
are no expressed warranties other than set forth herein. RFWireless/cramZ marketing does
not make, nor intends, nor does it authorize any agent or representative to make any other
warranties, or implied warranties, and expressly excludes and disclaims all implied
warranties of merchantability or fitness for a particular purpose.
This warranty is limited to the repair or replacement of the defective unit. Repair or
replacement shall be solely at the discretion of RFWireless/cramZ marketing upon
receipt of returned goods. Returns must be accompanied by a return authorization
number (RMA) obtained from customer service, and prepaid postage and insurance.
13 Liability
This 900-PRIME module, being an RF device, should only be used to control exits from
areas where an alternative method for exit is available. This product is not intended for, nor is
rated for operation in life-critical control applications. RFWireless/cramZ marketing is not
liable under any circumstances for loss or loss of life or any damage caused by or partially
caused by the misapplication or malfunction of the product. RFWireless/cramZ
marketings’ liability does not extend beyond the purchase price of the product.
Installation of the equipment shall constitute acceptance of RFWireless/cramZ
marketings’ limited liability.
16
Table of contents
