Cranborne Audio Camden 500 User manual
Camden 500 Preamp and Signal Processor
User Manual
Camden 500 User Manual [WIP] -Page 1 ©2018 Cranborne Audio Ltd

Welcome to our family
Cranborne Audio represents a commitment by four product designers to build an audio brand
that does things the right way. We don’t take shortcuts. We don’t compromise. We don’t accept
“good enough.”
We’re just like you. We’re musicians. We’re audio engineers.
We make products that we want to use. We create, innovate, and design with passion, purpose,
and belief. We strive to design products that remain accessible whilst offering the highest quality
and truly innovative new ways of working and achieving
that
sound that we all desire.
Cranborne Audio, for us, means so much more than metal boxes with components in them.
These are our labours of love that embody and demonstrate our demand for excellence. By
distilling what matters and putting our soul into these tools, we hope to help other people make
magic and express themselves, and in some way, become part of our Cranborne Audio family.
So welcome to our family. We care for our family. And we care about making your tracks, albums,
scores sound as good as they should.
Camden 500 User Manual [WIP] -Page 2 ©2018 Cranborne Audio Ltd
Camden 500
Congratulations on your purchase of the Camden 500 Preamp and Signal Processor and thank
you for selecting Cranborne Audio to be a part of your music creation process.
There are a lot of mic preamps out there. A lot of them add colour and the most loved and
desired transformer-based circuits add
a lot
of colour. On some sources it’s for the better, on
others it’s most certainly for the worst; the fact is, most mic preamps do one thing well and suite
certain sources better than others.
When we initially discussed creating a mic preamp, we unanimously came to the same conclusion
- we need to design one of the cleanest and most transparent preamps on the market; and that’s
what we did - and that’s what you have in your hands.
Camden 500 is capable of being the most delicate and natural preamp you’ve ever heard as it
exhibits the theoretical limits of EIN, THD, phase shift, and frequency roll-off performance.
Acoustic guitars and strings sound like they are right next to you; vocals sound open, natural, and
intimate; drums sound punchier and tighter than you have ever heard before.
We’re musicians and engineers ourselves, and we know that there
are
moments when you want
that extra bit of character. So, to compliment the clean and natural front end of Camden 500, we
developed our discrete Mojo analogue saturation circuit that transforms Camden 500 into the
fattest, warmest, and most characterful preamp in your arsenal at the turn of a dial. Mojo can be
subtle, it can also be exaggerated, but best of all it can be bypassed.
To top it all off, each and every Camden 500 is proudly made with the utmost care and attention
to detail by our team in the UK. The beauty of this is that each and every one of our products
receives our strict quality-control procedure to ensure that every product meets our specifications
without relying on offshore factories maintaining our strict high-standards on our behalf whilst
being situated halfway across the world.
Camden 500 User Manual [WIP] -Page 3 ©2018 Cranborne Audio Ltd

Contents
Control Overview 5
Getting Started 6
Installing and Removing 500 Series Modules 6
Installing Modules 6
Removing Modules 6
Feature Overview 7
Signal Path 7
Input and Connections: 7
Input Type switch: 7
Gain Control: 8
Signal & Clip Indicators: 8
48v Switch: 9
Polarity (Ø) Switch: 9
HPF Switch: 9
Mojo Overview 10
Mojo Control: 10
Mojo Style Switch: 10
Thump: 11
Cream: 12
Technical Specifications 13
Equivalent Input Noise 14
THD+N: 15
Frequency Response: 16
Phase Shift: 17
Application Guides 18
Achieving Ideal Operating Level 18
Reamping Sources Through Mojo 19
Maximising Your Mojo 20
Sources To Try With Mojo 21
Troubleshooting 22
Notices 23
Warranty 23
Repair Service 23
Maintenance 23
Important Links 23
Camden 500 User Manual [WIP] -Page 4 ©2018 Cranborne Audio Ltd

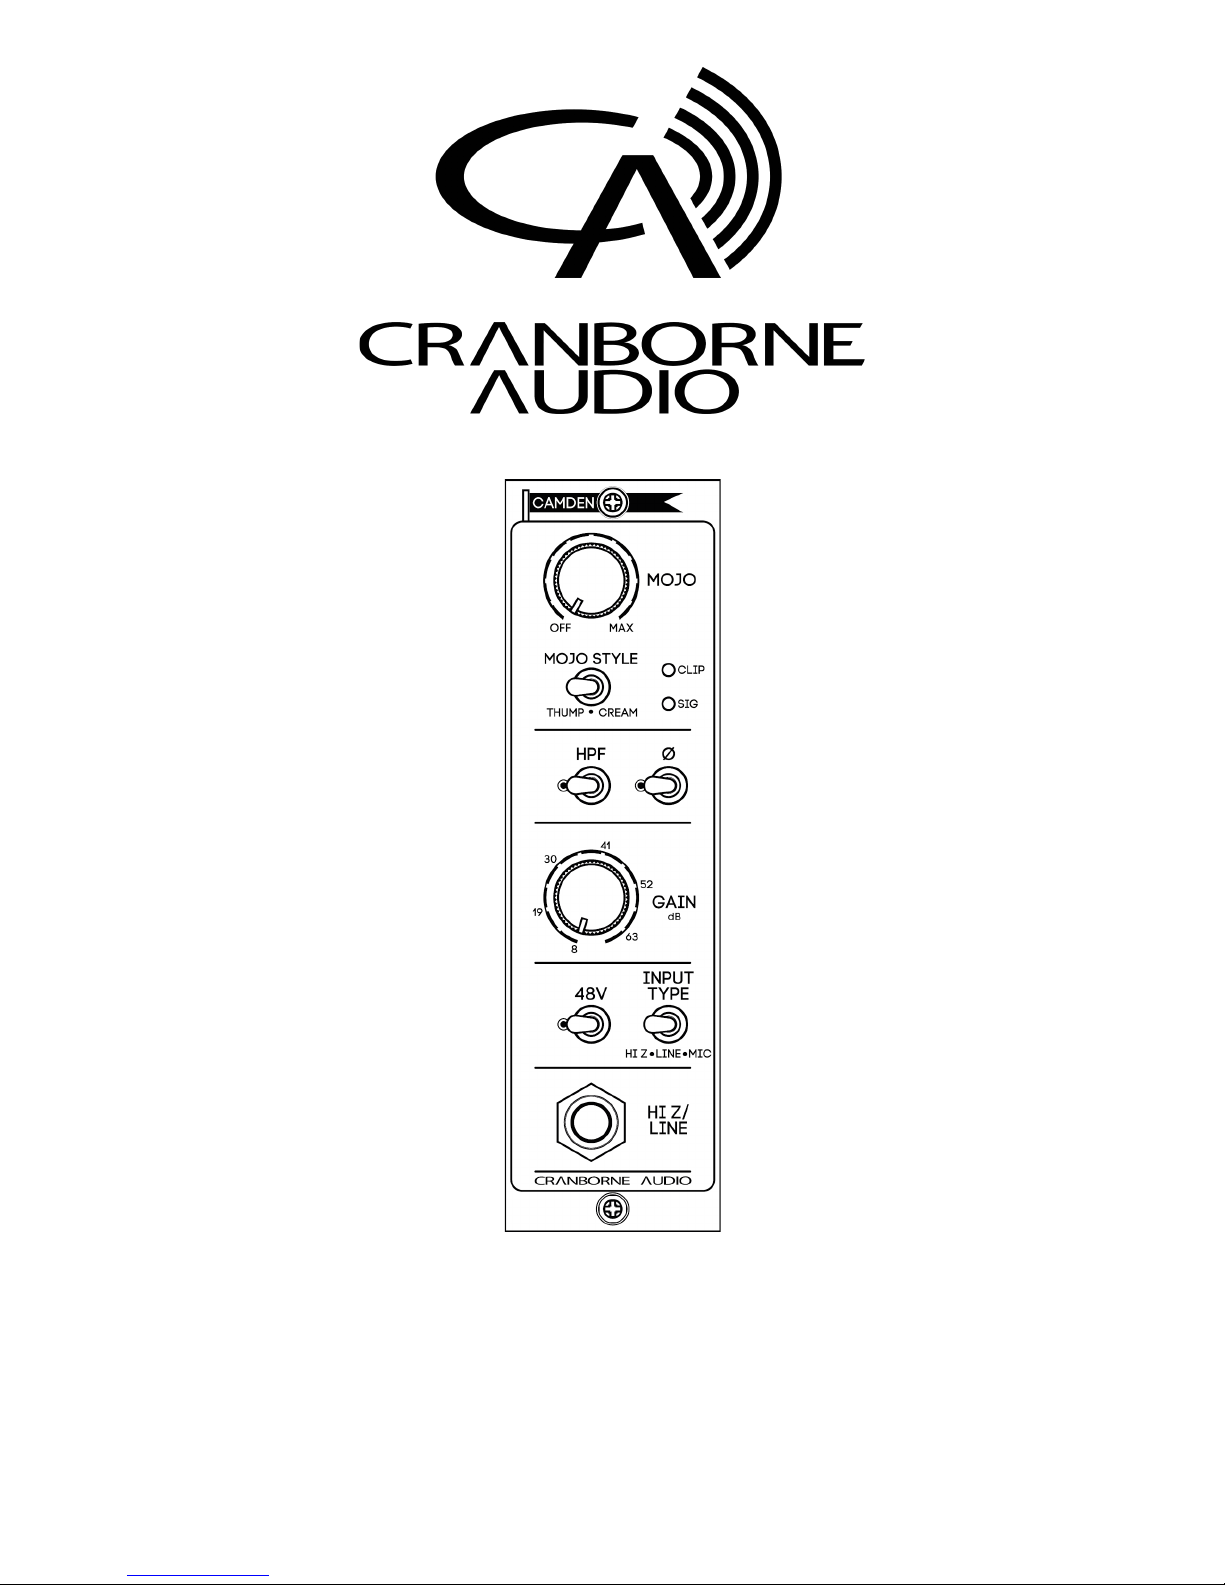
Control Overview
1) Mojo Control:
Adjusts the level of Mojo
analogue saturation.
Bypasses Mojo and clicks off
when it’s turned fully
anti-clockwise.
2) Mojo Style Switch:
Toggles the Mojo style
between 2 discrete styles:
Thump & Cream.
3) Signal & Clip Indicators:
Displays incoming signal level
and clip status.
LED’s intensity varies
depending on incoming signal
level.
4) HPF Switch:
Engages the 80Hz High Pass
(Low Cut) filter.
-3dB @ 80Hz.
5) Polarity Switch:
Inverts the polarity of the
input signal by 180 °.
6) Gain Control:
12 position switched pot.
Adjusts the input sensitivity of
the preamp from 8 to 68.5dB
in 5.5dB increments.
7) 48v Switch:
Engages 48v phantom power
for the rear XLR connector
onboard the 500 series
chassis being used with
Camden 500.
8) Input Type Switch:
3-way switch. Adjusts the
input Impedance and pad
status of the preamp Input to
match the desired input type;
hi-z, line, or mic.
9) Hi-Z/Line Input:
Used to connect Line or Hi-Z
instruments directly into the
preamp’s front panel. Front
panel input interrupts rear XLR
in hi-z and line modes.
Camden 500 User Manual [WIP] -Page 5 ©2018 Cranborne Audio Ltd

Getting Started
Installing and Removing 500 Series Modules
Installing Modules
First, make sure the 500 series chassis is powered off, the power supply has been removed and
the capacitors have had time to discharge.
Before picking up Camden 500, as a precaution, touch the metal chassis of your 500 series
chassis to discharge any built-up static electricity.
Carefully pick up Camden 500 and locate its card edge into the backplane connector of the
chassis; once located, push the card firmly into place and secure the module into the rack using
the supplied screws - be careful not to over tighten.
Removing Modules
First, make sure the 500 series chassis is powered off, the power supply has been removed and
the capacitors have had time to discharge.
As a precaution, touch the metal chassis of your 500 series chassis to discharge any built-up static
electricity. Remove the module fixing screws and store them in a safe place for future use.
Firmly pull Camden 500 to release the card edge from the backplane connector of the chassis
and then carefully remove the module from the rack itself.
Note:
Removing or installing the modules when the 500 series chassis is powered on could cause
irreparable damage to the backplane connector, supporting circuitry and/or the Camden 500
modules itself.
Camden 500 User Manual [WIP] -Page 6 ©2018 Cranborne Audio Ltd

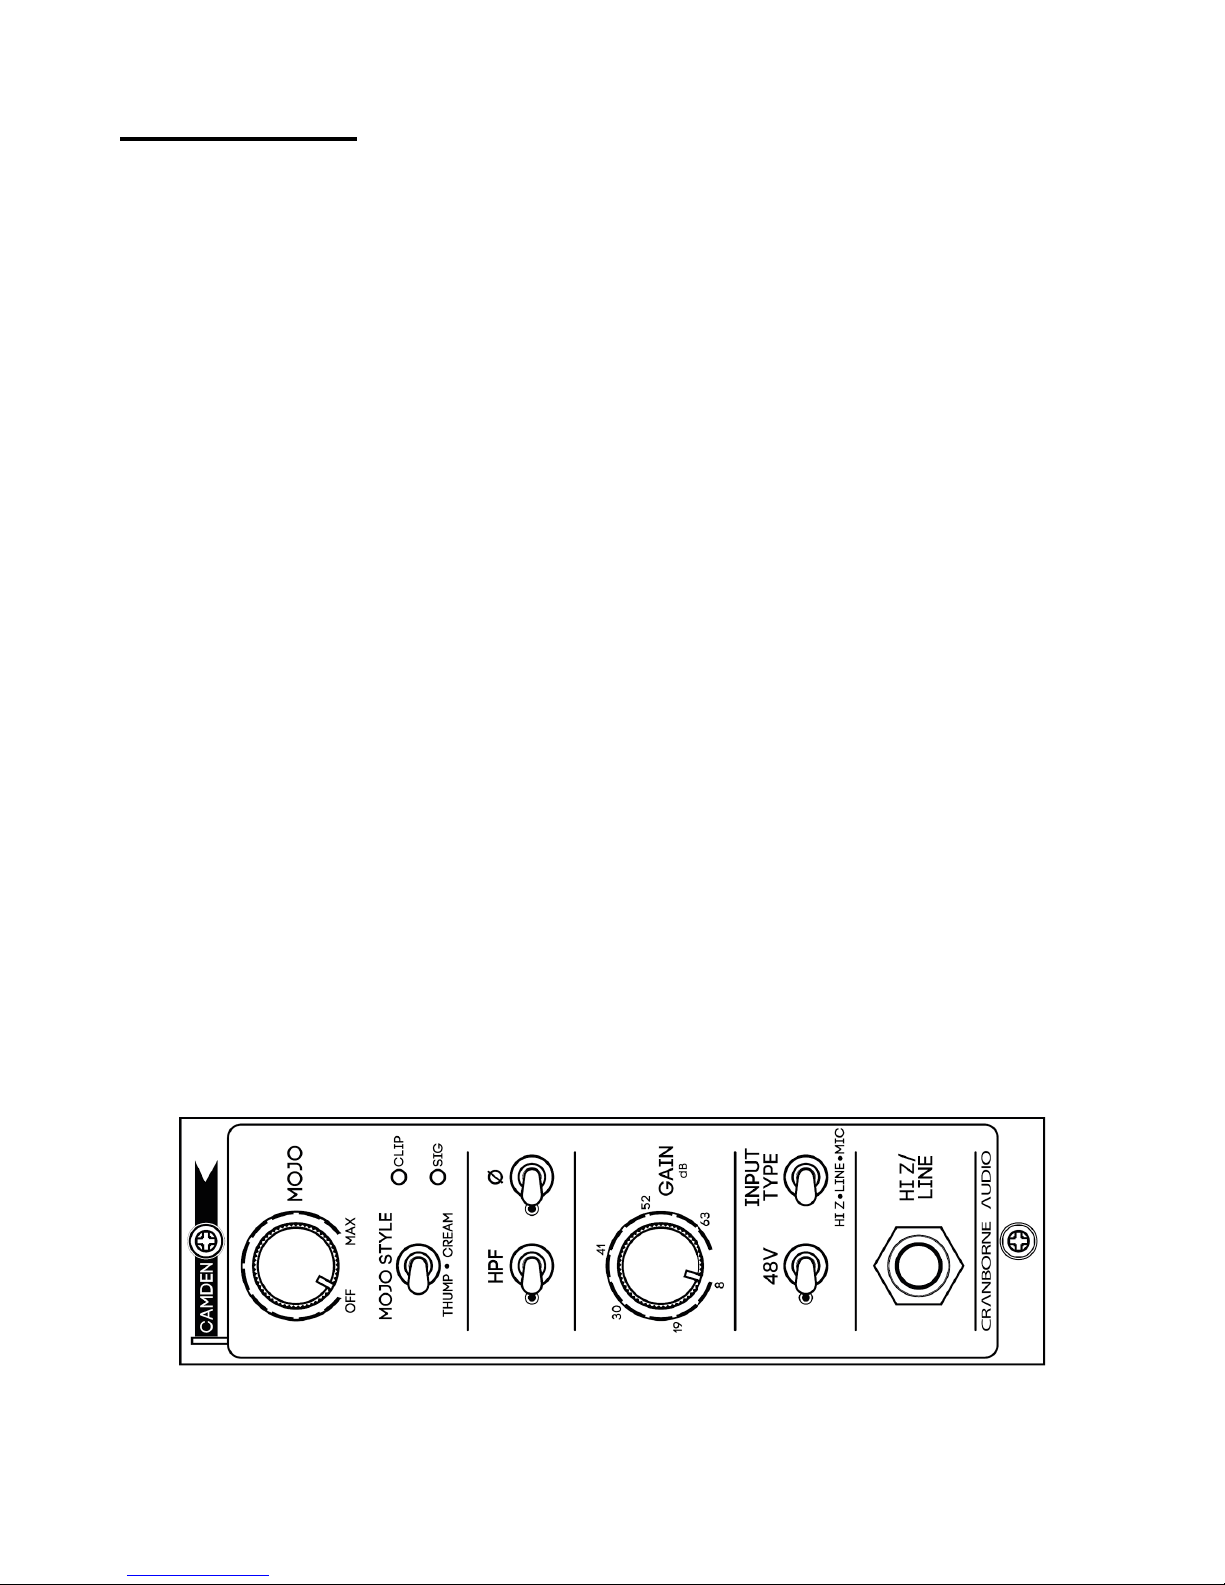
Feature Overview
Signal Path
Input and Connections:
When inserted into a 500 series chassis, Camden 500 has two possible input paths; one on the host chassis
itself, and one on Camden 500’s front panel. When connecting inputs, pay close attention to Camden
500’s input type switch to ensure that the correct input pad and impedance settings are being used for
your desired source.
REAR INPUT - The rear input can accept mic, line, and hi-z sources via XLR or Jack depending on the host
500 series chassis being used.
FRONT INPUT - The front input can accept balanced line or unbalanced/balanced hi-z sources via ¼” jack.
Microphones cannot be connected directly to the ¼” jack input on the front of Camden 500.
Input Type switch:
The Input type switch configures the front-end of Camden 500 to create the best possible environment for
mic, line, and hi-z sources. Each switch position determines the input impedance, active input connector,
and pad status of the preamp for each input type setting.
MIC -
Switches Camden 500’s input impedance to 8.9kOhms 48v Off, 5.4kOhms 48v ON. Mic input type
has a maximum input level of 17.6dBu.
LINE - Switches Camden 500’s input impedance to 23.4kOhms and engages the -8dB pad. The line mode
has a maximum input level of 26.5dBu.
HI-Z - Switches Camden 500’s input impedance to 1.5MOhms unbalanced, 3MOhms balanced. The Hi-Z
mode has a maximum input level of 24dBu.
Camden 500 User Manual [WIP] -Page 7 ©2018 Cranborne Audio Ltd

Gain Control:
The Gain control is used to adjust the input sensitivity of the preamp to boost incoming signals to
optimum operating level and achieve the best signal-to-noise ratio. The gain control is a 12-position,
stepped-switch that adjusts the input sensitivity in steps of 5.5dB.
MIC GAIN RANGE:
Position:
Min
2
3
4
5
6
7
8
9
10
11
Max
Gain
(dB):
8
13.5
19
24.5
30
35.5
41
46.5
52
57.5
63
68.5
LINE INPUT GAIN RANGE:
In line mode, Camden 500 engages an 8dB pad to enable a maximum input level of +26.5dBu and a gain
range of 0dB to 60.5dB in 5.5dB steps.
Position:
Min
2
3
4
5
6
7
8
9
10
11
Max
Gain
(dB):
0
5.5
11
16.5
22
27.5
33
38.5
44
49.5
55
60.5
Hi-Z INPUT GAIN RANGE:
Position:
Min
2
3
4
5
6
7
8
9
10
11
Max
Gain
(dB):
3
8.5
14
19.5
25
30.5
36
41.5
47
52.5
58
63.5
Signal & Clip Indicators:
The signal and clip indicators are visual aids to help achieve the best performance and highest possible
signal-to-noise ratio during the recording process. Correct gain staging will also get Mojo working at its
best.
SIG - The Signal Indicator features a gradual lighting mechanism that will get brighter depending on the
input level of the incoming audio.
CLIP - The Clip led indicates when the mic preamp is close to clipping. The Clip indicator begins to light
when the signal is within 3dB of clipping the preamp input.
Camden 500 User Manual [WIP] -Page 8 ©2018 Cranborne Audio Ltd

48v Switch:
The 48v switch engages 48v phantom power and sends supply voltage down pin 1 of the chassis’ XLR
input socket to power condenser microphones and Di boxes if required.
Note:
Do not engage 48v with vintage ribbon mics connected to Camden 500 as sending voltages through to
the ribbon can cause permanent damage to the microphone.
Be careful when connecting line-level instruments to Camden 500 via XLR when 48v is engaged. Sending
48v through to the line-level outputs of instruments and playback devices can cause irreparable damage to
their internal components.
Polarity (Ø) Switch:
The polarity switch flips the polarity of the incoming audio by 180° in order to optimise the phase
interaction of the preamp’s signal with other audio tracks also being recorded.
Note:
In isolation, flipping the polarity of the mic preamp will not result in any audible effects, however the
polarity switch is a useful tool when Camden 500 is being used as part of a multi-mic recording setup, or
instances where other instruments - also being mic’d and recorded - are bleeding into the microphone.
HPF Switch:
The HPF (often called Low Cut) switch engages a filter that removes low-end rumble from sources that do
not require low frequency extension. The filter is set to achieve 3dB of attenuation at 80Hz and features a
12dB per octave slope.
Camden 500’s High Pass Filter has been tuned to achieve a smoother onset but more dramatic roll-off than
standard filters resulting in a more natural-sounding low-frequency attenuation.
Note:
As the HPF is positioned after the Mojo circuit in the signal path it can also be used in conjunction with
Mojo to create more even more tonal-shaping possibilities.
- Try using Thump on a vocal track alongside the HPF to introduce a rich and intimate low-mid
harmonics without excessive plosive or rumble effects in the lower frequencies.
- Try using Cream on an electric guitar mic alongside the HPF to achieve more high-mid harmonic
focus, dynamically remove mid-range boxiness, and guitar cut through a mix whilst using the HPF
to trim the low-end ‘woof’ coming from the cabinet itself.
Camden 500 User Manual [WIP] -Page 9 ©2018 Cranborne Audio Ltd

Mojo Overview
A perfectly clean preamp is perfect for capturing sources that need the utmost clarity and detail, however,
being audio engineers and musicians ourselves - we know that some of the best records ever made had
grit, character, and were recorded on preamps that imparted their own colour onto the signal - that’s
the
sound we all hear when we say the word ‘vintage’.
Transformers are big, bold, and impart a lot of character onto the sound. Both vintage and modern
equipment feature transformers and they can sound great... but transformers can often cause issues.
Transformers are noisy, they exhibit huge phase shifts - as much 90 °at 50Hz (which equates to 5ms) - and
they impart an EQ onto the audio. Also, as transformers are integral to the way that a preamp works - they
cannot be bypassed to reveal the pure signal.
Our Mojo circuit is an analogue emulation of the desirable effects of transformers but without the
downsides such as dramatic phase shifts and excess noise. Unlike transformer-based designs, Mojo’s
effects live on a variable control that can be dialed to taste on some sources, and bypassed for others.
We built a brand-new type of saturation circuit consisting of an array of different filters (some of which are
inductive) and discrete second and third order harmonic generators that allow precise emulation of the
saturation and low-end reinforcement behaviours of vintage equipment. Mojo can even be dialed-in to
well-beyond the point that destructive clipping would usually occur with transformer-based designs for a
wider palette of saturation effects.
By manipulating these filters and harmonic generators; we can create two discrete Mojo styles; Cream and
Thump - both turn the impeccably clean and transparent Camden topology into the fattest, warmest, and
most characterful preamp in your arsenal - all at the turn of a dial.
Mojo Control:
The Mojo control adjusts the level of the Mojo effect that is being mixed-in with the dry signal. The pot is
variable to enable the best possible blend of the Mojo character to be dialed-in. When turned fully
anti-clockwise, the pot switches off in order to
completely
bypass Mojo from the signal path.
Mojo Style Switch:
The Mojo style switch selects which Mojo circuit is currently active; Thump or Cream. Each Mojo style suits
a variety of different instruments in different ways and for different effects.
Camden 500 User Manual [WIP] -Page 10 ©2018 Cranborne Audio Ltd

Thump:
Thump is a style that works best
on - but is not limited to -
low-frequency based instruments.
Thump excites low-end content
by boosting harmonics in the
range of ~100Hz to 20Hz and
below without increasing the
fundamental frequencies -
resulting in fuller low-end on all
reproduction mediums.
As Thump is not EQ-based, the
additional harmonic content is
shaped by the source and it’s
existing low-end frequency content resulting in a natural addition of extra “Thump”. Similar-sounding EQ
moves will result in extreme wooliness as all sonic energy is boosted - even unwanted audio in-between
the hits.
On sources such Kick drum, Thump will add the desired amount of low-end thickness required to provide
the foundation for the rest of the mix to sit on. As Thump is NOT EQ-based, the content added is
controlled by the hits unlike EQ.
On Snare, Vocals, and Guitar - sources that are traditionally filtered at around 80Hz - Thump can still be
used in conjunction with the Camden’s HPF to add low harmonics to the low-mid frequencies without
adding extraneous low-end that could cause havoc during the mix phase.
Camden 500 User Manual [WIP] -Page 11 ©2018 Cranborne Audio Ltd

Cream:
Cream introduces a vintage
smoothness that enables tracks
to sit deep within a complex
mix in a way that cannot be
replicated with EQ. The Cream
setting drastically increases
THD whilst smoothing out the
low-mids.
As with Thump, Cream is not
EQ based and is achieved by
blending 2 saturation stages
with the dry signal and
additional harmonics. Cream
varies entirely on the harmonic signature of the incoming source. It will increase high-end forwardness and
create unique harmonic-based tonal shaping effects on mid-range instruments, but it will also add low-end
on full range sources as well as unique “compression-style” effect on transients.
On vocals, a delicate amount of Cream will add high-end harmonics that will bring the vocals forward
whilst also taming the midrange ‘honkiness’ of an unprocessed vocal track. Higher Cream settings will take
a clean vocal track through to a warm vintage saturation with subtle overdrive effects that have the effect
of smoothing-out ‘esses’ and adding up-front warmth
On drums you will notice a 'fattening' of transients resulting in more emphasis on the sustain and shell of
the drum itself as well as a subtle low-end boost. Overheads in particular will sound as if they were
recorded in a bigger room.
On distorted electric guitars, a generous amount of Cream will turn a dull recording into a speaker-busting,
harmonically rich, mix-cutting masterpiece that stands shoulder to shoulder with any commercial
recording.
Camden 500 User Manual [WIP] -Page 12 ©2018 Cranborne Audio Ltd

Technical Specifications
When we set out to design Camden 500, we decided that we wanted to bring the kind of sonic
performance previously reserved for those with the highest budgets to everyday musicians and engineers -
people just like ourselves.
Put simply, Camden 500 is one of the cleanest, most linear, and transparent preamps you’ve ever heard.
These are very bold claims… but they’re not claims that we would make lightly. Below, we’re going to dive
into the technical specifications and show you some performance graphs that demonstrate what we mean.
Minimum Gain:
Mic= 8dB, Line = 0dB, Hi-Z = 3dB
Maximum Gain:
Mic = 68dB, Line = 60dB, Hi-Z = 63dB
Input Impedance:
Mic= 8.9kOhms 48v Off, 5.4kOhms 48v ON,
Line = 24.3kOhms
Hi-Z= 1.5MOhm unbalanced, 3MOhm balanced
Max Input Level:
Mic = 17.6dBu (<0.003%)
Line = 26.5dBu (<0.02% THD)
Hi-Z = 24dBu (<0.02% THD)
Output Impedance:
150 Ohms
Max Output Level:
27.5dBu (<0.002% THD, 30dB gain)
Equivalent Input Noise (EIN):
<-129.5dBu, 150 ohm source, unweighted
<-131dBu, 150 ohm source, A-weighted
<-135.5dBu, Inputs common, unweighted
Frequency Response:
± 0.25dB, <5 Hz to >200 kHz, 35dB gain
<± 1dB, <5 Hz to >200 kHz, max gain
Phase Shift:
<2.25 ° , 40dB gain, 20Hz to 20kHz
<4 °, Max gain, 20Hz to 20kHz
THD+N:
<0.0004%, 1kHz, 35dB gain, 24dBu out
Intermodulation Distortion:
<0.0008%, 50Hz and 7kHz, 35dB gain, 20dBu out
<0.0006%, 50Hz and 7kHz, 35dB gain, 15dBu out
HPF:
80Hz, -3dB, 12dB/Oct
Current Draw:
120mA per rail - idle
140mA per rail - typical use case
CMRR:
>70dB, typ >85dB, 35dB gain, 10-20kHz,
100mV Common mode
Slew Rate:
20V/uS, 35dB gain, 25dBu out
Dimensions (mm):
31.8/133.35/170.11 (w/h/d)
All specifications were generated using an Audio Precision APx555, Camden 500 pre-production
unit, and 500R8 prototype. Camden 500 specifications will vary depending on the specifications of
the 500 series rack used. All specifications are subject to change at any time and are likely to improve
with production units.
Camden 500 User Manual [WIP] -Page 13 ©2018 Cranborne Audio Ltd

Equivalent Input Noise
Equivalent Input Noise or EIN, measures the noise that the preamp adds onto an input signal. The lower
the EIN, the greater the signal-to-noise ratio and the more processing you can apply in your DAW without
fear of preamp noise masking an intricate performance.
EIN can be measured in different ways. We prefer using an “unweighted” measurement with a 150 ohm
load because this measurement is the most indicative of the performance achieved with a microphone,
instrument, or line input (a load). Other manufacturers may represent an EIN value such as “inputs
common”, “inputs shorted” or “A-weighting” on their EIN figures - these measurement techniques will
achieve lower numbers but will be less revealing as to what the noise performance will actually be with an
input connected.
Camden 500 has an EIN of -129.5dB unweighted with a 150 ohm load. If we use other measurement
techniques such as “inputs common”or “A-weighting” - Camden’s EIN performance is <-135.5dB, and
<-131dB respectively. The result is an ultra low-noise front-end that you would only find on the most elite
and expensive mic preamps.
Additionally, an important aspect to consider when evaluating EIN and noise performance of preamps is
that most manufacturers only site the EIN at one particular gain setting - usually where the performance is
best. But the EIN can change dramatically at different gain settings of a preamp. But not so for the
Camden - the Camden achieves the same EIN performance at all gain positions.
Note
Camden 500 User Manual [WIP] -Page 14 ©2018 Cranborne Audio Ltd

THD+N:
Total harmonic distortion or THD is what gives a preamp a ‘sound’ or ‘colour’. It’s a measurement of the
harmonic content that is generated by the preamp and added onto an input signal. Highly-regarded
“warm” or “vintage” mic preamps will have lots of THD from its transformers or valves to give its sound.
But equally, THD can sound “bad” like in the case of many entry-level mic preamps when the source of
the THD is transistor distortion and similar. As such, the sound of THD is very subjective.
However, what is
objective
with THD measurements is the smaller the THD percentage, the more
transparent the mic preamp and the less colour - good or bad - it is adding to the signal. When designing
Camden 500 - we aimed for the smallest possible THD percentage to achieve the most transparent
preamp possible.
Camden 500’s THD+N remains inaudible and below 0.02% at all frequencies and gain positions. THD+N
reaches 0.0002% (1kHz) at 24.5dB gain, and remains below 0.0008% (1kHz) at all gain positions from 8dB
to 46.5dB.
THD+N is often measured by other manufacturers at one gain setting and one frequency - usually where
the best number is achieved. But THD can vary significantly at different frequencies and gain positions -
but not with Camden 500. Throughout all gain positions, Camden 500’s THD is completely inaudible
meaning complete transparency at all gain settings and all frequencies - unless it has been applied using
Mojo.
Camden 500 User Manual [WIP] -Page 15 ©2018 Cranborne Audio Ltd

Frequency Response:
The brand new Camden topology sets new standards for frequency and phase linearity within the audio
band and well beyond.
Camden 500’s frequency response remains linear within 0.7dB from 5Hz to 200kHz at all gain settings.
Maintaining an extended frequency bandwidth dramatically reduces intermodulation distortion and other
complex interactions finding their way into the audio band and causing high-end smearing and ‘hype’. A
typical preamp can begin rolling-off frequencies above 20kHz which makes them susceptible to a harsh
and unnatural high-end character.
Preamps also tend to drastically increase frequency roll-off as the gain is increased to maximum, however
Camden 500 only has a maximum roll-off of 0.7dB for a consistently linear frequency response at all gain
settings - resulting in crystal clear, detailed, and accurate high end that is impervious to increased
intermodulation distortion as gain is increased.
Camden 500 User Manual [WIP] -Page 16 ©2018 Cranborne Audio Ltd

Phase Shift:
Phase shift means that certain frequencies are delayed when they are amplified by a preamp - they can
result in sluggish transients, a lack of punchiness, and tonal colouration. Vintage 1073-style preamps can
exhibit as much as 90° of phase shift at 50Hz - this essentially means that 50Hz arrives at your ears 5ms
after the initial transient.
Whilst this character can be attributed to being part of the sound and colouration that we want in these
vintage-style preamps, it can also be the root cause of alot of undesirable effects when used in multi-mic
setups and when trying to capture clean and pure audio signals; audible effects that cannot be remedied
by flipping the polarity or aligning transients in post-production.
Camden 500’s phase shift remains below 2.25° between 20Hz-20kHz up to 57.5dB of gain. This allows
Camden 500 to produce punchy, sharp, and tight transients at all frequencies and on all sources without
fear of reduced attack as gain is increased. At maximum gain, Camden 500’s phase shift increases to only
4° - an unprecedented figure for a preamp at maximum gain.
Camden 500 User Manual [WIP] -Page 17 ©2018 Cranborne Audio Ltd

Application Guides
Achieving Ideal Operating Level
In order to achieve the optimum signal-to-noise-ratio, get the most out of the on-board Mojo processing,
and retain our published specifications; Camden 500 should be run as ‘hot’ as possible before the LED clip
indicator lights up consistently.
The best way to do that is as follows:
1) Insert your desired source into Camden 500’s input connections.
2) With your source playing at the correct level/velocity, Increase Camden 500’s gain control until the
signal Indicator is displaying a strong and bright signal and the Clip indicator only
gently
and
occasionally lights up when the loudest transients are reached.
3) Ensure that the recording device connected to Camden 500 is set correctly.
●If you are sending the output of Camden 500 into an audio interface’s line input, make sure
that the line input is set to +4dBu reference level and any input gain control is set to its
minimum setting.
You should now be receiving a healthy level into Camden 500 and onwards to your audio interface. If the
preamp begins to clip during the recording process, reduce the input gain control accordingly.
Note:
Camden 500’s maximum output level is +27.5dBu however most audio interfaces have a maximum input
level of +21.5dBu; it is very easy for Camden 500 to clip the input of an audio interface if the gain controls
are not set correctly. If additional attenuation is required between Camden 500 and your audio interface,
then you can purchase an external PAD to bring the output level down to a usable range for your desired
audio interface.
Camden 500 User Manual [WIP] -Page 18 ©2018 Cranborne Audio Ltd

Reamping Sources Through Mojo
Camden 500 is more than just a preamp; it’s also a signal processor featuring our Mojo circuit. The great
thing about Mojo is that it is an amazing analogue saturation tool that can be used on anything from the
beginning (tracking) to the end of your music creation (mixing, parallel effects, summing) process.
By reamping, you can insert the Mojo control across a single track, group, or entire mix coming from your
DAW using your audio interface.
For this example we will use a single Kick drum track, however the same process applies for any source.
1. Using your DAW, assign the output of the kick track to be sent out of an unused, physical line
output of your audio interface.
●Consult the user manual of your DAW to find the exact facility for outputting channels to
hardware outputs of your interface - All DAW’s do this differently.
2. Connect the physical output of the audio interface into the input of Camden 500.
3. On Camden 500’s front panel, switch the input type switch to line, and reduce the gain control to
its minimum setting.
4. With the DAW playing and audio being sent out of your interface, increase the gain control of
Camden 500 until the Green LED is lighting brightly and the Clip indicator only gently lights up
when the loudest transients are reached.
5. Connect the output of Camden 500 to a spare line-Input on your audio interface.
6. Using your audio interface, monitor Camden 500 by using your speakers or your headphone
outputs
●All systems will do this different by monitoring through the DAW directly, or through a
custom mixer control panel.
7. Select the desired Mojo style (Thump/Cream) and turn the Mojo control clockwise until the pot
switches on and you begin hearing the effect of Mojo on the signal - then dial Mojo to taste.
Once the Mojo has been dialled to taste, you are ready to re-record the affected signal back into your
DAW:
8. Create a new track within your DAW and assign the input of the track to be the input that Camden
500 is connected to on your audio interface.
9. Record-enable the DAW track and mute its output.
10. Rewind the DAW to the start of the Kick drum track and press the master record button to begin
recording.
Once the recording process has stopped, you will now have a new Kick drum track that features your
desired Mojo processing and can be used in-place of the original audio file during the mix phase.
At this point, it’s a good idea to level match and A/B the Dry and Mojo tracks to hear the effects of Mojo
for yourself!
Camden 500 User Manual [WIP] -Page 19 ©2018 Cranborne Audio Ltd

Maximising Your Mojo
Mojo is harmonic-based tone shaping tool. Mojo’s effect varies entirely on the sonic signature of the audio
that is being sent into the cascading overdrive and discrete harmonic generation circuits. The level,
frequency, and dynamic range of the incoming audio will organically change Mojo and increase/decrease
the effect.
With this in mind, there are a few little tricks and ideas that you can use to achieve different results from
Mojo that might better-suit your desired source.
APPLYING MOJO PRE OR POST PROCESSING - The effects of mojo can change drastically depending on
if Mojo is applied to a signal pre or post processing. If an uncompressed signal is sent through Mojo set to
Cream, the mid range compression effect will take place as the performance varies in amplitude and mid
range content, however If a compressed signal is sent through Cream then its effects will be more
consistent and less dynamic.
Applying EQ after audio has been processed through Mojo allows accentuation of the additional harmonic
content and detail, however applying EQ before processing with Mojo allows more control over what
frequencies are influencing the harmonic effects of Mojo; filter-out low frequencies pre-mojo to determine
what frequencies Thump will target or filter after Mojo to retain Thump’s harmonic additions whilst
reducing LF rumble.
CASCADING MOJO - Cream and Thump work perfectly in isolation however when used together, they
can provide even more tonal shaping possibilities to turn raw, unprocessed audio files into warm, rich, and
analogue-sounding goodness that will sit nicely into the mix and require minimal further processing.
Cascading Mojo circuits does not always require two individual modules (although it can make the
processes simpler!). Thanks to Camden 500’s high-headroom line input and low-noise design, you can run
audio already processed by Thump or Cream, back-through Camden 500 to apply a second stage of
processing and re-record its effects back into the DAW.
Even cascading audio into two instances of the same Mojo style can offer-up a greater range of tonal
options. Two instances of Thump will increase low-end 2nd/3rd order harmonics whilst still remaining tight
and focused, without excess Mud. As the amplitude of the fundamental frequencies are not affected with
Mojo, the audio does not increase in perceived volume but the increased harmonics can lead to
interesting low-mid overdrive effects that can instantly warm-up stems, groups, or mixes in a way that is
not possible with EQ’s but it synonymous with classic ‘british’ mixing consoles.
There are no rules when it comes to Mojo! Give it a go and see what happens!
Camden 500 User Manual [WIP] -Page 20 ©2018 Cranborne Audio Ltd
Table of contents
Other Cranborne Audio Amplifier manuals


