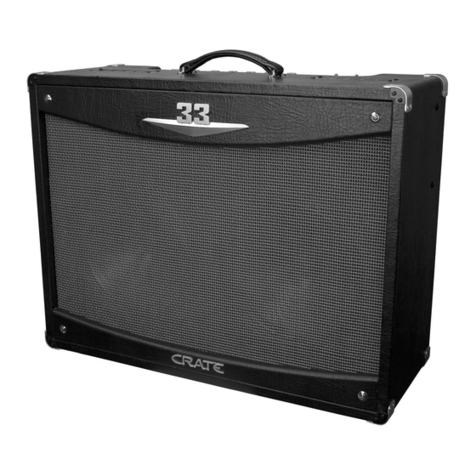
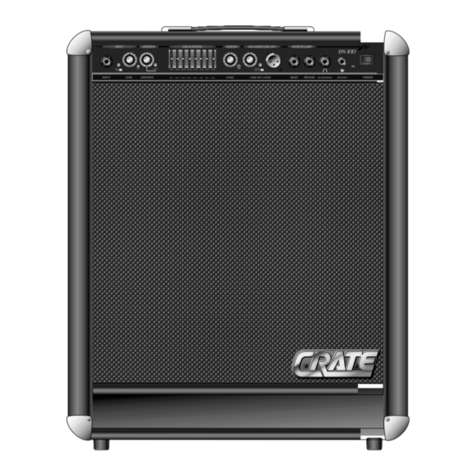
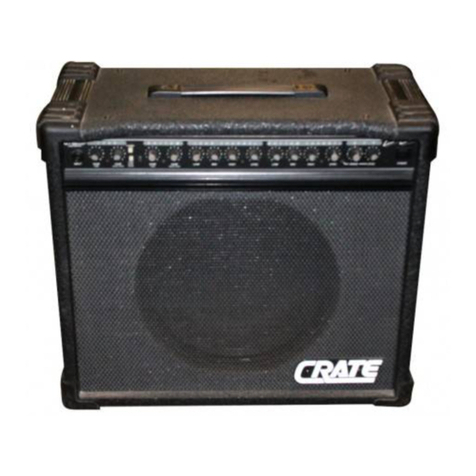
Crate Quadradrive GT-200 Series User manual

GT-200
Series
Quadradrive"
Amplifier
OWNER'S
MANUAL

CRATE”
61.200
series
quadracrive
Amplifier
Po
Congratulations!
You
are
now
the
proud
owner
of
the
one
of
the
newest
and
most
versatile
quitar
amplifiers
available,
the
Crate
GT-200/200H
Quadradrive™,
This
flexible
and
compact
unit
features
four
separate,
footswitchable
Gain
controls,
with
your
choice
of
Tube
OR
Solid
State
preamps
for
either
the
Rhythm
OR
Lead
channels.
Discrete
tone,
Level,
and
Reverb
controls
for
each
channel
and
Crate's
exclusive
Tube
Driven
Mosfet
power
amp
add
even
more
flexibility
and
control.
Like
all
Crate
products,
your
GT-200/200H
is
made
with
pride
in
America,
using
only
the
best
components.
Extensive
testing
at
the
hands
(and
ears)
of
skilled
technicians
and
musicians
insures
you
that
this
amplifier
is
the
absolute
best
it
can
be
In
order
to
get
the
most
out
of
your
new
amplifier,
we
strongly
urge
you
to
go
over
the
information
contained
in
this
manual
before
you
begin
playing.
o
And
thank
vou
for
choosing
TA
‘About
the
GT-200
System
Block
Diagram
——
The
GT-200
Front
Panel
The
GT-200
Rear
Panel
If
You
Have
a
DSP
Model
‘Some
Suggested
Settings
Technical
Specifications
ABOUT
THE
GT-200
The
Crate
GT-200/200H
Quadradrive™
is
truly
unique
and
versatile.
With
four
separate
Gain
controls
(all
foot-
switchable),
two
separate
channels
(footswitchable)
and
your
choice
of
tubes
or
solid
state
(also
footswitchable),
the
GT-200
gives
you
more
"sound
per
pound"
than
any
other
amp
of
its
kind.
Use
the
Solid
State
Rhythm
preamp
section
for
today’s
sound:
crisp
highs
and
a
tight
bass
response.
Use
the
Tube
Rhythm
preamp
section
for
that
vintage
tube
sound,
from
ultra-clean
to
a
bluesy
crunch.
The
Solid
State
Lead
preamp
section
gives
you
all
of
the
traditional
Crate
Mega-Gain
hard
rock
sizzle
and
fire
with
lots
of
definition
and
compression.
And
the
Tube
Lead
preamp
section
starts
with
a
bluesy
crunch
and
can
deliver
everything
up
to
screaming,
tube-driven
lead
distortion
with
plenty
of
sustain
and
to-
tal
tone
control.
FEATURES OVERVIEW
Given
below
is
a
quick
overview
of
the
GT-200's
features
and
controls:
vV
Two
Completely
Separate
Channels:
Independent
Gains,
3-band
EQ's,
Reverb
and
Levels.
Four
Gain
Controls:
Tube
Lead. Solid
Stale
Lead.
Tube
Rhythm.
Solid
State
Rhythm.
Expander
Switch:
Crate
original.
Creates
a
stereo-lkke
atmosphere
True
Stereo
Chorus:
Depth
and
Rate
controls.
Footswitchable.
Tube
Driven
Mosfet
Power
Amplifier:
Crate
exclusive.
No
traditional
solid
state
output
devices.
No
chance
of
harsh
"square
wave"
distortion.
Total
Footswitch
Control:
Channel
selection.
Tube
or
Solid
State
selection.
Chorus
orvoff.
All
at
the
touch
of
a
footswitch.
External
Speaker
Jack:
Series
connection.
No
chance
of
overloading
the
amplifier.
Standard
1/4"
mono
phone
jack.
Effects
Loop:
1/4"
Line
OWWLine
In
jacks.
Allows
extemal
signal
processor
connection.
Allows
direct
connection
to
external
power
amplifier,
mixer,
recording
console
or
whatever.
ak
a
sak


©
(BATE
GT-200
Series
Quadradrive
Amplifier
wo
n
31415
w
1.
INPUT:
Connect
your
guitar
here
using
a
shielded
instru-
mont
cablo.
LEAD
SECTION
2:
TUBE
GAIN:
This
serves
as
the
gain
control
for
the
Lead
Channers.
Tube
preamp
section,
giving
you
control
over
he
compression
and
overdrive
characteristics
of
the
GT-200
input
tubes.
Use
this
control
along
wih
the
Lead
Channels
Level
control
(#15)
to
create
a
wide
varety
of
sounds
at
any
volume
level.
(Some
suggested
settings
can
be
found
on
page
7),
With
the
control
to
the
fulldeft
positon,
no
signal
passes
through.
AS
you
bring
the
control
towards
center,
you
increase
the
signal
level
and
the
tube
comprossion,
with
maximum
tubo
distortion
towards
the
fulbright
position.
3.
LEAD
LED:
This
LED
glows
red
when
the
Lead
Channel
is
chosen,
and
along
with
LED
#14
gves
you
a
visual
sign
that
the
Lead
Gains,
tone
section
and
Master
Level
are
activ
4.
SOLID
STATE
GAIN:
This
serves
as
the
gain
control
for
the
Lead
Channels
Solid State
preamp
section,
Use
this
control
along
with
the
Lead
Channels
Level
control
(#16)
to
create
a
wida
variety
of
sounds
at
any
volume
level.
(Some
suggested
settings
can
be
found
on
page
7).
With
tho
control
to
the
full
position,
no
signal
passes
through.
As
you
bring
the
control
to-
Warde
center,
you
increase
the
signal
level
and
compression,
reaching
maximum
distortion
towards
the
ful-right
position.
5.
CHANNEL:
Select
either
the
Lead
Channel
(switch
in
the
IN
positon)
or
the
Rhythm
Channel
(switch
OUT)
with
this
push-
bution
switch.
The
channel
indicator
LEDs
(#3
&
14
for
Lead,
49
&
19for
Rhythm)
work
with
this
switch
as
a
visual
guide.
NOTE:
When
a
footswitch
is
connected
te
the
Channel
Select
footswitch
jack
(36,
roar
panal)
the
front-panol
owitch
will
havo
no
control
over
which
preamp
section
is
selected
6.
TUBE/SOLID
STATE:
Select
either
the
Tube
preamp
(switch
IN)
or
the
Solid
State
preamp
(switch
OUT)
for
either
channel
with
this
pusnbulton
switch.
The
Tube
LED
(47)
works
with
this
swich
as
a
visual
guide:
it
glows
when
the
Tube
sec-
tion
has
been
selected
NOTE:
When
a
footswitch
is
connected
to
the
Channel
Salact
footswitch
jack
(which
also
serves
as
the
Tube/Sold
State
se-
lect:
#26,
rear
panel)
the
frort-panel
switch
wil
havo
no
control
over
which
preamp
section
is
selected.
7.
TUBE
LED:
This
tude-shaped
symbol
glows
yellow
when
the
Tube
preamp
section
is
Selected,
giving
you
a
quick
visual
reference
as
to
which
preamp
secton
is
actwe.
RHYTHM
SECTION
8.
TUBE
GAIN:
This
serves
as
the
gain
control
for
the
Rhythm
Channels
Tube
preamp
section,
giving
you
control
over
the
compression
anc
overdrive
characteristics
of
the
GT-200's
preamp
tube.
Use
this
control
along
wth
the
Rhythm
Channels
Level
control
(#20)
to
create
a
wide
variety
of
sounds
at
any
vol-
ume
level.
(Some
suggested
settings
can
be
found
on
page
7).
Win
the
control
to
the
fulbleft
postion,
no
signal
passes
through.
As
you
bring
the
control
towards
center,
you
increase
the
signal
level
and
the
tube
compression,
with
a
bluesy
tube
crunch
coming
to
life
as
you
approach
a
setting
of
"8"
and
thick-
er
tube
distortion
in
the
ful-right
position.
4
v
2241520272
a
eso
2
9.
RHYTHM
LED:
This
LED
glows
green
when
the
Rhythm
Channel
is
chosen,
and
along
wth
LED
#19,
gives
you
a
visual
Sign
that
the
Rhythm
Channel
is
active.
10.
SOLID
STATE
GAIN:
This
serves
as
the
gain
control
for
the
Rhythm
Channels
Solid
State
preamp
section.
Use
this
control
along
with
the
Fnythmm
Channels
Level
control
(420)
to
create
a
wide
variety
cf
sounds
at
any
volume
level.
(Some
suggested
settings
can
be
found
on
page
7).
With
the
control
to
the
ful-left
postion,
no
signal
passes
through.
As
you
bring
the
control
towards
center,
you
increase
the
signal
level,
which
stays
clean
all
the
way
up
to
the
fullright
positon.
EAD
CHANNEL
11.
LOW:
Adjust
the
Lead
Channefs
low
frequency
output
with
this
control:
the
center
postion
is
"lat,"
that
is,
no
boost
or
cut.
By
tuming
the
control
to
the
left
you
reduce
the
low
frequency
ouput;
tuming
it
to
the
right
increases
the
low
frequency
output
The
Low
control
provides
up
to
12dB
of
boost
or
cut
centered
at
100Hz.
12.
MID:
Adjust
the
Lead
Channels
midrange
frequency
output
with
this
control
in
the
center
position
the
midrange
output
is
“lat”
(no
boost
or
cut).
Tuming
the
control
to
the
left
reduces
the
midrange
output;
turning
it
to
the
right
increases
the
mi.
drange
output.
The
Mid
control
provides
up
to
ScB
of
bocet
or
cut
centered
at
1000Hz,
which
affects
the
"Voice"
of
your
guitars
sound.
13.
HIGH:
Adjust
the
Lead
Channels
high
frequency
output
with
this
control:
in
the
center
position
the
high
frequency
output
wil
be
"flat"
(no
boost
or
cut).
Turning
the
control
to
the
left
re-
duces
the
high
frequency
output;
turning
t
to
the
right
increases
the
high
frequency
output.
The
High
control
provides
up
to
1048
of
boost
or
cut
centered
at
5000Hz,
which
allows
you
to
adjust
the
crispness
or
the
"bite"
of
your
guitar.
14.
LEAD
LED:
This
LED
glows
red
when
the
Lead
Channel
is
chosen, and
along
with
LED
#3,
gives
you
a
visual
sign
that
the
Lead
Gains,
tone
section,
and
Master
Level
are
active.
15.
LEVEL:
Adjust
the
output
level
of
the
Lead
Channel
with
this
controt
in
the
full-left
position
there
is
no
output.
As
you
ro-
tate
the
control
to
the
right
you
increase
the
strength
of
the
Lead
Channels
signal
going
into
the
power
amp,
thus
increasing
the
output
volume.
The
signal
level
for
the
Line
Out
jack
(#34,
rear
panel)
is
simullanecusly
affected
by
this
control.
RHYTHM
CHANNEL.
16.
LOW:
Adust
the
Rhythm
Channels
low
frequency
output
with
this
control:
the
center
postion
is
“Hat,”
that
is,
no
boost
or
cut.
By
turning
the
control
lo
the
lelt
you
reduce
the low
fre-
quency
ouiput;
turning
it
to
the
right
increases
the low
frequen-
ey
output.
The Low
control
provides
up
to
12dB
cl
boost
cr
cut
centered
at
100Hz.
47.
MID:
Adjust
tho
Ahythm
Channofs
midrange
frequency
‘output
with
this
control:
in
the
center
position
the
midrange
out
put
is
“lat”
(no
boost
or
cut).
Turning
the
control
to
the llt
re
duces
the
midrange
output;
turning
t
to
the
right
increases
the
midrange
output.
The
Mid
control
provides
up
to
748
of
boost
or
cut
centered
at
800Hz,
which
affects
the
"voice"
of
your
gui:
tars
sound.

©
(BATE
GT-200
Series
Quadradrive
Amplifier
18.
HIGH:
Adjust
the
Rhythm
Channel's
high
frequency
output
with
this
control:
in
the
center
positon
the
high
frequency
output
Wil
be
"fat"
(no
boost
or
cut).
Turning
the
control
to
the let
re-
duces
the
high
frequency
output;
turning
it
to
the
right
increases
the
high
frequency
output.
The
High
control
provides
up
to
1548
of
boost
or
cut
centered
at
10kHz,
which
allows
you
to
ad-
just
the
crispness
or
the
"bite"
of
your
guitar.
19.
RHYTHM
LED:
This
LED
dows
red
when
the
Rhythm
Channel
is
chosen,
and
along
with
LED
#9,
gives
you
a
visual
sign
that
the
Rhythm
Channel
is
active.
20.
LEVEL:
Adjust
the
output
level
of
the
Rhythm
Channel
with
this
control:
in
the
fulhleft
position
there
is
no
output.
As
you
ro-
tate
the
control
10
the
right
you
Increase
the
strength
of
the
Rhythm
Channels
signal
going
into
the
power
amp,
thus
in-
creasing
the
output
volume.
The
signal
level
for
the
Line
Out
jack
(#34,
rear
panel)
is
simultaneously
affected
by
this
contro!
REVERB
SECTION
21.
LEAD:
Adjust
the
amount
of
reverb
effect
for
the
Lead
Channels
signal
with
this
control:
in
the
fulklaft
position
the
sig-
nal
is
"dry"
(no
reverb).
As
you
rotate
the
contro!
to
the
right
you
increase
the
amount
of
reverberation,
with
maximum
reverb
ef-
fect
achieved
at
the
full-right
position.
22.
RHYTHM:
Adjust
the
amount
of
reverb
effect
lor
the
Rhythm
Channels
signal
with
this
control:
in
the
full-eft
position
the
signal
is
"dry"
(no
reverb),
rotating
the
control
to
the
right
in-
creases
the
amount
ci
reverberation,
30.
FUSE:
This
protects
the
GT-200
against
damages
caused
from
a
faulty
AC
power
source
or
other
problems.
If
the
fuse
blows,
replace
it
ONLY
with
the
same
size
and
type
GA
slo-blo
fuse.
If
the
fuse
blows
repeatedly,
check
the
AC
source:
if
i's
‘okay,
contact
your
Crate
dealer
for
service
information
31.
POWER
CORD:
Fimiy
plug
the
supplied
heavy-duty,
‘grounded
power
cord
into
a
safely
wired,
grounded
120
volt,
60
cycle
AC
power
outlet.
DO
NOT
attempt
to
defeat
the
ground
connection
on
this
cable.
It
your
GT-200
was
purchased
outside
of
the
United
States.
see
the
units
rear
panel
for
its
power
rating
and
follow
the
above
guidalines
32.
EXTERNAL
SPEAKER
JACKS:
Allow
you
to
connect
the
Output
of
the
GT-200
to
external
speakers,
placing
them
in
per-
allel,
Any
load
equal
to
at
least
4
ohms
may
be
connected
to
these
speaker
jacks.
If
more
than
one
jack
is
used,
the
total
load
impedance,
considering
both
jacks,
must
be
at
least
4
‘ohms.
The
standard
internal
speaker
is
6
ohms.
An
additional
8
ohm
speaker
may
be
connected
here,
which
would
total
4
ohms.
With
the
GT-200H
(head),
you
may
connect
one
4
ohm
speaker,
two
8
ohm
opoakors,
or
four
16
ohm
spoakers,
without
overioading
the
output
33.
STEREO
EFFECTS
LOOP
LINE
IN:
Connecting
an
exter-
nal
signal
processor,
such
as
digital
delay
or
echo,
can
be
CHORUS
SECTION
23.
CHORUS:
Select
Chorus
"ON"
(switch
in
the
IN
postion)
wih
this
pushbutton
switch.
The
Chorus
indicator
LED
(#27)
works
with
this
switch
as
a
visual
guide.
NOTE:
When
a
footswitch
is
connected
to
the
Chorus
foot-
Switch
jack
(#85,
rear
panel)
the
front-panel
switch
wil
have
no
control
over
chorus
selection.
24.
EXPANDER:
With
this
switch
in
the
IN
position,
cur
exclu-
Sive
Expander
circutry
Is
activated.
This
produces
the
effect
of
being
in
a
true
stereo
environment
wih
speakers
on
ether
side
of
you.
With
this
effect,
you
can
add
a
more
"roomy"
feeling
to
your
sound.
25.
EXPANDER
LED:
This
LED
glows
red
when
the
Expander
circuitry
is
selected,
giving
you
a
visual
indicator
that
it
i
active.
26.
DEPTH:
Set
the
intensity
of
the
stereo
chorus
effect
with
this
control
in
the
far-left
position
there
wil
be
almost
no
cho-
rus;
as
you
rotate
the
control
to
the
right
the
amount
of
effect
increases.
27.
CHORUS
LED:
This
LED
glows
green
when
the
Chorus
Section
is
selected
and
gives
you
a
visual
sign
that
the
Chorus
section
is
active.
28.
RATE:
Sel
the
speed
cf
the
stereo
chorus
effect
with
this
control
to
the
oft
for
slow,
smooth
"phasing"
sounds,
to
the
right
for
faster
“vibrato
sounds.
29.
POWER:
This
heavy-duty
rocker-type
switch
is
used
to
tum
the
amplifier
ON
in
the
left
positon,
OFF
in
the
right
posi-
tion.
The
channel
LEDs
provide
a
visual
indicator
that
the
unit
is
on.
accomplished
through
tha
Line
In
and
Line
Out
jacks.
Connect
the
OUTPUT
of
the
external
devce
to
the
Line
in
jack
using
a
shielded
cable
with
stereo
1/4"
plugs.
This
sends
the
line-level
signal
IN
tothe
GT-200's
internal
power
amplifies.
34,
STEREO
EFFECTS
LOOP
LINE
OUT:
This
carries
a
pre-
amplified,
post-EQ
signal
to
an
exernal
effects
device,
amplifier,
mixing
console
or
recorder.
Connect
the
Line
Out
jack
to
the
INPUT
of
the
device
using
a
shielded
cable
with
stereo
1/4*
phone
plugs.
35.
CHORUS
FOOTSWITCH:
A
single
footswitch
can
be
plugged
in
here
to
give
you
remote
control
for
the
Chorus
ON/OFF
for
the
unit.
Connecting
a
footswitch
here
disables
the
front
panel
switch.
36,
CHANNELTUBE
FOOTSWITCH:
A
dual
footswitch
can
be
plugged
in
here
to
give
you
remote
control
for
the
selection
of
the
Lead/Rnythm
channels
AND
the
Tube/Sold
State
preamp
sections.
When
connected,
the
footswitch
overrides
the
front
panel
switches
for
these
functions.
NOTE:
This
is
a
STEREO
114"
jack:
“tip
controls
the
channel
sselecticn,
“ing”
controls
the
preamp
section,
"sleeve"
is
ground
for
both.
Use
only
a
stereo-plug
equpped
foctewilch
(such
as
the
Crate
FS-60),
or
a
three-way
footswitch
(such
as
the
Crate
FS-80)
to
contra
Chorus
as
well
-
see
#35.

©
CRATE”
c1.200
series
quadraarive
amplifier
IF
YOU
HAVE
A
DSP
MODI
2
37.
LEAD
LEVEL:
Adust
the
amount
of
doita
sound
processing
eflect
for
tre
Lead
Channel
with
this
contiol:
in
the
llet
postion
he
output
sig-
nal
is
"dry"
(no
reverb
or
elect);
rotating
the
contiol
to
the
right
increases.
the
amount
o
effect
30.
RHYTHM
LEVEL:
Adjust
the
amount
of
digtal
sound
processing
et.
fect
for
the
Rhythm
Channel
with
inis
control:
in
the
ulat
positon
the
output
signal
is
"dry"
(no
reverb
or
effect);
rotating
the
contiol
to
the
right
Increases
the
amount
or
ontact
DSP
MODE
SECTION
39.
MODE
KNOB:
Select
the
type
of
digital
sound
processing
efect
with
this
contel
Each
charnel,
praamp
ard
chorus
combination
wil
“reme.
mber”
its
DSP
seting,
allowing
you
to
preset
afacts
for
sight
diferent
sounds,
For
a
complete
listing
of
the
different
effecis
and
their
corre-
‘sponding
settings,
see
"Using
the
Mode
Control"
on
this
page.
40.
MODE
LED
DISPLAY:
This
display
is
a
visual
indicator
of
which
digi-
sound
processing
setting
you
have
chosen
for
the
current
chan
nelpreamplehorus
combination
you
are
in.
This
will
change
when
you
swith
between
channels
and
preamps
and
chorus
ON/OFF,
depending
which
mode
yeu
have
set
for
he
configuration.
ABOUT
THE
DIGITAL
SOUND
PROCESSOR,
‘The
Digital
Sound
Processor's
32-postion
Mode
contol
alows
you
to
instantly
access
the
exact
type
of
effect
you
want
-
trom
classic
revorbora-
tion
to
radica
"backwards"
sounds
-
for
any
ofthe
channel,
preamp
or
cho-
rus
sotings.
Uso
the
tabla
on
this
page
to
familarizo
yourself
win
the
locals
ofthe
many
een!
sound
elects
posse
rom
your
GT-200
wan
Osi
‘The
setting
of
the
Mode
centro!
wil
determine
the
type
cf
effect
for
Whichever
channelipreampichorus
combination
the
amp
is
set
10
at
the
time
you
adjust
the
Made
control.
Once
set,
the
GT-200
DSP's
nonvolatile
memory
retains
the
seting
unti
you
reset
it
USING
THE
MODE
CONTROL
Plug
in
your
guitar
and
tum
on
the
amplifier.
Set
Channel
to
rythm,
Tube/Sold
Slate
1o
Tube.
Now
sal
the
Mods
contro
to
"12°
(medium
gated
reverb),
Strka
a
chord
on
your
guitar
and
isten
tothe
sound
ofthe
affect
Press
n
the
Channel
switch
to
choose
the
Lead
Channel,
then
sat Ihe
"Mode
contralto
26"
(largo
hard
surface
echo).
Strike
a
chord
and
listen
le
the
results.
Now
switch
back
to
the
Rhythm
Channel
and
strike
a
chord
even
though
you
haven't
changed
the
setting
of
the
Mode
control,
the
am-
Pier
"remembered"
that
you
had
programmed
in
seting
"12"
and
kept
the
rect
as
you
lom
t
“There's
more:
When
a
Chorus
footswitch
is
used,
you
can
program
sec
oi
the
four
channelpreamp
combinations
with
wo
Mode
setungs.
I
Yeu
vant
lo
contol
Digtal
Soun
Processing
ONIOFF
wi
ne
ost
ple,
set
he
Mode
lo
"O"
(bypass),
hit
the
footswitch
and
set
Mode
19°5°
(are
brighi
hal)
Now
you
have
tne
abi
1o
switch
ne
DSP
on
and
Of
withthe
footswitch.
With
the
footawitch
you
have
a
choice
of
two
DSP
Settings
for
sach
of
the
four
channelpreamp
combinations,
or
the
mos!
Moxy
and
vereatity
possibio!
TABLE
OF
SETTINGS
‘The
table
below
list
each
ofthe
32
settings
ofthe
GT-200DSP's
Made
control,
along
with
bret
explanation
of
each
effect.
a
mi
TE
DESSRPTON
[sual
Room,
BRIGHT
SMALL
REVERE
E
x
E
emir
comi
rin
oon.
7
|
SMALL ROOM.
ARK
SMALL
REVERS
‘EXE
capes
con
wih
up
1o
bu
pepe
|
SMALL
HALL,
ORGHT
SMALL
REVERB
120.240
Rear
Hal
wih
weng
os,
ard
wal
4
|
sunu
HAL,
OMAK
SMALL
VERO
20
x40
copete
Rohasma
Hal
wih
draped
malis
ard
pio
30
people
anar
oma
—
anos
REVENO
190.109
ergy
nes
ati
2
ocara
e
[tange
raut.
DU
TARGE
REVERE
3072100
Peter!
Hah
wah
v
to
SO
ends
and
com
7
[AVERAGE
CLUE,
BIGHT
TARGE
REVERS
500
casei
emote,
noo
oo,
ahnen
sound
ch.
|
AVERAGE
uo,
oane
URGE
REVERS
500
aane
eb
wood
for,
sled
proie
|
|
CONCERT
HALL,
BRIGHT
LARGE
REVERE
99
sea
Concer
al,
hd
bak
wal
eron
send
reck-
cr
TARGE
REVERO
40,00
soat
round
tad,
aĥenoon
ound
check.
one
hunde
rw
and
VIPs oniy
12
GATED
REVERE,
MEDUN
SPECIAL
REVERE
|
Stud
Elea
-
Engneer
cis
o
revera
shy
ae
sach
ae.
(220m
Guo
49
|
GATED
EVER
LONO,
SPEGUL
AEVERO
—
|
Sto
Eea
ngasor
ets
nte
mno.
an
cus
t
ofi
(360e
Gae
ve]
PLATE
REvER®
SPECUL
AEVERO
|
Sudi
Een
Series
Studo
Sine
Pate
Povo
16
|
SLAPBACK,
SHORT
DELAY
“1289
delay
plus
smal
reverb.
Elvis”
worte
17
|
SLAPOACE.
MEDUN
DELAY
soma
delay
plu
a
ever.
Rocks
special
16
|
SIAPDACE,
LONO.
"ELY
So
dea
ny
630
tal
moa
un
49
|
SHORT
MODERATE
SURFACE
ECHO
es
delay
min
142%
regenera
&
smal
re
21
|
SNOPTIMEDIU
MODERATE
SURFACE
EN
200m
aly
win
21.8%
mgenenten
&
srat
revert
22]
MEDIUM
SOFT
SURFACE
EE
So
ely
wih
125%
genton
23
|
meom
nano
SURFACE:
toro.
Sir
ely
win
26.5%
genton.
24]
MEDIUM
GLASS
SURFACE
tcro
So
ely
win
4.7%
grenon.
26
|
LARGE
MODERATE
SURFACE
HO
aasma
ely
win
03%
gnomon,
27
[LARGE
FARO
SURFACE
En
Aro
delay
wih
30.2%
ngenenten
Kamal
even
28
|
erore
DELAY
SPECA
EFFECT
|
sona
delay
mim
ever
9%
regenera
29
|
morenen
SPECW
EFFECT
Eee
[ewan
SPECIAL
EFFECT
|
"Batwords
maso
elect
une
i,
number
ane.
7
==:

©
CRATE?
c1.200
series
Quadradrive
Amplifier
SOME
SUGGESTED
SETTINGS
y
LEAD
CHANNEL
RHYTHM
CHANNEL:
SOLID
STATE
LEAD
SPARKLING
CLEAN
Gee
AAA
(LEAD
ERANNTIO
@PY
Hw
CHANNED
LEAD
CHANNEL:
RHYTHM
CHANNEL:
SOLID
STATE
CRUNCH
FUNKY
CLEAN
LEAD
CHANNEL:
RHYTHM
CHANNEL:
WARM
TUBE
CRUNCH
WARM
TUBE
NATIO
EHRVIRU
ERAN
LEAD
CHANNEL:
RHYTHM
CHANNEL:
HOT
TUBE
LEAD
BLUESY
DIRT

CRATE’
GT-200
Series
Quadradrive
Amplifier
GT-200
SERIES
TECHNICAL
SPECIFICATIONS
L
Z
Output
Power
Rating
80
watts/channel
RMS
@
5%
THO
-
8
ohm
load,
120VAC
100
watts/channel
RMS
@
5%
THD
-
4
ohm
load,
120VAC
Inpu
Impedance
TM
ohm
Maximum
Signal
Accepted
3V,
peak-to-peak
‘Signal
To
Noise
Ratio
Lead
Channel
Solid
State
6108
Tube
5748
Rhythm
Channel
Solid
State
8148
Tube
7248
Gan
8848
@
IKHz,
tones
@
©”
Tone
Control
Range
Lead
Channel
Low
2448
@
10047
Mid
10dB
@
1kriz
High
20d8
@
SkHZ
Rhythm
Channel
Low
2948
@
10047
Mid
14dB
@
800Hz
High
3048
@
10KHz
Tina
Out
Level
TV
AMS
typical
or
full
power
output,
4V
AMS
max.
Driver
Tube
Types
T2AX7
(1).
12AU7
(9)
Output
Device
Type
MOSFETs
Intemal
Speakers
(GT-200
only)
12
Crate
Custom-L,
80
watis,
8
ohms,
34
oz.
magnet,
1.75:
voice
col
Power
Requirements
100/1Z0VAC,
60Hz,
6
amps
max.
220/240VAC,
50Hz,
3
amps
max.
Size
and
Weight
GT-200
GT-200H
110,
57.25
bs.
(GT-200
DSP
-
58
bs.)
0.59,
38
lbs,
(G1-200H
DSP
-
38.75
lbs.)
Tho
GT-200
ie
covered
with
a
durable
black
Tolox
material;
to
ko
tho
cabinet
in
top
condition,
wipe
it
clean
with
a
damp
lint-free
cloth
to
remove
dirt
and
road
film.
The
GT-200H
is
covered
in
tough-as-nails
Ozite;
to
clean,
brush
off
with
a
furniture
brush.
Never
spray
cleaning
agents
directly
onto
the
cabinet,
and
stay
away
from
abrasive
cleanser
which
could
damage
the
tinish.
Crate
strives
continually
to
develop
new
products,
as
well
as
find
ways
to
improve
existing
ones.
For
this
reason,
the
specifications
and
information
in
this
Crate
manual
are
subject
to
change
without
notice.
A
TAA
“TA
AA
THS
EQUIPMENT
HAS
BEEN
DESONED
ANO
ENGINEERED
TO
PROVIDE
YEARS
OF
SAFE
ANO
RELIABLE
OPERATION.
IN
ORDER
TO
PROLONG
THE
LIFE
OF
THE
WARNING:
TO
REDUCE
THE
RISKOF
ELECTRIC
SHOCK:
(2)
DO
NOT
DEFEAT
OR
REMOVE
THE
GROUNOPIN
OF
THE
POWER
CORO:
CONNECT
ONLY
TO
A
PROPERLY
GROUNDED
AC
POWER
OUTLET.
CAUTION
TO
REDUCE
THE
ISK
OF
FIRE
OR
ELECTRIC
SHOCK,
DO
NOT
EXPOSE
THS
EQUIPMENT
TO
RAIN
OR
MOISTURE
CAUTION:
NO
USER
SERVICEABLE
PARTS
INSOE.
REFER
SERVICING
TO
QUALIFIED
SERVICE
PERSONNEL
CAUTION:
OUR
AMPUFIERS
ARE
CAPABLE
OF
PRODUCING
HGH
SOUND
PRESSURE
LEVELS.
CONTINUED
EXPOSURE
TO
HIGH
SOUND
PRESSURE
LEVELS
CAN
GAUSE
PERMANENT
HEARING
MFAIRMENT
OF
LOSS
USER
CAUTION
IS
ADISED
AND EAR
PROTECTION
IS
RECOMAENOED
IF
UNTI§OPERATEDAT
NON
EXPLANATION
OF
en
en
ee
GRAPIRCALEYNEOLE:
poemoj
onon
NDEN
PEDO
NOSE
MIGO
CRAM”
Table of contents
Other Crate Amplifier manuals

Crate
Crate B-10 User manual

Crate
Crate RED VOODOO BV-120HR User manual

Crate
Crate G130C XL User manual

Crate
Crate G-200C User manual

Crate
Crate B-150 User manual

Crate
Crate GS.150 User manual

Crate
Crate B160XL User manual
Crate
Crate BX-15 User manual
Crate
Crate TD-50C User manual

Crate
Crate G.212 User manual