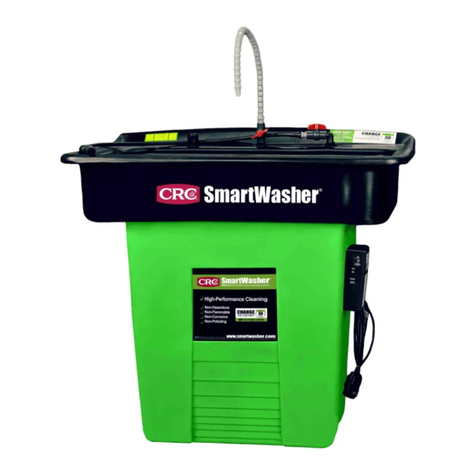
CRC SmartWasher SW-28XE Operator's manual

page 1 of 720
BIOREMEDIATING parts washing system
SmartWasher
®
USER INSTRUCTION MANUAL
ORIGINAL INSTRUCTIONS
..................... P. 1
.............P.81
.............P.41
...........P.201
...........P.121
...........P.281
...........P.241
...........P.161
...........P.521
...........P.361
...........P.481
...........P.601
...........P.561
...........P.681
SL
...........P.641
...........P.441
...........P.321
...........P.401
SmartWasher®
Models:
Mobile Parts/Brake Washer
SW-23 -RGB
Signature Parts Washer
SW-25 -RGB
Mobile Heavyweight Parts
Washer SW-37 -RGB
Supersink Parts Washer
SW-28 -RGB
PLEASE READ THIS INSTRUCTION MANUAL CAREFULLY AND
COMPLETELY TO ENSURE THAT YOUR NEW SMARTWASHER®
WILL OPERATE AT ITS MAXIMUM EFFECTIVENESS
C.R.C INDUSTRIES EUROPE BV
Touwslagerstraat 1, B-9240 Zele

page 2 of 720
BIOREMEDIATING parts washing system
SmartWasher
®
USER INSTRUCTION MANUAL
ORIGINAL INSTRUCTIONS
1. General
Before assembly, installation and use of this equipment, please read this user instruction manual.
Store the user instructions for later use or subsequent owners.
In case of transport damage, inform your SmartWasher®distributor or CRC Industries Europe
immediately.
2. Table of Contents
Chapter 1 General page 2 / 720
Chapter 2 Table of contents page 2 / 720
Chapter 3 Introduction page 3 / 720
Chapter 4 Description and operation page 4 / 720
Chapter 5 Safety instructions page 5 / 720
Chapter 6 Transport and storage page 7 / 720
Chapter 7 Installation and setup page 9 / 720
7.1 Mechanical installation and setup page 9 / 720
SW 23 page 9 / 720
SW 25 page 13 / 720
SW 28 page 17 / 720
SW 37 page 21 / 720
7.2 Electrical installation and setup page 25 / 720
Chapter 8 Use and application page 26 / 720
Chapter 9 Operation page 27 / 720
Chapter 10 Maintenance & repair page 29 / 720
Chapter 11 Troubleshooting page 31 / 720
Chapter 12 Environmental aspects page 33 / 720
Chapter 13 Frequently Asked Questions (FAQ) page 34 / 720
Chapter 14 Disclaimer and Warranty Page 38 / 720
Chapter 15 Declaration of Conformity Page 39 / 720
Chapter 16 Attachments Page 40 / 720

page 3 of 720
BIOREMEDIATING parts washing system
SmartWasher
®
USER INSTRUCTION MANUAL
ORIGINAL INSTRUCTIONS
3. Introduction
CONGRATULATIONS !!
You have purchased the state-of-the-art SmartWasher
®
.
SmartWasher Parts Washing Systems combine a power-
ful cleaning solution with the bioremediation power of
specially-bred Ozzy
®
microbe. Once a SmartWasher
®
has
been properly installed and activated, it is literally ALIVE.
Your SmartWasher®
IS safe and easy to use
USES the latest in bioremediation technology to elim-
inate hazardous liquid waste
HELPS deregulate and detoxify your workplace and
reduce government paperwork
SAVES you money
The SmartWasher®is designed to safely and eectively
remove oil and grease from automotive and industrial
parts. It replaces hazardous solvent part washers with
aqueous-based degreasing solutions called OzzyJuice®
and microbe impregnated particulate traps called Ozzy-
MatsTM. The microbes impregnated into the OzzyMat
come to life in the OzzyJuice
®
and break down, or “eat”
the grease, oil and other contaminants in the solution
leaving by-products of harmless carbon dioxide and water
- leaving nothing hazardous to haul away. OzzyJuice®is
an award winning, pH neutral, non-caustic, non-flamma-
ble and biodegradable degreasing solution. Working in
wconcert with our microbes (Ozzy®) these superior
products help eliminate or greatly reduce your need to
dispose of hazardous waste, giving you all the perfor-
mance you are used to in a typical solvent parts washer
without all the hazard and hassles. You have made a
great decision.

page 4 of 720
BIOREMEDIATING parts washing system
SmartWasher
®
USER INSTRUCTION MANUAL
ORIGINAL INSTRUCTIONS
4. Description and operation
4.1. Tecnical data
SW-23 SW-25 SW-28 SW-37
Electrical connection
Type of current V/~/Hz 220 V/AC – 50/60 Hz
Connected load pump W 45 45 45 45
Electrical fuses A 1 1 1 1
Performance data
Heating output kW 1.0
Working pressure Bar 0.3 0.3 0.3 0.3
Flow rate pump Litre/min 18 18 18 18
Adjustable thermostat °C 40 – 46 40 – 46 40 – 46 40 – 46
Container capacity Litre 60 95 95 95
Load capacity Kg 180 kg 225 kg 225 kg 450 kg
Noise emission (IEC 60704-1)
Sound pressure level dB(A) < 60
Device vibrations (ISO5349)
Washing brush m/s² < 0.62
Sizes and weights
Overall dimensions cm 109x69x107 90x67x102 119x97x107 122x89x114
Inside sink dimensions cm 69x58x20 69x44x20 104x58x20 84x69x20
Empty weight Kg 32 37 42 70

page 5 of 720
BIOREMEDIATING parts washing system
SmartWasher
®
USER INSTRUCTION MANUAL
ORIGINAL INSTRUCTIONS
5. Safety instructions
a.
Use SmartWasher
®
only as described in this manual.
Use only attachments, parts and tools recommended
by the manufacturer.
b.
The equipment may only be installed, used, maintained
and repaired by adult (> 18 years), professional, trained
and/or qualified personnel
c.
The equipment must be used indoor, protected
against deleterious environmental conditions (e.g.
extreme low/high temperatures, rain, snow, wind,
lightning, …)
d. Suciently lighting and ventilation must be foreseen
by the user during use, maintenance and repair.
e.
The parts to be cleaned must have an appropriate
shape, dimension and weight in relation to the equip-
ment. Respect therefore the maximum load capacity
of the parts to be cleaned, as indicated in part 4 of
this user instruction manual.
f.
The SmartWasher®may not be used in explosive at-
mospheres (ATEX environments), confined spaces, ...
g.
The equipment may only be maintained and repaired
after the equipment has been unplugged from the
main power supply and after the equipment is cooled
down to ambient temperatures. Care must be taken
as burns can occur from touching hot parts.
h.
The SmartWasher
®
may only be used for cleaning in a
closed position, with all quick disconnect pins in firmly
place. (see chapter 7.1 of this user instruction manual).
i. The overfill protection on the SmartWasher®may
never be blocked. The overfill protection may not be
connected to the sewage system of your company.
j. Care must be taken to the ergonomic position of
the operator in relation with the dimensions of the
equipment during use.
k. Care must be taken to the environment where the
equipment is installed. It must be kept free from
surrounding obstacles and greasy underground as
this may lead to slipping, tripping or falling.
l. Do not operate SmartWasher®with damaged elec-
trical cable or if the equipment has been dropped
or damaged until it has been examined by a qualified
service person.
m.
Tools or parts, showing damage or wear, must be
instantly replaced or repaired before further use.
n. Do not let an electrical cable hang over the edge of
the table, bench, or counter or come in contact with
hot manifolds or moving fan blades.
o. If an extension electrical cable is necessary, a cable
with a current rating equal to or more than that of

page 6 of 720
BIOREMEDIATING parts washing system
SmartWasher
®
USER INSTRUCTION MANUAL
ORIGINAL INSTRUCTIONS
p.
the equipment should be used. Electrical cables rated
for current lower than the equipment may overheat.
Care should be taken to arrange the cable so that it
will not be tripped over or pulled. (Must be rated a
minimum of 220 VAC))
q. Unplug the equipment from electrical outlet when
not in use for an extended period of time. Never use
the electrical cable to pull the plug from the outlet.
Grasp plug and pull to disconnect.
r.
To reduce the risk of fire, do not operate equipment
in the vicinity of open containers of flammable liquids
(gasoline).
s.
Adequate ventilation should be provided when work-
ing on operating internal combustion engines.
t.
Keep hair, loose clothing, fingers, and all parts of
body away from moving parts.
u. To reduce the risk of electric shock, do not use on
wet surfaces or expose to water.
v. The mobile models SW23 and SW37: do not move
them with high velocities (human walking speed only).
Fix the swivel wheels in blocked position prior to use.
During movement of these models of SmartWasher
®
,
be aware of obstacles, slippery floors, … as these may
cause personal harm by falling, tripping, slipping, …
These equipment can only be moved at walking speed.
w. Personal Safety Equipment
-
Always wear safety glasses to avoid eye contact
with the degreasing liquid
- Always wear safety shoes to avoid injury due to
falling objects you are busy cleaning
- It is good practice to wear gloves whenever using
industrial cleaning fluids.
x.
The equipment may ONLY BE USED for the removal
of oil and grease from automotive and industrial parts
y. The equipment may NOT BE USED for cleaning hu-
man parts (e.g. hands, …), animals, clothing, parts
which come in contact with food, painting tools, parts
containing hazardous substances (e.g. asbestos, cad-
mium, …), …
z.
For the degreasing fluids OzzyJuice
®
, consult the Safety
Data Sheet before use on the internet website of CRC
Industries Europe. If you do not have access to the
website, a paper copy can be obtained through your
local CRC distributor.

page 7 of 720
BIOREMEDIATING parts washing system
SmartWasher
®
USER INSTRUCTION MANUAL
ORIGINAL INSTRUCTIONS
6. Transport and storage
6.1. Transport
• Switch of the equipment and unplug from the main
power source and avoid damage to the power cable
during transport by putting it at a safe location
• Empty and clean the equipment
•
DO NOT move the equipment when there are
cleaned parts or parts to be cleaned on the equipment
•
During movement of the equipment in the workshop,
be aware of surrounding obstacles and the proximity
of co-workers
• For internal transport:
• If not fitted with wheels : put the equipment on a
stable underground (e.g. pallet)
• If fitted with wheels : make sure the wheels are in a
good status before moving
•
For external transport: Always put the equipment
on a stable underground (e.g. pallet) and fix it
well. Appropriate packaging is required to avoid
transportation damages and to protect against
deleterious environmental conditions
•
Use appropriate equipment for lifting (check the
weight of the equipment and the lifting devices),
handling and moving the equipment
•
During transport in vehicles, secure the equipment in
an appropriate manner to avoid slipping and tipping.
6.2. Storage
• Switch of the equipment and unplug from the main
power source
• The equipment must be emptied and cleaned.
•
The equipment must be stored in a dry and clean
environment
•
Protect the equipment for adverse environmental
conditions

page 8 of 720
BIOREMEDIATING parts washing system
SmartWasher
®
USER INSTRUCTION MANUAL
ORIGINAL INSTRUCTIONS
PARTS WASHER OPERATION BRAKE WASHER OPERATION
1. The pump switch is attached to a ten minute timer.
Turning the switch “ON” (upward position) will start
fluid flowing for ten minutes. To restart the flow, turn
the switch “OFF” then “ON” again and the flow will
restart for another ten minutes.
2.
Adjust the valve at the base of the nozzle to control
the flow of the fluid through the nozzle. The valve
at the base of the brush hose controls the flow of
fluid through the brush. Both outlets can be operated
independently or together.
1.
Unplug the SmartWasher
®
from the electrical outlet,
roll up the power cable and secure it with the strap
on the handle.
2. Roll the SmartWasher®to the vehicle and position
it under the brake you desire to clean.
3. Plug in the power cable and begin cleaning.
4.
When finished, unplug the power cable and secure it
with the strap on the handle. Roll the SmartWasher®
back to its original spot and plug the power cable
into the appropriate outlet.

page 9 of 720
BIOREMEDIATING parts washing system
SmartWasher
®
USER INSTRUCTION MANUAL
ORIGINAL INSTRUCTIONS
7. Installation and setup
7.1. Mechanical installation and
setup
7.1.1. Model SW-23
1.
Remove the OzzyMat
®
from its package, unfold it and
lay it on the mat support grid located in the lowest
level in the sink. Make sure to lay the OzzyMat®
white side up.
2. Place the false bottom in position in the sink.
3. Form the flexible nozzle to its desired shape and be
sure that the parts brush is inside the sink
4. DO NOT PLUG UNIT IN BEFORE ADDING
OZZY JUICE®
5.
At start up, carefully add ± 60 liter of OzzyJuice®
to the SmartWasher by slowly pouring the solution
directly into the sink.
6. Plug the unit into a 220 VAC GFCI electrical outlet
7.
The SmartWasher
®
will take approximately four hours
to heat up to its selected optimal temperature of
40°C (± 1°) or 46°C (± 1°). This temperature will be
maintained as long as the SmartWasher
®
is plugged in
and full of OzzyJuice®. If the “Add Fluid” light is on,
the heater automatically shuts o.
PARTS WASHER SETUP SW-23
33076
Mat support grid
32950
Multi-Layer OzzyMat FL-4
33046
False Bottom for SW-23
32981
Plastic Basket

page 10 of 720
BIOREMEDIATING parts washing system
SmartWasher
®
USER INSTRUCTION MANUAL
ORIGINAL INSTRUCTIONS
SINK DIAGRAM SW-23
32981
Plastic Basket
33046
False Bottom for SW-23
32950
Multi-Layer OzzyMat FL-4
33076
Mat support grid
33068
Angled Brush Assembly
(includes: brush, instagrip tubing
and hose clamps)
32678-AA
Angled Brush
32982
Nozzle Kit
33057
1/2” NPT Connector - Grey
33090
1/2” ball valve PVC threaded
Grey body, blue handle
33087
Velcro Strap
(for power cord)
33053
Sink Fitting Kit for SW-23 v.2
(includes : quick disconnect plug and valve)

page 11 of 720
BIOREMEDIATING parts washing system
SmartWasher
®
USER INSTRUCTION MANUAL
ORIGINAL INSTRUCTIONS
POWER
ADD FLUID
ENERGIA
SECTEUR
AÑADIR FLUIDO
AJOUTER FLUIDE
Additional Parts for
Model SW-23:
32993-CF Heater Fuse; 6,3 Amp
32993-CH Pump Fuse; 1 Amp
33072 Bulkhead Fitting
BASE DIAGRAM SW-23
32987-AA
Quick Disconnect Plug
33086
Quick Release Pins
32987-AB
Quick Disconnect Base
33049
Overflow Assembly for Base
32985
Heater for SW-23
33051-AA
Heater Box Assembly
(includes: box, heater,
and probe)
33096
Dolly Kit
(includes: dolly base,
wheels, casters and
hold-down clips)
33080
4” Caster
NO BRAKE
33079
4” Caster
WITH BRAKE
33081
8" Wheel
33078
Dolly Clips - Set of 4
32986
Probe
33065
Pump Kit
(includes: pump,
liquid tight tubing,
quick connects
& tubing for plumbing)
33051-AD
5-LED Control
Box with Fuse
(includes: switch,
boot, and fuse
33095
Control Box Lid
33073
Toggle Switch
33074
Boot Seal
33082-AA
Cotter Pin
for Wheel

page 12 of 720
BIOREMEDIATING parts washing system
SmartWasher
®
USER INSTRUCTION MANUAL
ORIGINAL INSTRUCTIONS
PARTS WASHER OPERATION
1. The pump switch is attached to a ten minute timer. Turning the switch “ON” (upward position) will start
fluid flowing for ten minutes. To restart the flow, turn the switch “OFF” then “ON” again and the flow will
restart for another ten minutes.
2. Adjust the valve at the base of the nozzle to control the flow of the fluid through the nozzle. The valve at
the base of the brush hose controls the flow of fluid through the brush. Both outlets can be operated inde-
pendently or together.

page 13 of 720
BIOREMEDIATING parts washing system
SmartWasher
®
USER INSTRUCTION MANUAL
ORIGINAL INSTRUCTIONS
7.1.2. Model SW-25
1.
Remove the OzzyMat
®
from its package, unfold it and
lay it on the mat support grid located in the lowest
level in the sink. Make sure to lay the OzzyMat®
white side up.
2. Place the false bottom in position in the sink.
3. Form the flexible nozzle to its desired shape and be
sure that the parts brush is inside the sink
4. DO NOT PLUG UNIT IN BEFORE ADDING
OZZY JUICE®
5. At start up, carefully add ± 95 liter of OzzyJuice®to
the SmartWasher
®
by slowly pouring the solution
directly into the sink.
6. Plug the unit into a 220 VAC GFCI electrical outlet
7.
The SmartWasher
®
will take approximately four hours
to heat up to its selected optimal temperature of
40°C (± 1°) or 46°C (± 1°). This temperature will be
maintained as long as the SmartWasher®is plugged
in and full of OzzyJuice®. (If the Add Fluid Light is on,
the heater automatically shuts o)
33075
Drain Basket 3 1/2”
Stainless steel
32950
Multi-Layer OzzyMat
FL-4
33052
False Bottom With
Drain For Sink
33076
Mat Support Grid

page 14 of 720
BIOREMEDIATING parts washing system
SmartWasher
®
USER INSTRUCTION MANUAL
ORIGINAL INSTRUCTIONS
SINK DIAGRAM SW-25
33052
False Bottom With Drain For Sink
32950
Multi-Layer OzzyMat FL-4
33076
Mat Support Grid
33075
Drain Basket 3 1/2”
Stainless steel
32982
Nozzle Kit
33057
1/2” NPT
Connector - Grey
33066
Brush Assembly, with 2-foothose
(includes: brush, hase & valve)
or
32678-AB
flow-through brush alone
33054
Sink Plumbing Kit
Includes: tubing, hose, clamps, tee
connectors, female hose barb,
& maile hose barb
33090
1/2” ball valve PVC
threaded - grey body,
blue handle
33090
1/2” Ball Valve PVC
threaded
grey body, blue handle
33094
90° Street Elbow
33093
Nipple 1/2"x2"

page 15 of 720
BIOREMEDIATING parts washing system
SmartWasher
®
USER INSTRUCTION MANUAL
ORIGINAL INSTRUCTIONS
POWER
ADD FLUID
ENERGIA
SECTEUR
AÑADIR FLUIDO
AJOUTER FLUIDE
BASE DIAGRAM SW-25
Additional Parts for
Model SW-25:
33061
Heater Box Assembly
(includes: heater, probe,
box, fittings)
32993-CF Heater Fuse,
6,3 Amp
32993-CH Pump Fuse,
1 Amp
33072
Bulkhead Fitting
33049
Overflow Assembly
for Base
33056
Heating Element
32986
Probe
33095
Control Box Lid
33074
Boot Seal
33073
Toggle Switch
33059-AA
5-LED Control Box
with Fuse
(includes: switch,
boot & &fuse)
33064
PUMP ASSEMBLY 220V
(includes: pump, liquid tight
tubing, quick connects &
tubing for plumbing

page 16 of 720
BIOREMEDIATING parts washing system
SmartWasher
®
USER INSTRUCTION MANUAL
ORIGINAL INSTRUCTIONS
SW-28
PARTS WASHER OPERATION
1. The pump switch is attached to a ten minute timer. Turning the switch “ON” (upward position) will start
fluid flowing for ten minutes. To restart the flow, turn the switch “OFF” then “ON” again and the flow will
restart for another ten minutes.
2. Adjust the valve at the base of the nozzle to control the flow of the fluid through the nozzle. The valve
at the base of the brush hose controls the flow of fluid through the brush. Both outlets can be operated
independently or together.

page 17 of 720
BIOREMEDIATING parts washing system
SmartWasher
®
USER INSTRUCTION MANUAL
ORIGINAL INSTRUCTIONS
7.1.3. Model SW-28
1. Remove the OzzyMat®from its package, unfold it and
lay it on the mat support grid located in the lowest
level in the sink. Make sure to lay the OzzyMat®white
side up.
2. Place the false bottom in position in the sink.
3. Form the flexible nozzle to its desired shape and be
sure that the parts brush is inside the sink
4. DO NOT PLUG UNIT IN BEFORE ADDING
OZZY JUICE®
5.
At start up, carefully add ± 95 liter of OzzyJuice
®
to the SmartWasher®by slowly pouring the solution
directly into the sink.
6. Plug the unit into a 220 VAC GFCI electrical outlet
7.
The SmartWasher®will take approximately four hours
to heat up to its selected optimal temperature of
40°C (± 1°) or 46°C (± 1°). This temperature will be
maintained as long as the SmartWasher®is plugged
in and full of OzzyJuice®. If the “Add Fluid” light is on,
the heater automatically shuts o.
33075
Drain Basket 3 1/2”
Stainless steel
33062
False Bottom With
Drain For Sink
33076
Mat Support Grid
32950
Multi-Layer
OzzyMat FL-4

page 18 of 720
BIOREMEDIATING parts washing system
SmartWasher
®
USER INSTRUCTION MANUAL
ORIGINAL INSTRUCTIONS
SINK DIAGRAM SW-28
33062
False Bottom With Drain For Sink
33075
Drain Basket 3
1/2”
Stainless steel
32950
Multi-Layer OzzyMat FL-4
33076
Mat Support Grid
33070
SuperSink Nozzle Kit
33090
1/2” Ball Valve PVC
threaded - grey body, blue handle
33094
90° Street Elbow
33093
Nipple1/2"x 2"
33088
Nozzle Clamp
33057
1/2” NPT Connector - Grey
33090
1/2” ball valve PVC
threaded
grey body, blue handle
33067-AA
4’ Brush Assembly
(includes: brush,
hose & valve)
OPTIONAL ITEM:
33071
2nd Brush Station kit
(includes: 4’Brush Assembly,
1/2” Ball Valve & Connector,
90o Street Elbow
33055
Sink Plumbing Kit
includes: tubing, hose, clamps,
tee connectors, female hose barb,
& maile hose barb
2nd Work
Station
Connection
33091
1/2” Cap
33093
Nipple 1/2" x 2"

page 19 of 720
BIOREMEDIATING parts washing system
SmartWasher
®
USER INSTRUCTION MANUAL
ORIGINAL INSTRUCTIONS
POWER
ADD FLUID
ENERGIA
SECTEUR
AÑADIR FLUIDO
AJOUTER FLUIDE
BASE DIAGRAM SW-28
Additional Parts for
Model SW-28:
33067-AB
Heater Box Assembly
(includes: heater, probe,
box, fittings)
32993-CF
Heater Fuse, 6,3 Amp
32993-CH
Pump Fuse, 1 Amp
33072
Bulkhead Fitting
33064
Pump Assembly
(includes: pump, liquid
tight tubing, quick connec-
tors & tubing for plumbing)
33049
Overflow Assembly for
Base
33056
Heating Element
32986
Probe
33095
Control Box Lid
33074
Boot Seal
33073
Toggle Switch
33059-AA
5-LED Control Box
with Fuse
(includes: switch,
boot & fuse)
33064
PUMP ASSEMBLY 220V
(includes: pump, liquid
tight tubing, quick
connects
& tubing for plumbing
33086
Quick Release
Pins

page 20 of 720
BIOREMEDIATING parts washing system
SmartWasher
®
USER INSTRUCTION MANUAL
ORIGINAL INSTRUCTIONS
SW-37
PARTS WASHER OPERATION
1. The pump switch is attached to a ten minute timer. Turning the switch “ON” (upward position) will start
fluid flowing for ten minutes. To restart the flow, turn the switch “OFF” then “ON” again and the flow will
restart for another ten minutes.
2. Adjust the valve at the base of the nozzle to control the flow of the fluid through the nozzle. The valve
at the base of the brush hose controls the flow of fluid through the brush. Both outlets can be operated
independently or together.
This manual suits for next models
4
Table of contents
Languages:
Other CRC Washer manuals

CRC
CRC SmartWasher BenchtopPRO User manual
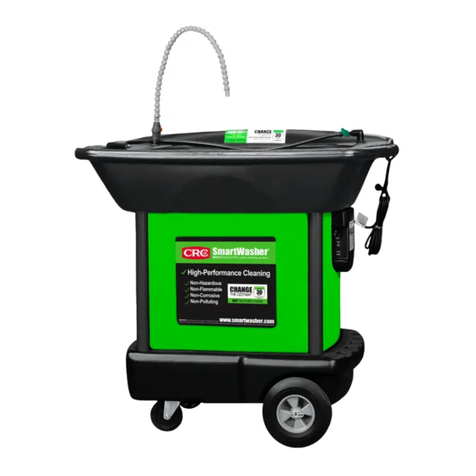
CRC
CRC Smartwasher SW-37 User manual
CRC
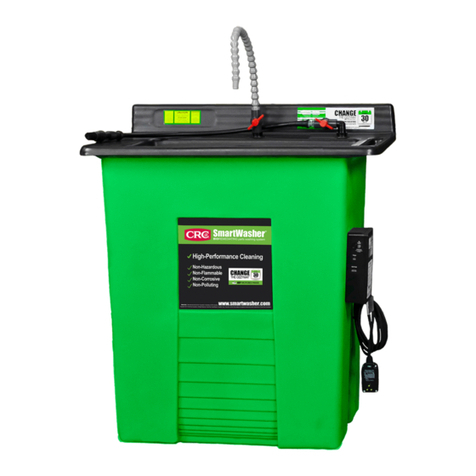
CRC SmartWasher SW-25 User manual
CRC
CRC Simply Go User manual
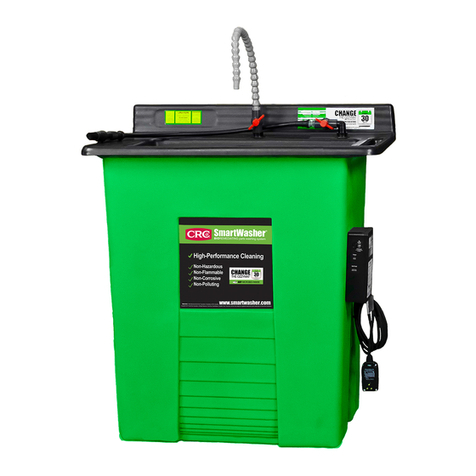
CRC
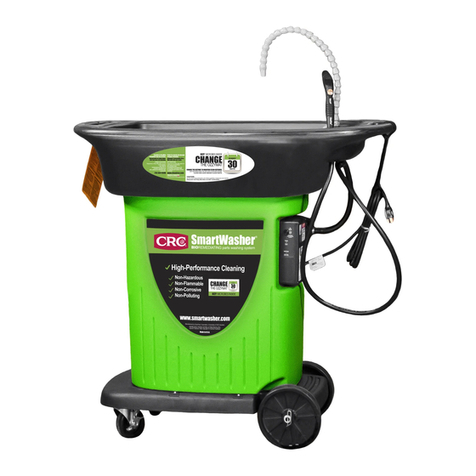
CRC SmartWasher SW-23-RGB Operator's manual
CRC
CRC SmartWasher SW-23 Operator's manual
CRC
CRC SmartWasher SW-28 User manual

CRC
CRC SnartWasher SW-23 User manual
CRC
CRC SmartWasher SW-23 User manual
