Creamsource CSV-REM User manual

Page 4 Page 1CSV-REM Creamsource Remote User Manual – 07 Jan 2022 Version 1.0
3. Operation Cont.
4. Compliance
5. Contact Us
3.7 Individual Mode – Control Units Independently
This mode allows individual control of multiple Creamsource fixtures with one remote.
The DMX address must be set to either 1 or 2 in each Creamsource to use this feature.
Multiple Creamsource fixtures may share the same DMX address if you want them to
be controlled together. Creamsource fixtures should be daisy chained together using
DMX cable.
Hold the MODE button to switch between NORMAL and INDIVIDUAL modes. When in
INDIVIDUAL mode, Mode LED 1 or 2 will begin to flash. Tap the MODE button to switch
between controlling the fixture on DMX address 1 or 2. Independent levels and colour
settings can be set using the wheel and adjusted as needed. Note it is not possible to
have CCT on one fixture and HSI on another fixture.
To return to NORMAL mode, hold the MODE button again until the Mode LED stops
flashing.
5.1 Support
Have any questions? Feel free to get in touch
https://creamsource.com/support
4.1 Compliance Notes
This device complies with Part 15 of the FCC Rules. Operation is subject to the
following two conditions: (1) This device may not cause harmful interference, and (2)
This device must accept any interference received, including interference that may
cause undesired operation.
3.8 Locking The Buttons And Control Wheel
Hold the Power button down for two seconds to lock the buttons and control wheel.
The Mode 1 LED will ‘ping’ to show that the unit is locked, and the ring display will
pulse. Hold the Power Button again to unlock. 1.1 Overview
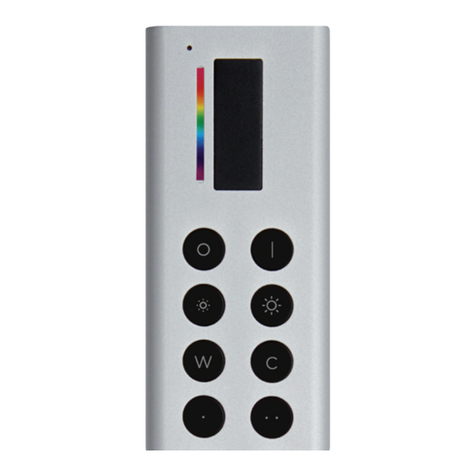
The Creamsource remote allows you to control one or more Creamsource fixtures with
a single controller. The 20 sunlight readable LEDs give accurate level indication, and
dedicated buttons allow the fixture to be turned on and o or flashed. If used with a
colour fixture the Green/Magenta and Hue/Saturation can also be adjusted.
The remote is plugged directly into the Creamsource Accessory port on either the
Micro, SpaceX, or Vortex fixtures. Note previous version of the remote (CS-REM) had a
dierent connector for direct connection to Doppio and Mini series fixtures.
To control more than one Creamsource, they can be daisy-chained together with DMX
cable between the DMX-IN and DMX-THRU ports.
1.2 Part Numbers
The table below lists part numbers for the Creamsource Remote.
Part Number Description
CSV-REM Creamsource Remote for Micro/SpaceX/Vortex Series
1. About the Creamsource Remote
Creamsource Remote
Quick Start Guide
Creamsource
2/49 Carrington Road Marrickville, NSW 2204 AUSTRALIA

Page 2 Page 3CSV-REM Creamsource Remote User Manual – 07 Jan 2022 Version 1.0
Power
TAP to turn light on and o. Press and HOLD to lock or unlock buttons
and wheel.
Mode
TAP to switch between CCT and HSI modes (colour fixtures only). Press
and HOLD to switch between normal and individual mode (see 3.7).
Colour Temp
HOLD and use wheel to adjust colour temperature or hue. TAP 3 times
and HOLD to adjust Green/Mag or Saturation (LEDs will flash).
Flash
TAP to flash the light momentarily.
Control Wheel
Use to adjust current
setting. Turn fast for rapid
changes, or slowly for
more precise adjustments.
2.1 Controls
The Creamsource Remote features easy to use controls.
2. Controls
1
1
2
3
4
5
2
3
4
5
3.1 Brightness, ON/OFF And Flash
The control wheel will control brightness by default, unless the COLOUR TEMP button
is held down. To turn the light on/o, press the Power button. The LED ring display
will dim when the light is o. To flash the light, press the FLASH button.
3.3 Colour Temperature (CCT Mode)
Hold the COLOUR TEMP button while adjusting the control wheel. The ring display will
change to show current CCT and setpoints are illuminated at 3200K and 5600K. The
adjustable range is from 2200K to 15000K. Not all fixtures can produce the full range.
3.4 Green/Magenta Adjustment (CCT Mode)
Tap the COLOUR TEMP button 3 times in quick succession, holding the button down
on the 3rd tap. The ring display will start to flash quickly. Adjust Green/Magenta using
the control wheel. Turn clockwise to add green, turn anticlockwise to add magenta.
The two centre LEDs will be illuminated to show neutral green/magenta oset.
3.5 HUE Adjustment (HSI Mode)
Hold the COLOUR TEMP button while adjusting the control wheel. The ring display will
change to show current Hue, and setpoint are illuminate for colour points RED,
YELLOW, GREEN, CYAN, BLUE, MAGENTA and RED. The adjustable range is from 0-360°.
Note this mode only works on colour fixtures.
3.6 Saturation Adjustments (HSI Mode)
Tap the COLOUR TEMP button 3 times in quick succession, holding the button down
on the 3rd tap. The ring display will start to flash quickly. Adjust saturation from
0-100% using the control wheel.
3.2 Switching Between CCT And HSI Modes
Tap the MODE button to switch between CCT and HSI modes. One of the two Mode
LEDs will illuminate, showing the mode selected:
1. CCT Mode. This gives control of Brightness, Colour Temperature and Green/
Magenta balance.
2. HSI Mode. This gives control of Brightness, Hue and Saturation.
Not all functionalities will be available on all Creamsource fixtures
3. Operation
