Creative XP GlassCondor PRO User manual


Table of Contents
Introduction
Product Overview
Power Supply
Changing the Modes
Download files to the PC
Functions
Tips & Warnings
Warranty
Compelte Hunter Kit
.................................................................................................4
..................................................................................6-7
...............................................................................................8
............................................................................9-11
.......................................................................12
...............................................................................................13-16
...................................................................................17-18
...............................................................................................19-20
.......................................................................22-30
TABLE OF CONTENTS
3

Introduction
Thank you for purchasing the Creative XP® GlassCondor Night Vision
Monocular PRO. This manual will help you optimize your viewing experience
by explaining how to utilize the binoculars’ controls and features, and how to
care for them. READ the instructions carefully before using your night vision
monocular.
The night vision monocular can be used in complete darkness, low light
situations, or daytime. You can use it for hunting, security, wildlife monitoring,
camping, hiking, boating, law enforcement, airsoft, etc.
Please read the user manual before using it. You can find YouTube tutorial
videos on our channel as well – CREATIVE XP Hunting.
We are an American family-owned business and you can contact us via
email (support@creative-xp), our website (www.creative-xp.com) or
phone (+1 646 450 6330). If you are not happy with the GlassCondor in any
way, please contact us and we will take care of it as soon as possible.
Also, you can watch our YouTube Tutorial Videos if you need additional
instructions on using the binoculars.
We are always happy to help!
4

THE AMERICAN WAY
OF ADVENTURE
3
1 2 5 8 9 10
4 6 7
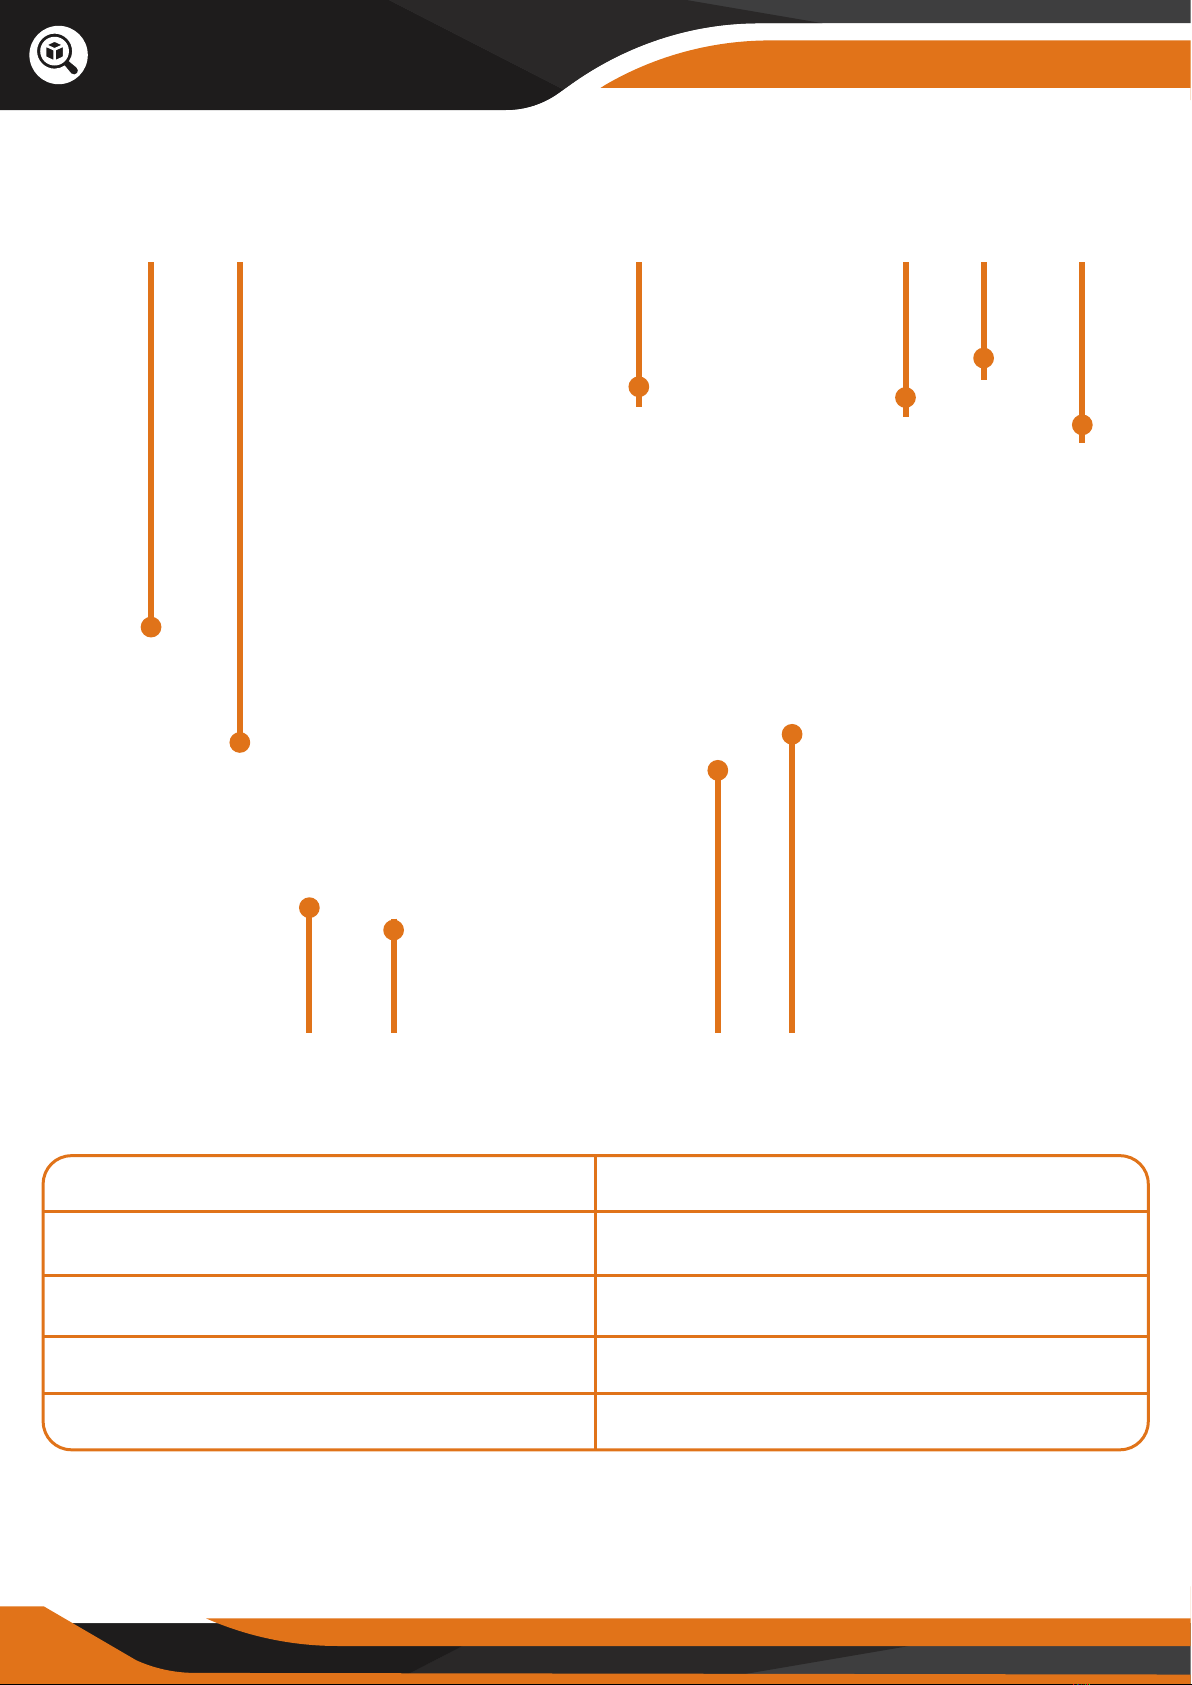
Product Overview
6
1 - Objective focus knob
3 - Infrared illuminator
5 - Operating zone
7 - TF card socket
9 - Eyecup
2 - Objective lens
4 - Battery compartment
6 - USB 2.0 socket
8 - Diopter ring
10 - Ocular lens
7
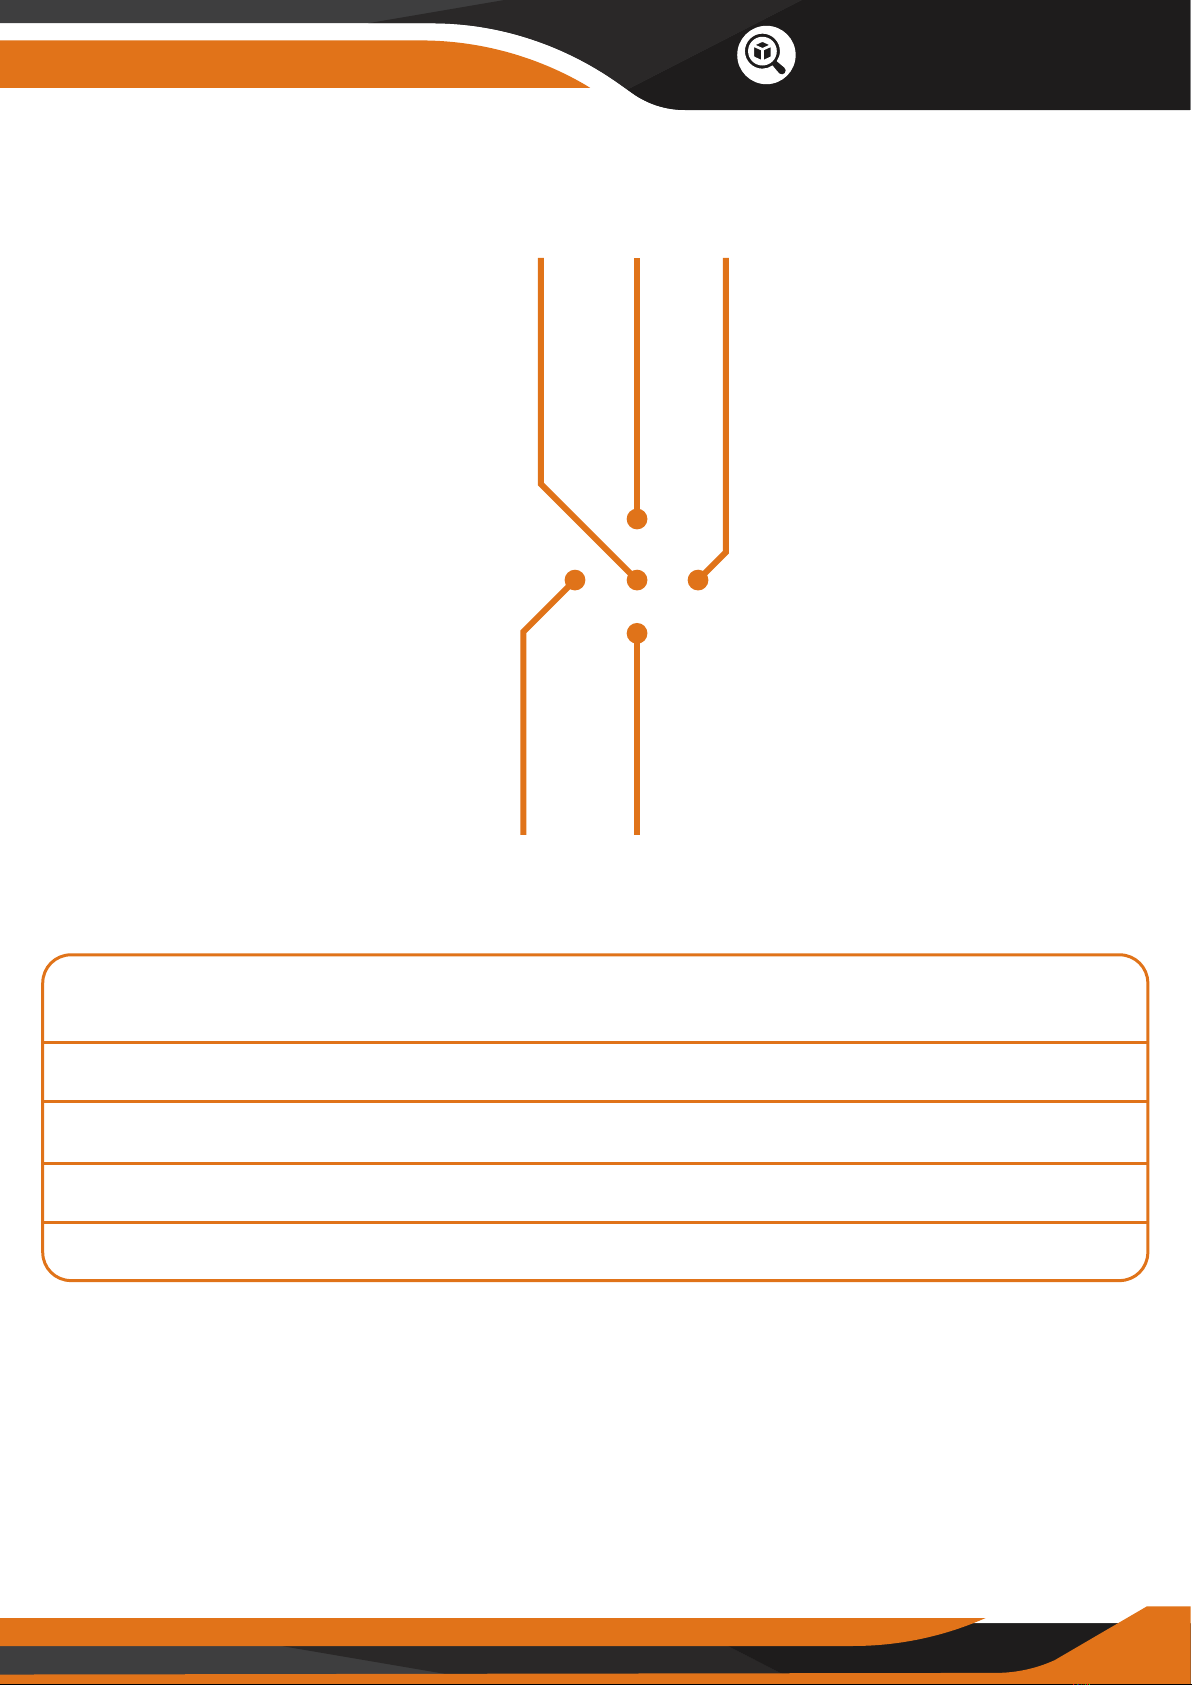
11 - Menu Switch for IR illuminator light and adjustment of the screen
brightness
12 - UP
13 - POWER/Function Check
14 – Switching Modes (photo shooting, video shooting, playback)
15 - DOWN
Product Overview
1112
13 14 15

8
Battery Installation
The GlassCondor night vision monocular requires a 16340 Model lithium-ion
battery (3.7V). Turn the battery cover counter-clockwise to unscrew the
battery cover, insert the battery with negative electrodes on the bottom, and
then tighten the battery cover clockwise.
Please ensure the battery charges for at least 10 hours the first time you use
it to make it work better.
Turn ON/OFF
Long press #13 button for 3 seconds, look through the Eyecup #10
- the monocular works well if the screen lightens up and icons appear as in
Picture 1.
The default starting mode is Photo Shooting. You can change that by pressing
the #14 button.
External Power
The monocular can change with external power. It can charge through the
USB interface or a standard mobile charging source (power bank).
The monocular would work continuously and won't turn o automatically
when there is an external power supply.
The battery will charge when the monocular connects to an external power
source.
Auto Power O
The monocular will turn o if there is no operation within 3 minutes. You can
shut o the auto power-o function or specify the auto power-o time
choice in" Menu Setting".
The monocular won't turn o automatically in the video shooting and
playback modes.
Power Supply

Changing the Modes
9
Scenery Observation
In photo shooting mode, look at the screen from Eyecup #9. Adjust the
diopter ring #8 to get the sharpest images. Adjust the objective focus knob
#1 to change the focus based on the object's distance.
The digital zoom turns on after pressing #12 and #15 – ranging from 1X to 8X.
If the light resource is enough, turn the IR light OFF to save battery power.
If there is no light around, you must turn the IR light ON and adjust the screen
brightness to make the image sharper.
Icons Description
1 - Current mode(Photo shooting)
2 - Image Capacity Remaining
3 - magnification range
4 - TF card in
5 - Battery charge indicator
6 - System time
6
Picture 1
1 2 3 4 5

10
Changing the Modes
The GlassCondor has 3 modes and you can switch between them by pressing
the MODE (#14) button.
Announcements
In any of the three modes, the menu will disappear if no action is taken within
3 seconds.
Turn the IR light OFF to save power when there is a light source around.
Please don't block the IR light after you turn it ON.
Photo Mode
The monocular goes in photo shooting mode automatically after starting up
(Picture 1). You can start taking photos or observe the wildlife in this mode.
The button "OK" (#13) works as the "Shoot" button in this mode. Each press
takes one photo. The photos save automatically on the TF memory card.
The memory capacity left is shown on the screen (icon #2). There could be a
small dierence between the number shown and the actual number of photos.
Photo Mode For taking photos
Playback Mode For viewing recorded files
Video Mode For taking videos
Changing the Modes
Table of contents


