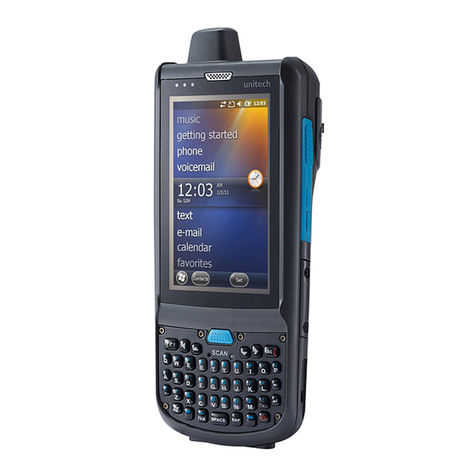
CReTE Systems DB6 User manual

HANDHELD COMPUTER
DB6
USER’S GUIDE

Notice
The company reserves the right to revise this publication or to change its
contents without any notice. Information contained herein is for reference only,
and does not constitute a commitment on the part of the manufacturer or any
subsequent vendor. They assume no responsibility or liability for any error or
inaccuracy that may appear in this publication nor are they in anyway
responsible for any loss or damage resulting from the use (or misuse) of this
publication.
Any of the software described in this manual is sold or licensed "as is". Should
the programs prove defective following purchase, the buyer (and not the
manufacturer, its distributor, or its dealer) assumes the entire cost of all
necessary servicing, repair and any incidental or consequential damages
resulting from any software defects.
Copyright © 2010 CReTE Systems Inc.

Trademarks
All other brand and product names are trademarks or registered trademarks of
their respective companies.

Regulatory Information/ Disclaimers
Installation and use of this computer must be in strict accordance with the
instructions included in the user documentation provided with the product. Any
changes or modifications (including the antennas) made to this device that are
not expressly approved by the manufacturer may void the user’s authority to
operate the equipment.
The manufacturer is not responsible for any radio or television interference
caused by unauthorized modification of this device, or the substitution of the
connecting cables and equipment other than manufacturer specified. It is the
responsibility of the user to correct any interference caused by such
unauthorized modification, substitution or attachment. Manufacturer and its
authorized resellers or distributors will assume no liability for any damage or
violation of government regulations arising from failing to comply with these
guidelines.

FCC (Federal Communications Commission) Statement
This equipment has been tested and found to comply with the limits for a Class
B digital device pursuant part 15 of the FCC Rules. These limits are designed
to provide reasonable protection against harmful interference in a residential
installation.
This equipment generates, uses, and radiates radio frequency energy. If not
being installed and used in accordance with the instructions, it may cause
harmful interference to radio communications. However, there is no guarantee
that interference will not occur in a particular installation. If this equipment does
cause harmful interference to radio or television reception, which can be
determined by turning the equipment off and on, the user is encouraged to try
to correct the interference by one or more of the following measures:
Re-orient or relocate the receiving antenna.
Increase the separation between the equipment and receiver.
Connect the equipment into an outlet on a circuit different from that to
which the receiver is connected.
Consult the dealer or an experienced radio/TV technician for help.
This device complies with Part 15 of the FCC Rules. Operation is subject to the
following two conditions:
This device may not cause harmful interference.
This device must accept any interference received, including
interference that may cause undesired operation.
FCC Caution
To assure continued compliance, any changes or modifications
not expressly approved by the party responsible for compliance
could void the user's authority to operate this equipment.
(Example - use only shielded interface cables when connecting to
computer or peripheral devices).

CE
Products with the CE Marking comply with both the EMC Directive
(2004/108/EC) and the Low Voltage Directive (2006/95/EC) issued by the
Commission of the European Community.
Compliance with these directives implies conformity to the following European
Norms:
EN55022 CISPR 22 Radio Frequency Interference
EN55024 EN61000-4-2, EN61000-4-3, EN61000-4-4, EN61000-4-5,
EN61000-4-6, EN61000-4-8, EN61000-4-11, EN61000-3-2,
EN61000-3-3,
Generic Immunity Standard
LVD EN 60950 Product Safety, IEC 60950-1: 2005

R&TTE (CE) Manual Regulatory Requirement
WLAN - IEEE 802.11a/b/g/n
802.11a/b/g/n Restrictions:
European standards dictate maximum radiated transmit power of 100mW
EIRP and frequency range 2.400-2.4835 GHz. In France, the equipment must
be restricted to the 2.4465-2.4835 GHz frequency range and must be
restricted to indoor use.

CE Declaration of Conformity
It is confirmed to comply with the requirements set out in the Council Directive
on the approximation of the laws of the member states relating to
Electromagnetic Compatibility Directive (2004/108/EC), Low-voltage Directive
(2006/95/EC) and the procedures given in R&TTE Directive (99/5/EC).
The equipment was passed, and the equipment test was performed according
to the following European standards:
EN 300 328 V1.7.1:2006
EN 301 893 V1.4.1(2007-07)
EN 301 V1.8.1 2008-04 / EN 301 489-17 V1.3.2 2008-04
EN 50371:2002
EN 60950-1: 2005
UL, TÜ V: AC Adapter (TÜ V includes EN60950 LVD)

Environmental Information, Material Safety & Recycling
All materials used in the manufacturing of this equipment are recyclable or
environmentally friendly. Please recycle the packing materials by the local
regulations at the end of the product's service life.
Notice:
The equipment may still contain tiny amount of hazardous substances
for health and environment, though those are below control level.
To avoid spreading such substances into the eco system, and to
minimize the pressure on the natural, you are encouraged to use the
appropriate take-back for reusing or recycling most of the materials in a
safe way after the service life.
The crossed bin symbol indicates proper disposal is required.
For more information on collection, reuse and recycling, please consult
the local or regional waste administration for more information. You can
also contact with the dealer for more information on the environmental
details of the equipment.
The symbol of the crossed out wheeled bin indicates that the
product (electrical and electronic equipment) should not be
placed in municipal waste. Please check local regulations for
disposal of electronic products.

TABLE OF CONTENTS
CHAPTER ONE -GETTING STARTED...................................................1
UNPACKING.............................................................................................1
WORKPLACE ...........................................................................................2
RUGGEDNESS .........................................................................................2
APPEARANCE OVERVIEW..........................................................................3
READY FOR USE......................................................................................7
CHAPTER TWO -OPERATING INFORMATION ........................................9
START USING YOUR HANDHELD COMPUTER...............................................9
STOP USING YOUR HANDHELD COMPUTER................................................9
INSTALLING OPERATION SYSTEM.............................................................10
USING INDICATORS AND KEYPAD .............................................................11
USING APPLICATION MENU .....................................................................13
USING TOUCH SCREEN ..........................................................................13
USING MICROPHONE..............................................................................15
USING FINGERPRINT SENSOR (OPTIONAL)...............................................16
OPERATING WIRELESS DEVICES .............................................................17
USING CAMERA (OPTIONAL) ...................................................................21
USING CRADLE (OPTIONAL)....................................................................22
CHAPTER THREE -MANAGING POWER.............................................23
CHARGING BATTERY ..............................................................................23
CHECKING THE BATTERY LEVEL ..............................................................23
POWER CONSERVATION .........................................................................24
REPLACING BATTERY .............................................................................24
POWER SAVING TIPS..............................................................................24
SUPPORTING ACPI................................................................................25
ACADAPTER AND AC POWER CORD SAFETY...........................................26
BATTERY PRECAUTIONS .........................................................................27
CHAPTER FOUR -BIOS SETUP.......................................................28
MAIN MENU...........................................................................................28
ADVANCED MENU ..................................................................................29
BOOT MENU..........................................................................................30

SECURITY MENU....................................................................................31
EXIT MENU............................................................................................32
BIOS SETTING FOR WINDOWS 7INSTALLATION........................................33
CHAPTER FIVE -DRIVERS AND APPLICATIONS ..................................36
CHIPSET ...............................................................................................36
GRAPHIC CONTROLLER..........................................................................36
TOUCH SCREEN.....................................................................................37
STICKPOINTER.......................................................................................37
AUDIO...................................................................................................37
FINGERPRINT SENSOR (OPTIONAL).........................................................37
WIRELESS DEVICES...............................................................................38
DEVICE POWER MANAGER .....................................................................39
GIGABIT LAN (OPTIONAL) ......................................................................39
CRADLE (OPTIONAL)..............................................................................40
CHAPTER SIX -SPECIFICATIONS......................................................41
STANDARD SYSTEM UNIT .......................................................................41
OPTIONAL DEVICES AND ACCESSORIES ...................................................43
CHAPTER SEVEN -MAINTENANCE AND SERVICE ...............................45
CLEANING.............................................................................................45
TROUBLESHOOTING ...............................................................................45
RMASERVICE.......................................................................................46

Chapter One - 1
Getting Started
Chapter One - Getting Started
Unpacking
After unpacking, the followings are the standard items along with your
computer. If there is any missing or damaged, please notify the dealer
immediately.
Handheld Computer Unit
AC Adapter
AC Power Cord
Utility DVD
Stylus Pen
Quick Guide

Chapter One - 2
Getting Started
Workplace
A clean and moisture-free environment is preferred. Make room for air
circulation. Remember to avoid areas from:
Sudden or extreme changes in temperature.
Extreme heat.
Strong electromagnetic fields (near television set, motor rotation area,
etc.).
Dust or high humidity.
If it is necessary to work in a hostile environment, please regularly maintain
your computer by cleaning dust, water, and etc. to keep it in an optimal
condition.
Environmental Ratings-
Operating Temperature: 0 ~ +40 ºC (DB6-I)/ -20 ~ +50 ºC (DB6-M)
Operating Altitude: 0 ~ 4,572 meters
Operating Humidity: Up to 95%
Ruggedness
The computer is designed with rugged features such as vibration, shock, dust,
and rain/ water protection. However, it is still necessary to provide appropriate
protection while operating in harsh environments.
Since the handheld computer is passed MIL-STD-810G for the temperature,
vibration, shock, humidity and salt fog tests, and IP55 (I Model) or IP65 (M
model) for dust and water resistant tests, the handheld computer is therefore a
fully-rugged one.

Chapter One - 3
Getting Started
Appearance Overview
Before starting to use your handheld computer, we suggest you to have a
quick glance at it to know the external components well.
Front
1. Embedded Antennas:
Embedded antennas for wireless
application
2. LCD:
For displaying the output of the handheld
computer
3. LED Indicators:
For indicating status by different colors
and lighting methods.
4. Keypad:
For quick operation
1
2
3
4
Side A
Side B
Side C
Side D

Chapter One - 4
Getting Started
Rear
1. Fingerprint Reader (Optional):
Scanning users’ fingerprints for
security
2. 2M AF Camera (Optional):
Capturing images and recording
videos
3. Speaker:
Internal speaker
4. Battery Lock:
Locating the battery correctly and
locking with it.
5. Stylus Pen:
Tool pen for using touch screen
6. Battery:
Swappable Li-Ion Battery
1
2
3
5
6
4

Chapter One - 5
Getting Started
Side A
Location 1 & 2 Standard:
No Function
Location 1 & 2 Optional:
(Select 2 out of 7)
a. Sealed USB
b. Sealed Gigabit LAN (Trade-off:
WLAN)
c. Sealed Audio
d. GPS SMAAntenna
e. Wi-Fi SMAAntenna
f. HSDPA/ UMTS SMAAntenna
g. Bluetooth SMAAntenna
Side B
DC Power Jack:
For external power supply and power
charging
Location 5 Standard:
No Function
Location 5 Optional:
Expansion POGO Connector
Signals consisted:
a. USB x 1
b. COM1 (RS232)
c. RGB (Trade-off: Cradle RGB)
d. Gigabit LAN
e. DC In
DC Power Jack
Location 5
Location 1 Location 2

Chapter One - 6
Getting Started
Side C
Location 4-
Cradle POGO Connector:
For connecting with the
optional cradle.
Side D
Standard I/O Ports:
Location 3-
Standard I/O Ports:
1. SIM Card Slot
For Inserting SIM card
2. USB 2.0 Port (Host)
Connecting with USB
Devices
3. SD Card Slot
For reading SD card
1
2
3
Location 4

Chapter One - 7
Getting Started
Ready for Use
After taking a quick look at your handheld computer, the following illustrations
will get you ready for using it.
Mounting the Battery
1.
Mount the battery into the
battery bay.
2. Use a suitable-size coin to
lock.
Connecting with AC Adapter
1. Insert the DC Jack to the end
and lock the connector well
clockwise.
2. Plug the AC cord to the AC
adapter.
3. Plug the AC cord to a right electrical outlet.

Chapter One - 8
Getting Started
Turning ON the Power
1. Make sure the battery is mounted or connect all power cords well for the
stable power supply.
2. Now, you are able to turn ON the power of your handheld computer by
pressing “Power Button”.
Turning OFF the Power
Directly click “Shut down” from your OS to turn OFF the power of your
handheld computer.
Note:
The power is able to be ON
without any battery mounted
once all the power cords are
connected well.
Please see more information in
“Operating Information”.
Note:
The above-mentioned description is a standard way to turn
OFF the power. Directly turn OFF the power by pressing
“Power Button”will cause data lose and is not suggested.
There are still other ways to stop your handheld computer
from operating, see more information in “Operating
Information”.
Press on the keypad to turn
on the power of your handheld
computer.

Chapter Two - 9
Operating Information
Chapter Two - Operating Information
Start Using Your Handheld Computer
Always turning on your handheld computer by using the power button, this is a
standard operating procedure to start using your handheld computer. After
turning on the power of your handheld computer, it will start with the operating
system (OS) such as Windows XP.
Boot up
When turning on the power, your handheld computer will start loading the OS
into the system memory. This start-up procedure is called “boot up”.
Power on Self-Test (POST)
Each time when your handheld computer is turned on, BIOS will automatically
perform a self-test of CPU, memory, hardware devices, and so on.
Stop Using Your Handheld Computer
Each time when you finish working with your handheld computer, there are
several ways to stop your handheld computer from operating.
Shut down
Directly click “Shut down” from your OS such as Windows XP to turn OFF the
power of your handheld computer. Before shutting down, please always
remember to save the unfinished works and close the application for
preventing from any possible data loss or HDD damage.
“Shut down” will totally turn OFF the power of your handheld computer. If you
want to start your handheld computer again, you need to press the power
button.
Other manuals for DB6
1
Table of contents
Other CReTE Systems Handheld manuals
