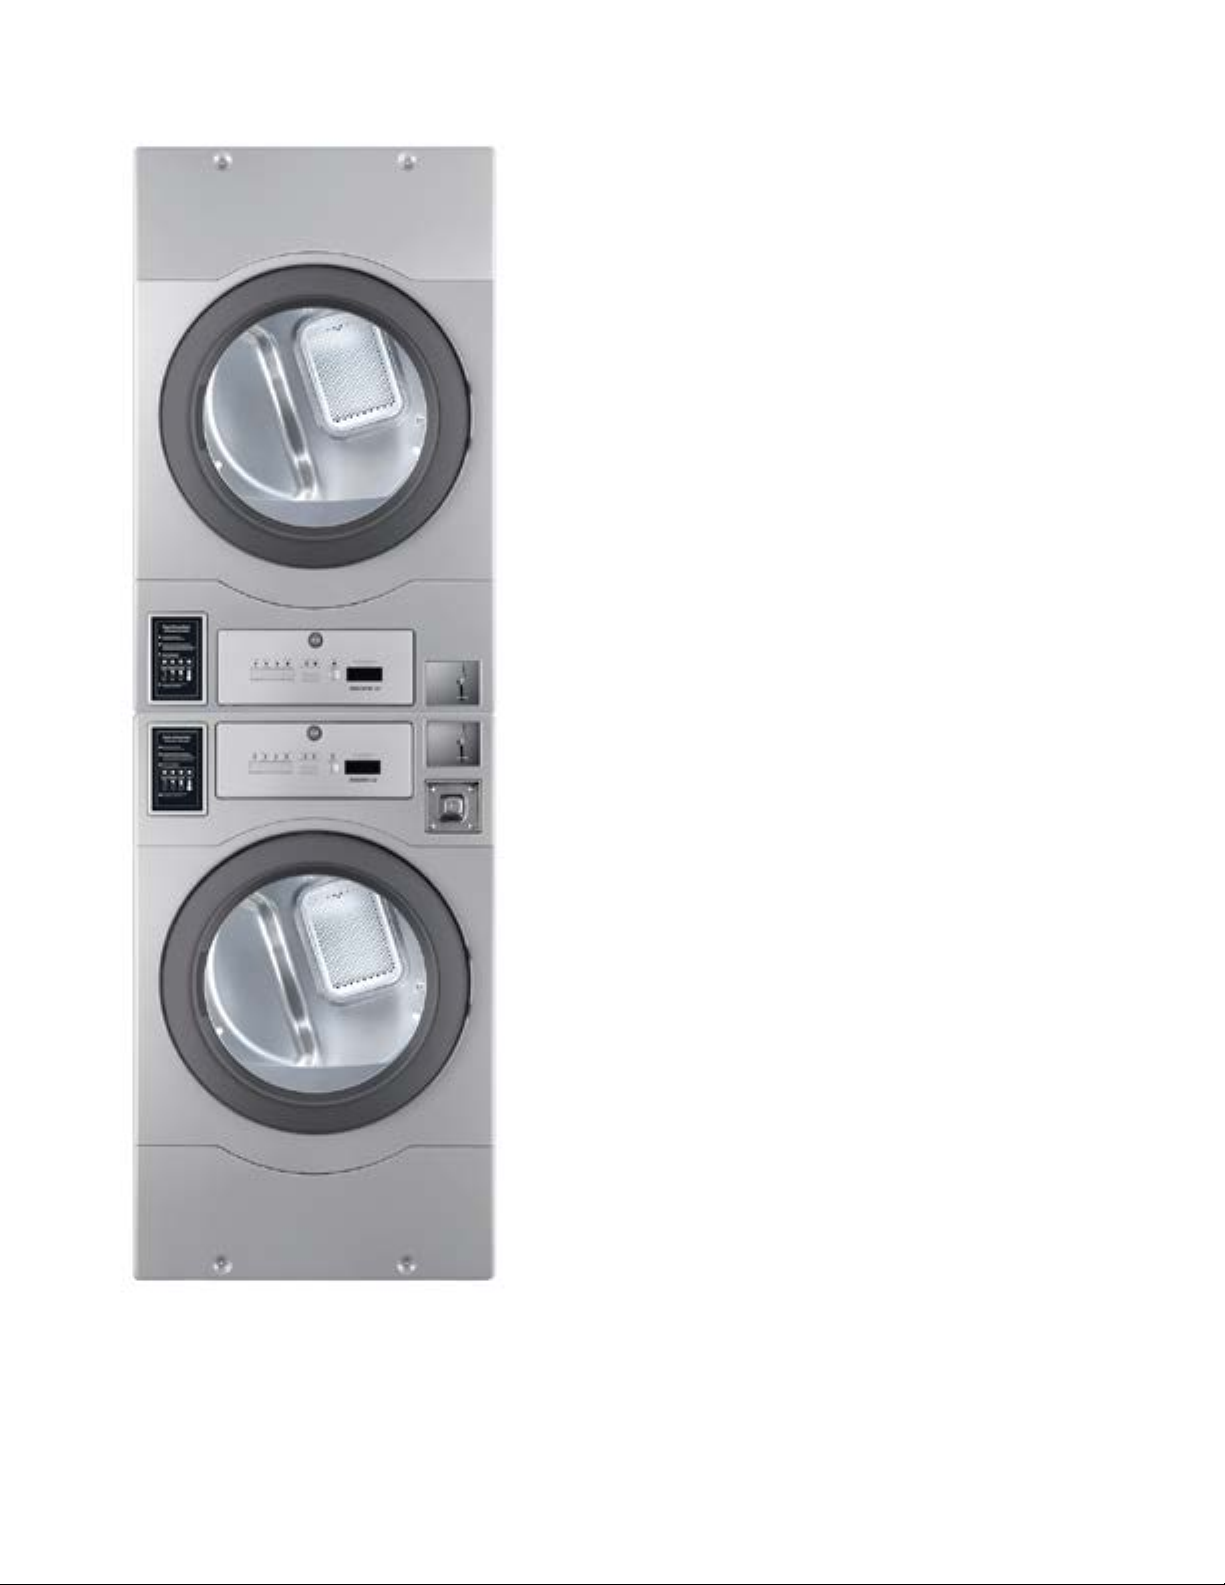
Crossover Laundry Crossover 2.0 User manual
CROSSOVER 2.0
DRYER STACKING INSTRUCTIONS
Distributed by

Follow the instructions in the Installation and Operating manual to properly install and
operate the machines.
When stacked units are installed, it is advised to tether the top machine to the wall
behind the units, to avoid tipping over. A tethering kit is available as an optional
part. Contact your distributor for more information. Dryer stacking installation is
recommended to be done by 2 people.
CAUTION
!
IMPORTANT SAFETY INSTRUCTION
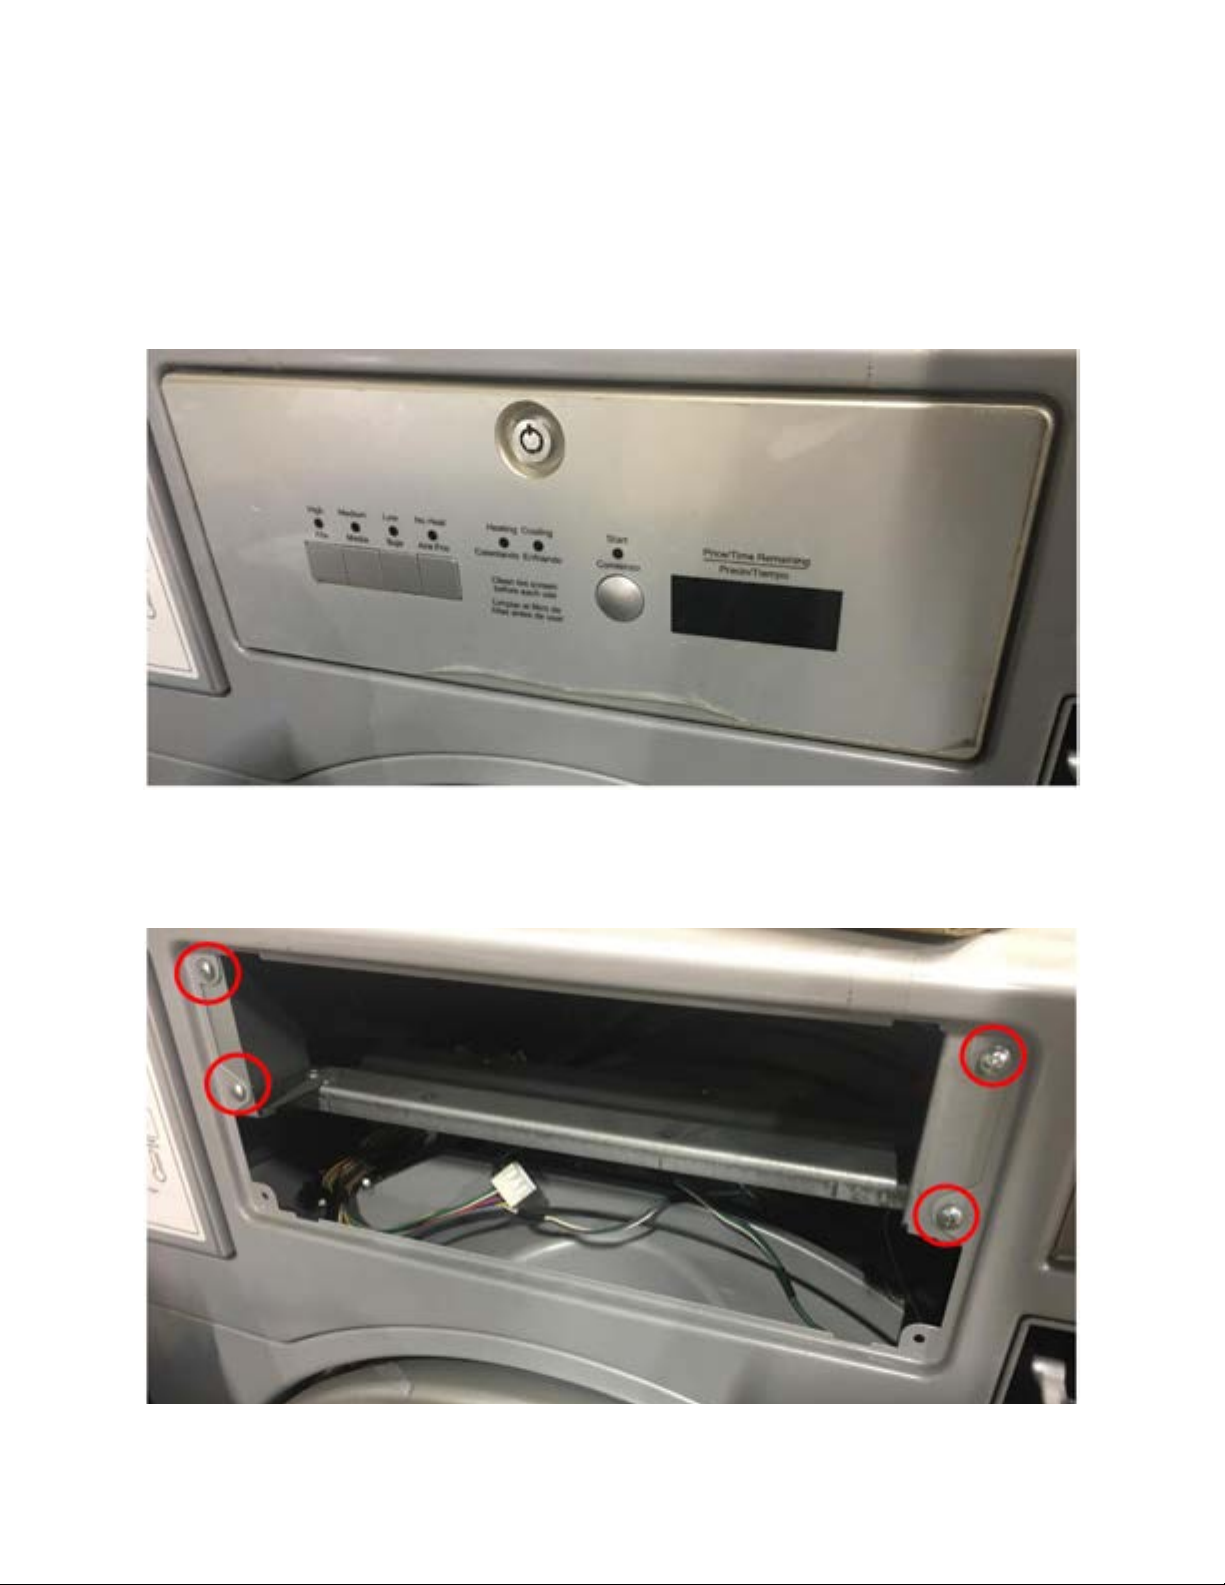
1. Demount the control panel by using the provided service key. Disconnect the cables
between the control module, and the machine, and set the control module aside.
Demount the top panel of the Top Control Dryer
2. Disassemble the front control panel by removing the four screws shown
Stacking a Crossover 2.0 Bottom-Control Dryer (DLHS) over
an Encore Top-Control Dryer (DLHF)
3. Remove 2 screws from the front of the top panel
4. Remove the 2 top panel screws from the tabs in the back of the machine.
5. Slide the top panel rearward and lift to remove the top panel from the machine
6. The disassembly process is similar for the bottom-control machine, except instead of
removing the control panel remove the two screws from the front top blank panel and
demount the panel
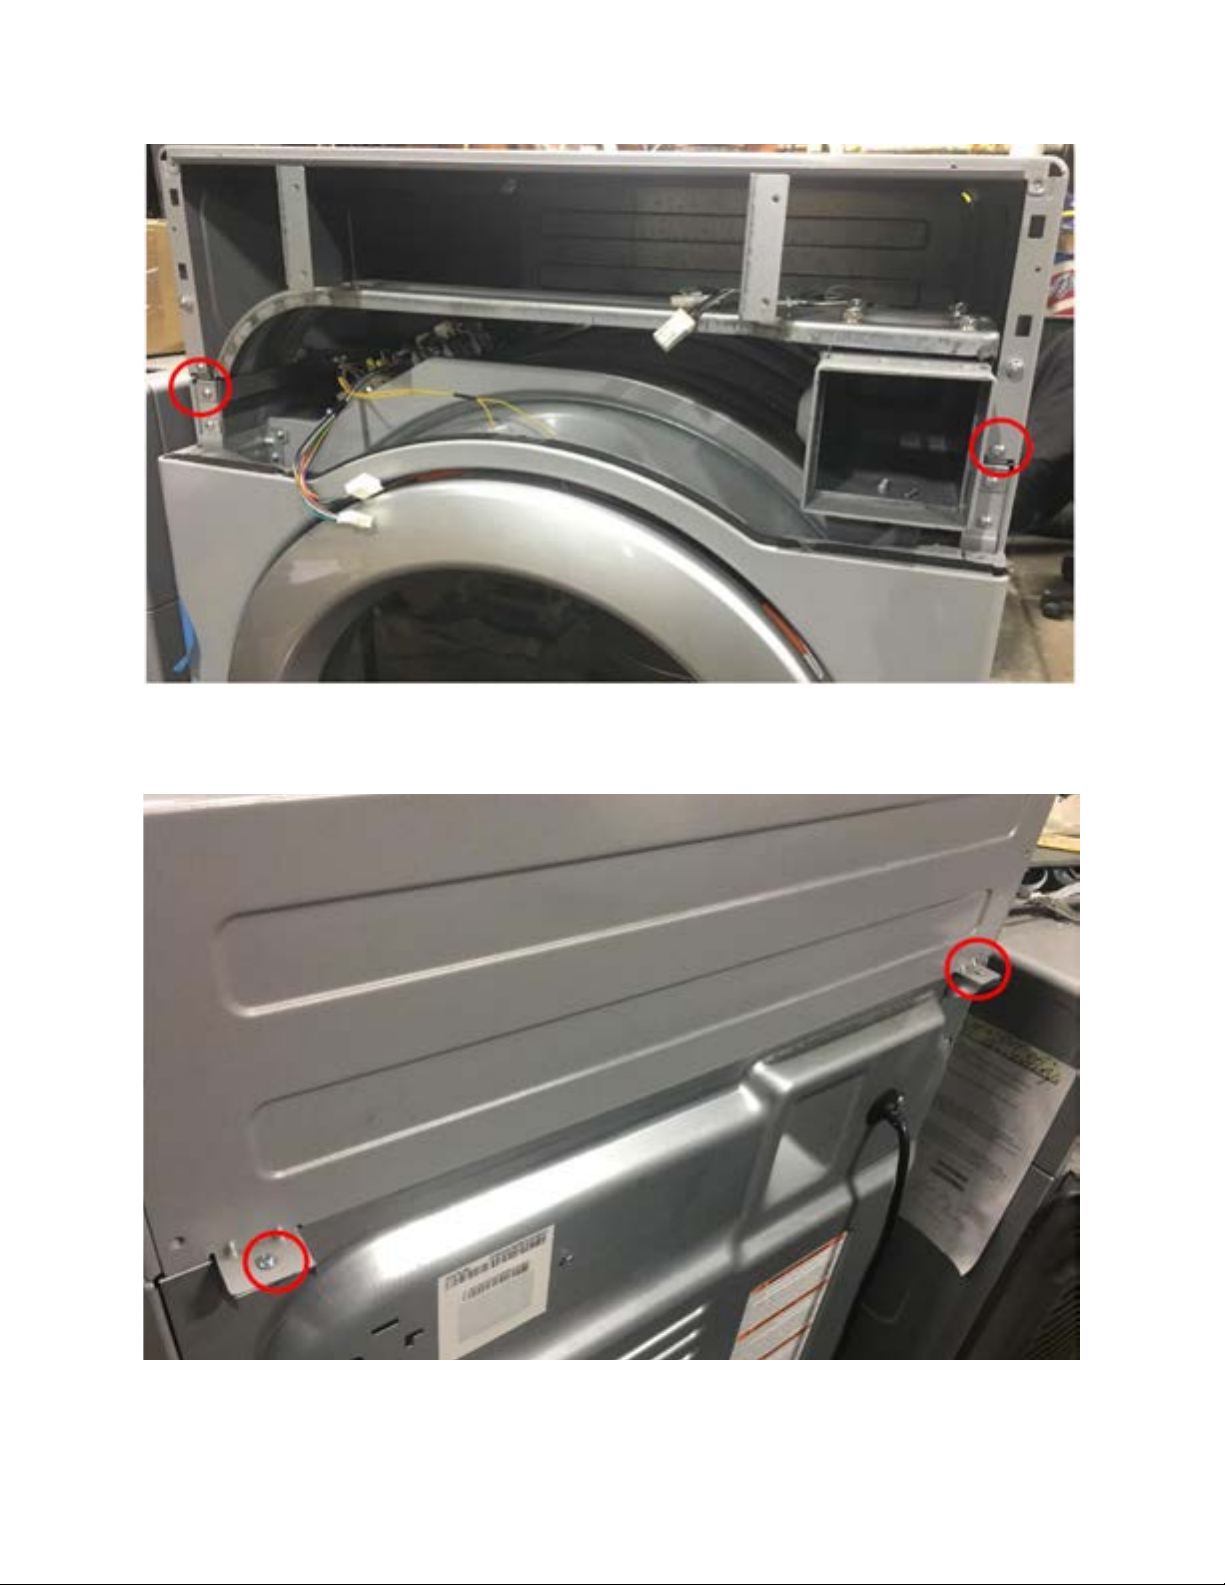
7. Swap the TOP panels between the top-and-bottom-control machines
After swapping the TOP panels
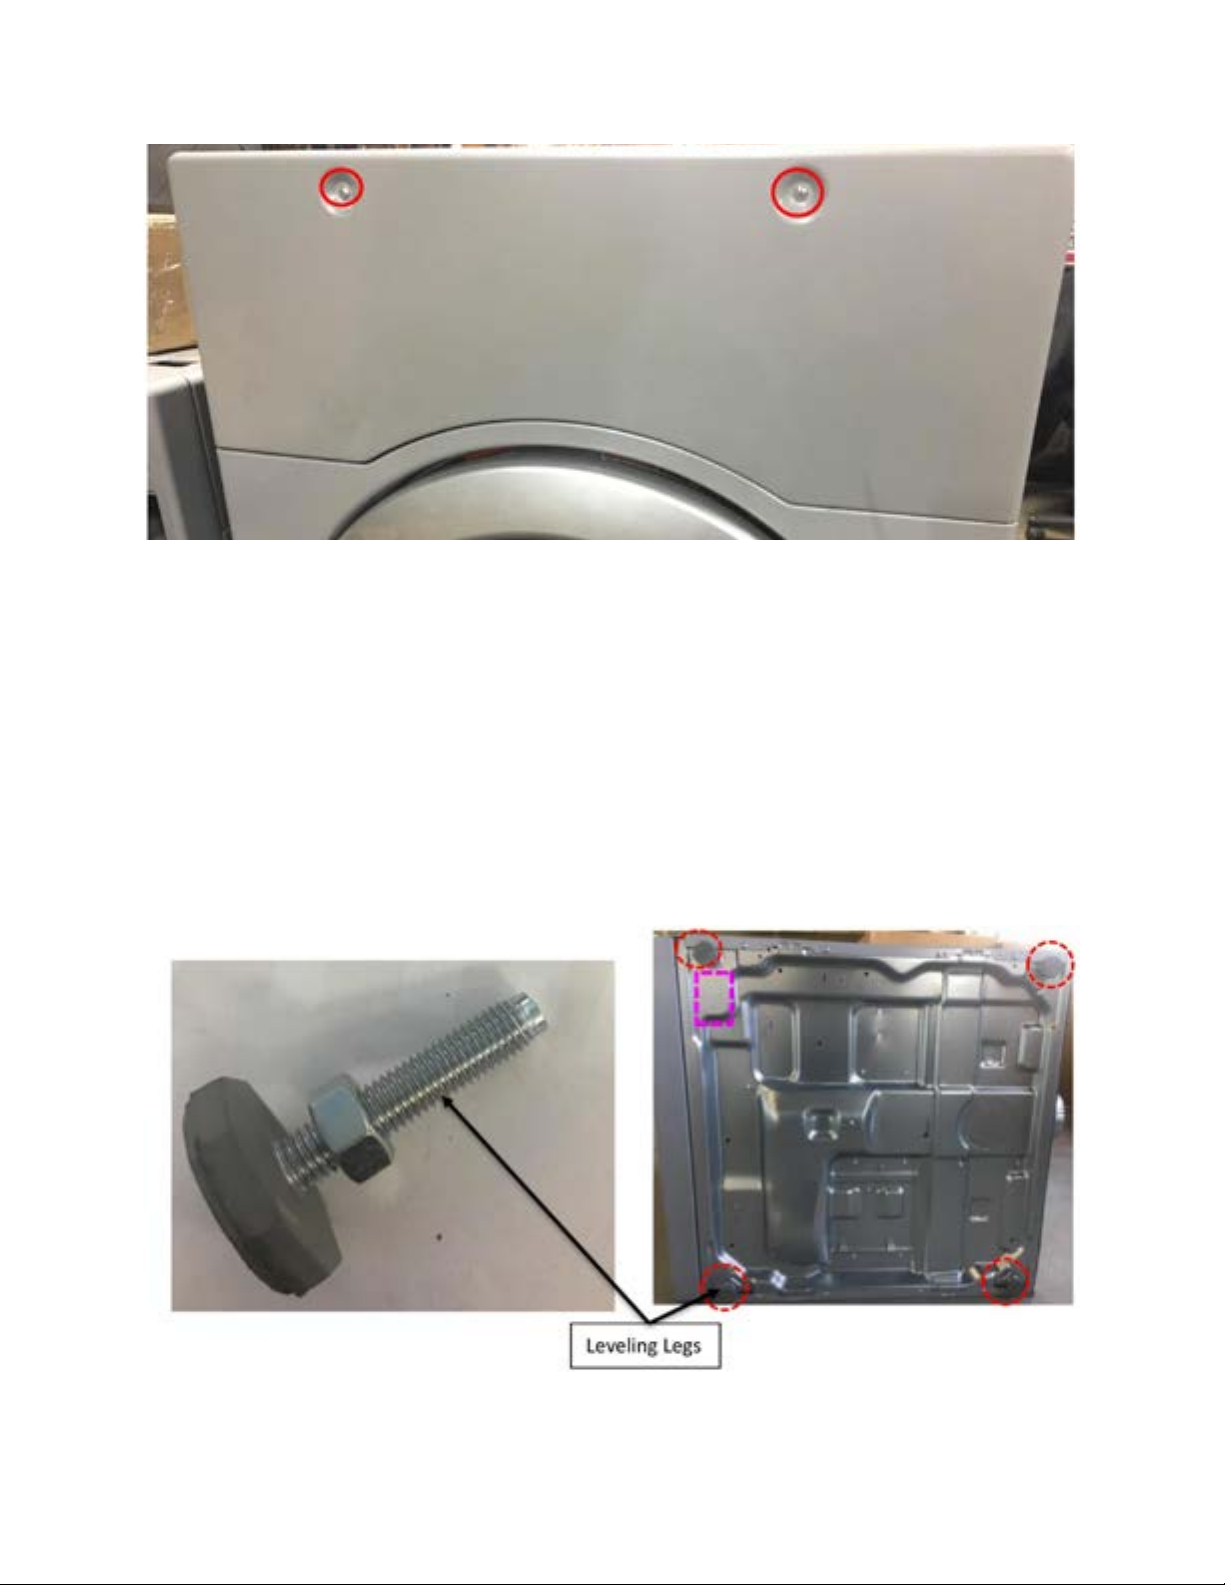
10. From the bottom control machine, remove the rectangular knock-out plate, as
indicated in the picture using a hammer and screw driver.
11. Also, remove the four leveling legs from the base panel of the machine.
8. Adjust the feet on the Top Control machine, to level it according to the intended
installation position and remove the drum contents from the bottom-control dryer.
9. Flatten a machine carton, and tilt the bottom-control dryer on one of its sides on the carton

12. Loosen slightly, but do not remove, the 4 shouldered screws that are already
attached to the base panel of the top dryer (circled in the photo)
13. Remove the screw (circled in the photo) from the raised part of the right-front
stacking bracket on the bottom dryer’s top panel, and retain it for later use (Step 15)
14. Stack the bottom-control machine (DLHS)
onto the top-control machine (DLHF). The four
shouldered screws in the base panel of the
top dryer must slide into the open back side of
the stacking-brackets on the top panel of the
bottom machine. Apply force to the top machine
from the rear until the fronts of the top and
bottom machines are aligned.
Note: Gently tapping the lower part of the back
of the top-mounted dryer with a hammer and
block of wood can help to align the machines.

15. Once the machines are securely stacked, open the control panel of the top machine
(bottom- control machine) (DLHS) using the provided service key
17. Install and tighten the locking-screw that was taken from the stacking bracket in
step 12 back into the bracket through the clearance hole provided in the base of the top
dryer.
16. Remove the control panel frame and cross frame

18. Re-assemble the control console of the top machine and re-connect the CN8 and
CN3 connectors of the control board back to machine.
20. Once the connections are properly made, mount back the control panel frame and
the cross frame.
21. Before remounting the control, panel reconnect the harness connections.
22. Lock the controller using the service key.
19. Route the extended wiring harness from the CN 9 connections through the hole in
the base panel of the bottom control machine (see step 9) and connect the coin meter
connector (Red, White and Blue wires) to the “TOP” assigned meter of the dual coin
connections of the Top Control Machines.

The washer top panel for dryer mounting (0020809423F) does not come with the
stacking brackets attached. The panel has a total of 12 tapped holes, 3 in every corner
for attaching the stacking brackets.
1. Remove the stacking brackets from the top
panel of the bottom control dryer (DLHS).
2. Mount the stacking brackets on the new
washer top panel (Part Number: 0020809423F).
3. Then remove the already installed top
panel from the washer and replace it with the
Top Panel (0020809423F) with the attached
brackets.
Attaching the brackets to the Washer Top Panel
4. After placing the washer in the intended installation position, level the washer as per
installation manual.
5. Flatten a machine carton, and tilt the bottom-control dryer on one of its sides on the
carton
Additional Item Needed: Washer Top Panel for Dryer Mounting (Part Number: 002089423F)
After assembling the Top Panel (0020809423F)
on the Washer (WHLFP)
Stacking a Crossover 2.0 bottom control dryer (DLHS) on
the Encore washer (WHLFP)
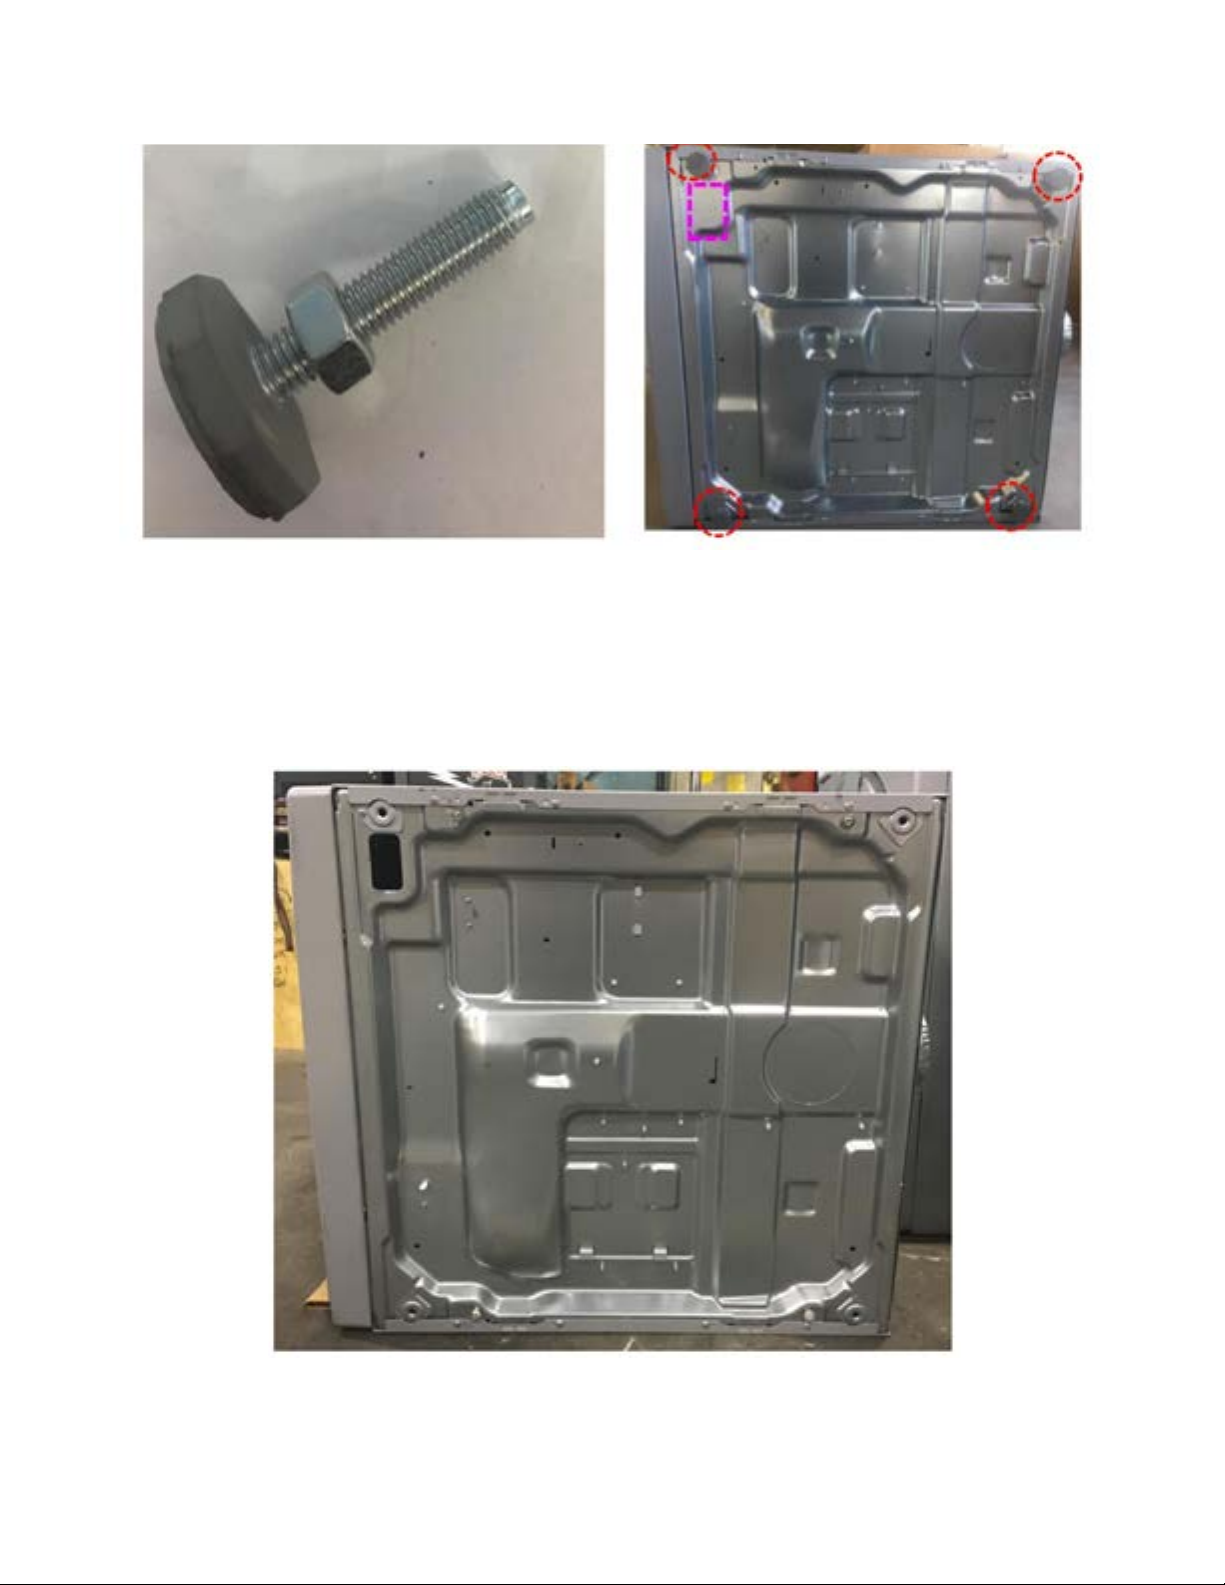
8. Loosen slightly, but do not remove, the 4 shouldered screws that are already attached
to the base panel of the top dryer (circled in the photo)
6. From the bottom control machine, remove the rectangular knock-out plate, as
indicated in the picture using a hammer and screw driver.
7. Also, remove the four leveling legs from the base panel of the machine.

25. Remove the control panel frame and cross frame
9. Remove the screw (circled in the photo) from the raised part of the right-front stacking
bracket on the bottom dryer’s top panel, and retain it for later use (Step 15)
23. Stack the bottom-control machine (DLHS) onto the Encore Washer. The four
shouldered screws in the base panel of the top dryer must slide into the open back side
of the stacking-brackets on the top panel of the bottom machine. Apply force to the top
machine from the rear until the fronts of the top and bottom machines are aligned. Note:
Gently tapping the lower part of the back of the top-mounted dryer with a hammer and
block of wood can help to align the machines.
24. Once the machines are securely stacked, open the control panel of the top machine
(bottom- control machine) (DLHS) using the provided service key
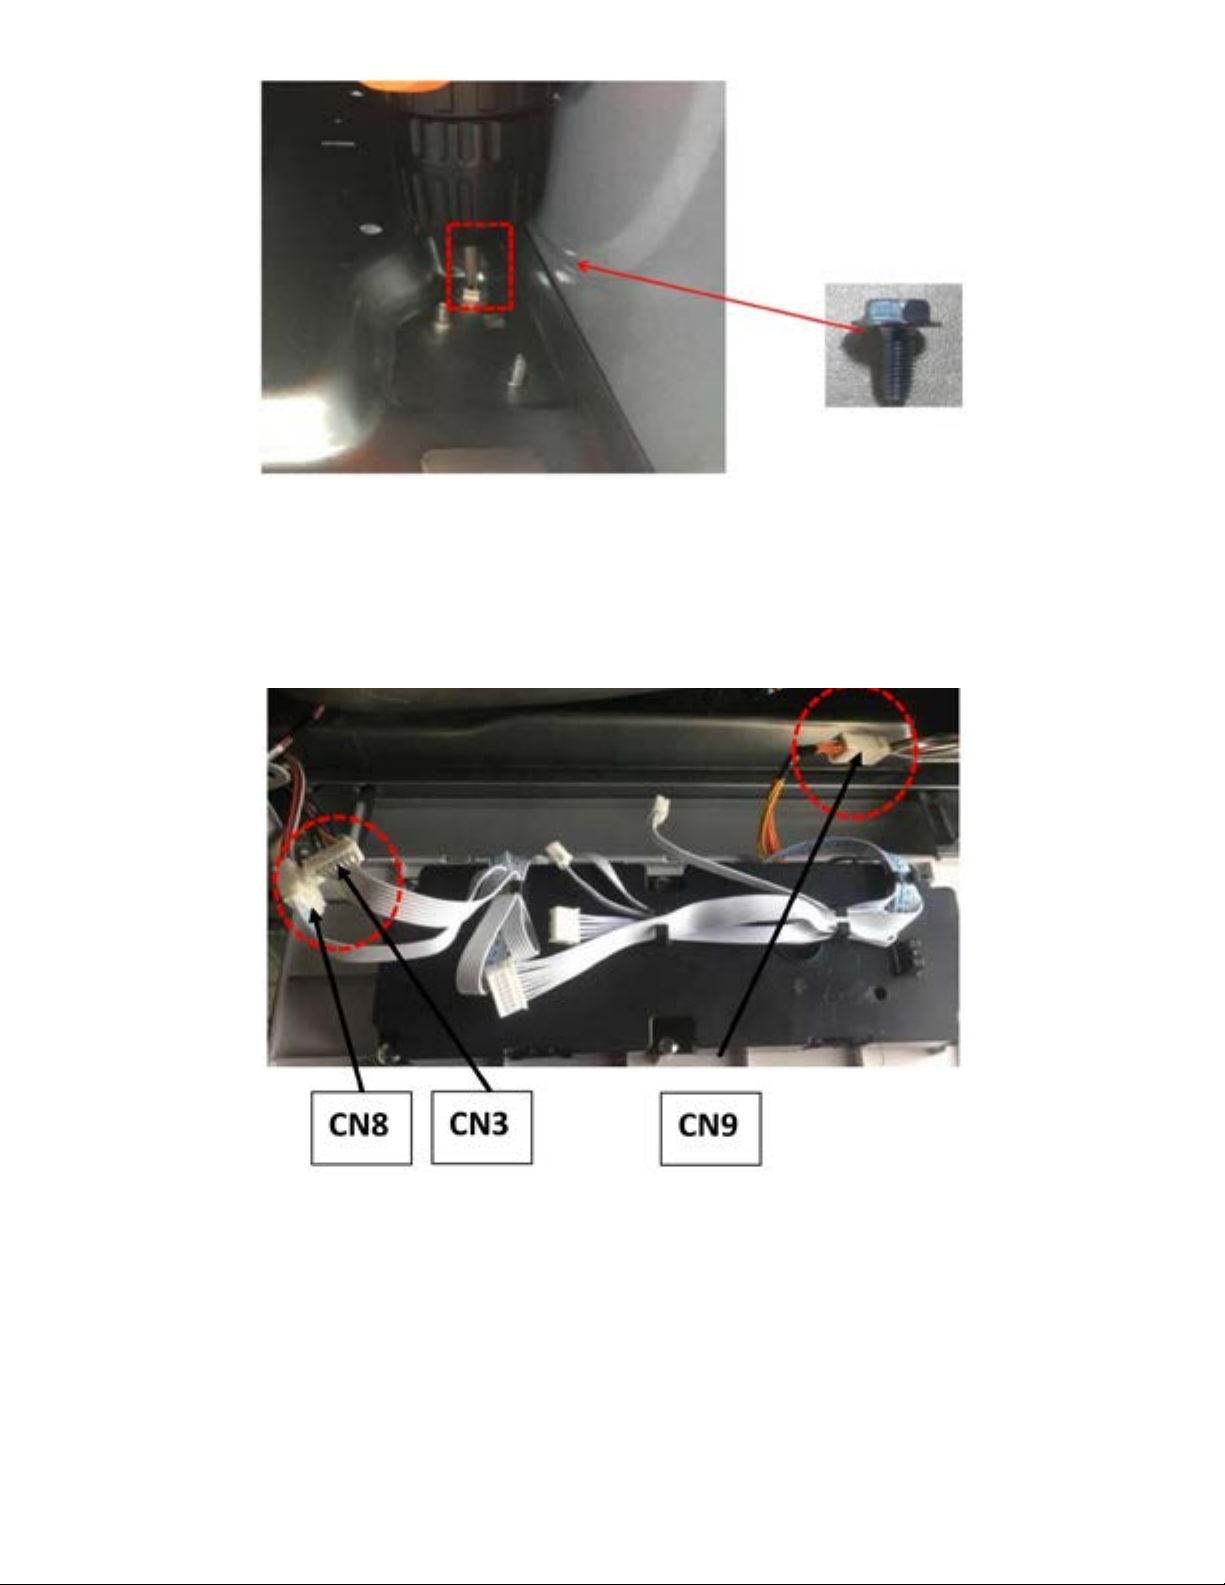
27. Route the extended wiring harness from the CN 9 connections through the hole in
the base panel of the bottom control machine (see step 9) and connect the coin meter
connector (Red, White and Blue wires) to the “TOP” assigned meter of the dual coin
connections of the Top Control Machines.
28. Once the connections are properly made, mount back the control panel frame and
the cross frame.
29. Before remounting the control, panel reconnect the harness connections.
30. Lock the controller using the service key.
10. Install and tighten the locking-screw that was taken from the stacking bracket in
step 12 back into the bracket through the clearance hole provided in the base of the top
dryer.
26. Re-assemble the control console of the top machine and re-connect the CN8 and
CN3 connectors of the control board back to machine.

Distributed by
Table of contents
Popular Dryer manuals by other brands


Bosch
Bosch WTE84101AU Operating and installation instructions

Indesit
Indesit IDCE H G45 B instruction manual

Numatic
Numatic TTV-5565/200T Owner's instructions

Bosch
Bosch WTMC3521UC - Nexxt 500 Series Gas Dryer Operating, care and installation instructions

Electrolux
Electrolux EDC2096GDW user manual

John Lewis
John Lewis JLTDH23 user manual


