Crossport Systems Pivio User manual

Crossport Systems
PivioTM Network Security System
Crossport Systems, Inc.
www.crossport.com
User’s Guide
Rev 1.7g
(April 16, 2001)

ii
Table of Contents
Copyright Notice
© 2001 Crossport Systems, Inc. Bellevue WA
All rights reserved.
“Crossport Systems Pivio Network Security System User’s Guide”
Notice
Reproduction, adaptation, or translation of this manual is prohibited without written permis-
sion of Crossport Systems, Inc.
The information contained in this document is subject to change without notice.
Pivio, Pivio Firewall, Pivio Plus Firewall,and Crossport are trademarks of Crossport Systems, Inc.
All other trademarks and trade names belong to their respective holders.
Revision 1.7g published April 16, 2001
Acknowledgements
The following people contributed to the creation, design, programming, testing, and documenta-
tion of Pivio Network Security System.
Rob Arnold Tom Arnold Steve Coretti
Edgar Faulkner Chad Fischer Ron Heinrichs
Case Kuehn Aaron Logue John Mohr
Nikos Mouat Bill Patterson Jess Roberts
Divina Segui Jeanne Shreuder Howard Smith
Kevin Steil Jeff Sterling Zeta Wagner
Jeff Bienstadt Brian Fisher Robert Gidley
Ed Gregory Caleb Reed Paul Schnackenberg
Dick Shorter Graham Stinson
About Crossport Systems
Crossport Systems, Inc., is dedicated to resolving the next generation of Internet
security risks for small businesses with high-speed Internet access. Crossport is the
creator of PivioTM, a network security system that integrates software, hardware
and monitored services to protect businesses from hackers, viruses and service
disruptions.
Crossport Systems, Inc.
10940 NE 33rd Place, Suite 101
Bellevue, WA 98004
Ph: 425-576-8382
Fax: 425-576-9953
www.crossport.com

iii
Pivio User’s Guide
Table of Contents
Chapter 1
Introduction......................................................................................7
Pivio System features and benefits ................................................................... 9
Technical Support............................................................................................. 10
Chapter 2
Getting Started ..............................................................................11
Installing the Pivio Firewall................................................................................ 12
Installing the Pivio Plus Firewall ........................................................................ 16
Chapter 3
Dynamic IP configuration .............................................................21
What is a “dynamic” IP address?.................................................................... 22
Configuring the Pivio Firewall .......................................................................... 23
Configuration complete .................................................................................. 25
Set up your password ....................................................................................... 26
Registering your Pivio Firewall .......................................................................... 28
Testing your configuration................................................................................ 32
Chapter 4
Static IP configuration ...................................................................33
Record your current settings............................................................................ 34
Configuring your computer ............................................................................. 35
Windows 95/98/ME configuration.......................................................................... 35
Windows NT configuration ...................................................................................... 40
Windows 2000 configuration................................................................................... 43
Macintosh configuration ......................................................................................... 46
Linux configuration ................................................................................................... 49

iv
Table of Contents
Configuring the Pivio Firewall .......................................................................... 51
Configuration complete .................................................................................. 53
Set up your password ....................................................................................... 54
Registering your Pivio Firewall .......................................................................... 56
Testing your configuration................................................................................ 60
Chapter 5
PPP over Ethernet...........................................................................61
Getting your computer ready for the Pivio Firewall ...................................... 62
Configuring your computer ............................................................................. 63
Windows 95/98/Me configuration ......................................................................... 63
Windows NT configuration ...................................................................................... 65
Windows 2000 configuration................................................................................... 67
Macintosh configuration ......................................................................................... 70
Configuring the Pivio Firewall .......................................................................... 72
Configuration complete .................................................................................. 74
Set up your password ....................................................................................... 75
Registering your Pivio Firewall .......................................................................... 77
Testing your configuration................................................................................ 81
Chapter 6
Pivio System Services ....................................................................83
Signing up for services...................................................................................... 84
About the services ............................................................................................ 86
Flash update...................................................................................................... 87
Services Available............................................................................................. 88
Other service options ....................................................................................... 92
Chapter 7
Special Installations.......................................................................95
Multiple computers........................................................................................... 96
DHCP server already exists on network .......................................................... 97
Installing the Pivio Firewall inside a corporate firewall.................................. 99
Chapter 8
Virtual Private Networks ..............................................................101
Creating a VPN Connection ......................................................................... 102
Modifying a VPN Connection ....................................................................... 104
Starting and Stopping a VPN Connection................................................... 105

v
Pivio User’s Guide
Chapter 9
System Administration.................................................................107
Changing your account name and password ........................................... 108
Pivio Firewall summary.................................................................................... 109
Reset button .................................................................................................... 110
Statistics available .......................................................................................... 111
When using software firewalls........................................................................ 112
Chapter 10
Advanced Settings......................................................................113
What the Online light means ......................................................................... 114
Connectivity settings for the Internet............................................................ 115
Connectivity settings for your LAN ................................................................ 117
Using SNMP ...................................................................................................... 119
Firewall settings................................................................................................ 120
Port forwarding................................................................................................ 122
Special IP Addresses....................................................................................... 124
Glossary ...........................................................................................127
Index.................................................................................................131
FCC Notice ...................................................................................................... 133
UL Listing........................................................................................................... 133
Software acknowledgements ....................................................................... 133

vi
Table of Contents

7
Introduction
Thank you for purchasing the Pivio Network Security System. Based on a
powerful network computer, the Pivio Firewall incorporates firewall, virtual
private networking (VPN), and management services. The Pivio System is
secure, cost effective, and an easy-to-use solution for your Internet security
needs.
The Pivio Network Security System is the complete Internet security solution.
Chapter 1
Introduction
Crossport Systems Pivio Network Security System

8
Pivio Network Security System User’s Guide
An alarming number of hacker attacks occur everyday, and anyone with an
unprotected broadband Internet connection is susceptible to these attacks.
The Pivio System prevents many of the most common types of attacks. With the
Pivio System, you control what information passes to and from your computer.
IT managers can safely and easily extend corporate systems, applications, and
information over high-speed Internet connections to employees, contractors,
and partners in remote office locations.

9
Introduction
Pivio System features and benefits
Features
Hacker Protection
Powerful firewall protection halts hackers at the door with a highly
sensitive intrusion system.
Virus Protection
The best protection against viruses is up-to-date virus definitions. The
Pivio System automatically updates the definitions on every PC with no
action required by employees.
24/7 Security Response
The Pivio System provides around-the-clock surveillance designed to
quickly identify and terminate unauthorized attempts to access your
network. When the Pivio System senses a possible high-risk situation
developing, you’ll receive an Instant Alert.
Virtual Private Networking
Because the Pivio Firewall can create encrypted two-way private data
transmissions, you can send sensitive information to remote locations,
without compromising security.
Management Reporting
The Pivio System includes detailed and monthly summary reports.
Reports are presented in a simple, intelligible format that keeps business
owners informed of all Internet-related activities.
Benefits
Make the Internet work effectively for you.
The Internet can transform your business by reducing costs, enhancing
productivity, and extending your market reach. With the Pivio System,
you can also connect your office networks without undue risk, block
undesirable Internet sites, and monitor your Internet connections and
web site availability.
Enjoy ease of use.
Do you have limited technical knowledge or resources? No problem. The
Pivio System is surprisingly easy to install and activate.
Enjoy significant savings.
You’ll pay only a fraction of the cost of an in-house security expert. And
you won’t have to invest in expensive technology.

10
Pivio Network Security System User’s Guide
Technical Support
Phone: 425-576-8382
Fax: 425-576-9953
URL: http://www.crossport.com
Email: support@crossport.com

11
Getting Started
Chapter 2
Getting Started
The Pivio Firewall is available in two models: Pivio Firewall and Pivio Plus
Firewall, which includes a built-in four-port Ethernet hub. Both the Pivio Fire-
wall and the Pivio Plus Firewall are configured in the same way. The only
difference occurs when you connect the devices. This chapter provides separate
instructions for the Pivio Firewall and the Pivio Plus Firewall.
The remaining chapters in this User’s Guide apply to both the Pivio Firewall
and the Pivio Plus Firewall.
Model identification
The easiest way to identify your model is to look at the back of the unit.
A model number is shown on the back. Model 2000 is the Pivio Firewall and
Model 2500 is the Pivio Plus Firewall . In addition, the Pivio Plus Firewall is also
an Ethernet “hub.” There will be four slots on the back for plugging in various
network devices and computers.
Pivio Pivio Plus

12
Pivio User’s Guide
Installing the Pivio Firewall
Packing list for the Pivio Firewall
Before you begin installing the Pivio Firewall , please check the contents of the
box. You should have:
❍Pivio Firewall
❍AC adapter
❍One red Ethernet crossover cable
❍QuickStart CD-ROM
❍“Getting Started” Illustrated Guides
❍Registration reminder card

13
Getting Started
Pivio Firewall parts identification
Front
Back
Power
System: Flashing when
working correctly
LAN:
Right: On when
connected to local
network
Left: Flashes (with
traffic)
Internet:
Left: On when
connected to
Internet
Right: Flashes (with
traffic)
Online: On when Internet sites can be
reached VPN: On when VPN connection
is active
Update: Flashes when Update
available
AC-In: Plug AC
adapter in here
LAN: Cable from
Computer/hub
goes here
light: green when
correct cable is
connected
Internet: Cable
from DSL/Cable
modem goes here
Reset: Pushing this clears
Pivio memory
Mode: press this once
if LAN light is not on
Support: On when SNMP
is enabled

14
Pivio User’s Guide
Connecting the Pivio Firewall
Use the following procedure to connect the Pivio Firewall.
Step 1: Plug the AC adapter cord included with the Pivio Firewall into the
“AC In” outlet located on the back of the firewall.
Step 2: Plug the AC adapter into a surge-protected outlet.
Step 3: Turn off your computer.
Step 4: Find the cable connecting your DSL/Cable modem to your com-
puter or network hub. Unplug it from the modem, and plug it into
the port labeled LAN located on the Pivio Firewall.
Step 5: Plug one end of the red cable into the port labeled Internet on the
Pivio Firewall and the other end into your DSL/Cable modem.
Insert the Pivio Firewall between your computer or hub and DSL/Cable
modem
Step 6: Verify that the green LED light next to each port on the back of the
Pivio Firewall is lit.
If the LED is not lit, press the Mode switch next to the port. This
should cause the LED to light up.

15
Getting Started

16
Pivio User’s Guide
Installing the Pivio Plus Firewall
Packing list for the Pivio Plus Firewall
Before you begin installing the Pivio Plus Firewall, please check the contents of
the box. You should have:
❍Pivio Plus Firewall
❍AC adapter
❍One red Ethernet crossover cable
❍QuickStart CD-ROM
❍“Getting Started” Illustrated Guides
❍Registration reminder card

17
Getting Started
Pivio Plus Firewall parts identification
Front
Back
Power
System: Flashing when
working correctly
LAN:
Right: On when
connected to local
network
Left: Flashes (with
traffic)
Internet:
Left: On when
connected to
Internet
Right: Flashes (with
traffic)
Online: On when Internet sites can be
reached VPN: On when VPN connection
is active
Update: Flashes when Update
available
AC-In: Plug AC
adapter in here
Uplink: Cable
from Computer/
hub goes here
light: green when correct
cable is connected
Internet: Cable
from DSL/Cable
modem goes here
Reset: Pushing this clears
Pivio Plus memory
Mode: press this once
if light is not on
lights: green when correct
cable is connected
Mode: press this once
if light is not on
Support: On when SNMP
is enabled

18
Pivio User’s Guide
Connecting the Pivio Plus Firewall
Use the following procedure to connect the Pivio Plus Firewall.
Step 1: Plug the AC adapter cord included with the Pivio Plus Firewall
into the “AC In” outlet located on the back of the firewall.
Step 2: Plug the AC adapter into a surge-protected outlet.
Step 3: Turn off your computer.
Step 4: Find the cable connecting your DSL/Cable modem to your com-
puter or network hub. Unplug it from the modem , and plug it into
the port labeled Uplink located on the Pivio Plus Firewall.
Step 5: Plug one end of the red cable into the port labeled Internet on the
Pivio Plus Firewall and the other end into your modem.
Insert the Pivio Plus Firewall between your computer or hub and DSL/
Cable modem
Step 6: Verify that the green LED light next to each port with a cable in it
on the back of the Pivio Plus Firewall is lit.
If the LED is not lit, press the Mode switch next to the port. This
should cause the LED to light up.

19
Getting Started

20
Pivio User’s Guide
This manual suits for next models
2
Table of contents
Popular Firewall manuals by other brands
Fortinet
Fortinet FortiManager 400C quick start guide
PaloAlto Networks
PaloAlto Networks PA-800 SERIES Hardware reference

Draytek
Draytek Vigor3900 Series quick start guide
Fortinet
Fortinet FortiGate 100A Administration guide
BeyondTrust
BeyondTrust UVM20 installation guide
McAfee
McAfee SG720 Quick installation guide
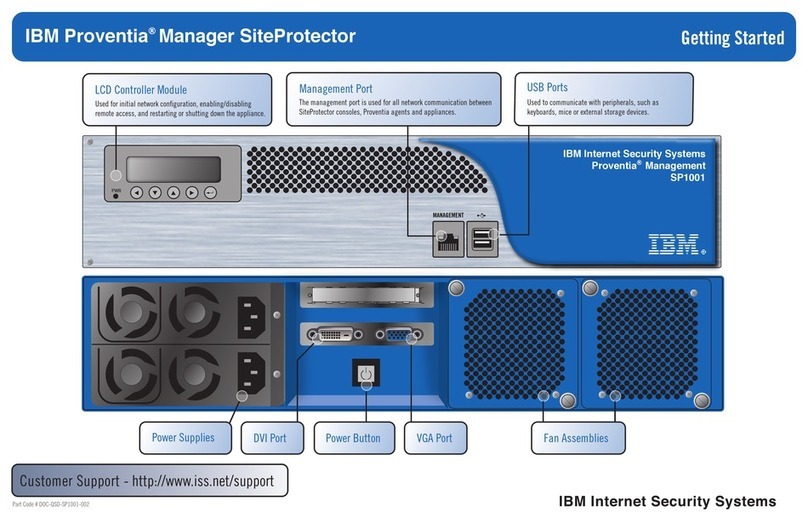
IBM
IBM Proventia Management SiteProtector SP1001 Getting started

Alcatel-Lucent
Alcatel-Lucent Temporis 150 user guide
Fortinet
Fortinet FortiGate 50A Installation and configuration guide
KEYTRONIX
KEYTRONIX I-SAD 19"-S operating instructions

McAfee
McAfee MFO-3400-SWGA - Web Security Appliance 3400... installation guide
Alpha Shield
Alpha Shield FIREWALL user manual
