Cryptophone 100 User manual
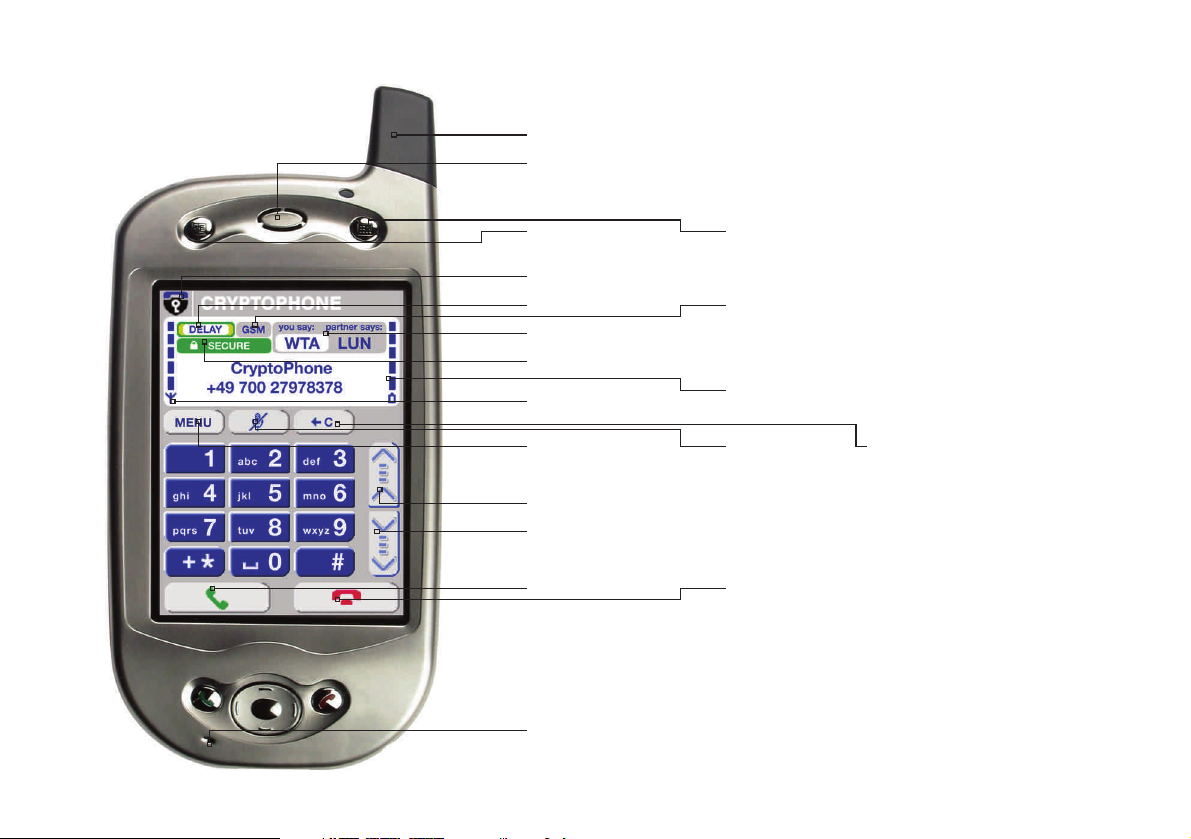
SECURE indicator
DELAY indicator Line type indicator
Security code
GSM Signal
strength meter Battery meter
Configuration
menu button Mute button Delete button
Down
Up
Talk Hang up
System menu
Contacts Calendar
Speaker
Microphone
Antenna

Inhalt
3 … Unpacking
4 … General
5 … Charging
6 … Insert your SIM
6 … Switch on
7 … Enter your PIN
7 … Standby
8 … Flight Mode
9 … Power down
10 … General Mobile Phone Security Advice
10 … Setting the volume
10 … Mute during call
11 … Using the Headset
12 … Placing a Secure Call
13 … Call Quality during Secure Calls
14 … Problems with setting up a Secure Call
15 … Secure Calls while moving
16 … Redialing
16 … Calling from the Contacts list
17 … Calling contacts stored on SIM card
17 … Troubleshooting
18 … Security Updates
19 … Security, Storage and Handling
20 … Repairs
21 … Accessories
22 … 3rd Party Software Install

3
Unpacking
Suitcase.a •3•
Unpacking
Your CryptoPhone was packaged using several tamper-evident seals to
ensure that nobody manipulated with your device while it was in transit.
Please take a minute to follow the security verification procedure outlined
on the Anti-Tamper Verification Instructions that are placed above the
CryptoPhone inside the suitcase.
To open suitcase, place it in front of you, so that the handle faces you.
Then use a sharp knife to cut the seals.Now open the suitcase by lifting
upwards the levers on the front. The levers are robust and at first use
might require a bit of force to move.
Inside the suitcase you will find your CryptoPhone packaged in a security
sealed, transparent plastic filme nested in the foam pad. Please also
verify the plastic filme and seal for tampering. The uneveness of the film
and the seal are intentional and a method of individualization to make
tampering harder. You can verify the authenticity with the Anti Tamper
Verification procedure. You will also find the headset, desk stand, power
supply, direct charge adaptor and headset ear clip in the suitcase. (Suitcase.a
•3•)
Behind the foam pad in the lid of the suitcase you will find the headset
manual, the Admin Policy Password and printed documentation. It is
recommended to store this manual also in the lid behind the foam, so
it wont get lost.
4General
General
Your CryptoPhone is based on a generic GSM equipped PDA that is sold
under different brands, and uses the PocketPC 2002 operating system.
On this device, a few additional applications besides the necessary
components for the CryptoPhone are installed, like an address book, an
agenda and an unencrypted phone mode.
The firmware and operating system have been modified to accommodate
the CryptoPhone functionality and provide added security, so a number
of things that you might know from other PocketPC PDAs are not available
on the GSMK CryptoPhone for security reasons. We supply the original
PocketPC2002 manuals, license sticker and CD with the GSMK CryptoPhone
100, but you need to be aware that some functionality of the the PocketPC
OS have been disabled by us for security reasons. Installing 3rd party
applications requires an Admin Policy Password.

5
Charging
Direct-charge adaptor •5•
Charging
Before using your CryptoPhone, we recommend you charge the battery
until full. In order to do this, you must connect the power supply to the
CryptoPhone. Depending on your location, you may need a plug adaptor
to use the power supply if the plug does not fit in your outlet. The power
supply is rated 100-240V, which means it will accept your line voltage
without conversion as long as it lies within this range. The LED in the
upper right corner of your CryptoPhone will change color to yellow while
it is charging and to green when fully charged. You can either charge the
CryptoPhone in the desk stand or using the small direct-charge adaptor
(Direct-charge adaptor •5•).
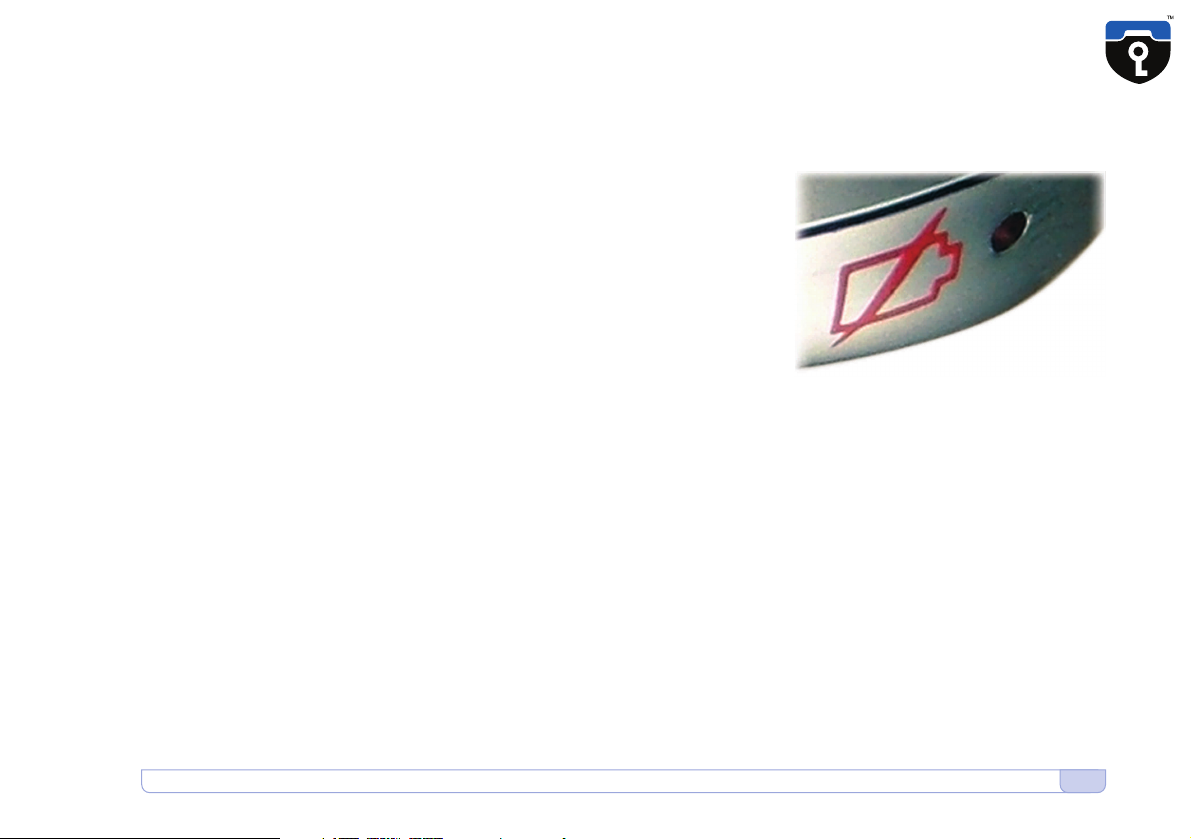
You will see a battery warning when the battery charge is below 50%.
You can see the current battery status at the right bar of the CryptoPhone
display. The battery of the CryptoPhone has a standby time of 150 hours
and a talk time of 3 hours 15 minutes in secure mode. Due to the higher
power consumption of the built-in PDA and the display backlight, this is
less then what you might be used to from normal GSM phones. Also
please note that these times may vary depending on your distance to
the nearest GSM base station: the further away the base station, the
more power your phone needs to use to reach it.
Note: we recommend you charge your GSMK CryptoPhone every night,
so you will not run out of battery unexpectedly. For security reasons
explained later in the chapter ‘Security, Storage and Handling’, we
suggest you place the CryptoPhone next to your bed while it is charging.
If the phone rings, or you need to place a call, while the phone is charging,
you can leave it plugged in while operating the phone.

6Insert your SIM • Switch on
Power down •6•
Stylus.a •6•
Stylus.b •6•
Insert your SIM
You need to insert a valid GSM card (SIM) into the CryptoPhone in order
to be able to place calls. Use the tip of the stylus to carefully open the
rubber flap on the lower right side of your CryptoPhone and insert the
SIM card. Then close the flap with some pressure, so it snaps into the
right position again. If the flap is not seated correctly, you might not be
able to power on the phone. See the enclosed PocketPC2002 manual for
more details on inserting the SIM.
Switch on
To power up your CryptoPhone for the first time, get the stylus out (its
nested inside the antenna) (Stylus.a •6•), unscrew the black plastic part of
the stylus (Stylus.b •6•) and press the small thin end of the plastic part into
the tiny hole on the right of the lower part of the CryptoPhone (Power
down •6•). Now the screen will lighten up and the GSMK CryptoPhone
100 begins its firmware initialization. This may take a moment. You will
be then requested to calibrate the touchscreen of the GSMK CryptoPhone
100 by clicking a few markers. To do this, simply follow the instructions
on the screen.
7
Enter your PIN • Standby
Enter PIN •7•
Standby button •7•
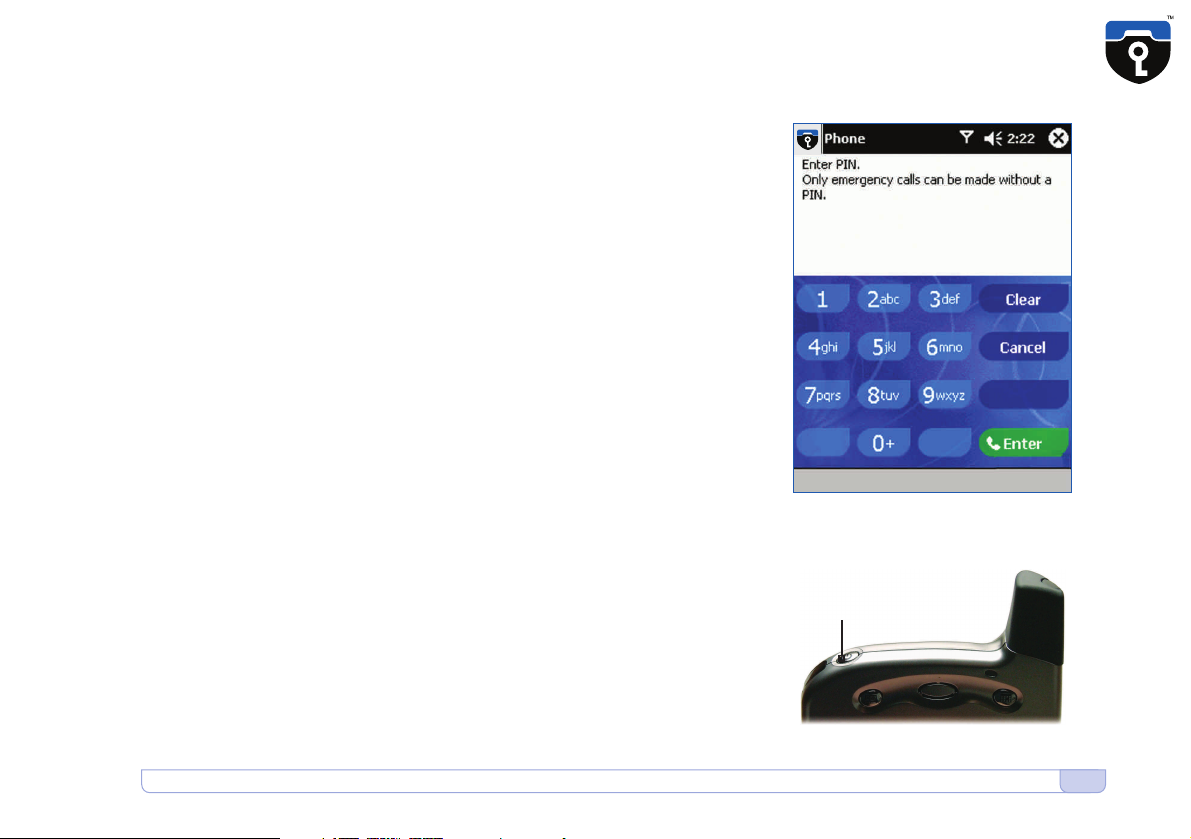
Standby button
Enter your PIN
Most GSM SIM cards require you to enter a PIN number. (Enter PIN •7•)
After you have booted the CryptoPhone hardware, the application for
unencrypted phone calls shows up and asks you to enter your PIN.
After you entered the PIN, press the green Enter button. The CryptoPhone
will finish initialization and provide the secure telephony mode. If your
GSM card does not require a PIN, the secure telephony mode will be
enabled right away.
Standby
The GSMK CryptoPhone has four basic modes of operation. It can be
either completely switched off, in ‘standby mode’, switched on, or in
‘flight mode’.
In normal operation the CryptoPhone is in ‘standby mode’. In standby
mode, you can switch the device on at any time by briefly pressing the
button on top of the device (towards the left). (Standby button •7•)
Now the screen will become illuminated. To put the GSMK CryptoPhone
100 back into standby mode, press the switch again, and the screen
becomes dark. The GSMK CryptoPhone will still receive incoming calls
when it is in standby mode. In other words: standby mode will not disable
the radio.
8Flight Mode
GSM.a •8•
Turn phone off •8•
GSM.b •8•
Turn phone off •8•
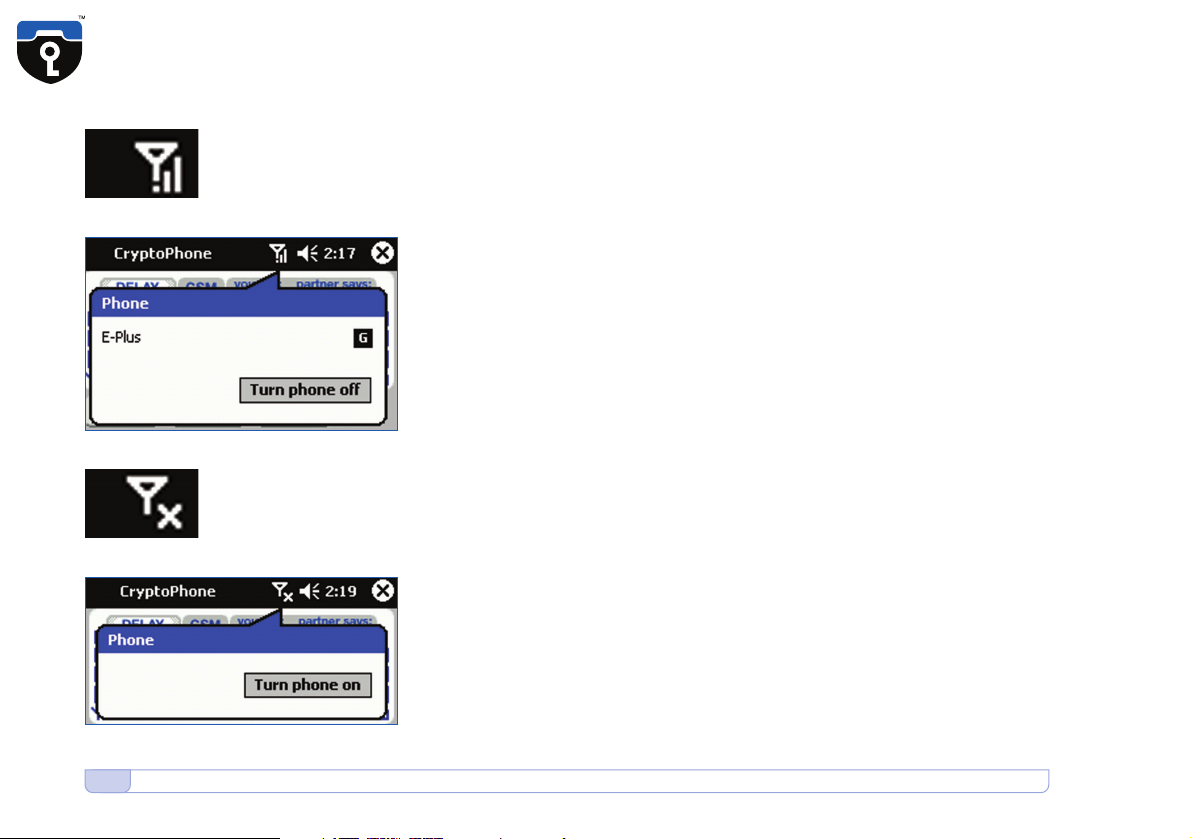
Flight Mode
It is not safe to enter a airplane, hospital or other no-phone area with the
GSMK CryptoPhone switched on, or even in standby mode. To ensure
the radio is off, you need to enter ‘flight mode’. To enter flight mode, first
turn the device on by pressing the button on the top. Then use the stylus
to click the antenna symbol in the top bar of the screen. (GSM.a •8•)
Click the »Turn phone off«-Button to disable the GSM radio part (Turn
phone off •8•). This may take a minute. When the antenna symbol has
changed to off (GSM.b •8•), the radio is switched off. You can still work
with the address book, schedule, notes and the other PDA functions, but
cannot place or receive calls. To switch the GSM back on, click on the
antenna symbol in the top bar again, and select the »Turn phone on«
button in the popup window. (Turn phone on •8•)
9
Power down
Power down •9•
Power down
To completely power down the GSMK CryptoPhone, unscrew the black
part of the stylus and insert the little pin into the power-down hole on
the right underside of the device. (Power down •9•)
Power down erases the content of the volatile memory (which contains
your address book, list of last calls, notes, your SMS messages and
everything else you stored on the device). A power-down can also happen
when you forget to charge your CryptoPhone and the battery runs
completely empty. The GSMK CryptoPhone firmware is unaffected by a
power-down as it resides in non-volatile memory.
Initiating a Power down is recommended in emergency situations where
the capture of the device by an adversary is imminent, to get rid of any
data stored in volatile memory that might compromise your security.
Power down will not erase the contacts and SMS messages stored on
your SIM card.
Note: no key material that might compromise the security of your
past calls is stored anywhere on your device. Upon completion of a
secure call, all key material for the call is destroyed and permanently
erased. The recommendation for a Power down in emergency
situations only relates to other data like notes, contacts, SMS, call
history etc. stored on the device.
Table of contents
Other Cryptophone Cell Phone manuals


