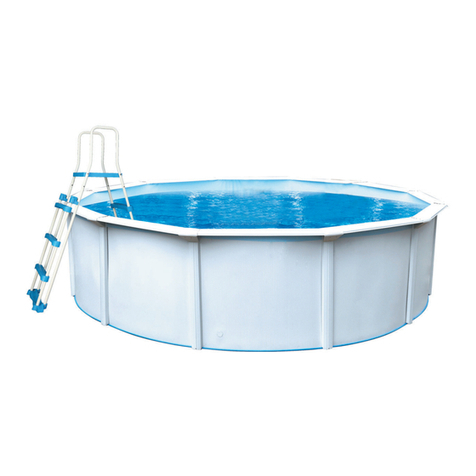
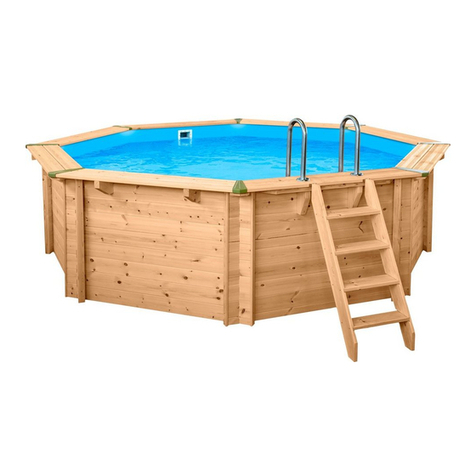
Crystal Enterprises Barrica Series User manual

2
INDEX
1. SAFETY GUIDELINES ..............................................................................Page 3
2. ADVICES FOR A CORRECT STORAGE ......................................................Page 4
3. DETERMINING THE INSTALLATION SITE FOR THE POOL.........................Page 4
4. TOOLS ............................................................................................................Page 5
5. COMPONENTS ...............................................................................................Page 6
6. PREPARE THE AREA BEFORE THE INSTALLATION..................................Page 6
7. PLACEMENT OF THE LOW METAL GUIDES (M)..........................................Page 7
8. ASSEMBLY OF THE STEEL WALL (CH)........................................................Page 8
9. INSTALLATION OF THE WOODEN SLATS (LS)............................................Page 9
10. INSTALLATION OF THE LINER (L) .............................................................Page 11
11. INSTALLATION OF THE PLASTIC PROFILES (P)......................................Page 12
12. INSTALLING THE TOP CONNECTORS (EMB) ...........................................Page 13
13. LAST DETAILS ............................................................................................Page 14
14. INSTALLING THE RETURN VALVE (VR) ...................................................Page 14
15. INSTALLING THE SKIMMER(SK) ..............................................................Page 15
16. MAINTENANCE OF THE WOOD .................................................................Page 15
17. MAINTENANCE OF THE SWIMMING POOL...............................................Page 15
18. CARE DURING WINTER MONTHS..............................................................Page 17
19. TO EMPTY, DISASSEMBLE AND STORE YOUR POOL............................Page 17
20. GUARANTEE AND CONDITIONS ...............................................................Page 18

3
ATTENTION: READ THESES INSTRUCTIONS CAREFULLY BEFORE PROCEEDING TO ASSEMBLE YOUR SWIMMING POOL.
REMIND ALL POOL USERS THAT THESE SAFETY INSTRUCTIONS MUST ALWAYS BE FOLLOWED-UP. KEEP THESE
INSTRUCTIONS FOR FUTURE CONSULTATIONS. YOUR CHILDREN’S SAFETY DEPEND ON YOU! RISK IS HIGHER WHEN
CHILDREN ARE UNDER 5 YEARS OLD. ACCIDENTS CAN HAPPEN TO EVERYBODY SO IF INSTRUCTIONS ARE NOT FOLLOWED
MAY CAUSE HEALTH RISKS AND ESPECIALLY WITH CHILDREN!
1. SAFETY GUIDELINES
Remember that safety is the most important factor when installing the swimming pool. Safety must
be given priority over any decorative aspect. Do not lean, jump, sit, stand or walk on profiles. They
have not been designed to that effect.
Do not dive or jump headfirst in your swimming pool, do not jump from a ladder or elsewhere. This
pool is not deep enough to dive without risk of accident. The self-adhesive sign “Unsupervised,
your child in danger” must be placed close to or on your pool. For replacement adhesives, please
contact our factory.
Do not use your swimming pool when being under the effects of alcohol, medicines or drugs.
To avoid drowning and injuries, do not leave tables, chairs or other objects near the pool to prevent
children from climbing into the pool.
Do not install a slide on your swimming pool.
To avoid electrocution risk, do not manipulate electrical equipment near to your swimming pool or
with a wet body. Make sure that all electrical equipments are protected by a grounded switch.
When bathing, never use metallic or puncturing foot wear.
If your pool has a cover on, do not allow anybody, and especially small children, to walk or play on
it.
Assign one entrance and exit for our swimming pool. This area must be kept totally clean. Remove
all object that could hurt barefooted people.
Do not make holes in your swimming pool wall to install lights or any other devices. It could result in
serious injuries, electrocution or property damage.
For more security, we recommend to install a 122cms high fence or wall around your swimming
pool made of a resistant material. All access doors/gates should have a lock installed at least at
122cms high in order to prevent small children from
opening them. If doors, windows and garden gates make part of the fence, make sure that they can
be closed with a key or bolt.
Do not use your swimming pool at night or when visibility is not good. The water of your swimming
pool should be always kept clean in order to see the bottom and appreciate its depth. Users should
be capable to see that the pool is not deep enough to dive. If you decide not to take into account
this safety instruction, then it’s your responsibility to provide users the appropriate instructions on
the correct use of this product and supply sufficient light. For lighting recommendations, consult
your local licensed electrical contractor on the appropriate light so as to fulfil all local and national
norms of electricity and other security requirements.
If your pool is equipped with a ladder, then follow-up all safety guidelines and assembly instructions
indicated in the manual.
A ladder must be used to get in and out of the swimming pool. When not in use, the ladder should
always be removed and kept in an inaccessible place.
In order to maintain its stability, the ladder should be placed on a solid, levelled base at all times.
Only one person at the time should be on the ladder.
Install the ladder where the entrance/exit of your swimming pool will be.
Never use your ladder for other aims. The pool ladder has not been developed for other
applications.
If your swimming pool is equipped with a filter, make sure that the swimming pool is filled with water
and your filter correctly connected as indicated in the manual.
During the bathing season, the filter must work every day, long enough to renew all the water at
least one time.
Attention: All filter systems fulfil normative of installation NF C 15-100. It stipulates that all
electrical item that is to less than 3.50mts from the swimming pool and freely accessible, must be
fed on very low tension.12 volts.
All electrical item fed on 220 V must be place at least, at 3.50mts from the pool’s edge. A
permission of the manufacturer is needed to modify any of the components of the filtration system.
Verify all parts of your pool on a frequent basis in order to detect possible failures and make sure all
components are installed correctly. Always replace components with original TOI spare parts.
This swimming pool has been designed for private use only. Do not use for commercial activities.
Avoid accidents and be prepared to react in case they occur!

4
2. ADVICES FOR A CORRECT STORAGE
The wooden slats that cover the pool have been treated with Autoclave IV. Nevertheless, the wood is a
natural, noble and living material. It’s very important to bear in mind its composition and the features of
the product and to take basic precautionary measures, in order to obtain the greatest satisfaction.
Slight deformations (concave wood, convex in the sense of the length, knots….) won’t make the
assembly more difficult. Cracks and slight cracks are normal drying phenomena that don’t make
problematic the assembly or the guarantee.
While the pool is not assembled yet, it’s sensitive to the temperature changes. It’s necessary to have in
mind the following advises, after receiving it:
1. If the pool is not assembled immediately:
- Storage the pool in a flat and ventilated surface, protected from important temperature and humidity
changes.
- The best thing would be to store it with some weight on, so no piece will twist.
2. If the pool is immediately assembled:
- Remove the strip carefully, not to be injured by when it is cut..
- Assemble the structure within a 24 hours term.
- Don’t assemble the pool in different stages, with a very hot weather and exposing the wood to the
sun.
- Use appropriate tools.
IMPORTANT: We suggest you to use a brush to apply a water-based varnish (not included in the kit) in
order to protect the wood from the weather’s effects. Thereby, the wood will keep all properties that
have been applied in the manufacturing process (autoclave and organic solvents).
We recommend to repeat the process at least once a year, to extend the life of the wood and improve
its appearance.
3. DETERMINING THE INSTALLATION SITE FOR THE POOL
1. Take the time to read carefully all of the instructions before installing the pool. Follow all the steps.
2. This pools must be assembled on a firm, strong and levelled floor and outdoors.
3. This swimming pool has been conceived and designed to be easily installed. The final result will
depend on the care and attention given to the assembly and if the instructions are followed, in order to
increase the longevity of the pool.
4. Check local codes and be sure to get building permits, if necessary. Check electrical codes and local
building codes regarding the installation of above ground pools.
5. Remember that your pool is like a big tank. If the pool was too full, the pressure against the wall
could break it and release a big quantity of water. This could cause damages and injuries to the people
that would be closet to the pool.
6. This kind of swimming pool contains big quantities of water and a significant weight. Take all the
safety measures to avoid accidents. To calculate the approximate weight of your pool, please bear in
mind that every litre of water is equivalent to a kilo.
7) At least 2 adults are required to assembly the pool.
8) The time to install the pool between 2 people is from 5 to 6 hours, depending on the model.

5
The swimming pool must only be installed above ground and on a hard, solid ground. The swimming pool must be installed
near a drain or sewage system to avoid flooding in case of breakage/leakage.
A large area is ideal. However, if a flat area, large enough for the swimming
pool is not available, then
choose an area where minimum digging is required. Under no circumstances, the swimming pool
must be installed below ground level.
The maximum weight that the installation site can support must be taken into consideration.
Remove roots, grass and stones in the selected area, including those under the ground. The weight of the water
will compress these elements between the liner and the earth under the swimming pool, resulting in damages.
Grass left underneath the pool liner will rot and give of an unpleasant odour and stones and roots will damage the
pool liner.
Do not install your swimming pool on: marshland, tar, gravel and wood. A foundation made of levelled, solid and
very compact soil/earth is the best base for your swimming pool. Do not install your swimming pool on a fragile
earth or on a site that will not support the weight of the pool.
ELECTRIC WIRES.
The swimming pool must be installed at a minimum distance of 6 meters from any electrical socket. To ensure maximum safety, it should
never be installed directly below high voltage or medium voltage overhead electricity wires. In some communities, it is illegal to do so.
UNDERGROUND CABLES.
Check for any buried electrical, telephone cables, or gas pipes a the site before you start digging to level the surface.
TREES.
Overhanging trees and their tenants (birds, insects…) are not the swimming pools best friends. The resin and falling leaves and twigs can
cause problems in maintaining your swimming pool’s water clean. If there is a filtering system, it will have to be used more often. Install the
swimming pool away from the trees.
GROUNDED SOCKETS.
In the case where the swimming pool has or uses a water filter or any other electrical device, and there is no grounded socket nearby, you
must have one installed by an authorized electrical technician.
Important:
Determine the location of the swimming pool. Make sure that the distance with other near houses,
fences…etc is the appropriate. Check that the ground is levelled. Contact the competent authorities to
receive all the information concerning to the installation of the pool in his/her house.
4. TOOLS: (not included)
1.- A measuring tape
2.- A spirit level
3.- A marker (felt pen)
4.- Adhesive tape
5.- Cutter
6.- Gloves
7.- Clothespins
8.- Scissors
9.- Metal saw
10.- A wrench
11.- A flat screwdriver
12,- A star screwdriver
13.- File
(A rake, a stake and a rope)

6
5. PART LIST (COMPONENTS)
COMPONENTS: Remove and sort the components of the pool before starting installation
Ø
350x120
Ø
460x120
Ø
550x120
L
1
1
1
CH
1
1
1
TO
31
31
31
AR
31
31
31
TU
31
31
31
M
10
12
15
M2
10
12
15
LS1
86
116
139
LS2
2
2
2
LS3
1
1
1
LS4
2
-
-
PL
11
15
17
P
10
12
15
EMB
10
12
15
P2
20
24
30
C
2
2
2
SK
1
1
1
VR
1
1
1
PREPARE THE AREA BEFORE THE INSTALLATION
For this kind of pool we recommend to make a concrete platform. This platform should have the same size as the
pool diameter plus 30 cm. security. The surface must be TOTALLY HORIZONTAL, WITHOUT DIFFERENCE.
VERY IMPORTANT: Never assemble the pool on polystyrene plates or similar.
- We recommend to put on the ground a protective sheet, a rot-proof tapestry or Astroturf, to protect the liner from
breaks caused by the fret of the liner with the floor.
- Directly on the area, previously conditioned (see instructions here below), you will need the following tools:
A stake, a rope, a funnel (bottle), and some lime, flour or similar. Mark the area where the pool will be placed. For
major security, use gloves.
- Hammer a peg in the ground; in the centre of the area where you want your pool. Tie a string/rope to the peg
equal to the length of the radius of the swimming pool +30 cm, and mark a circle with a chalk or with a bit of lime
or flour and a funnel (or bottle) (fig.1).
- If you need to level the floor, don’t fill in the holes. Dig away higher areas and level the ground with lower areas
(not the other way round). Anyway, it’s needed to remove roots, grass, stones, twigs… and any kind of sharp
objects (fig. 2 & 3)
- Level the ground with a rake or a table, covering the holes with sand (fig. 4).
- Keep on checking that the ground is levelled 100%, with a spirit level and a flat strip of wood. Level all the
surface in the same level tan the lowest place, filling in with fine sand. Level again. (fig. 5).
- And finally, place a thin layer of sieved sand throughout the surface. Spread the sand with a table and level it at
the same time. Flatten the area with a roller (fig. 6).

7
fig. 1
fig. 2
fig. 3
fig. 4
fig. 5
fig. 6
7. PLACEMENT OF THE LOW METAL GUIDES (M)
Make a platform 30 cm. more (approx) tan the measure of your pool, so this
will give you a safety margin. Locate the centre of the platform (on the central
point), tie the rope equal to the length of the radius of the pool (+30 cm) and
mark a circumference with chalk, lime or flour and a funnel (fig.1).
a) Put the metal guides (M) around the circle (previously marked) and link
the guides with the union pieces (M2) as the below pictures show. At the
end, make sure that the circle is not deformed (fig. 7).
Advice: Leave a gap between the guides of approx. 4 mm.
This will allow you to close the steel wall (CH) easily.
fig. 7

8
8. ASSEMBLY OF THE STEEL WALL (CH)
VERY IMPORTANT: Don’t fold or wrinkle the steel wall during the installation. Unfold it very carefully. Put a
cardboard under the metal wall in order to unfold it easily and avoid it to be scratched with the floor contact
(possible cause of rust).
Installation must be done by at least 2 people, on a sunny day and with no wind. During the installation, don’t fold
the metal wall and handle it very carefully.
Don’t unfold neither break the lower or upper guides during the pool assembly.
Very important: Please wear gloves during the pools assembly, to avoid cuts with the metal hedges.
a) Unpack the coiled pool wall (CH) and place it vertically (the
inner wall sticker up) on a cardboard at the centre of the pool circle.
This will help you to unroll it easily and make sure that it doesn’t get
scratched by rubbing against the ground (fig. 8).
IMPORTANT: THE SKIMMER HOLE IN THE ROLLED STEEL WALL MUST BE
AT THE TOP OF THE POOL.
b) Start unrolling the wall, placing the bottom corner of the wall in
the low metal guide (M) (fig. 9).
b) Unfold the metal wall, following the circle till the wall will be
assembled inside the low metal guides (M). (fig. 10)
c) Join the two ends of the metal wall so that the screws (TO)
can pass inside both holes, leaving the nuts (TU) and the washers
(AR) at the outer side (fig. 11).
Cover the ends of the junction and the wall boards (inside of
the pool) as well as the screws, with the PVC tape in order to
protect the liner from the contact with this objects, that may
cause breaks in it. The PVC tape must be firmly stuck in this
area and if it was necessary, use adhesive tape or similar to
fix it to the wall.
Very important: Put all the screws in the metal wall, from the bottom
up, excepting the last hole. Tighten strongly, all the screws with
screwdriver. If the assembly and the fixation of screws and nuts is not
correct, the guarantee of the pool could be void.
Install the plastic profile (PL) around all the perimeter of the pool.
Cut the excess of the last section of the profile (PL) to fit perfectly.
Be very careful not to damage the liner.
Before installing the wood slats, cut the skimmer
hole with a pair of scissors for metal.
Smooth the edges to avoid the liner to be
damaged or cut.
(fig. 12)
fig. 8
fig. 9
fig. 10
fig. 11

9
9. INSTALLATION OF THE WOODEN SLATS (LS1- LS2- LS3- LS4)
Put the textile tape (C) around the steel wall and adjust it in order
for it to remain on the top of the pool (30 cm from the top approx.).
To tighten the tape, please follow these steps:
1- Thread one end inside the two rings and tighten to adjust the belt to the wall.
2- Take the end of the tape and wipe inside the second ring as shown in the second image.
3- Pull the end you just entered and finally adjust the tape to the band in order for it not to fall.
1
2
3
Don’t tighten the textile tape too much now as the steel wall could be deformed. It’s enough for
it to remain hold.
To place the wood slats is very simple. Separate the tape with a hand and introduce the slats
between the tape
and the wall, from top to bottom (fig.13), by sliding it until it snaps into the bottom guide wire
(fig.14)
Fig. 13
Fig.14

10
Make sure that the slats are well positioned and introduced correctly in the low
metal guide (fig.14) in order that they remain aligned with the top part of the steel
sheet. The picture 15 shows how a wrong assembly and a correct one.
Place the slats one after another, without joining them completely. Leave a
gap of approx. 1-2 mm between them. In this way In this way the movements of
the wood (due to the humidity) will be absorbed (fig 16).
a. Start assembling the slats that go in the valve zone (LS3) and in the skimmer
(LS2). Introduce the low part of the slat (LS3) between the wall and the tape, by
matching the hole in the wall with the one in the wood slat.
b. Place 2 slats (LS1) towards the skimmer hole in the way you put the slat in
the valve zone (LS3).
c. & d. Adjust now the 2 slats for the hole in the skimmer (LS2) by matching the
hole in the steel wall with the hole in the slats. Adjust the slats that have just been
put to centre the holes in the woods with the holes in the steel sheet. In this case,
the skimmer will match perfectly.
a
b
c
d
Put the rest of the slats (LS1) around the pool, leaving the wood slat (LS4), that is narrowest than the other slats
(LS1), to the end. (Note: LS4 is only for the pools with size 3,50). A slight gap between the slats must me left
while assembling them.
ADVICE: If there is a gap between the slats LS1 when you have finished putting all of them, distribute this gap
between all joints of the slats in order to hide the link. This has been done on purpose for the holes to absorb the
natural movements of the wood, due to the changes of temperature and humidity.
Place the other textile tape around the pool at approx. 30 cm from the bottom of the pool and tighten it. You can
make a knot in the end of the tape to ensure that it won’t be loosened over time.
Fig.15
Fig.16

11
At this point, make sure that the pool is round before start the
following step (fig. 18). Check the guides make a perfect circle and it
adapts to the circumference, previously marked
(7. PLACEMENT OF THE LOW METAL GUIDES).
Before the liner’s installation, place a protective floor cover or put a
sieved and thin sand layer (without stones) on the inner area with a
thickness of 5 cm. Use a rake to ensure that the sand layer doesn’t
have slopes (fig. 19).
Important: Once the floor cover or the sand layer have been put
down, put more clean sand (without any stone or strange objects)
creating a triangular chock of 20 cm. base and 20 cm height. In this
way we’ll avoid the water pressure damage or slide the liner under
the wall, and the water forces will be distributed uniformly (fig. 20).
Before installing the liner, we recommend to put a plastic sheeting
between the sand and the liner, to give more protection to the liner.
fig. 18
fig.19
fig. 20
10. INSTALLATION OF THE PVC LINING (LINER) (L)
Important: Install the liner with 2 (or more) people. The PVC used for our liners has been developed to
withstand exposure to heat and ultraviolet rays for a long period of time. Therefore, under certain climates and
conditions of use, the liner quality can vary slightly.
Never walk on the liner with your shoes on. Don’t put tools or pieces on the liner. Any cut or damage produced by
a wrong handling will void the liner’s guarantee (See “Liner’s guarantees”).
The liner is the most important and delicate part of the swimming pool. Don’t use knives or any sharp object to
open the swimming pool bag/container. Carefully separate the liner from the rest of the parts and keep it in a safe
place to avoid undesired holes or damages that could be caused by the tools or the metal wall.
Install the liner on a sunny day, minimum at 20ºC, so that can easily stretch during the installation. It’s made of
a highly flexible vinyl material, sensitive to the heat so it must be warm when installed in the swimming pool.

12
a) Place the liner (L) in the centre of the swimming pool and
unfold it towards the sides (place the rough side towards the
upside and the flat side down). The welded part that joins the
base of the liner to the side of the pool must perfectly aligned
and match the low profiles of the pool (fig.21), all around the
inside perimeter at the bottom of the swimming pool.
b) Locate the side welding (SL) so that it’s perfectly right and
perpendicular to the ground. This will help you to place the
liner without folds. Pull away softly all the excess of the liner
and don’t pull it too hard. The liner must be centred, well
extended and not wrinkled. Cover the upper edges of the pool
(the steel wall and the wooden slats) with clothespins (fig. 22).
Remove the excess.
c) To remove the excess of wrinkles in the base, don’t wear
shoes,
and extend the liner towards the sides with your hands and feet.
Flatten the liner and start filling the pool with water, but no more
than 2 cm approx. Take the time to do it properly and for the liner
to be free of wrinkles.
d) Once the base hasn’t got any wrinkle, ADD MORE WATER
(approx.10 cm under the hole of the return valve). DON’T FILL
THE POOL COMPLETELY YET. While the pool is getting full of
water, stretch the sides of the pool up to tighten it the most. The
water pressure will fix the liner to the wall.
IMPORTANT:
CHECK THE WATER DISTRIBUTES EQUALLY. If there
were any puddles, that means that the ground has hollows. If the
water accumulates in a side, means that the area is unbalanced.
IN THIS CASE, THE POOL MUST BE EMPTIED AND
DISASSEMBLED COMPLETELY TO START FROM THE
BEGINNING, THE GROUND WILL HAVE TO BE WELL
LEVELLED.
fig. 21
fig. 22
fig. 23
11. INSTALLATION OF THE PLASTIC PROFILES (P)
1- The plastic profiles (P) are linked together by the connecting pipes (P2).
Take a profile and insert two connecting tubes (P2) by the end of the
profile. Enter the tubes half way. Take another profile and press the 2
profiles together strongly (fig. 24)
2- Place the 2 profiles (already linked) against the metallic guide (M) that
holds the wooden slats and make it match the joint of the metal guides
(shown in the picture Fig. 25 with an arrow) with the centre of the plastic
profile (P). This will make the link more solid.
fig. 24

13
3- Press down starting at one end of the plastic profile (P) (fig. 26). In this
way, it will be easy to match the profile, because it’s been designed to fit
with some pressure (so, inserting it at the same time would be more
difficult). Follow the same process for the rest of the plastic profiles, joining
the profiles between them as in the 1st step. Don’t put the last section yet.
Before placing the last section, check that all profiles are perfectly fixed
between them. Place the last profile in its position to close he circle and
mark where the excess of profile will be cut (in order for it to match
perfectly). It’s better to cut twice to fix it better, than to cut too much and not
match it properly (fig.27)
Once the last section has been cut, lift slightly the profiles that are already
placed in the pool; put the union tubes (P2) in the last section and link it to
the plastic profile, already placed (P). Puss down slightly to adjust the
profiles (P) to the metal guides (M).
fig.25
fig. 26
fig. 27
12. INSTALLING THE TOP CONNECTORS (EMB)
1
2
3
1- Place the top connector in the middle of the union of the profiles.
2- Open it slightly with the hand and first, hook it on the inside of the pool and then set it to the profile.
3- Repeat the operation with the other top connectors.

14
13. LAST DETAILS
Once all profiles and top connectors have been placed, you can cut the
excess of the liner (that overlaps out below the metal guides). Use a pair of
scissors or a blade to do it. Pull the end of the liner and cut it carefully, as
it’s shown in the picture (fig. 28).
Put “adhesive advices” in a visible place (i.e. close to the ladder). Figs. 29,
30.
fig. 29
fig. 30
- Assembly the ladder following the instructions and place the sticker it in a visible place, in the entry/exit way of
the pool. Remove it after using it.
- Assembly the filter equipment following the instructions of its manual. It must be placed (as min.) 3,5 meters far
from the pool, once plugged and connected to it by the hoses.
14. INSTALLING THE RETURN VALVE (VR)
The return valve is the item through which the water returns to the pool, after having been filtered in the filter
equipment (fig. 35). Important: Put Teflon in all threads. The excess of Teflon can cause breaks of the pieces.
Remove the rear fitting of the return valve and put Teflon, then screw it until the end.
Fig.31
Fig. 36
Fig. 37
1) Once the water reaches +/-10 cm under the bottom edge of the valve, mark a cross in the hole (in the liner)
with a felt pen. Cut with a blade, from the inside to the outside, very carefully and make the cross without
exceeding the hole. Place the rubber washer (B) on the steerable grid (A) and introduce it into the hole, inside the
pool (Fig. 36). From the inside to the outside, cut the piece of the liner that exceeds on the outside.
2) Place the rubber joint (C) out of the pool. Put Teflon on the threads and firmly tighten the nut (D) (fig. 37). Put
Teflon and insert the return hose (E), that runs from the from the outlet of the filter to the return valve (A), and
secure it with the clamp (H).
For the best filtration, we suggest you orientate the jet of water, so the washer/ring (AR). Move the
adjustable ball (BO) towards one of the sides of the pool and slightly down and then, fasten the ring (AR). In this
way, the impurities will be directed to the skimmer and the water will circulate throughout the pool.
fig. 28

15
15. INSTALLING THE SKIMMER (SK)
Once the water of the swimming pool is +/- 5 cm under the skimmer hole, mark
the hole in the liner with a felt pen and cut the skimmer’s square with a sharp blade the
piece of marked square of liner (fig. 36).
Cover the “Fitting Thread” with Teflon and screw tightly the connecting screw
to the skimmer’s body. It’s important to put Teflon on all the connection threads to
ensure a good seal. The excess of Teflon can be broken off.
To put the skimmer on, start by placing the rubber gaskets one on each side (fig.
37). Put the frame on the inside of the pool and insert a screw in the top central
hole in order to go through the frame + rubber gasket + liner + the other rubber
gasket + skimmer’s body, from the inside to the outside. Screw a little bit to hold it
to the skimmer’s body (Figs. 38 & 39).
Repetir esta operación en el agujero del marco central inferior, enroscar suavemente,
a continuación ir colocando los demás tornillos uno después de otro, siguiendo el
orden indicado, al final apretarlos firmemente.
Connect the end of the hose to the connection thread with a clamp. Fit the other end of
the hose to the inlet of the filter equipment and tighten with the help of a clamp.
Finally, place the basket inside the skimmer
and close the skimmer’s body with the cover.
To finish, fill the pool a little more than half of
the skimmer’s gate to get water inside and fill the
filter system.
16. MAINTENANCE OF THE WOOD
To keep the wood all the properties that have been applied in the manufacturing process (Autoclave and organic
solvent), we suggest you to use a brush to apply water varnish in order to protect the wood from the weather
changes (not included in the kit).
We recommend to repeat the process at least once a year, to extend the life and improve the appearance of the
wood.
17. MAINTENANCE OF THE SWIMMING POOL
- WATER MAINTENANCE
All swimming pools need chemical treatment to maintain the water disinfected and crystal clear. Consult your chemical
products supplier to determine those that are best for your needs. Water treatment procedure is not the same in all regions,
because it depends on the water quality in each region.
WARNING: An incorrect treatment may cause water pollution that produces infections, poisonings and diseases.
fig.36
fig.37
fig.38
fig.39

16
The best water quality is obtained by using the right preventive treatment. To prevent the growth of algae and bacteria, use
bactericide, algaecide, water pH correctors and flocculants (except for cartridge filters). Apply the first chlorine treatment within
24 hours of filling the pool.
Never add chemical products directly to the water. Chemicals must be diluted before being introduced into the water.
Otherwise, the liner could be damaged.
However, it is easier to keep the water clean than to clean contaminated water. Use your filter frequently.
Water maintenance is the most important factor in making your pool liner look excellent and last for a long time. Therefore,
follow the instructions in the filter manual. The filter capacity must be high enough to filter the water of the pool 3 times in every
24 hours. The filter must be connected when there is nobody in the pool.
Make sure to check the water at least once a week, to keep the pool in optimum conditions.
Make sure that you do the following on frequent basis:
- Analyze the water pH and make sure it is between 7.2 and 7.6.
- Analyze the chlorine level and make sure it is between 0.5 and 2 grams per cubic meter.
- Remove any leaves and insects from the water.
Make sure that you do the following on weekly basis:
- Add the correct “maintenance quantity” of algaecide.
- Add anti-hardness products if lime is formed or the water is hard.
- Use flocculants to improve filtering (except when using a cartridge filter).
- HANDLING CHEMICAL PRODUCTS AND SAFETY MEASURES
The following precautions must be taken when handling chemical products:
- Use gloves to protect your hands and masks or goggles for eye protection.
- No smoking where the products are stored or used. Many products are flammable.
- Wash your hands and face after using the products.
- Store the products in a dark and dry place. Do not leave the products in the sun.
- Make sure that the containers are closed. Tighten their caps or lids.
- Do not leave the products within the reach of children. Make sure that the products are stored in a high and safe place.
- Do not reuse the empty containers.
- Keep the products in their original containers.
- Do not remove the labels from the containers.
- Make sure that the storage area for chemical products has proper ventilation.
- When raining, increase the level of chlorine and anti-algae-bactericide.
- When adding water in the pool, check again the chlorine and anti-algae-bactericide levels.
- Well ventilate the place where the chemical products are stored.
- POOL MAINTENANCE
After your pool has been completely installed, follow these instructions to keep it clean and in good condition.
- Liner –Regularly check for leaks in the liner. Use the repair kit for small repairs on the liner.
- Pool wall –Keep it clean, using a neutral soap. Do not use abrasives, chemicals or cleaning solutions.
Clean up silt chemical products, used for water treatment, right away. Coat all showing screw heads with clear outdoor
varnish.
Check the metal parts for rust, at least once a year. Coat all scratches and rusted areas with an anti-rust paint. Follow the
instructions for paint application.
At the end of the season, drain the water until the water level is 30 cm. Remove the upper part of the liner and check for
possible rust on the inner side of the pool wall.
Pay special attention to leaks in the filter and outlet holes. Leaks must be repaired right away.
Shock chlorination
It destroys quickly and efficiently all microorganisms, bacteria and fungi, if chlorine level is raised up to 20ppm
approx.
Shock chlorination is recommended in the following cases:
a) At the beginning of bath season.
b) Depending on special climatic conditions (storms, rain…).
c) In case of intensive use of the swimming pool.
Cleaning the bottom of the swimming pool by aspirating: only for pools with skimmer and filter with
engines 6, 8, 10 & 15 m³. Connect the end of the hose to the brush and immerse it in the water for the
hose to get filled up. Connect the other end of the hose to the aspiration cover and put it on the basket of
the skimmer. Start the filter system in “drain off” and start cleaning the bottom.

17
Cleaning the bottom of the pool with a venturi: Connect a hose to the head of the venturi and immerse it in
the swimming pool. Open the tap with a normal pressure and the venturi will start working. The water
bounces on the ground producing an updraft that collects and deposits the dirt inside the filter-bag.
Problems
Causes
Solutions
Turbid water
Poor filtration. High pH. Excess
of organic residues.
Backwash the filter. Add flocculant tablets in dispenser.
Perform a shock chlorination.
Except cartridge filters.
Green water
Algae formation.
Brush the bottom and the pool’s wall. Analyse pH and
adjust between 7,2 and 7,6. Make a shock
chlorination and add extra anti-algae.
Brown water
Presence of iron and manganese.
Analyse pH and adjust between 7,2 and 7,6. Make a
shock chlorination
Inlays
Precipitation of calcium salts in the
water.
Analyse pH and adjust between 7,2 & 7,6. Add anti-scale
once a week.
Eyes and skin
irritation
pH disarranged. Excess of organic
residues.
Analyse pH and adjust between 7,2 y 7,6. Make a
shock chlorination.
18. CARE DURING WINTER MONTHS
If the pool is not disassembled during the winter, compliment following instructions at the end of the season to prepare your
swimming pool for the winter. During wintering, do not drain all the water. Never leave a swimming pool dry outside. Decrease
the water level just below the skimmer opening. Cover the pool with a cover. To keep the cover flat, place an inflatable object
or floater between the water and the cover. This way, the liner is not damaged by rain and/or freezing. You can also add a
chemical product to the water in order to protect the liner against freezing. This product also facilitates the cleaning of the liner
after the winter time.
To avoid that the water starts freezing, let several empty plastic bottles (or balls made of Plastic) float on the water. In case
of snow, remove the snow of the cover regularly so as to avoid extra weight on the cover.
- Check all points and screws and that all joints are correctly adjusted. Check that the pool wall has not come out of the lower
profiles. Check the screws are tight.
- Check rusted areas and paint all scratches or rusted areas using anti-rust paint.
- Check liner. Check that the upper part of the liner is still joined to the pool wall with plastic copings. DO NOT remove the pool
liner. Removal of the liner shall void the product warrantee and/or guaranty.
- Find any leaks. Check that there are no leaks in the liner. Leaks can cause great damage to your pool during the winter.
- Pool accessories. Remove all accessories, including the ladder, from the pool. Wash the ladder with water and neutral soap.
Wash the rest of the accessories with water and neutral soap.
- Filter. Remove the filter from the pool. Wash the whole filter with water and neutral soap. Read the filter installation and
maintenance manual.
19. TO EMPTY, DISASSEMBLE AND STORE YOUR POOL
If the pool is disassembled during the winter, empty the pool with the filter till the return valve level and then use “the
communicating vessels principle”. For this purpose submerge a hose in the pool until it’s full of water, then, cover on end with
your hand and take it out of the pool. Water will start to come out. Make sure to keep the other end of the hose submerged to
empty the pool.
Once the pool has been emptied, disassemble it carefully in the inverse sense in which it had been assembled, in order not
to
damage or deform the pool. Check all pieces are clean and dry them before storage.
Before store the liner, clean it with water and neutral soap. Don’t use abrasive products, remove all impurities and dry it with
a cloth or absorbent paper. This will help to keep the liner in the best conditions and avoid bad odours and humidity. Fold it
and store it in a dry place, protected from the sun.
In case you have any broken component/s, replace it/them as soon as possible, using original accessories parts.

18
GARANTÍA ¤ GARANZÍA ¤GARANTÍE ¤GUARANTEE ¤GARANTÍA
GENERAL ASPECTS
In agreement with these regulations, the seller guarantees that the product of our brand (mark)
corresponding to this guarantee does not present any lack of conformity in the moment of its delivery.
The guarantee period for the product is 2 years (except for the liner), counted since the moment of delivery.
If a lack of conformity took place and the buyer was notified during the guarantee period, the seller will have
to repair or replace the product to the buyer in the place where he/she will consider although it was impossible or
disproportionate.
When the product can’t be repaired the buyer may ask for a proportional reduction of the price or, if the lack
of conformity is enough important, the resolution of the sales contract could be also asked.
The replaced or repaired parts under guarantee don’t extend the guarantee’s term of the original product, but
will have their own guarantee.
For the effectiveness of this guarantee, the buyer must prove the date of the purchase and the delivery of
the product.
After 6 months of the delivery of the product and there was a lack of conformity, the buyer must prove the
origin and the existence of the alleged defect.
This warranty certificate does not limit or prejudice the rights corresponding to consumers under national
mandatory rules.
PARTICULAR CONDITIONS
This guarantee covers the products referred to in this manual.
This certificate of warranty shall apply only in the countries of the European Union.
For the effectiveness of this warranty, the purchaser must strictly follow the manufacturer’s instructions
included in the document accompanying this product when this is applicable according to the range and the
model of the product.
When a calendar is specified for the substitution, maintenance or cleanliness of certain pieces or
components of the product, the guarantee will only be effective when the above mentioned calendar has been
followed correctly.
LIMITATIONS
This warranty shall apply only to sales made to consumers, understanding the consumer as the person that
acquires the product with ends/purposes that don’t enter the area of his professional activity.
No guarantee is given respect the normal wear and tear of the product. Regarding the pieces, components
and/or consumables (as batteries, bulbs…) will be as provided in documentation accompanying the product.
The guarantee doesn’t cover those cases in which the product: 1/ has been object of an incorrect treatment.
2/ has been repaired, handled or maintained by a non authorized person (expert). 3/ has been repaired or
supported with not original pieces.
When the lack of conformity of the product has been a consequence of an incorrect assembly o a wrong
starting, this guarantee only will work if the assembly and starting have been included in the contract of sale and
purchase and under the responsibility of the seller.
Crystalclear Enterprises
Hamilton Lodge
58 Queens Road
Chadderton
Oldham
Tel. 0161 345 1110
E-Mail: sales@cheshireluxurypools.co.uk
www.cheshireluxurypools.co.uk
Please ask us for further information regarding up-
grading your: - Plumbing, Heating, water sanitisation
systems and all your pool needs

19
SWIMMING POOLS –GUARANTEE’S CONDITIONS
Components
Guarantee
Loss of Guarantee
Liner
The Guarantee covers any fault of
manufacturing of welds for 1 year.
These faults, if existing, appear a little
time after having assembled the pool.
Within 15 days after assembly, the
Guarantee stops having effect, as the
conservation of the liner depends on the
use that the buyer gives to it.
Pricks or pores in the surface of the liner,
produced by wrong handling while assembling
the pool, unpacking or incorrect storage voids
warranty.
Use of chemical aggressive chemical products
(like salfuman, or solid chlorine) voids
Guarantee.
In case of disassembly to reassemble the
swimming pool in another place, the following
year also voids warranty
Metallic Band
The Guarantee covers 2 years against
any fault of fabrication, as well as the
oxide.
The metallic band has to be assembled
as per the Manual of Instructions,
putting all pieces, screws and ironworks
in place.
To bury the swimming pool even partially,
totally cancels the Guarantee, because these
pools are designed to be assembled above
ground only.
Paint or use of Chemicals products on the
Metallica band, or use of corrosive products to
clean the pool’s surroundings, voids the
Guarantee against oxide.
Filter System
The Guarantee covers for 1 year
against any fault of manufacturing.
The assembly and maintenance of the
filter system will have to be done as the
Manual of Instructions shows.
The “muffle”, produced by plants/tree’s leaves,
because of bad cleanliness of the pool, as well
as the use of acid products, cancels the
Guarantee.
If the pump has been handled and/or
manipulated by non qualified people the
Guarantee is void.
Pump damage, produced by making it work
dry voids Guarantee
The Guarantee is annulled if instructions of
electric installation aren’t followed scrupulously.
Decoh! pool
The Guarantee of the Decoh! Pool
cover is only 6 months against any fault
of fabrication.
The Guarantee of Decoh! pool covers
the loss of the colour during 1 summer
because this is a biodegradable
product; sensitive to the solar radiation
(which varies, according to the pool’s
location).
Cuts and tears, produced during the assembly
and discolouration produced by spillage of
chemical products are not covered by the
Guarantee.
The guarantee does not cover the use of this
Decoh sleeve! on any other pool.
Winter Cover
The Guarantee covers 1 year against
any fault of manufacture.
Breaks produced by atmospheric inclemency.
Incorrect dimensions provided by purchaser.
GENERAL EXCLUSION OF THE GUARANTEE
The Guarantee won’t have effect in the following cases:
- When breakdowns or damages have been produced by an incorrect use, assembly or bad handling of the product.
- When damages to the product are produced by natural catastrophes, casual events or major force.
In case there is any incident, remember:
- it is important to keep and supply the Purchase receipt should an issue arise.
- Also, it is important to give the Lot nº (inside the package).
- If you see that the package is damaged or spoilt, when the pool is received, you must write an “observation” in the
Proof of Delivery, although damages can’t be checked until after unpacking.
- If the presence of a specialized technician is required to solve the problem, and they see that the problem has been
caused by bad handling or assembly by the buyer, the expenses will fall to the customer’s account, NOT the company.

20
Table of contents
Popular Swimming Pool manuals by other brands

Intex
Intex Easy Set Pools 128122NP owner's manual

Outside Living Industries
Outside Living Industries ubbink 500x1100-H140 cm Note of assembly
Trilogy
Trilogy Nebula installation guide
Intex
Intex Prism Frame 128917GH owner's manual
Everbilt
Everbilt THD1085 Use and care guide
azalp
azalp ubbink 500x1100-H140 cm Note of assembly


